Adult

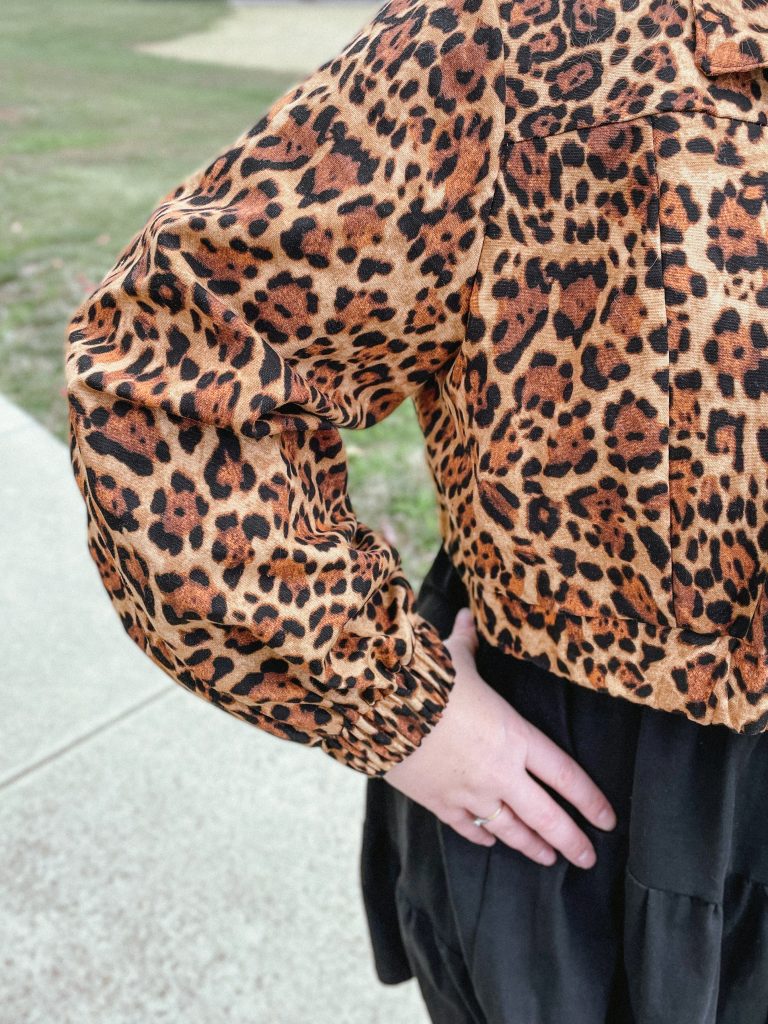
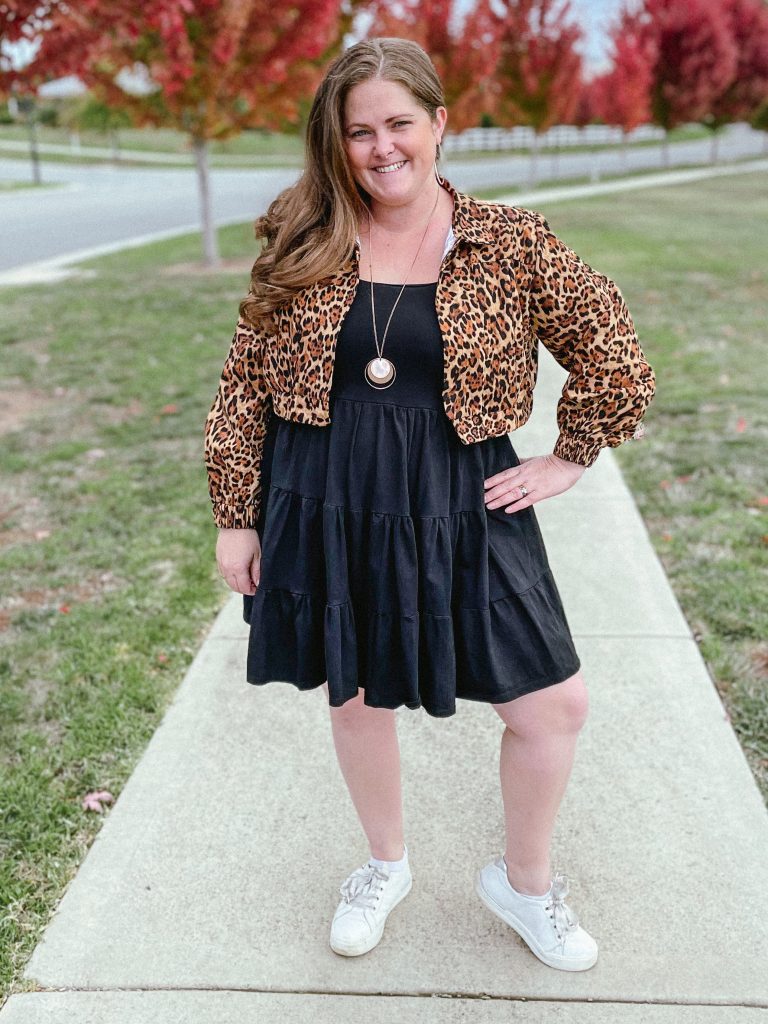
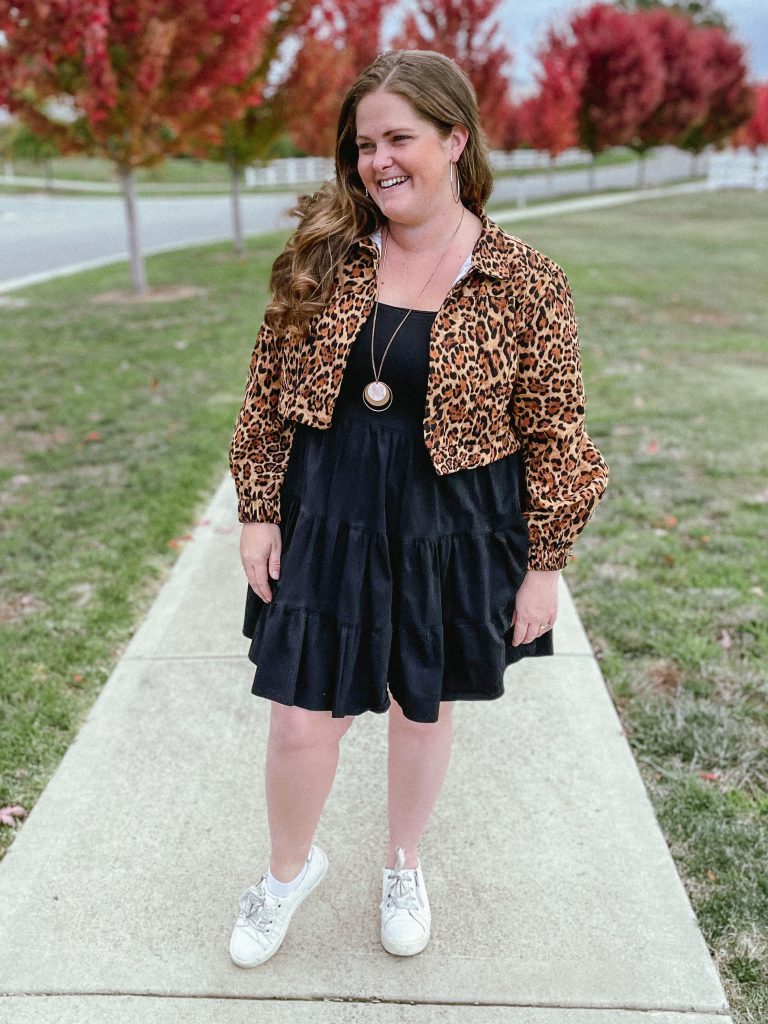
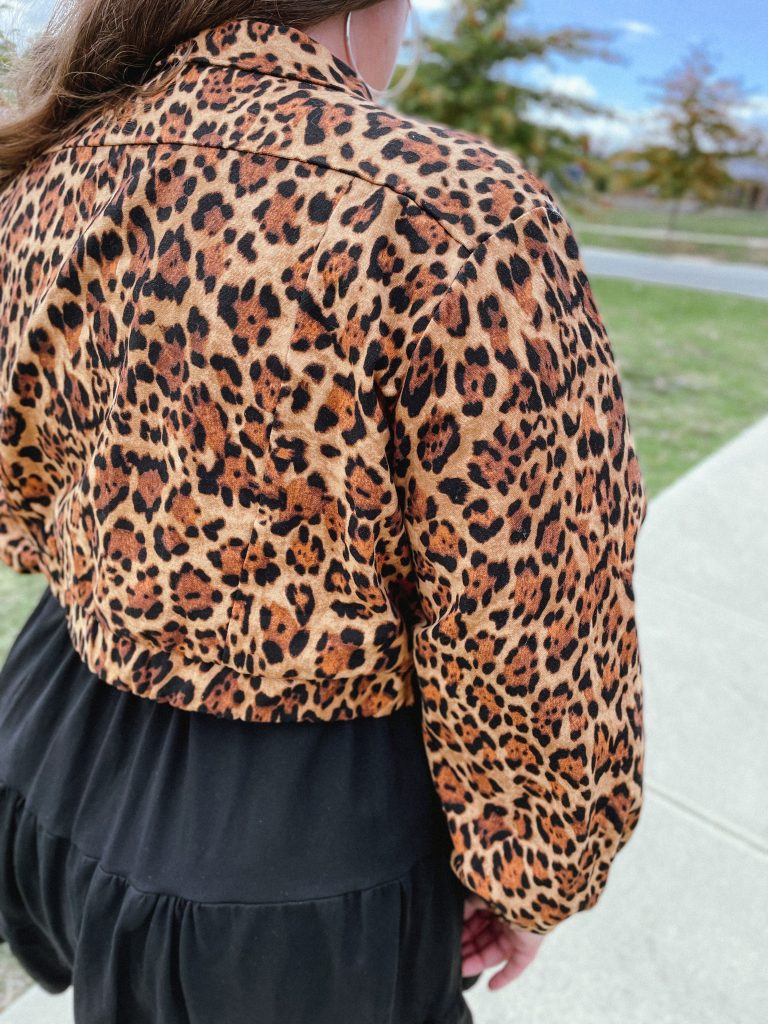
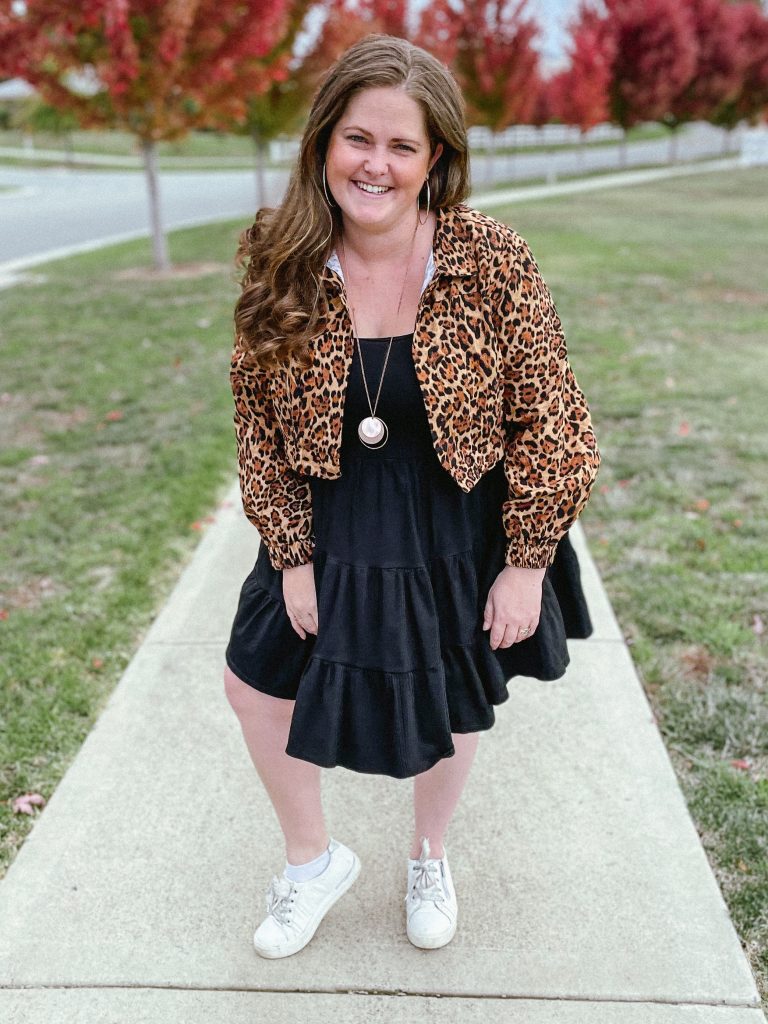
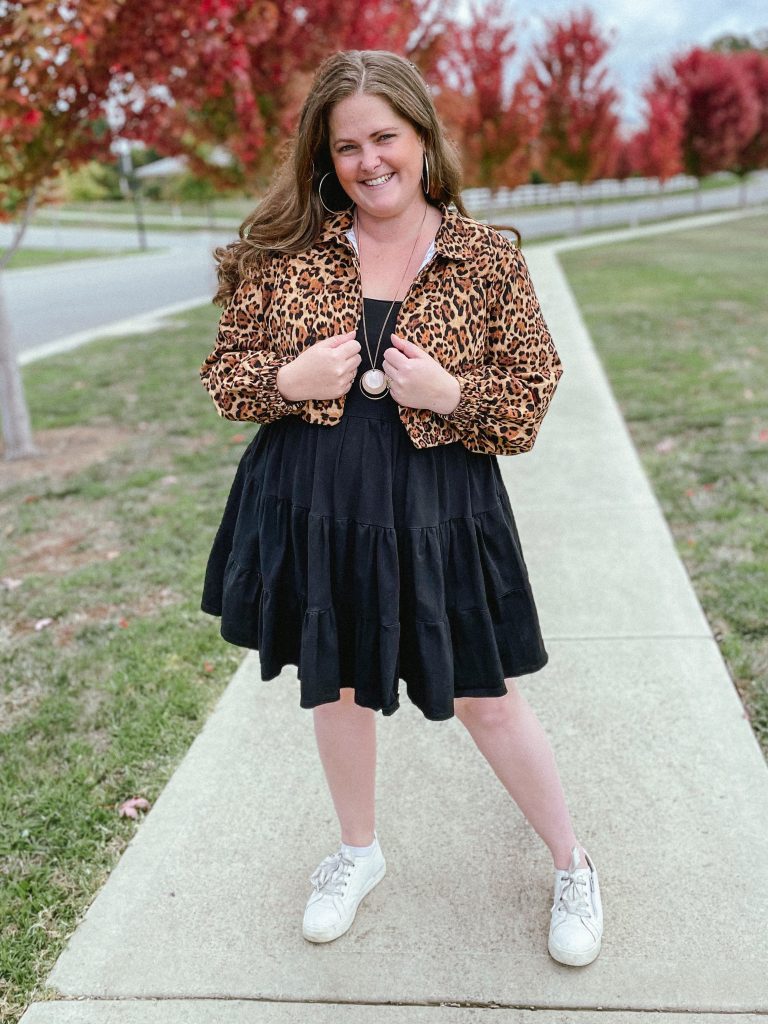
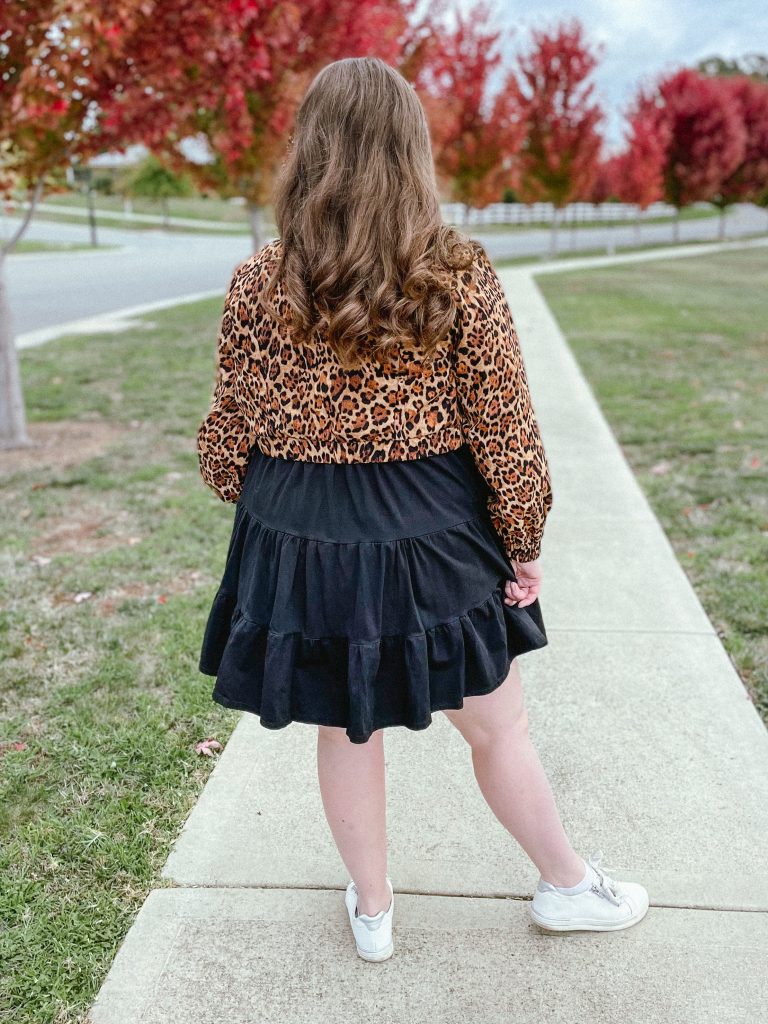
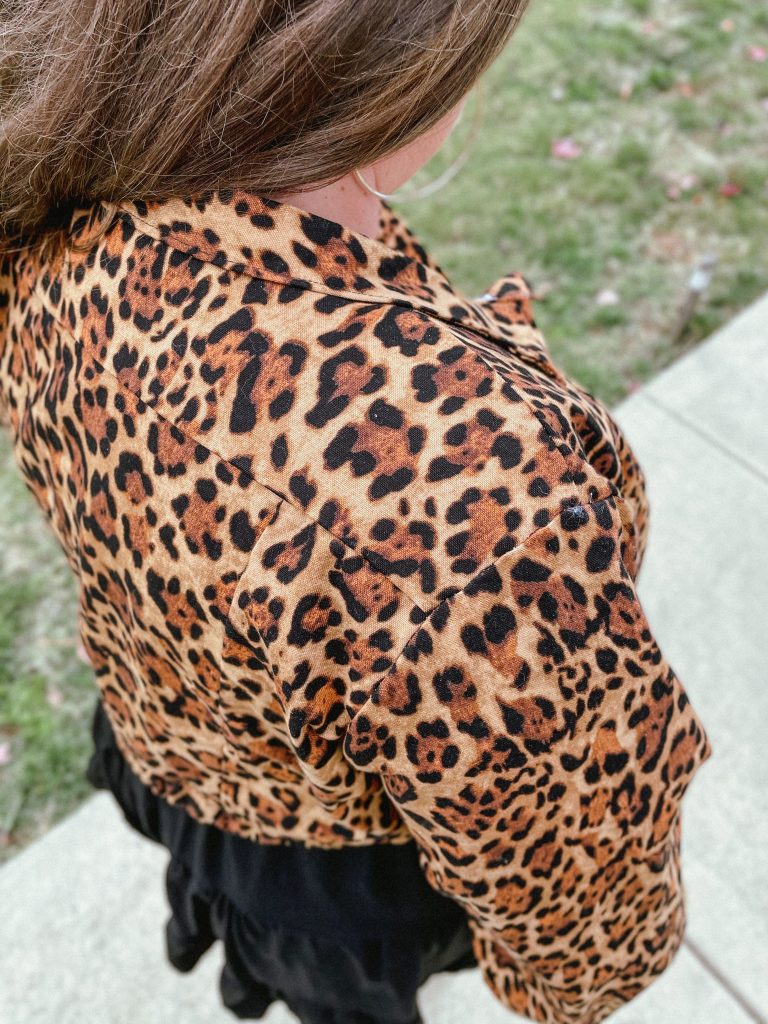
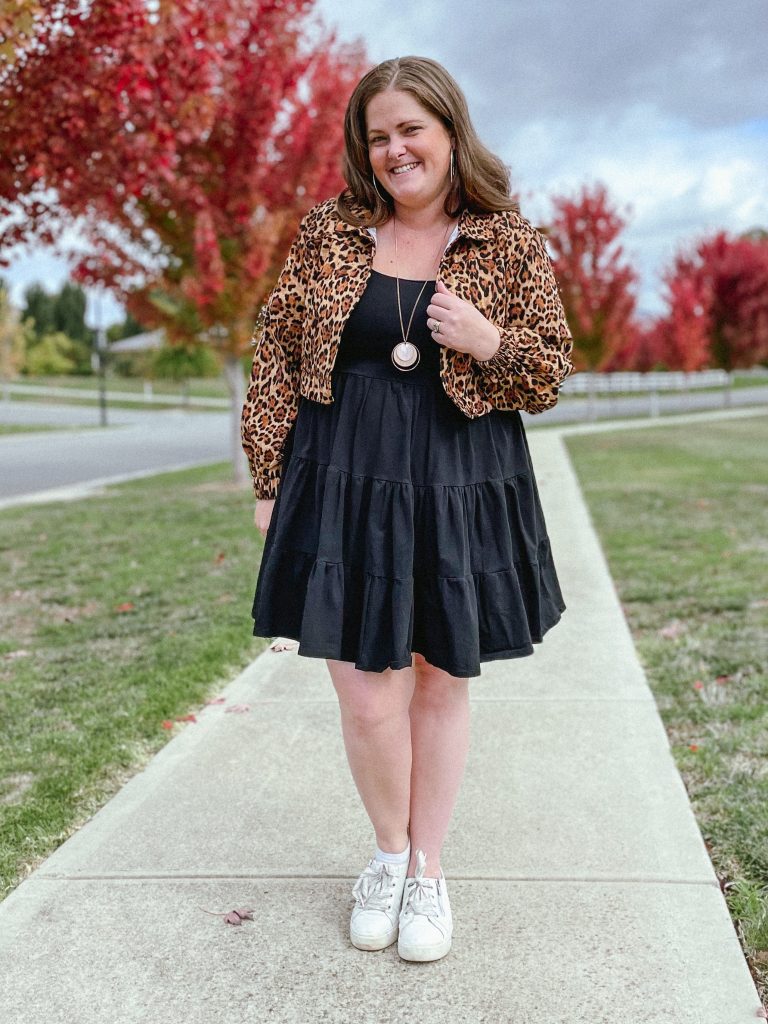
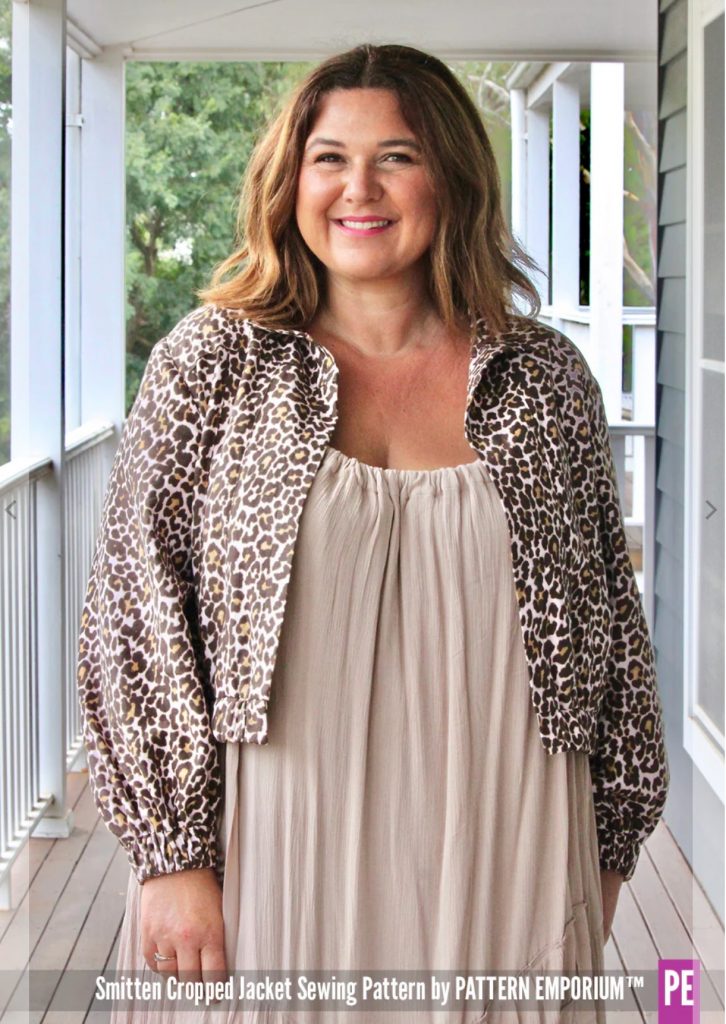
  • Pattern Review of the Smitten Jacket

    Pattern: Smitten Jacket
    Designer: Pattern Emporium
    Fabrics: Cotton Drill from Spotlight Stores
    Skill level: Experienced Beginner
    Size made: 18 FBA
    Adjustments: None
    Pros: Love this one to chuck over a dress or top to dress it up or keep you warm on cooler nights.
    Cons: None

    The Wrap Up

    When I saw Kate from Pattern Emporium ask for testers for this jacket, I put my hand up straight away, it’s SO cute! I had my eye on the ultra crop version and I was not disappointed with my final version.

    One of the things I liked about it is that Kate wasn’t marketing it as a straight Denim jacket, rather one that could be used with softer fabrics such as Linen, Linen Blends and Rayons, which just makes it so much more versatile.

    I also really love the options on this one. Having the front and back yoke as well as the paneled front gives it so many ways to customise for a prefect style fit just for you. I am a huge fan of the top stitching element (though I didn’t top stitch this one), as it gives you the opportunity to add a contrasting colour that can really make it pop.

    Pattern Emporium really do have great written instructions for their patterns making it so much easier for beginners especially to feel like they are being supported as they attempt new patterns. It has a size range of 4-30, and mashes with quite a few other Pattern Emporium patterns.

    I thoroughly enjoyed making this one and have plans for a denim and Corduroy version for winter. I highly recommend giving this one a go!

    Watch my Review with construction tips

    What next?

    Experience the satisfaction of wearing your own handmade clothes

    Learn to sew with confidence and let me guide you to more sewing success.

  • Pattern Review of the Ivy Colourblock Tee

    Pattern: Ivy Colorblocked Tee
    Designer: Sinclair Patterns
    Fabrics: Cotton Lycra Solids and Panels from Rubyjam Fabrics
    Skill level: Beginner
    Measurements: Bust: 45″; Waist 39.5″; Hips 47″
    Size made: 18
    Adjustments: None
    Pros: I love the yoke and color blocking on this one, it makes for such a flattering fit.
    Cons: None

    The Wrap Up

    This month in The Sewing Corner, I had the pleasure of sewing up the Ivy Colorblocked Tee from Sinclair Patterns, and I have to say, I’m pretty pleased with how it turned out!

    First of all, I have to comment on the pattern itself. Sinclair Patterns is known for their well-drafted and thorough patterns, and the Ivy Tee is no exception. The instructions are clear and easy to follow, plus the pattern includes a wide range of sizes which I always appreciate.

    As for the design of the Ivy Tee, I love the colorblocking! It’s such a fun and modern twist on a classic tee, and it allows you to play around with different fabric combinations. I went with a darker teal solid on top and utilised one of Rubyjam’s jamPODs (Panels On Demand) for the lower section, and I’m really happy with how it turned out.

    You can have a lot of fun using different colour combos as well as integrating pattern prints to either the yoke or bottom colour block. If you like to matchy match, there is the kids version, the Ivyberry, that you can play around with too.

    As I mentioned above, this is the tutorial I filmed for The Sewing Corner this month, so if you need help sewing this pattern up come and join in the community of The Sewing Corner. Rubyjam is the sponsor this month so you not only get the tutorial, you get an exclusive discount only available to Sewing Corner members of 15% off their Panels on Demand. They have over 1000 to choose from now, make sure you check them out!

    If you’re not sure about the on going monthly subscription of The Sewing Corner, you can also purchase this course on it’s own, check out the link HERE to find out more. 

    What next?

    Find the confidence you've been lacking

    Learn to enjoy sewing and have confidence in the garments you make.

  • Pattern Review of the Willow Wrap Dress with how to add pockets

    Pattern: Willow Wrap Dress
    Designer: Love Notions
    Fabrics: Cotton Lycra from Clover & Co. Fabrics
    Skill level: Confident Beginner
    Measurements: Bust: 45″; Waist 39.5″; Hips 47.5″
    Size made: XL graded to 2XL at waist
    Adjustments: Shortened to Empire waistline
    Pros: Gorgeous pattern for showing off your bustline
    Cons: No pockets, but watch my tutorial on how to add them!

    The Wrap Up

    I love this pattern so much I have made 3 of them!

    I am a huge fan of the Love Notions Willow wrap, it is such a flattering pattern with a variety of options. You can choose from dress or peplum length, and to be honest, you can also cut between the peplum and dress lengths to create a tunic length as well if you wanted. There are also 5 different sleeve options, 2 neckline heights and it is great for Maternity and Nursing.

    I would note that with the flutter sleeve option I think it is better suited for lighter, drapier fabrics as when I used the 220gsm Cotton Lycra it was just a bit too ‘stiff’. I didn’t think it sat as nicely as when I made it from a double brushed poly.

    I also prefer an Empire Waistline to a Natural Waistline, so I used the tutorial I made for the Margot Peplum, also from Love Notions, to shorten my bodice to Empire.

    This is the Feature Friday pattern for Love Notions, Friday 31st March, 2023 which means here in Australia it will be on sale for $5USD (approx. $7.50 AUD) till around 3pm Saturday 1st April.

    Use code MEGAN10 for an extra 10% off at the checkout!

    I also think every dress should have pockets, so make sure you check out my video review below which includes a tutorial on how to add pockets to any dress! Don’t forget to subscribe to my channel while you’re there so you don’t miss any future reviews and tutorials.

    Pattern Review and How to add pockets to your Willow Wrap Dress

    What next?

    Stop wasting fabric and time on projects that don't fit right. 

    Learn to sew with confidence and let me guide you to more sewing success.

  • Pattern Review of the Adult Discoverer Tee

    Pattern: Adult Discoverer Tee
    Designer: Ellie & Mac
    Fabrics: Cotton Lycra from Rubyjam Fabrics
    Skill level: Beginner
    Measurements: Bust: 45″; Waist 40″; Hips 46″
    Size made: XXL
    Adjustments: None
    Pros: Love the colour blocking on this and how it allows you to mix and match coordinating fabrics.
    Cons: None

    The Wrap Up

    I had a lot of fun sewing this one up.

    My Brother in Law’s partner has a bit of a thing for avocado’s so as soon as I saw this fabric I knew that I wanted to make it into something for her. 

    The discoverer tee seemed perfect as I was able to colour block with a solid to break up the ‘strong’ hero print. It’s also quite a flattering fit for larger busted women (as my sis in law is) as the colour blocking hits above the bust.

    If you like a simple, easy sew with colour blocked options, this is a great pattern. I have also written a tutorial on how to add knit piping across the colour blocked section which I’ll link here. I did it for a the kids version but it’s the same principle for the adult version.

    Learn to sew it LIVE

    What next?

    Lacking motivation and need help?

    Join a supportive community that motivates and inspires you to get the best from your sewing time. You’ll also learn loads as well!

  • Pattern Review of the Sicily Swing Dress/Top

    Pattern: Sicily Swing Dress/Top
    Designer: Peek A Boo Pattern Shop
    Fabrics: Bamboo Lycra from Clover & Co. Fabrics
    Skill level: Beginner
    Measurements: Chest: 45″; Waist 40″; Hips 47″
    Size made: 2XL graded to 3XL
    Adjustments: Just the grading
    Pros: SUPER comfy and easy to wear. Also has nursing option
    Cons: Needs updated sizing

    The Wrap Up:

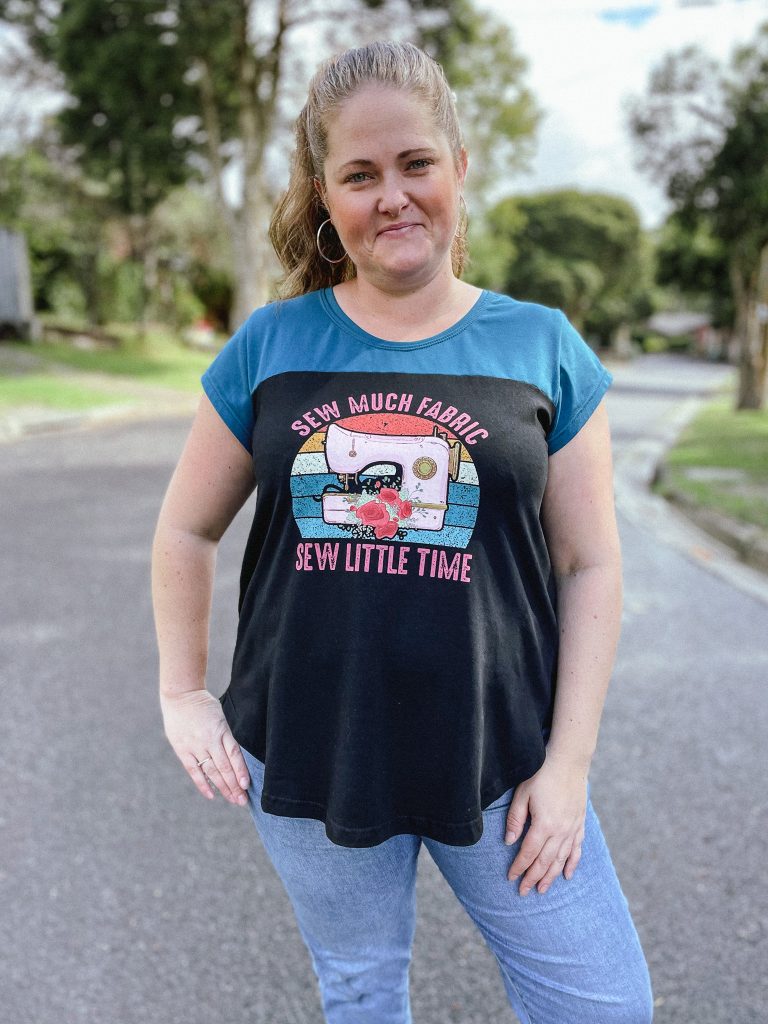
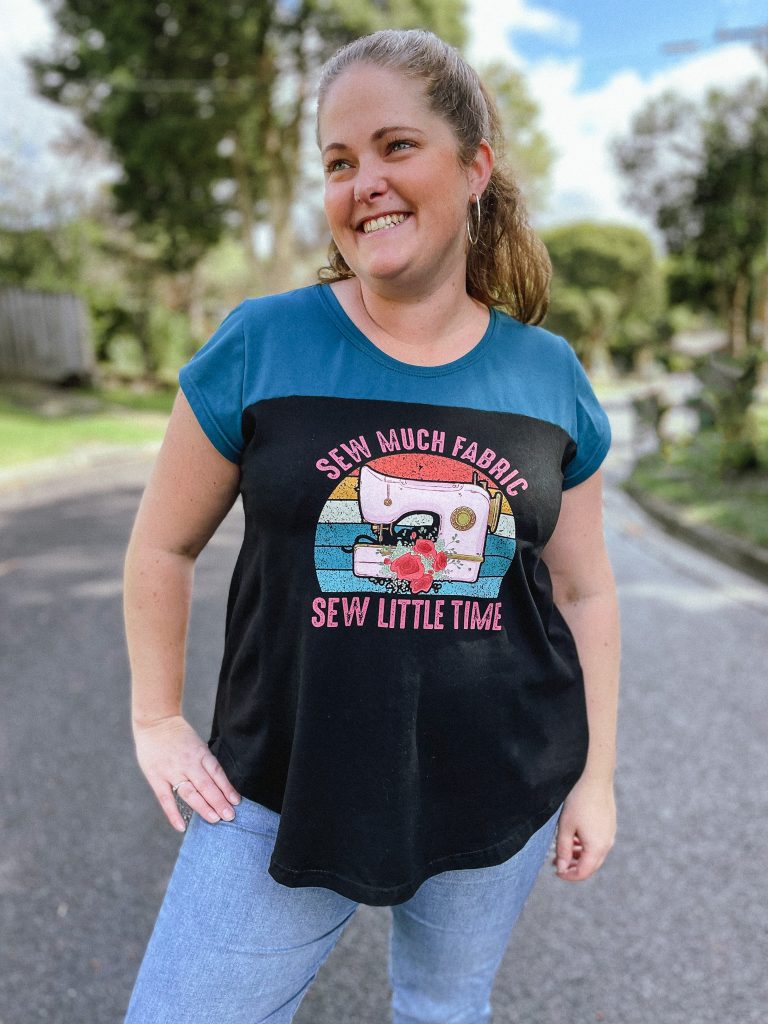
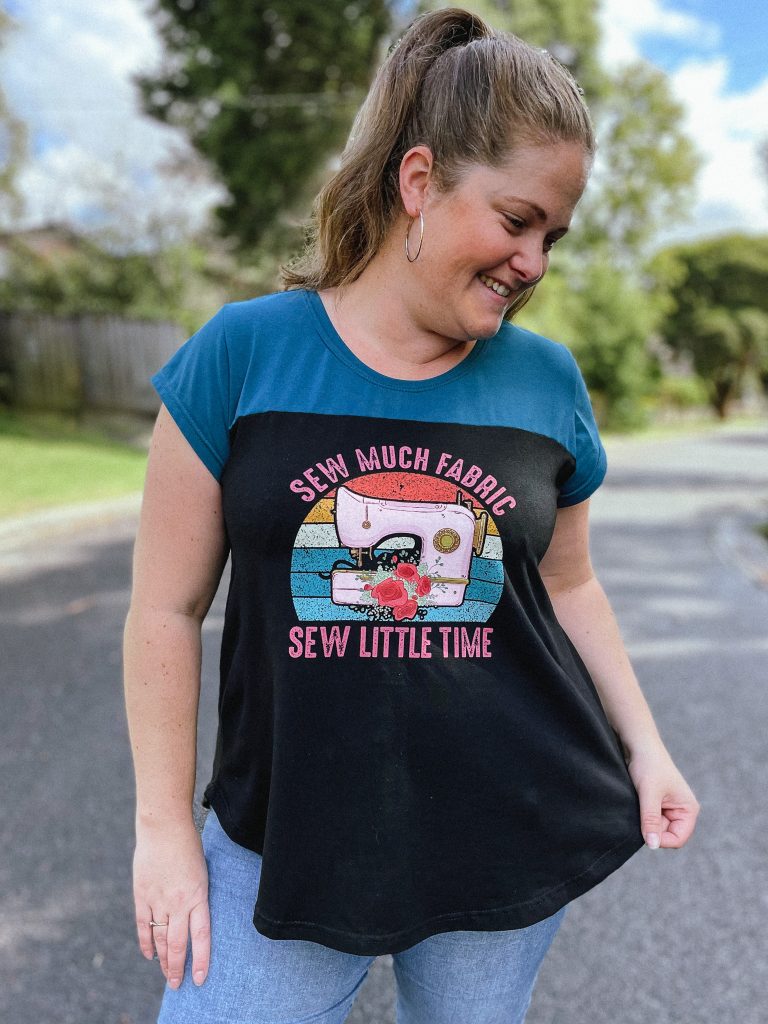
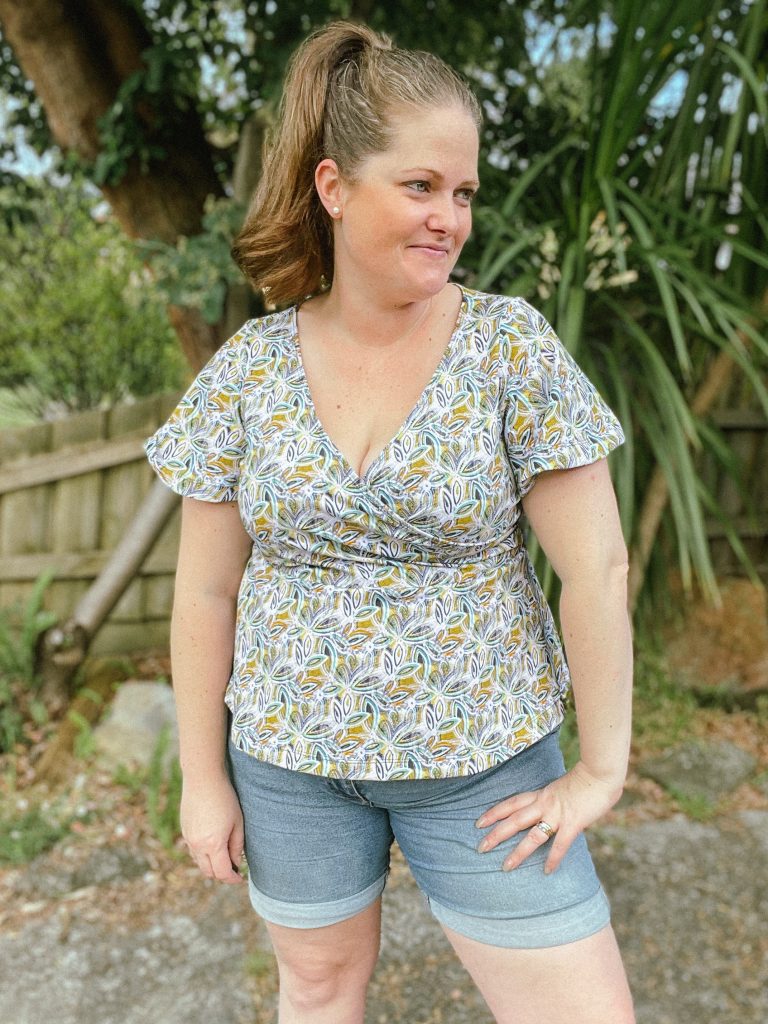
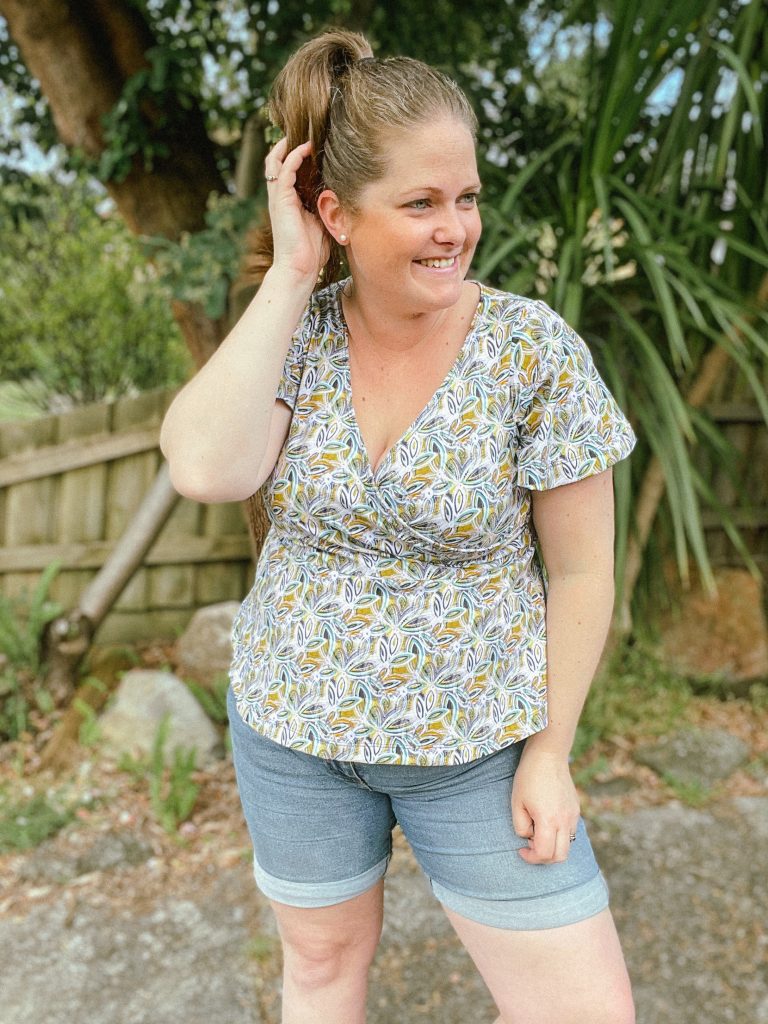
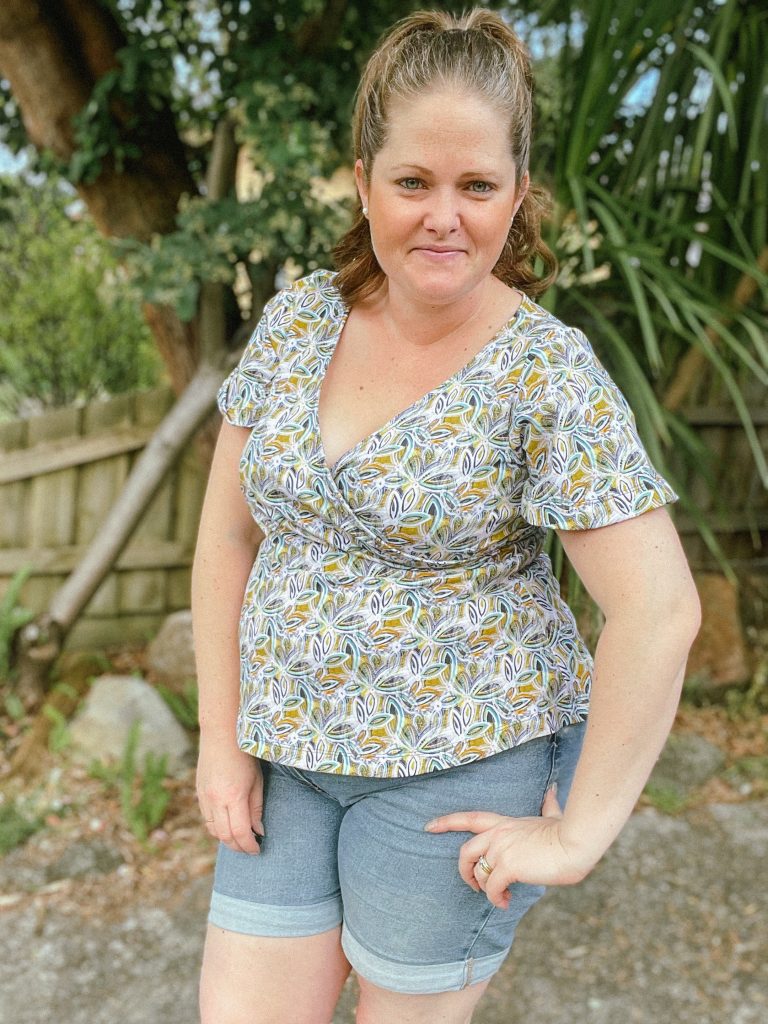
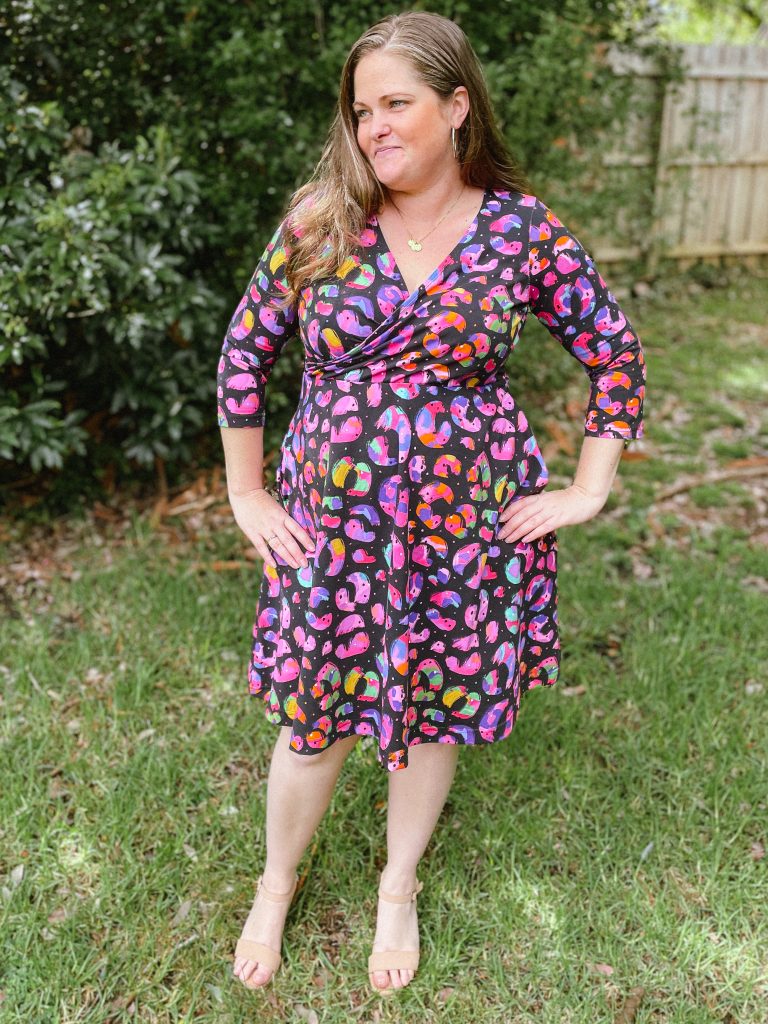
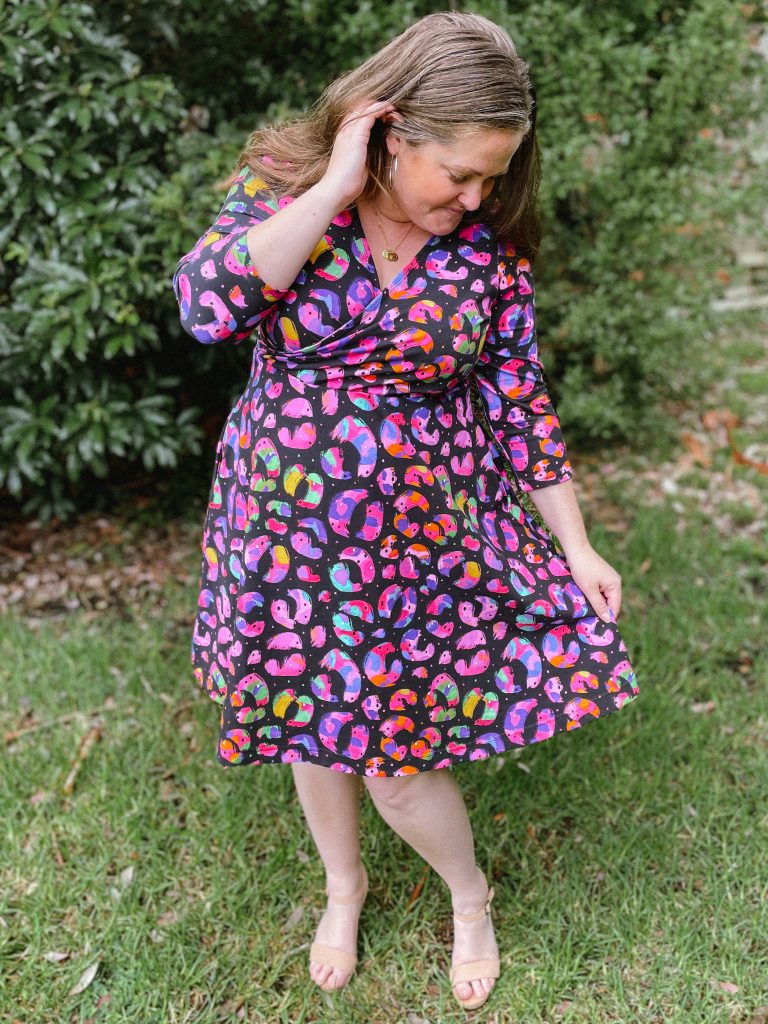
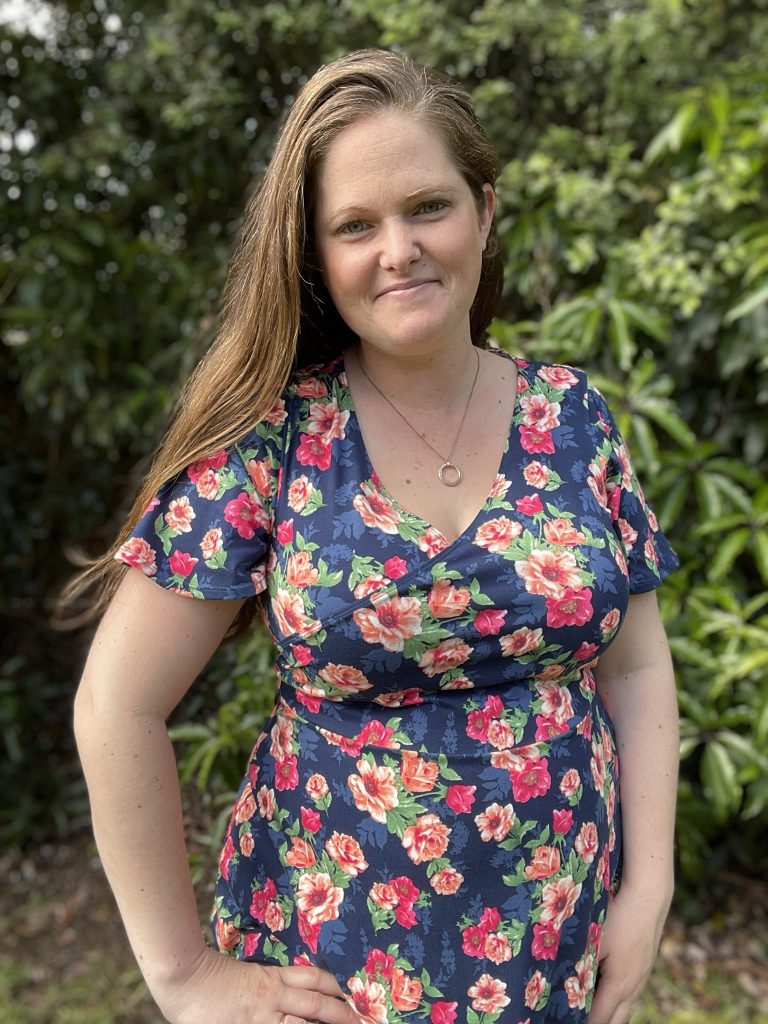
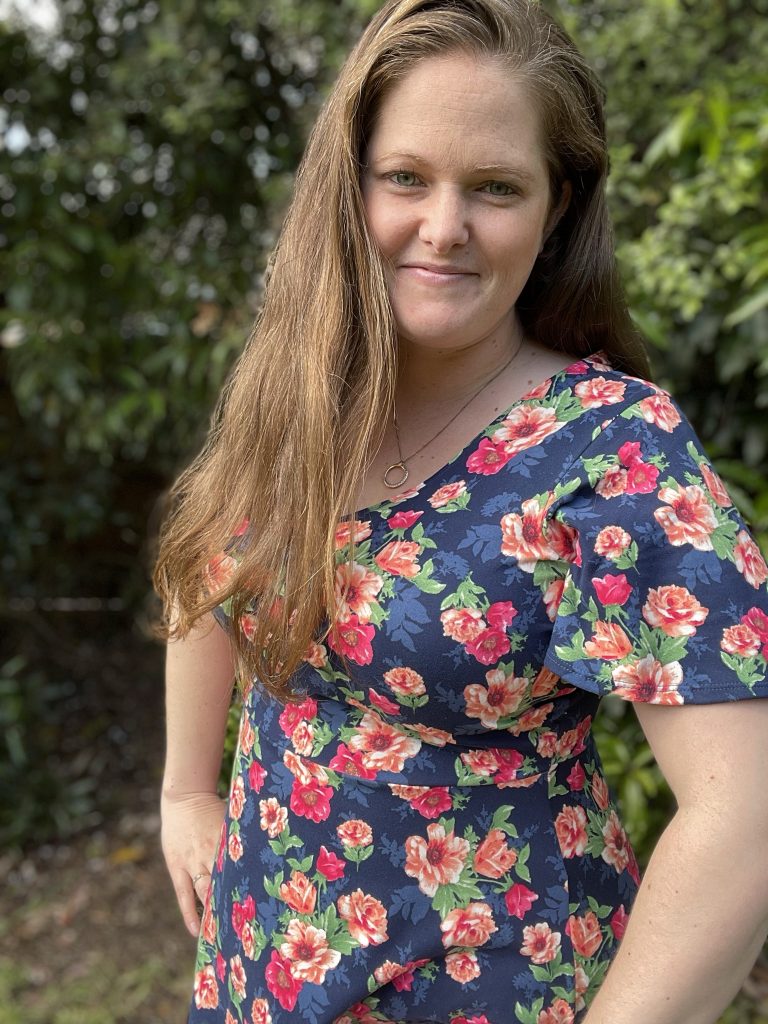
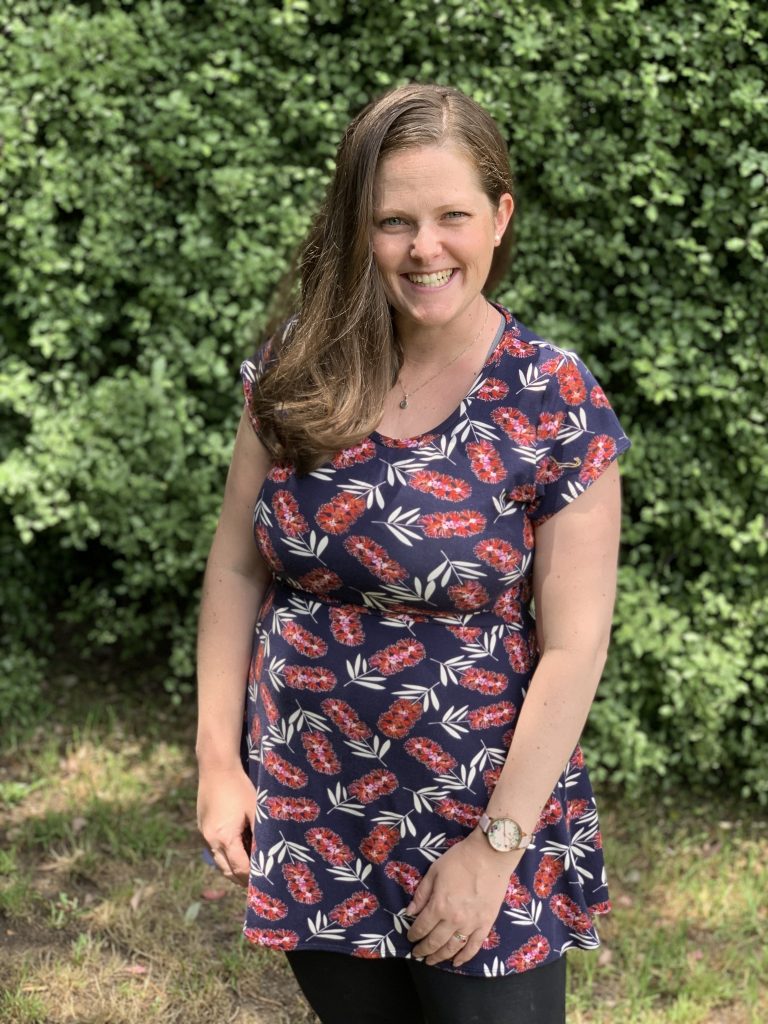
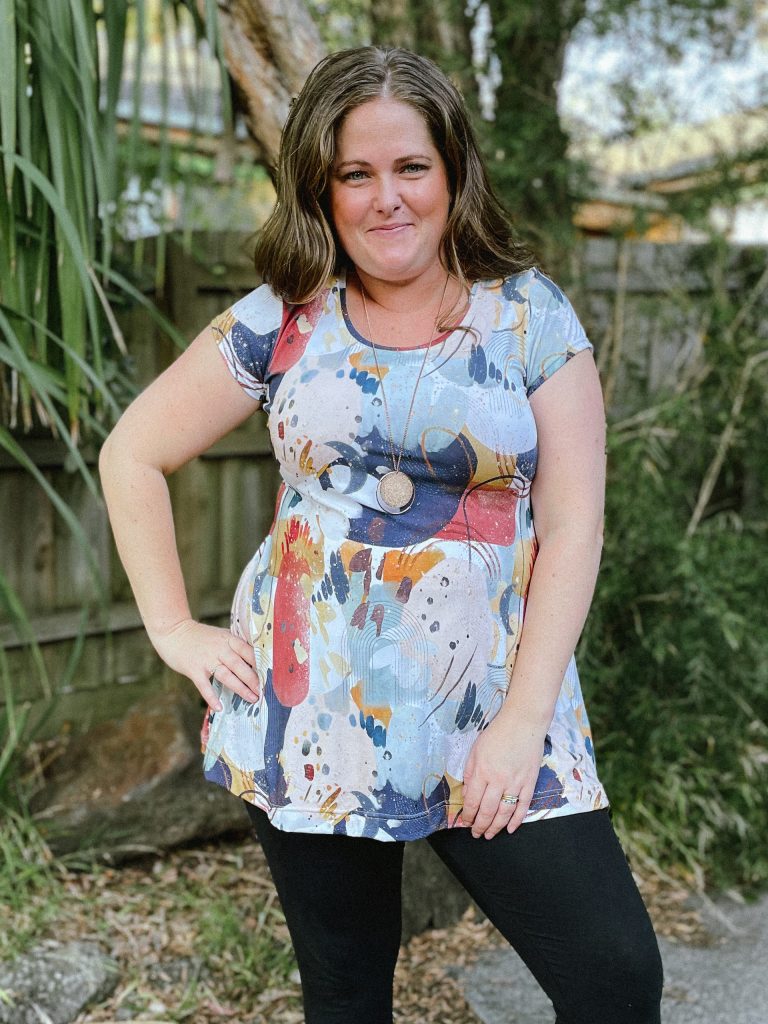
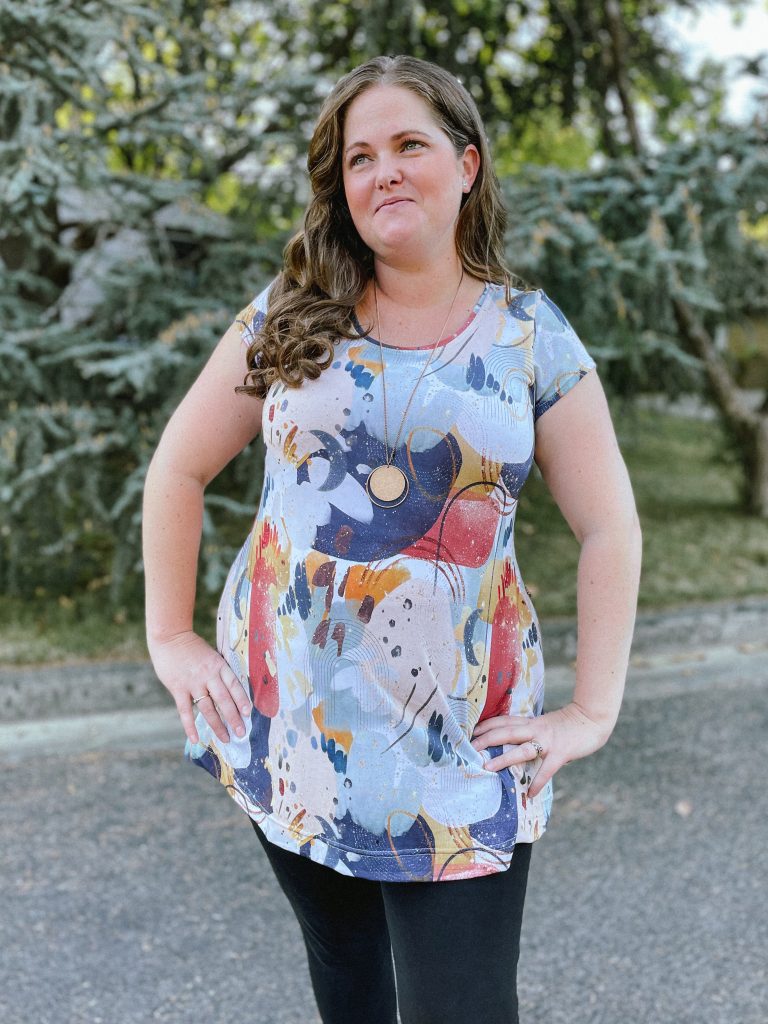
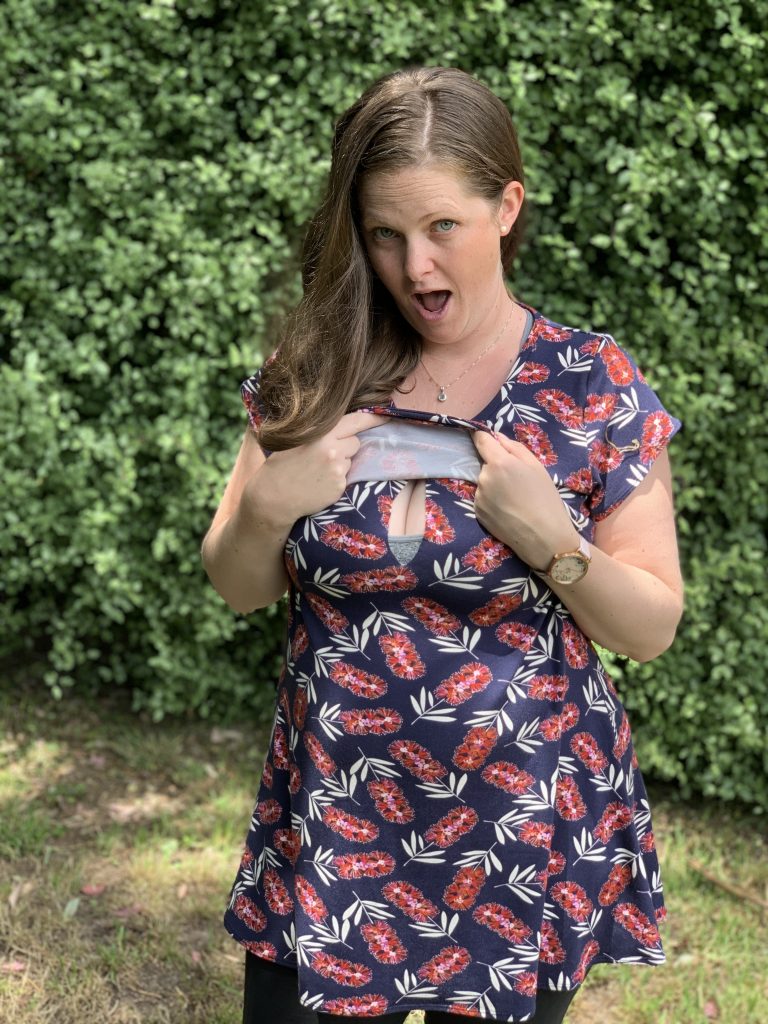
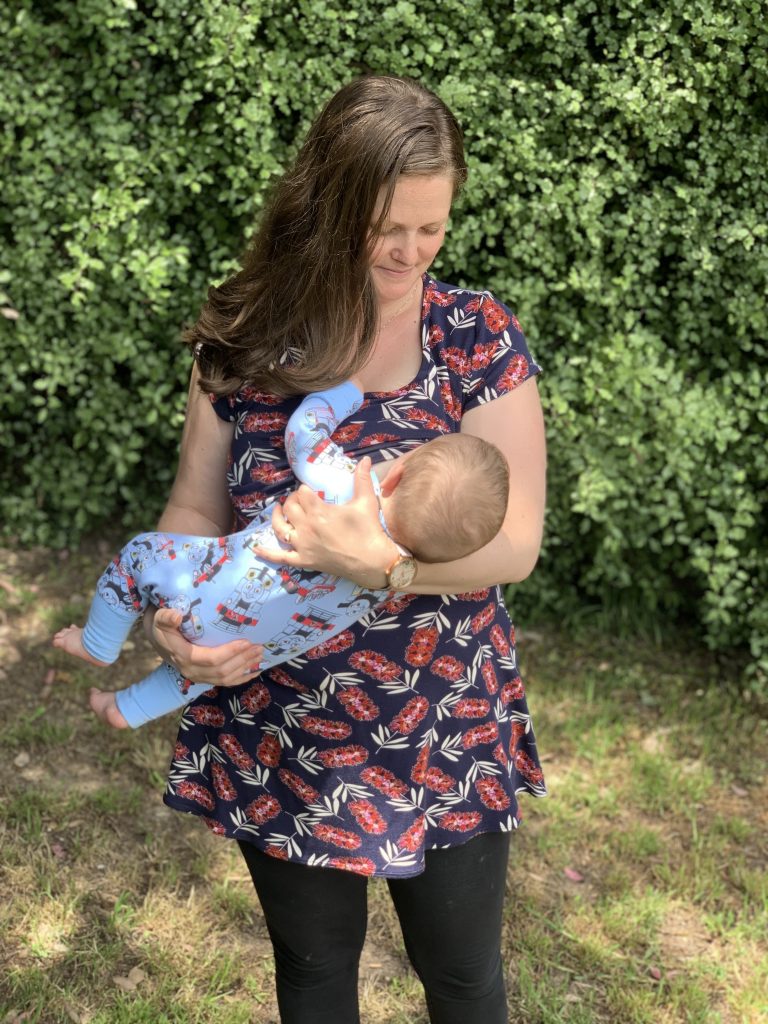
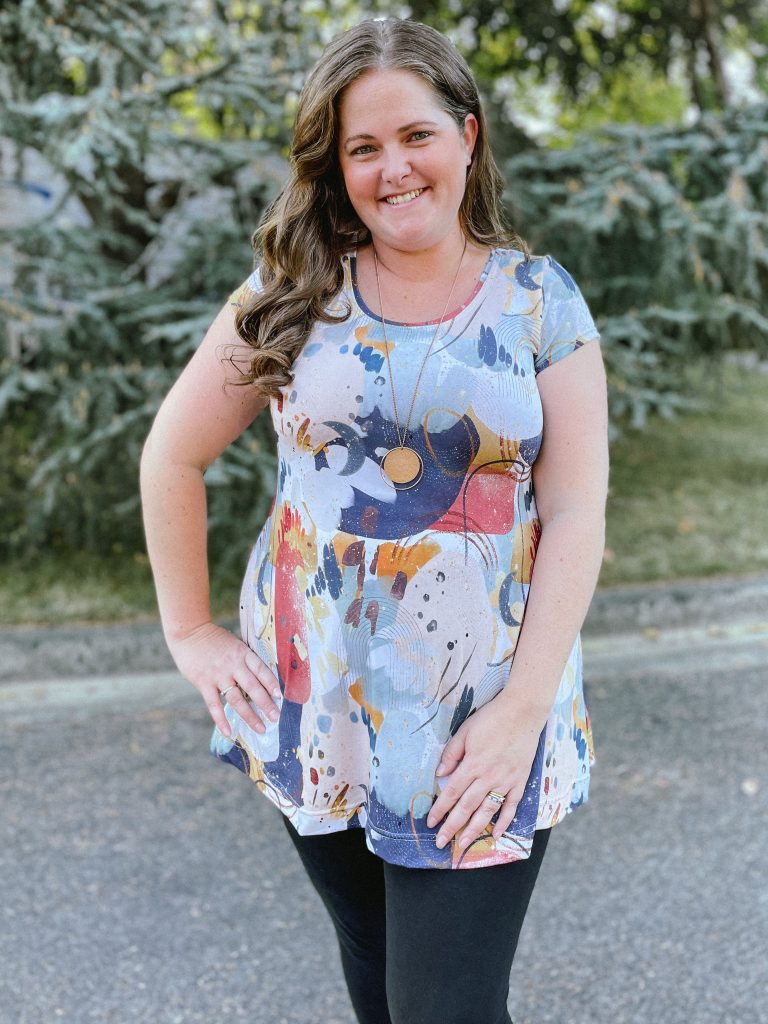
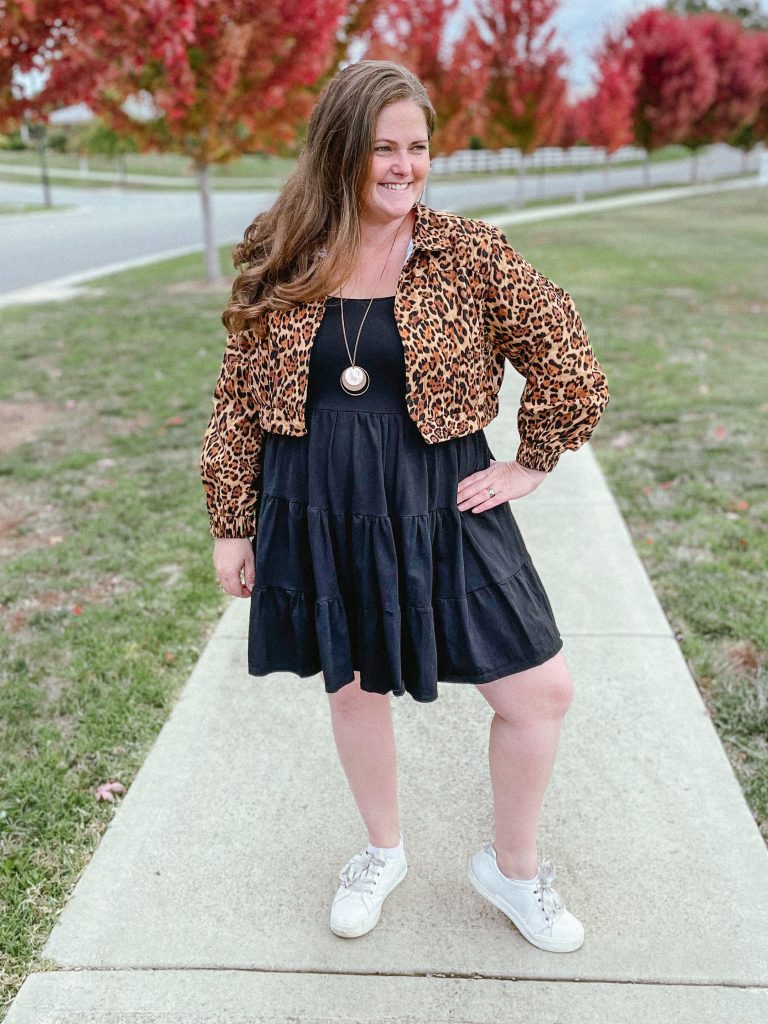
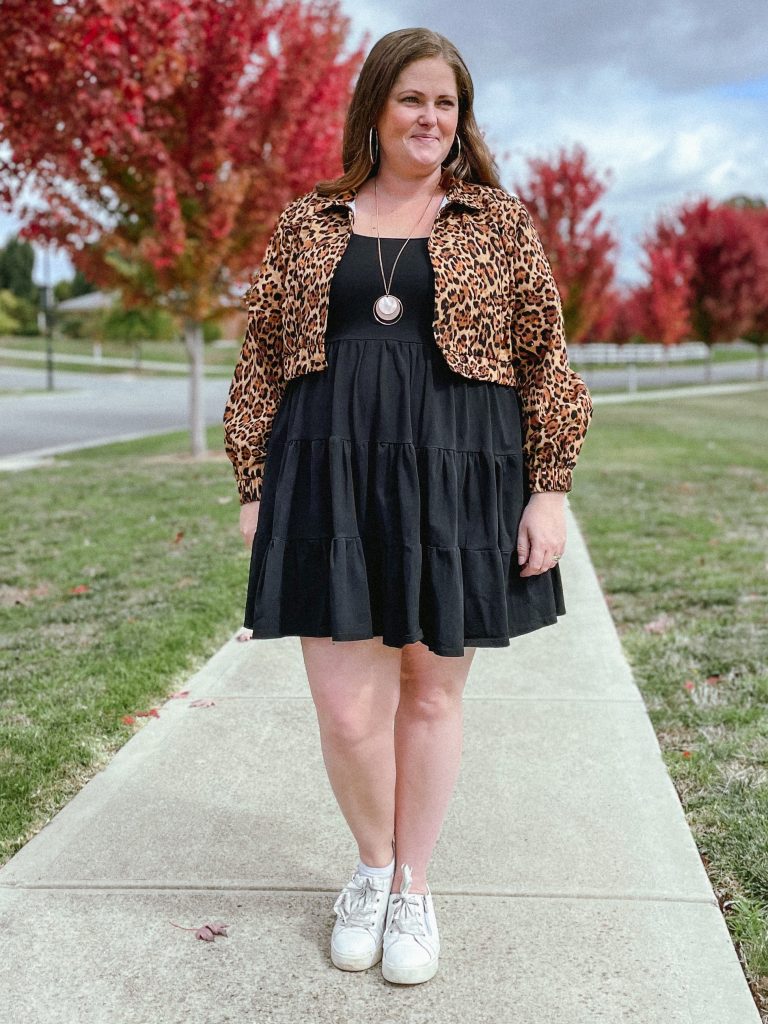
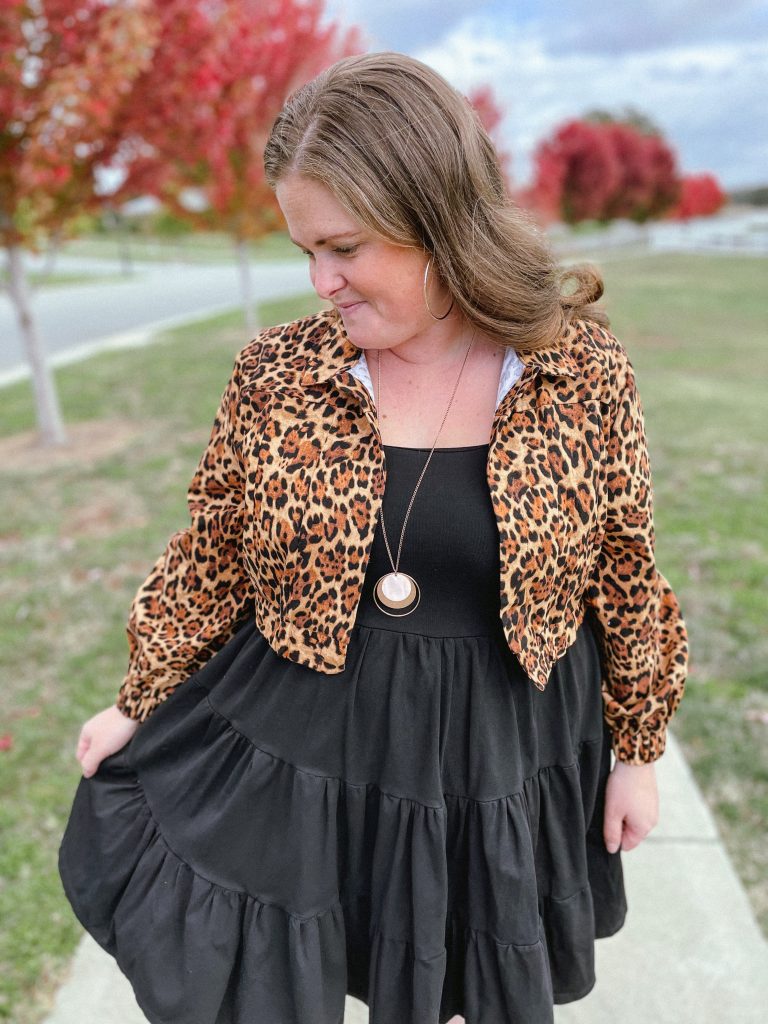
    I think this was one of the first patterns I ever tried of Peek a Boo as it had the nursing option and I loved it straight away.

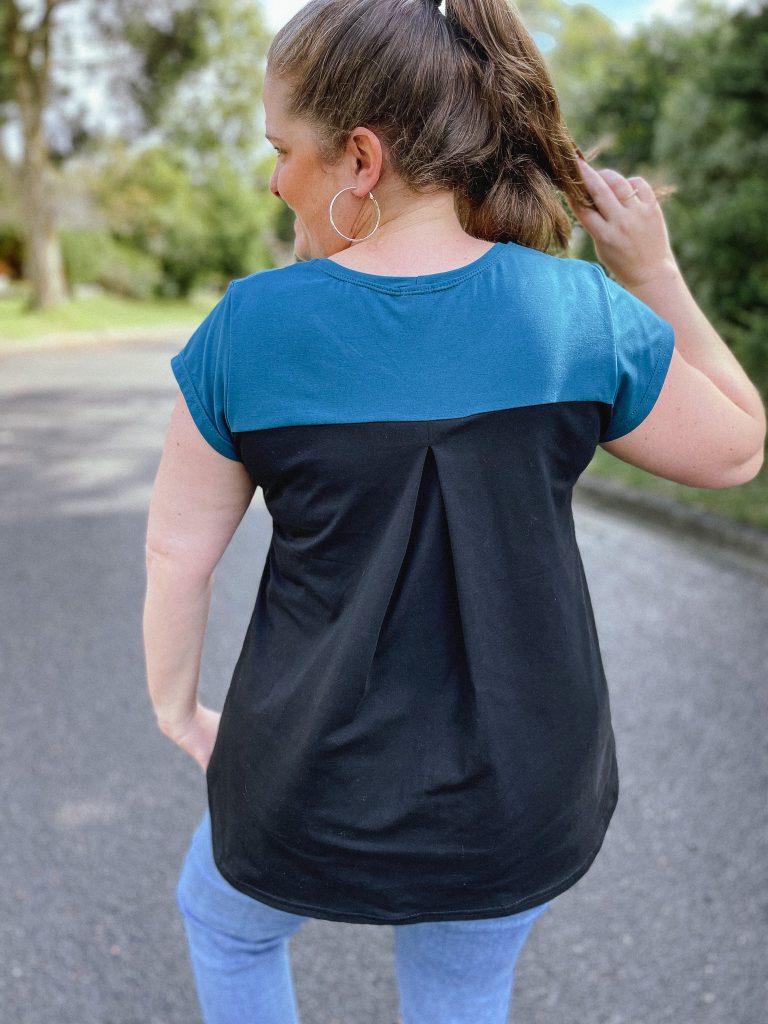
    The fit and flare style really suits me and I love that their are a couple of different neckline options. Especially over the fringe months, I really enjoy a cowl neck for that little bit of added warmth, without having to carry a scarf around. 

    Like I mentioned as well, this has the option of nursing which is so nice to see. When I was feeding my son I had such limited choices in Ready to Wear clothing and it was kind of what sparked me to really give clothes for myself another go, so to be able to make stylish feeding friendly tops was amazing!

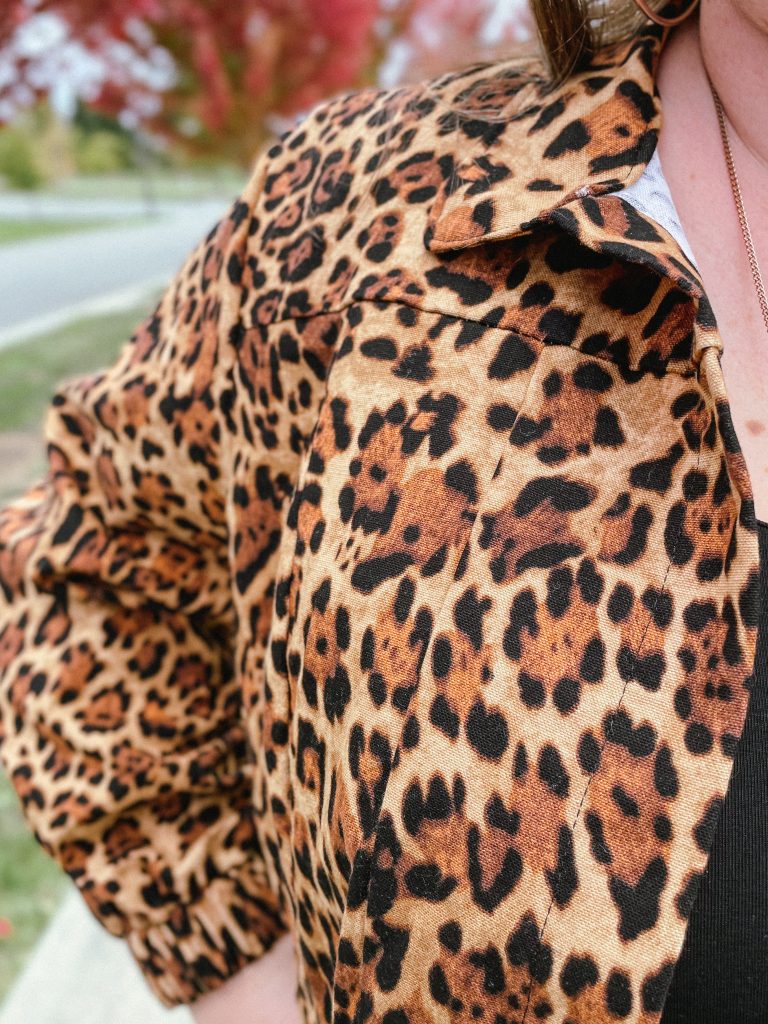
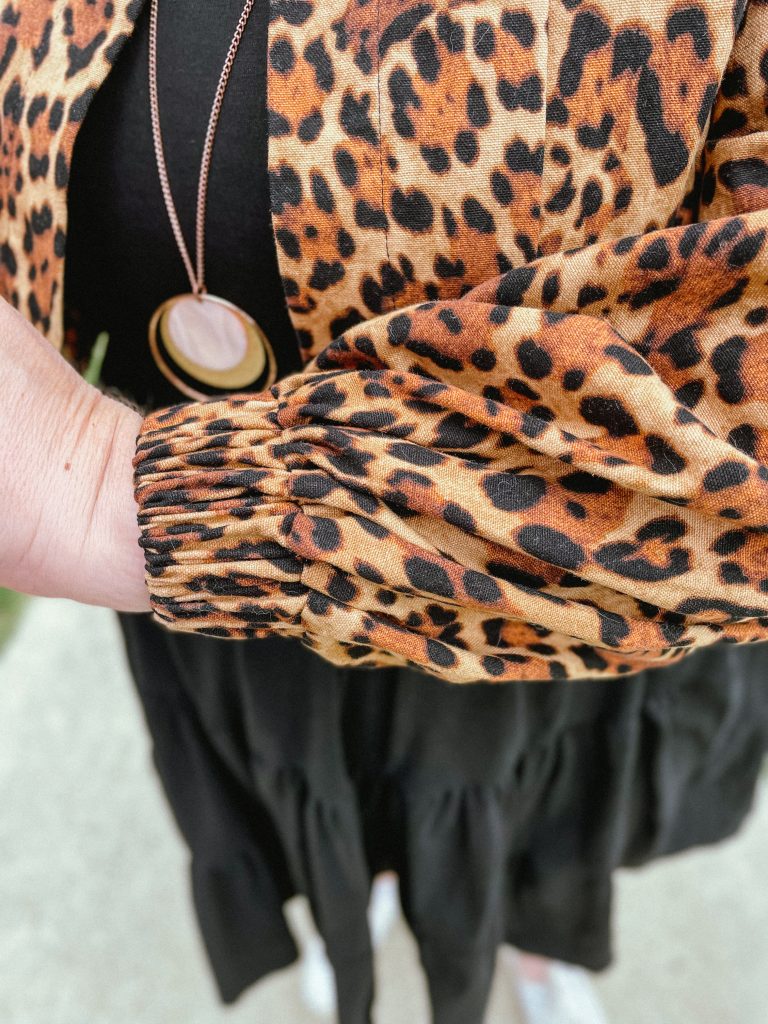
    The fabric I made my latest from is a pre order I did with Clover and Co in Bamboo Lycra. I like that this fabric design and pattern can be paired well with both leggings and jeans, making it easy to dress up or down. Put a little crop jacket it with it and a pair of heels if you’re going out, or straight cut jeans and a pair of white sneakers and you’re day ready.

    I 1000000% will be getting more of Clover’s bamboo lycra as well. It is DIVINE!!! SO soft and drapey to wear. I want all the bamboo lycra now.

    What next?

    Find More Sewing Joy

    Discover an inclusive and supportive sewing community with a growing library of sewing tutorials, tips and tricks.

  • Pattern Review of the Adele Boatneck

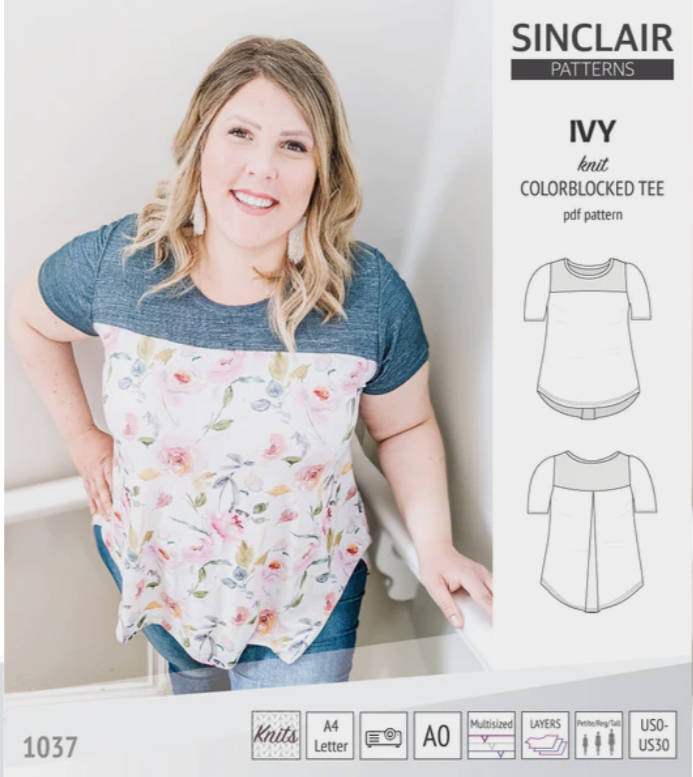
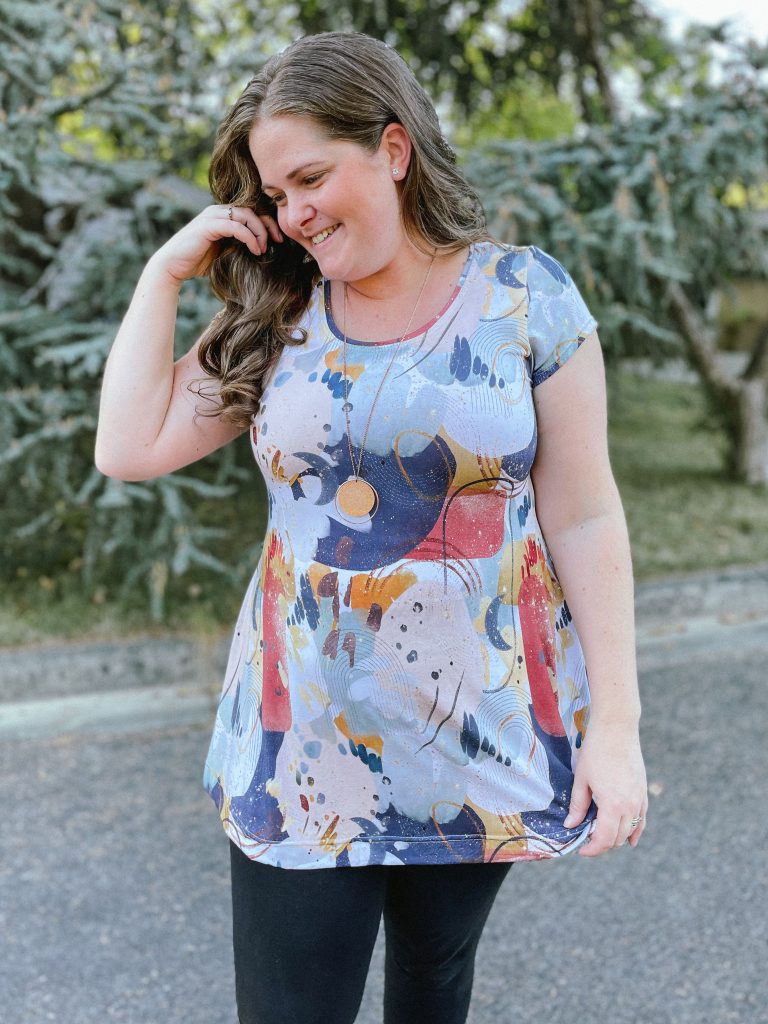
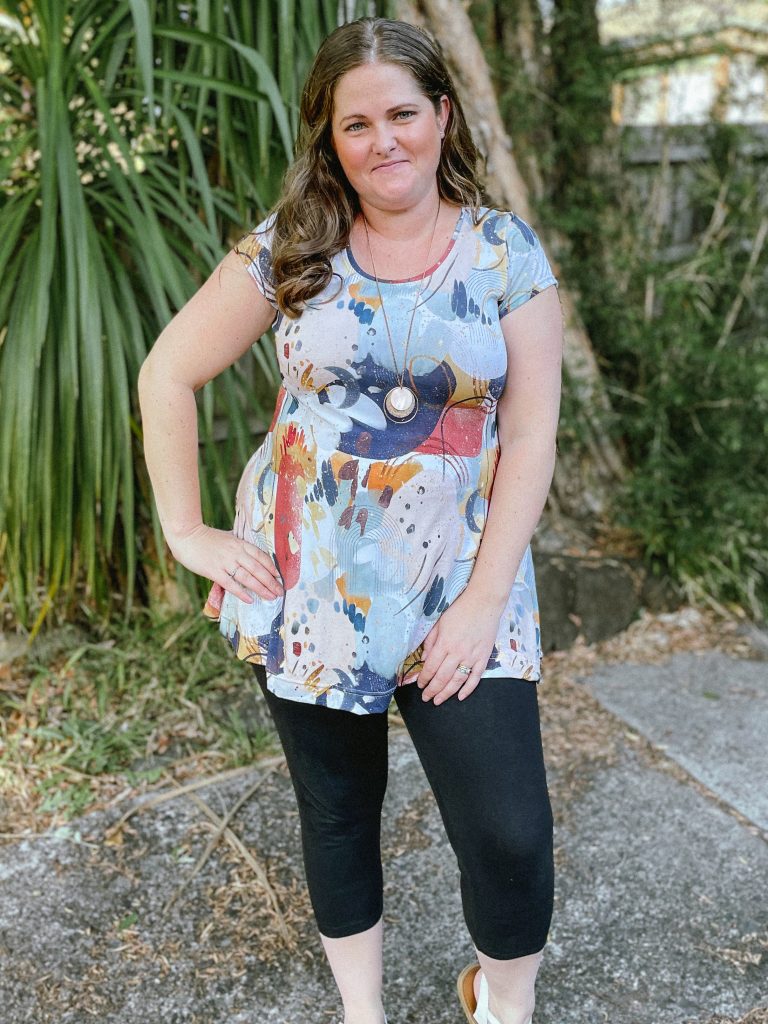
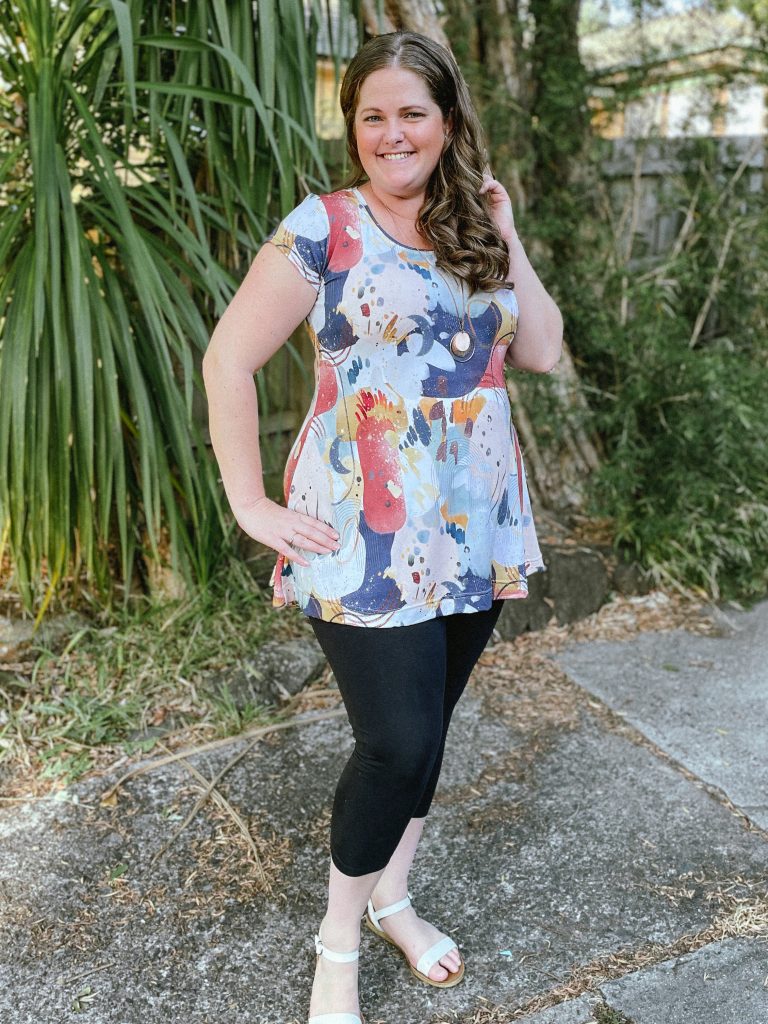
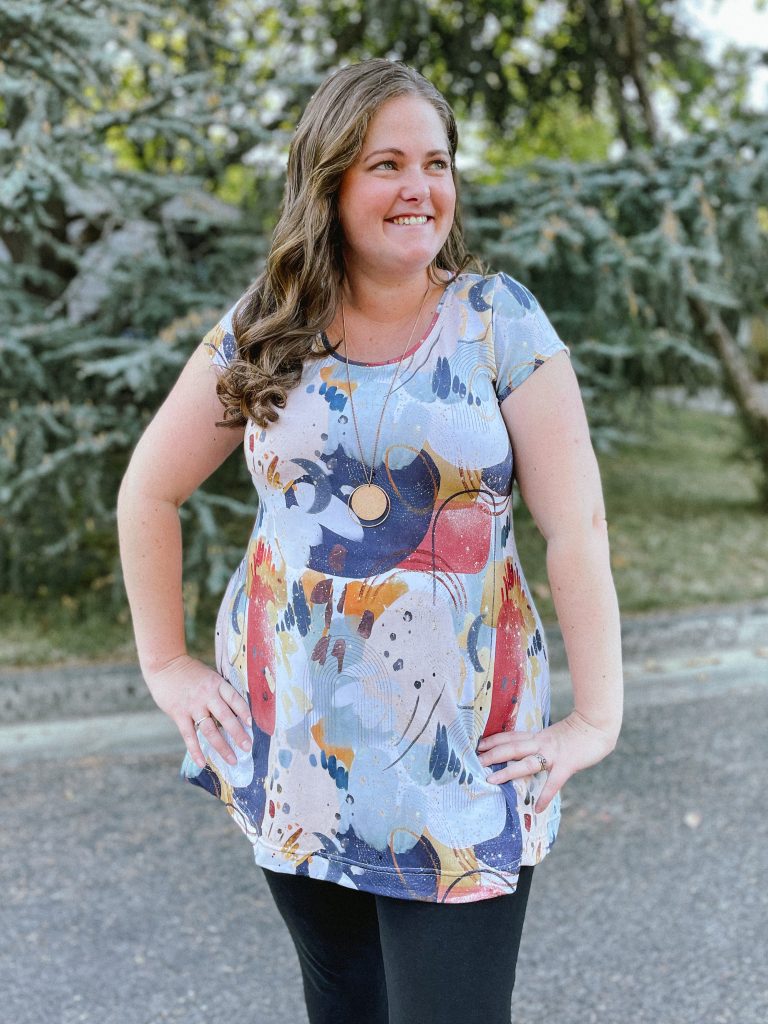
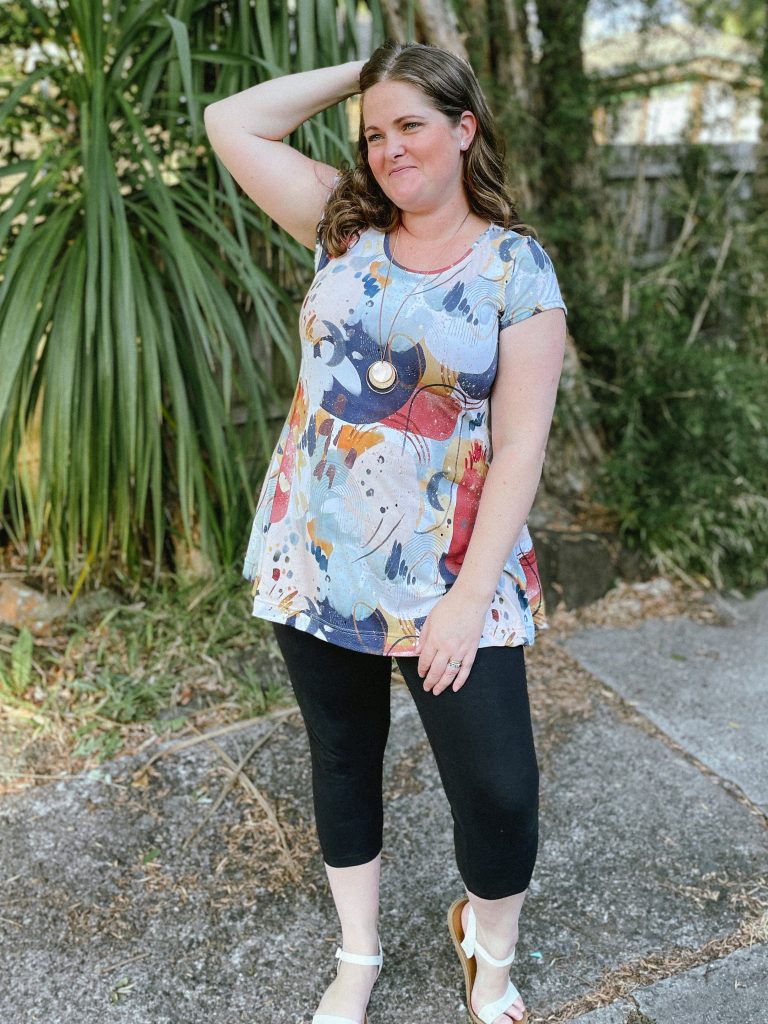
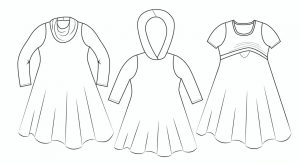
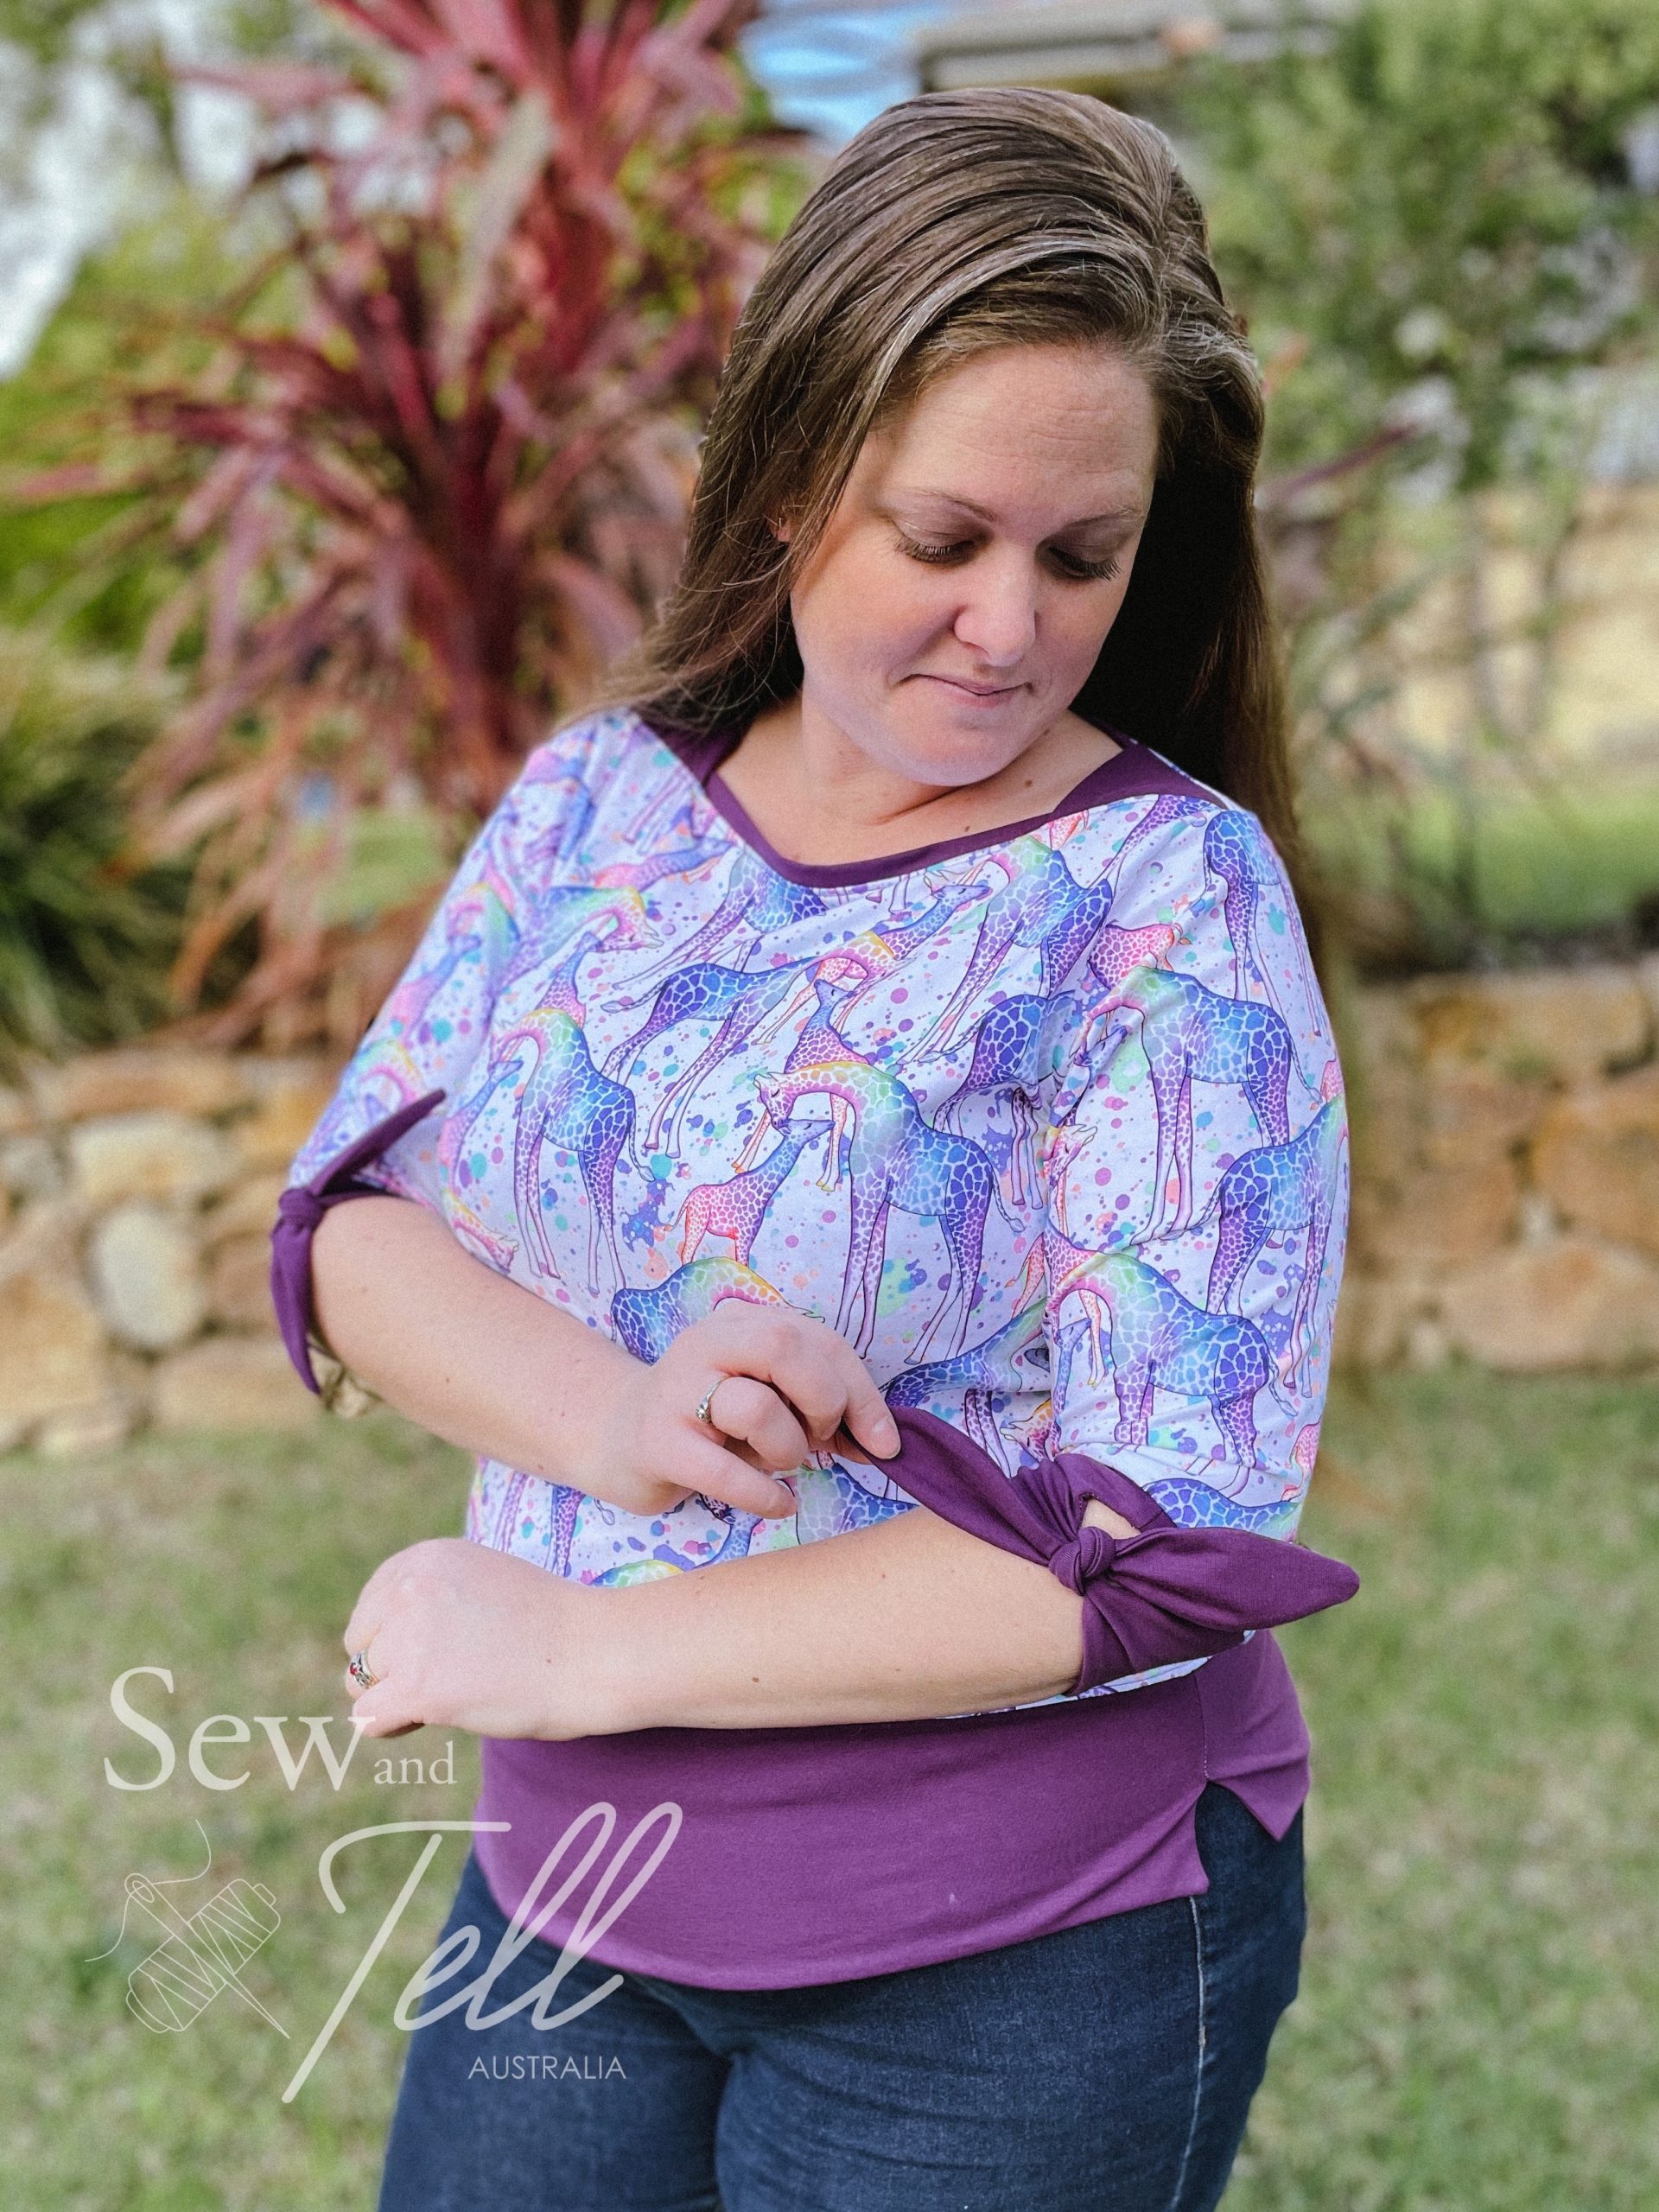
    Pattern: Adele Boatneck
    Designer: Sinclair Patterns
    Fabrics: Sew Unique Fabrics
    Measurements: Bust: 44″; Waist 39″; Hips 48″
    Size made: US18
    Adjustments: None
    Pros: I really love the details on this one, it’s a fun pattern to make
    Cons: No real cons, I just wish I had sized out at my hips as its a bit tight over my tum and bum.

    Links:

    The Wrap Up:

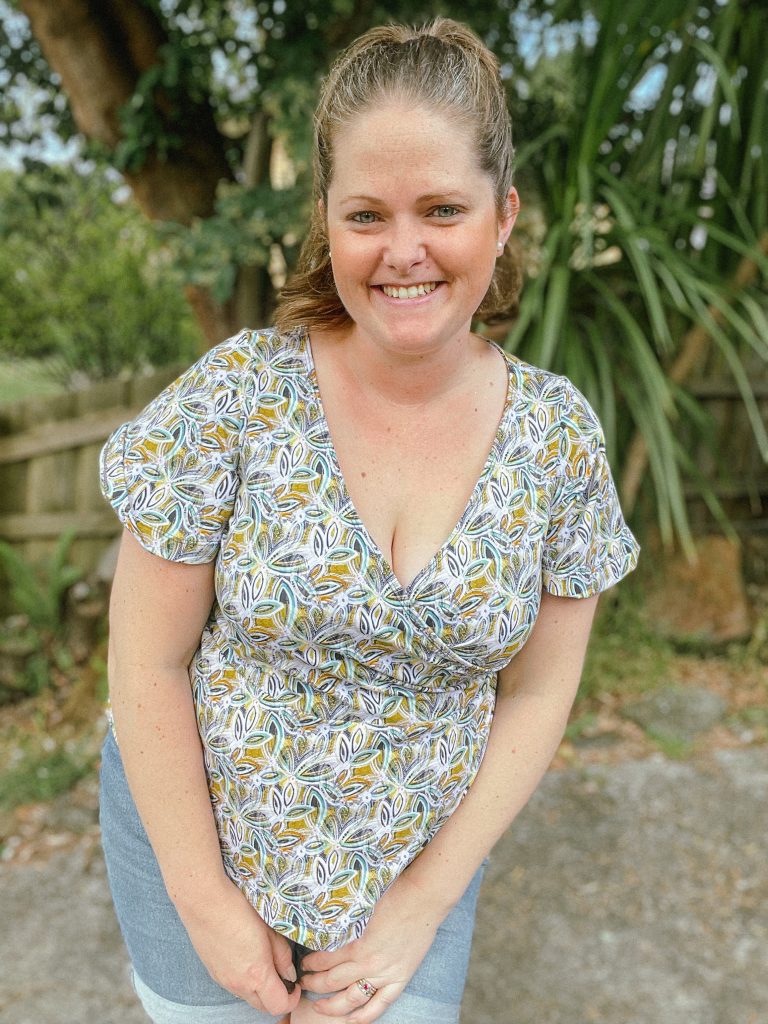
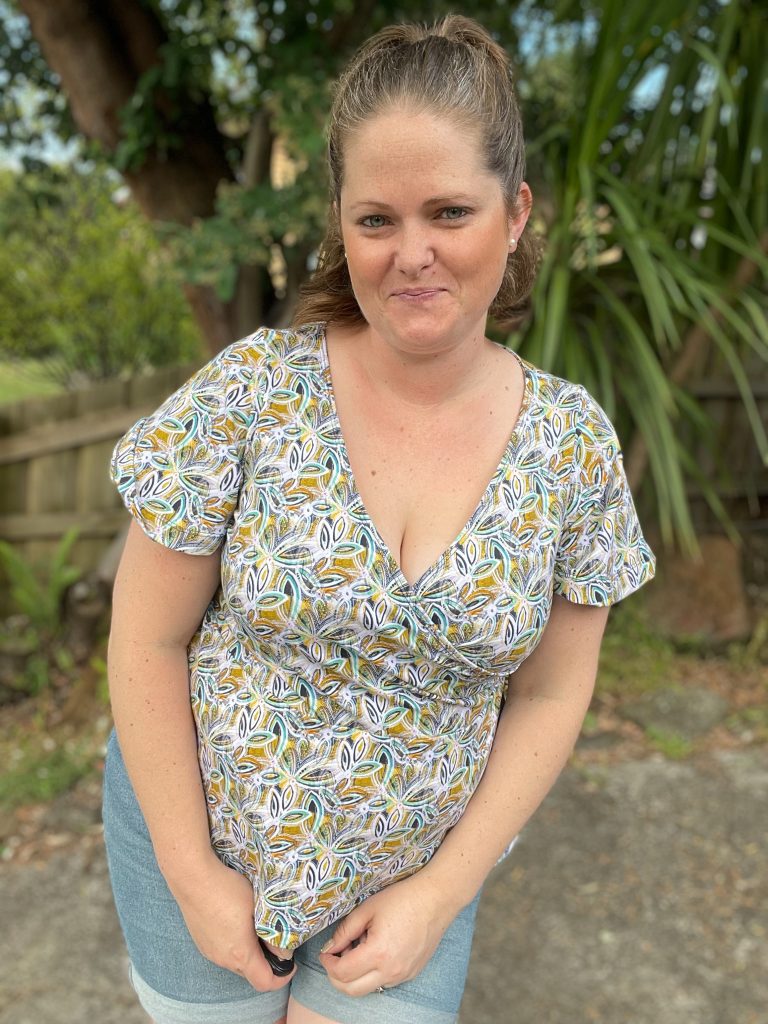
    This was the first time I made the Adele Boatneck and I was really happy with the result. I really liked the details on the shoulders as well as the sleeve options and peplum version. As soon as I saw the fabric I used on this one, I knew I wanted to make the boatneck and I was not disappointed. I think it worked so well with this pattern.

    I made the US size 18 which was great for the top half but I should have graded out more in the waist as it was a little tight over my waist and bum. Other than that though, the fit was great. I liked the way the neckline came together though I did it as a band and not as a binding. Even with the band though it is such a clean look and sits beautifully on the neckline giving that high boat look.

    The other detail I liked is the seperate lower piece, giving it a kind of faux layered look. It helps to be able to use shorter cuts of fabrics on the top piece, which is great for if you have limited amounts. While the sleeve cuffs are not a style I would normally go for, and I might not do again, I am still glad I tried them.

    So all in all I am very pleased with how this one came together and I would happily make it again.

    Video Review:

    Gallery:

  • Pattern Hack – How to use a Tee pattern as a Jumper/Sweater

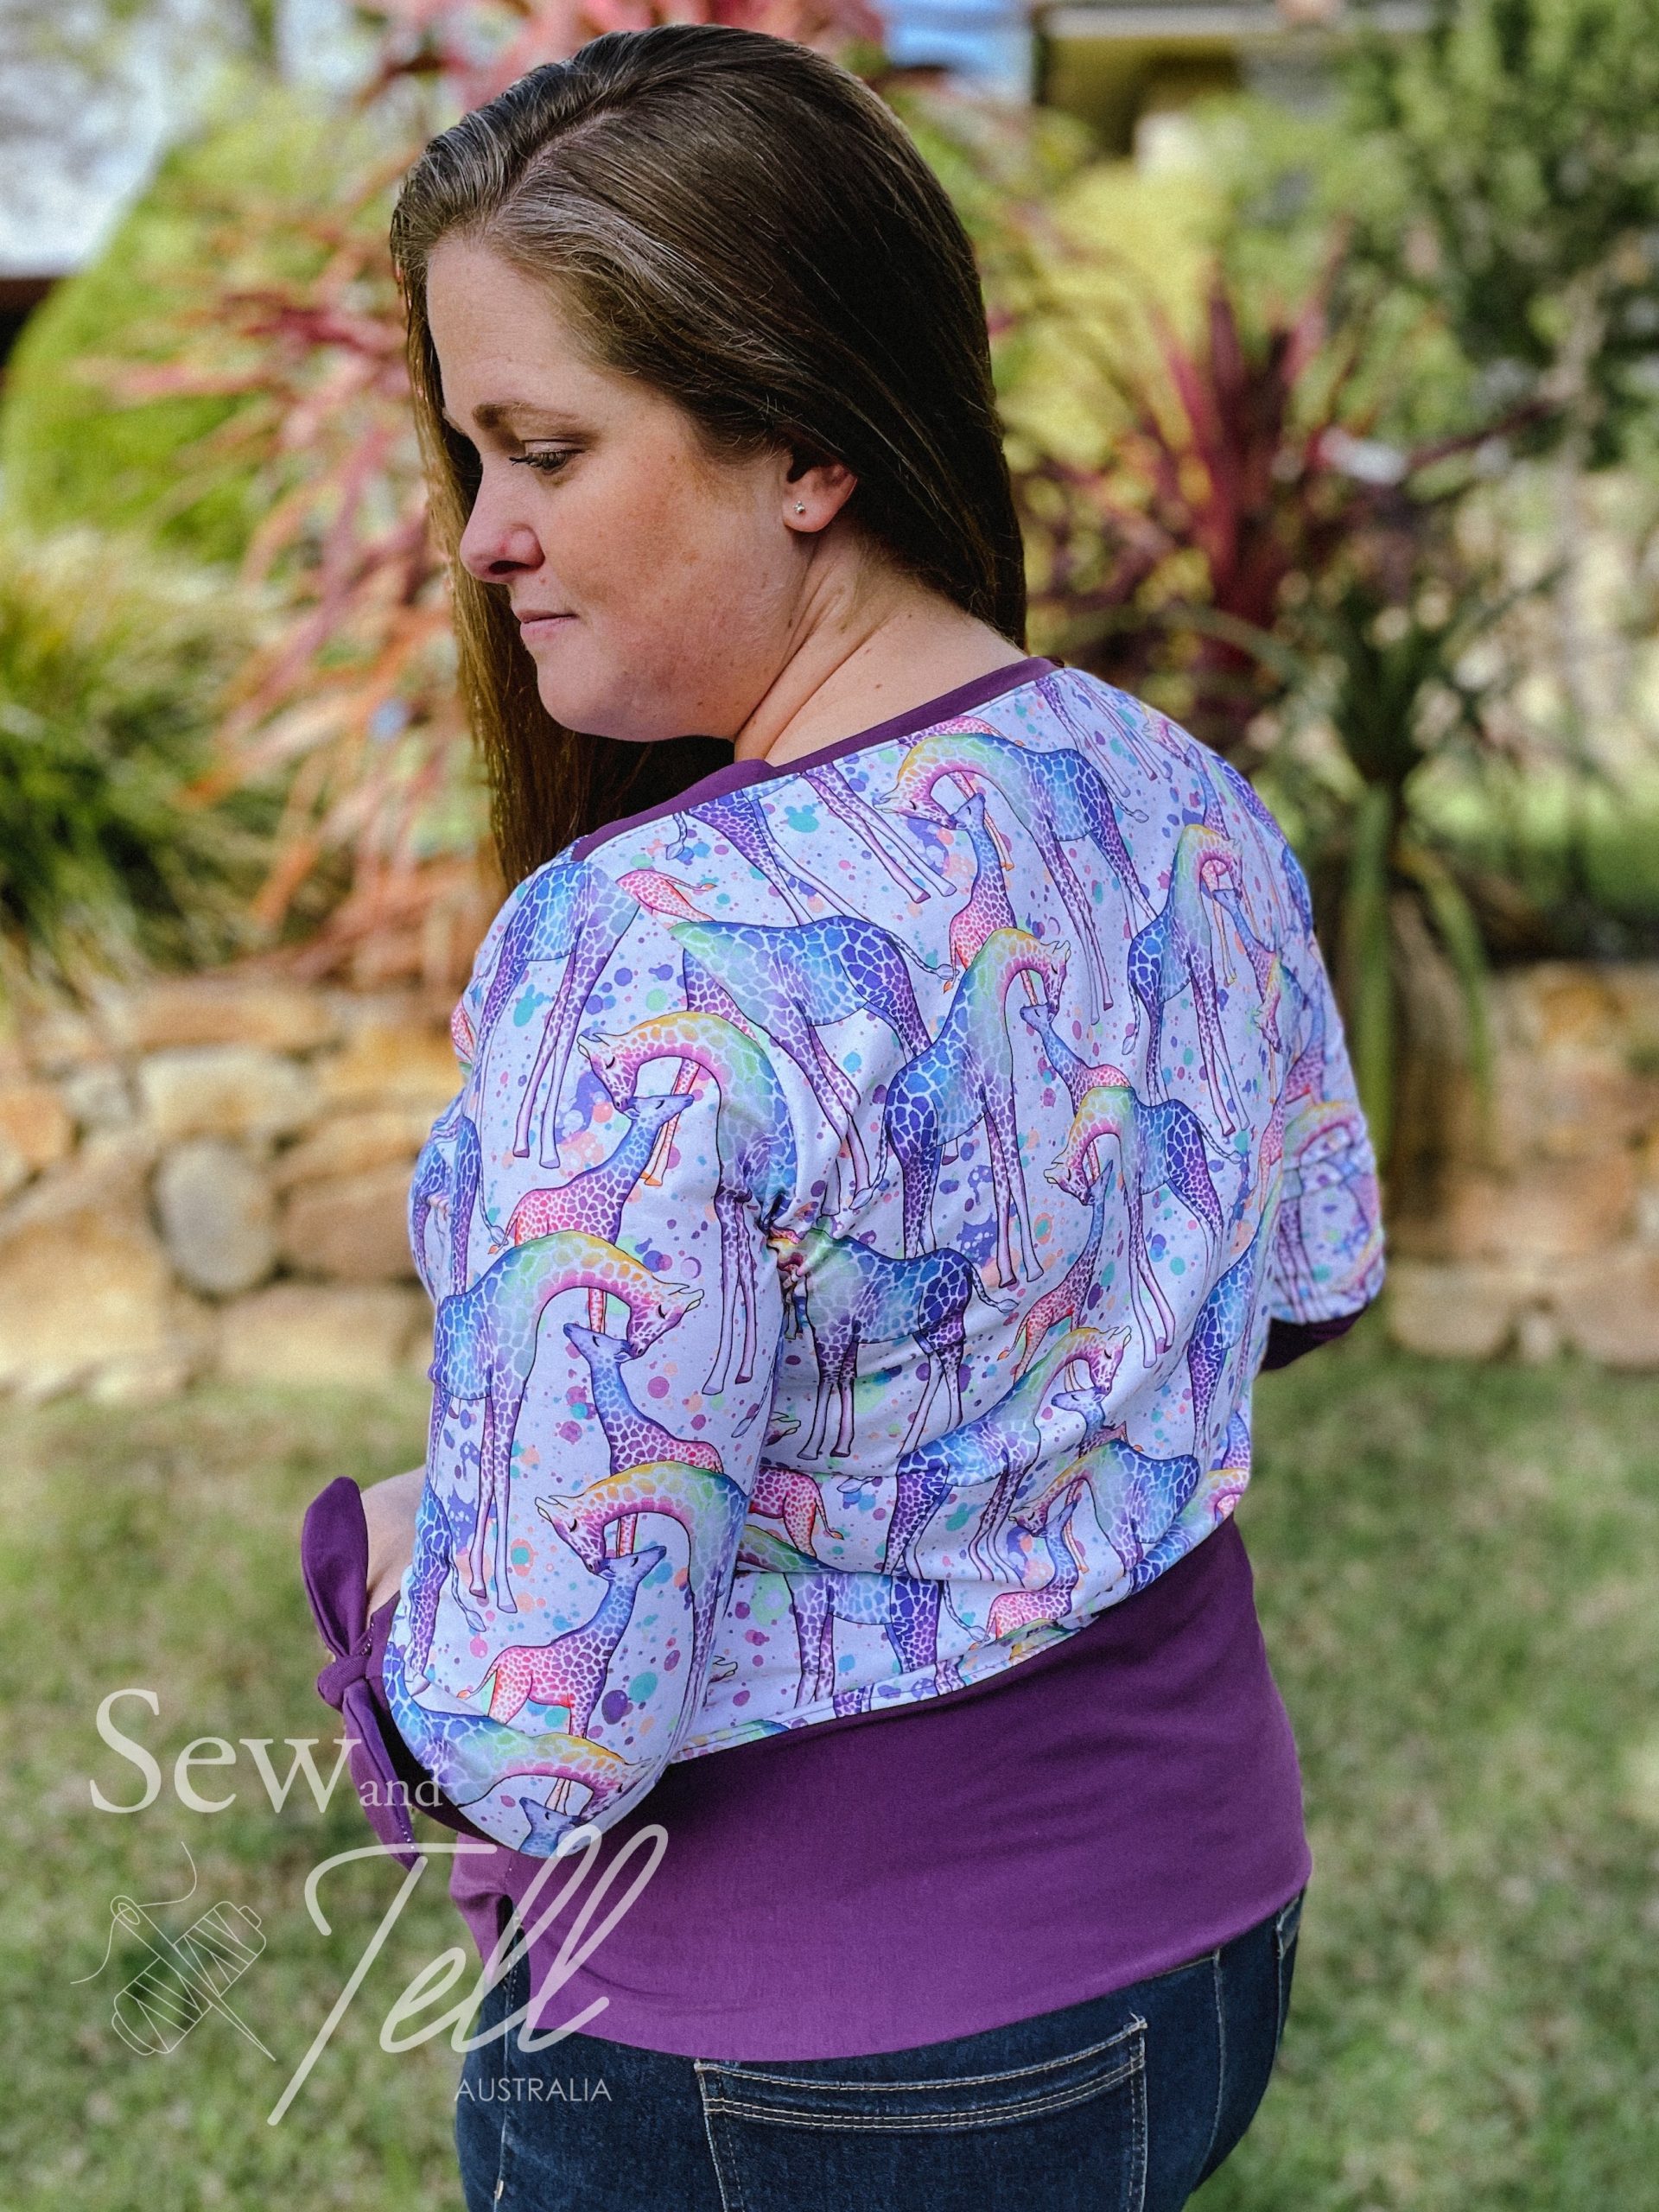
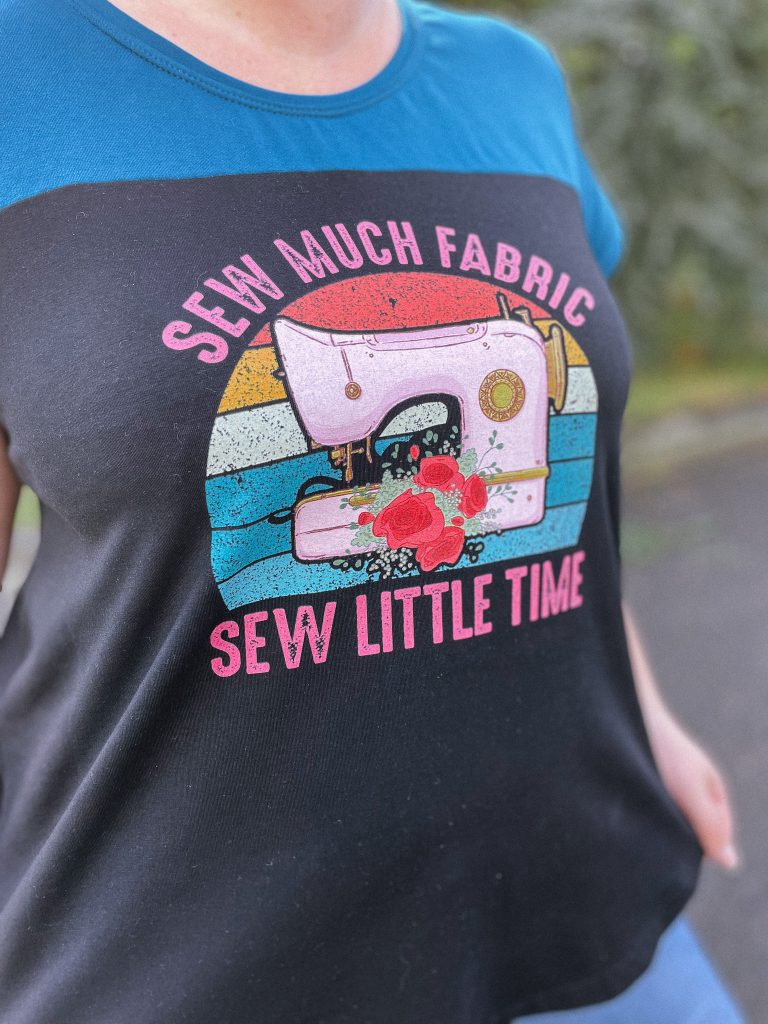
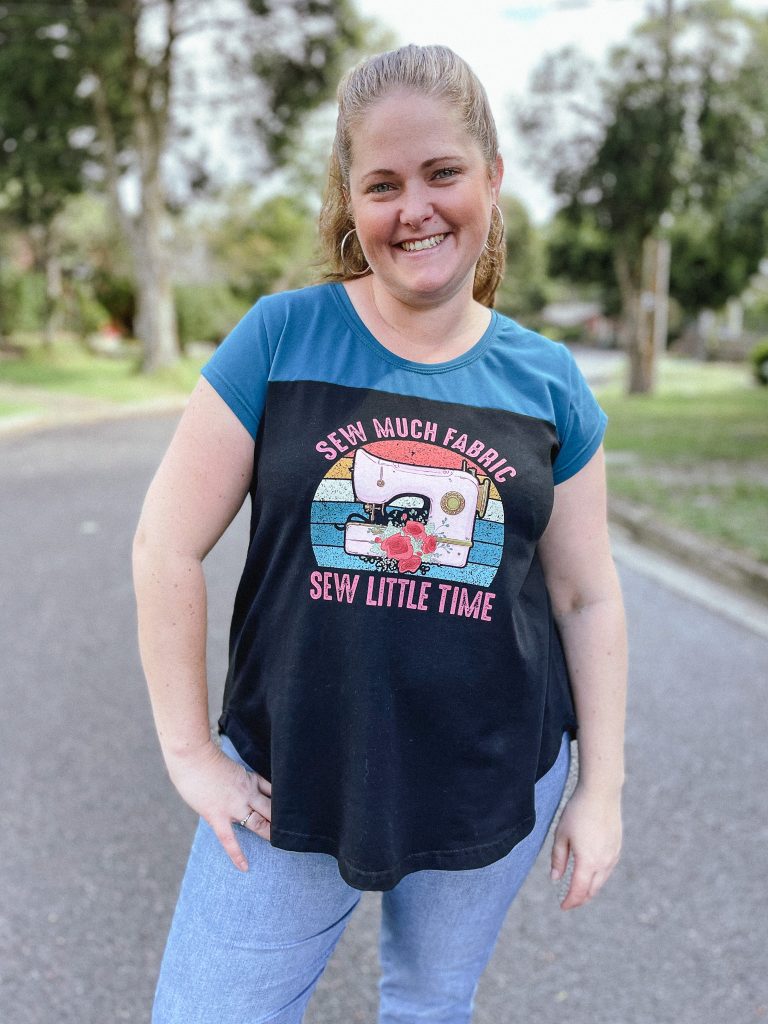
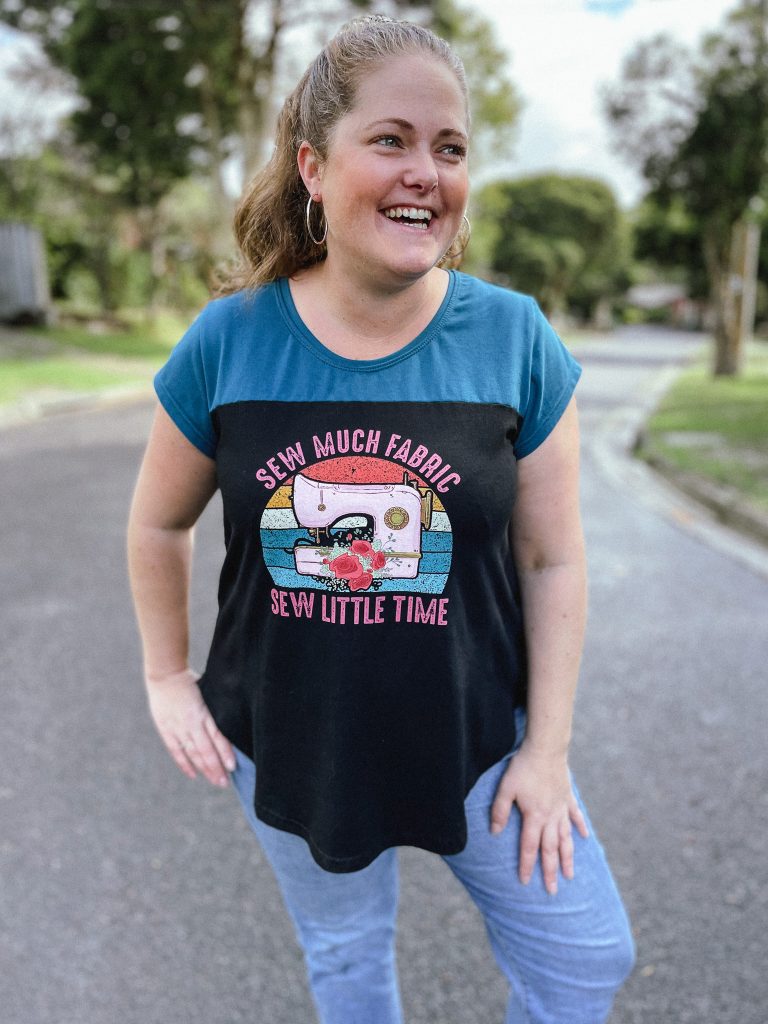
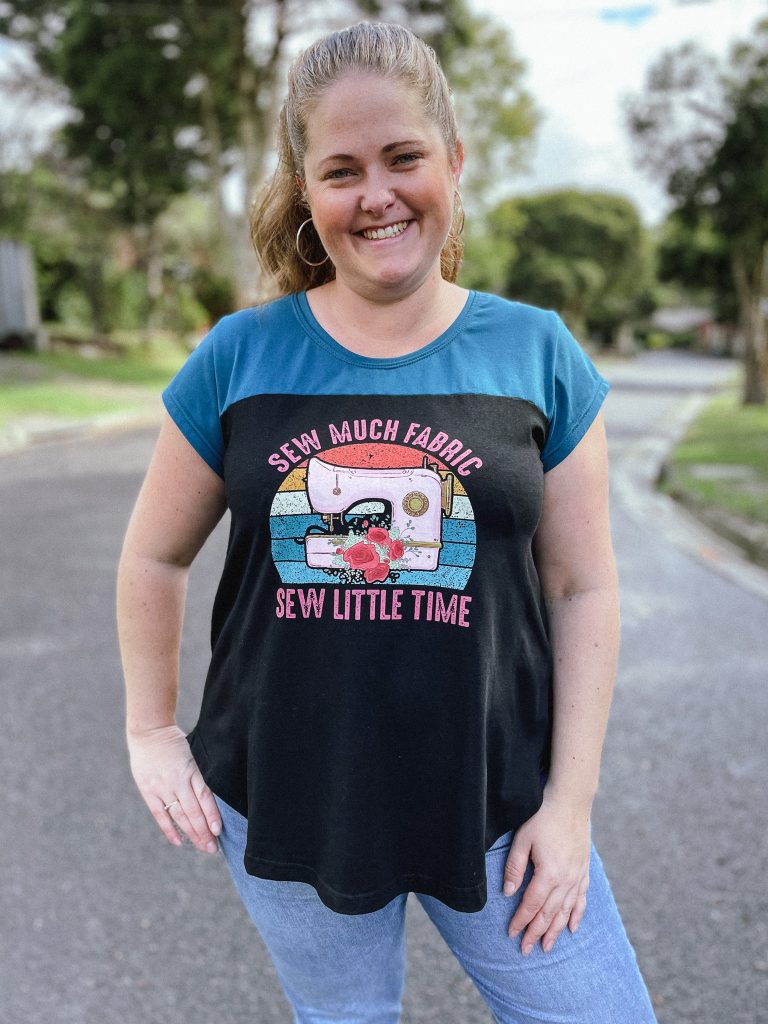
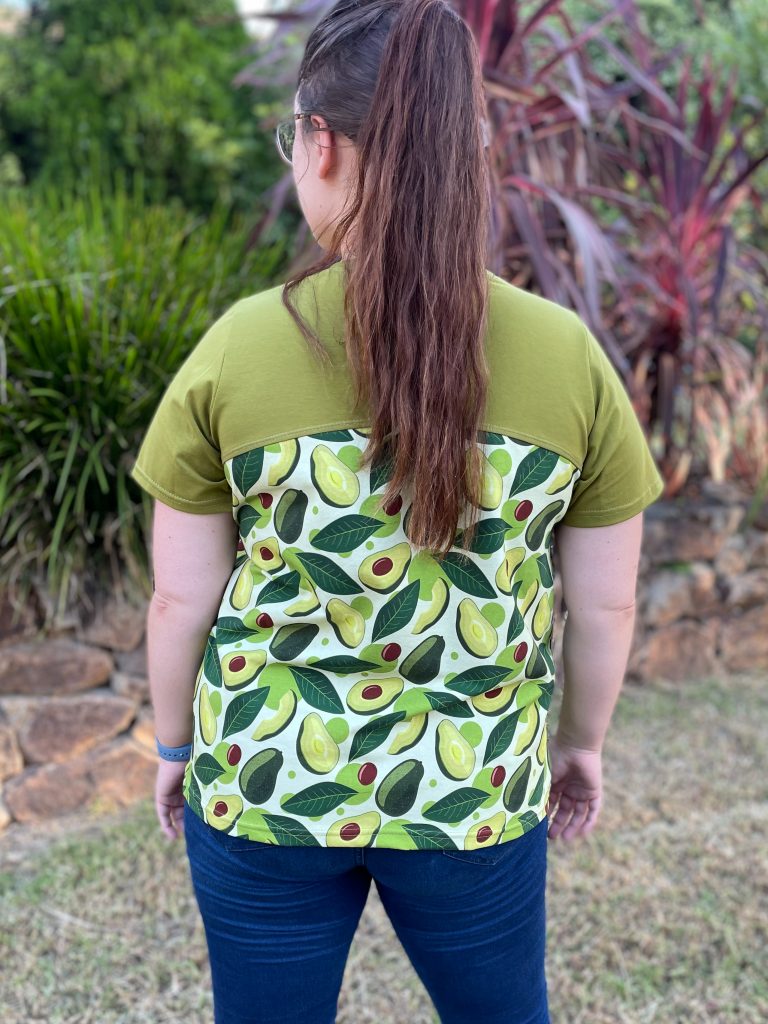
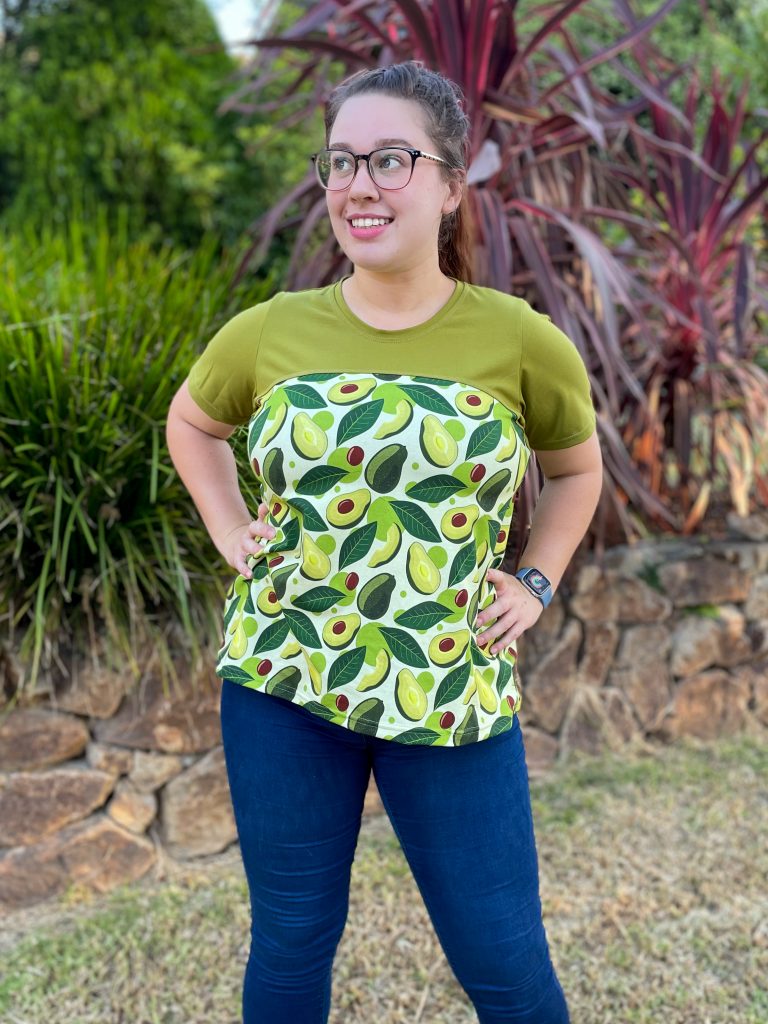
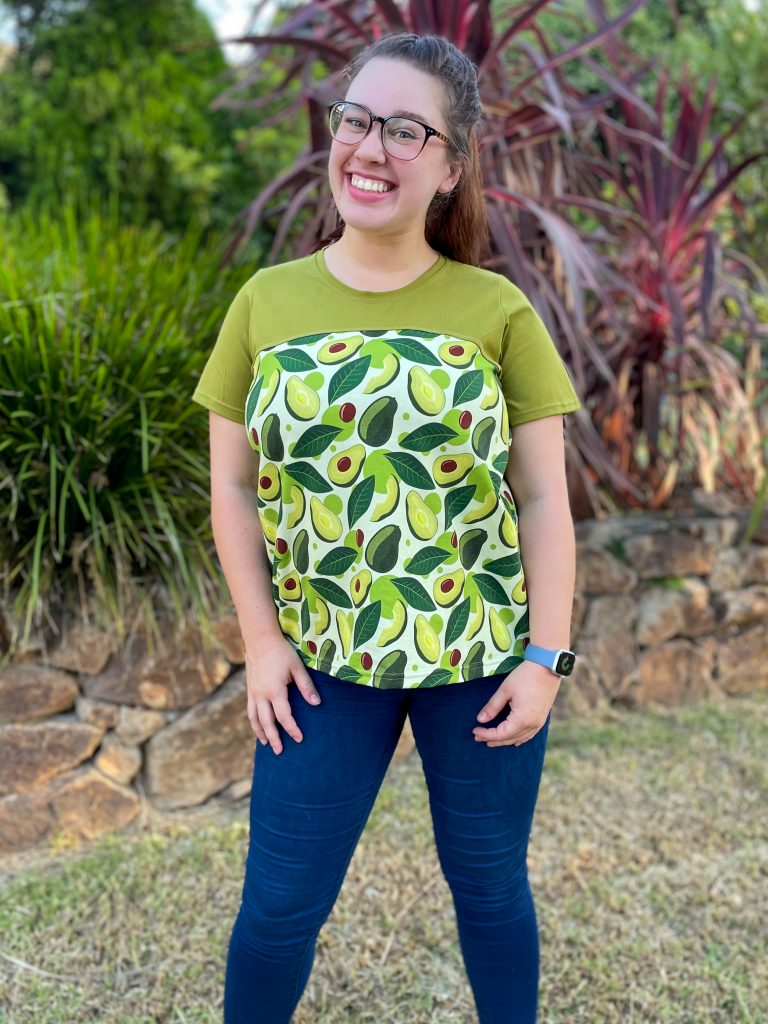
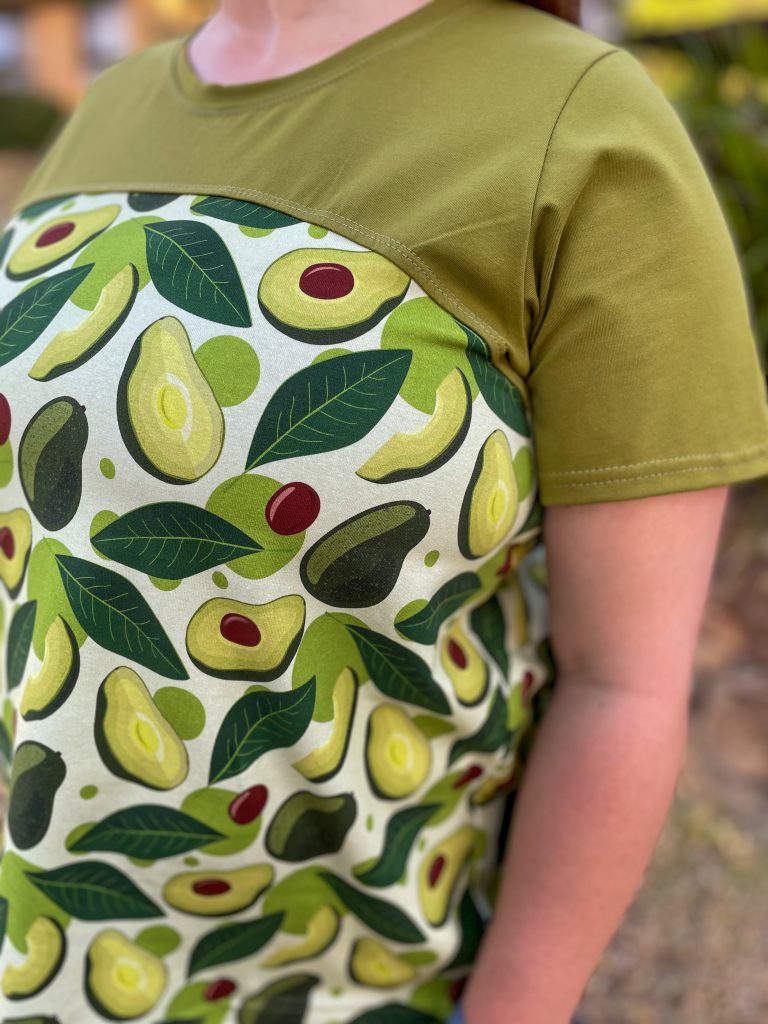
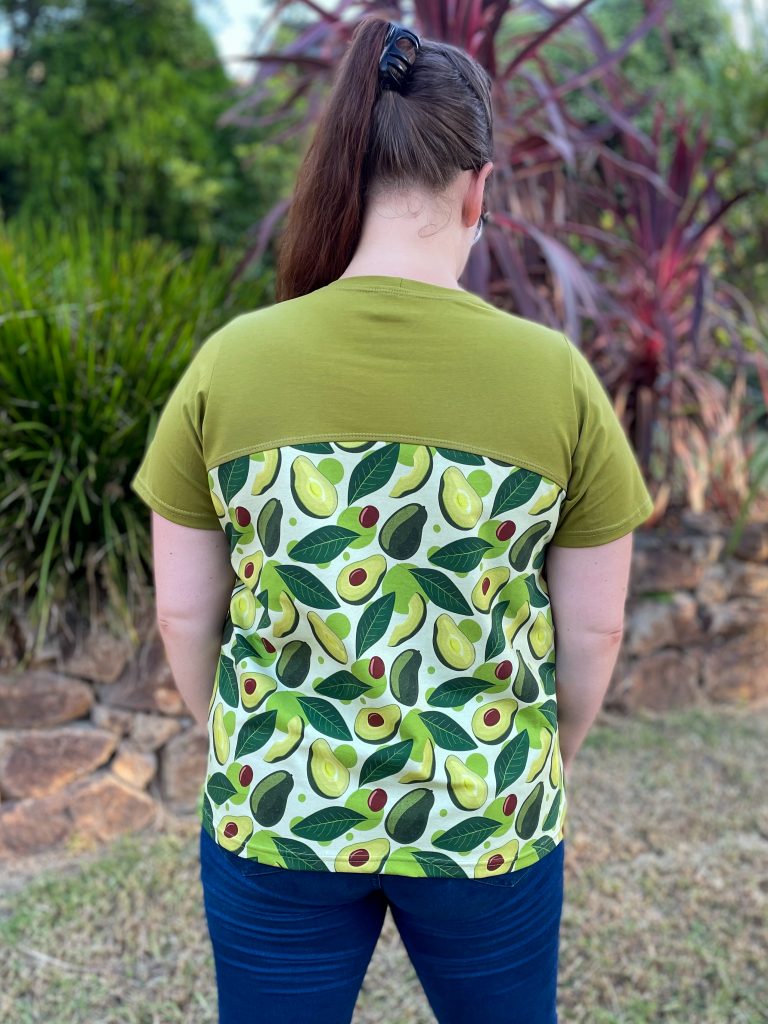
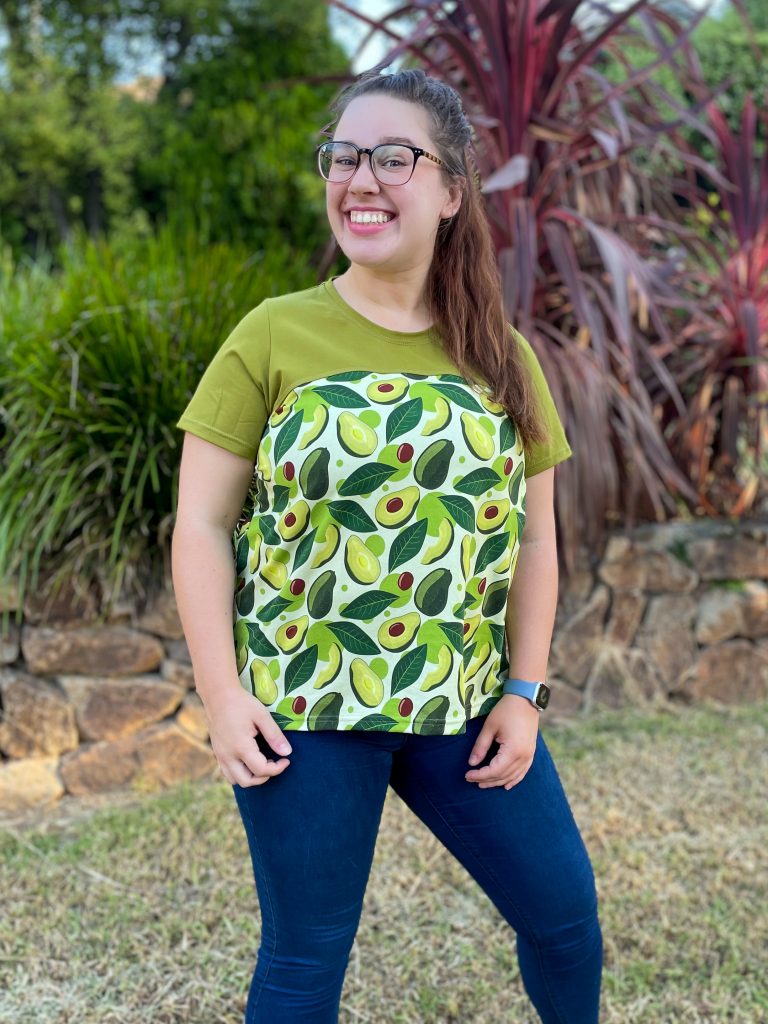
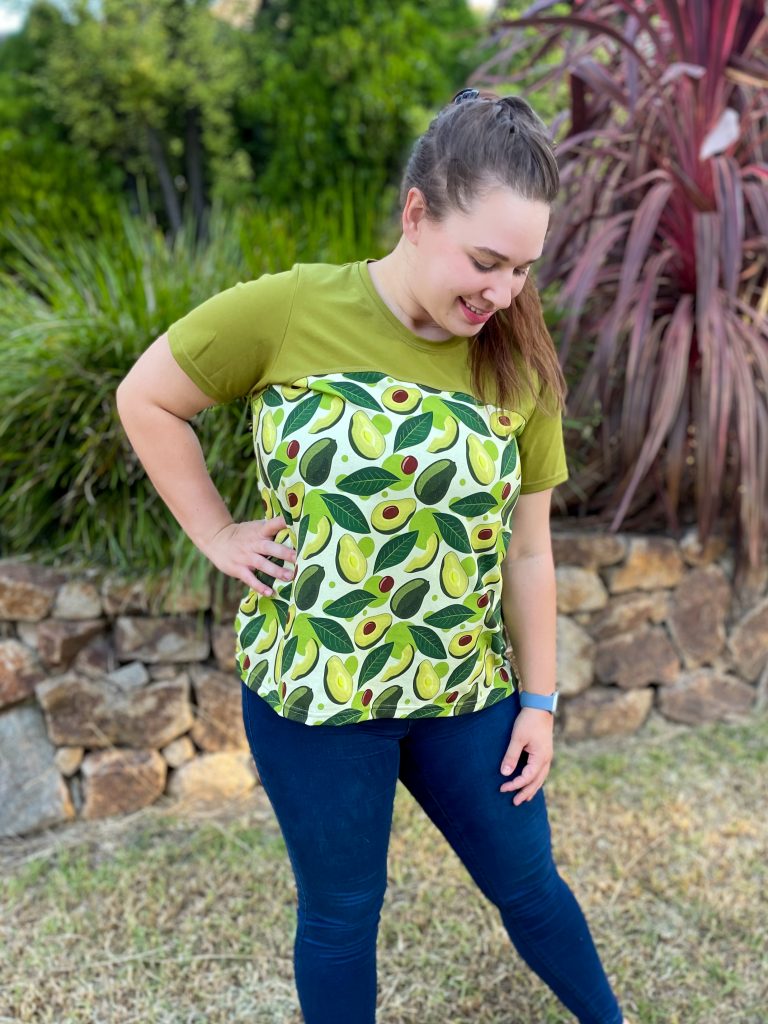
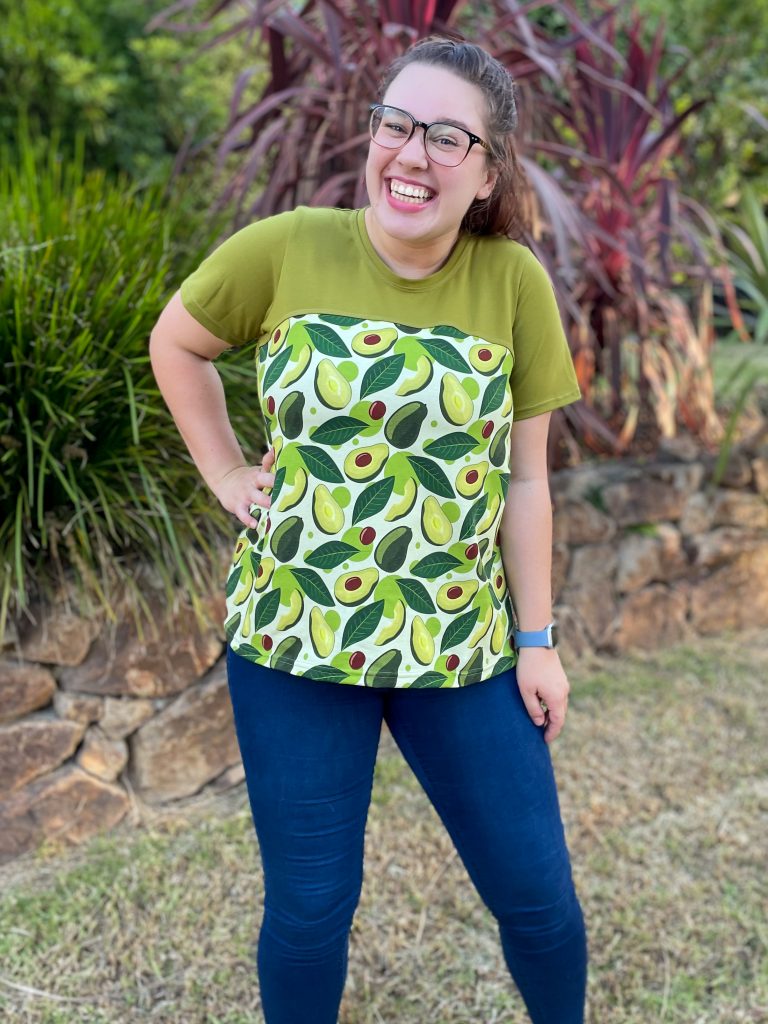
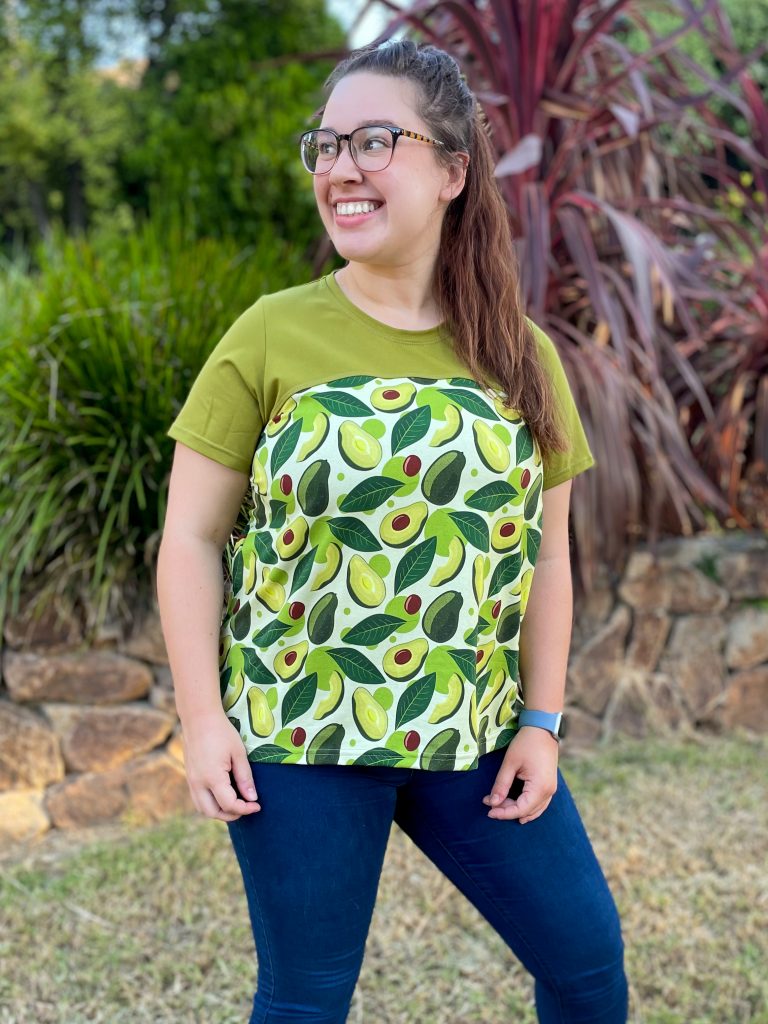
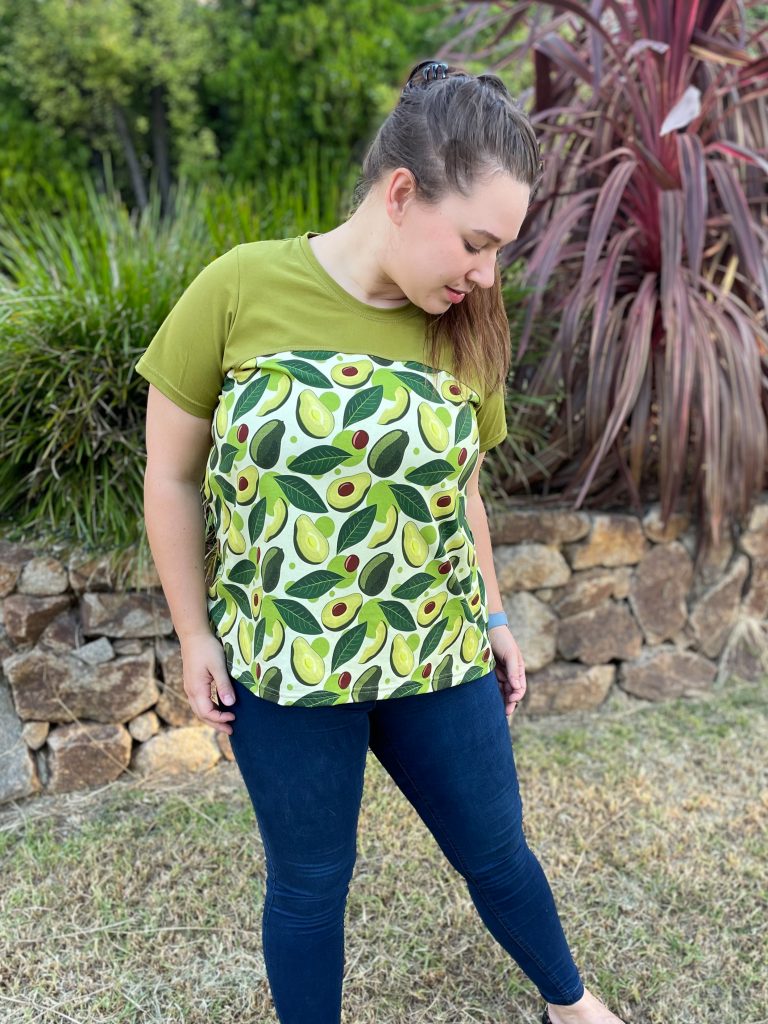
    Pattern: Women’s Domino Dolman
    Designer: Peek A Pattern Shop
    Fabrics: Ribbed Knit from Sew Unique Fabrics
    Skill: Beginner

    Links:

    The Wrap Up:

    Have you ever seen a Tee pattern and thought, gee I love the colour blocking or shape on that, I wish they made it as a jumper pattern. Well, there is no reason you can’t use it as a Jumper pattern!

    When I had this gorgeous rib knit to sew up from Sew Unique Fabrics, I knew that the Domino Dolman would be perfect for what I wanted with the colour blocking and dolman style sleeves, so I simply sized up! It can be hard to know how much to size up, but a big clue is by looking at the amount of ‘ease’ in a pattern.

    Ease is the term used to let you know how tight or loose the final garment will be. For example, if the size chart says a size Large is for bust size 38″ – 40″, and then in the final garment size chart it says the bust size is 41″, then there is a built in ease of 1-3″, meaning the the garment will fit your bust of 40″ PLUS have an extra 1″ around the bust area.

    So once you know the ease, you can work out how much to size up by. I wanted a fairly oversized jumper so I went up 2 sizes, but to be honest, I probably could have gotten away with just 1 size up as this pattern has a generous amount of ease. I’m still really happy with the result though!

    Hopefully that helps give you a little confidence to think outside the box and not think if a pattern says it is a Tee, it only has to be a Tee. Patterns are whatever you want them to be 🙂

    Gallery:

  • Pattern Review of the Elodie Wrap Dress

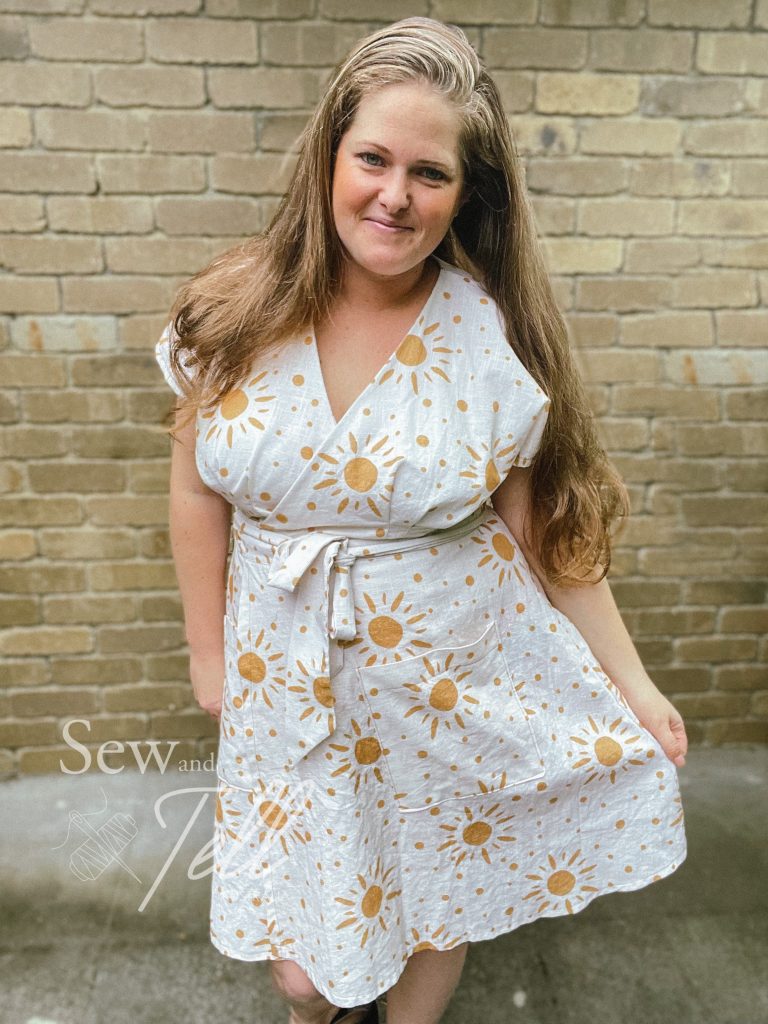
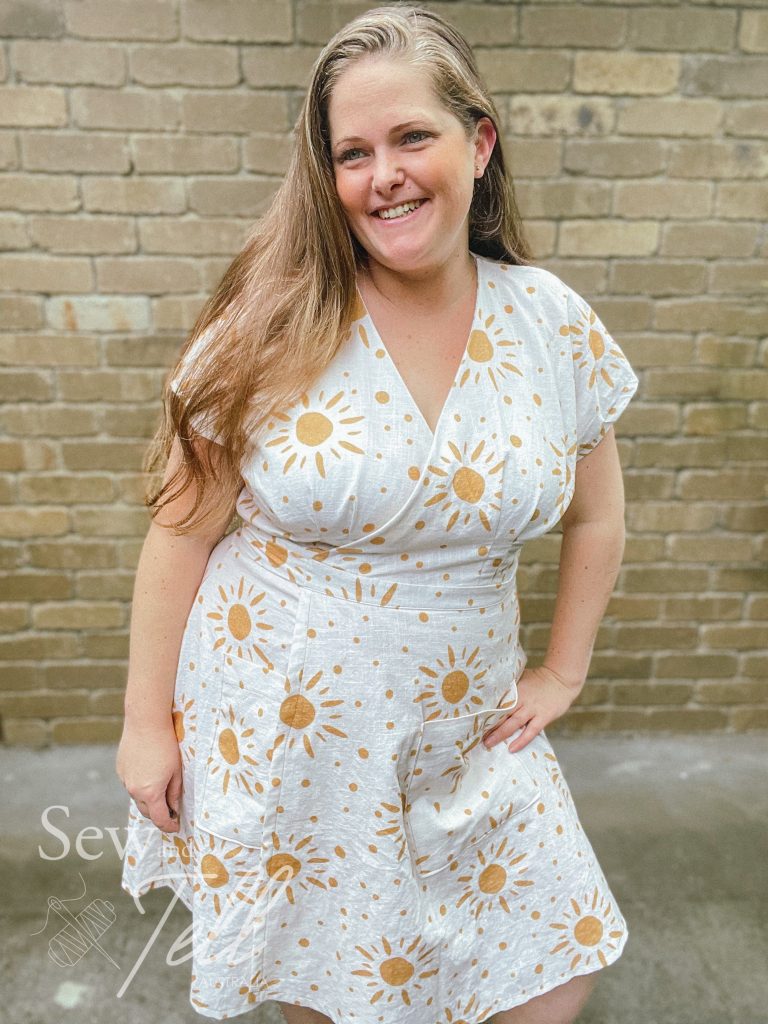
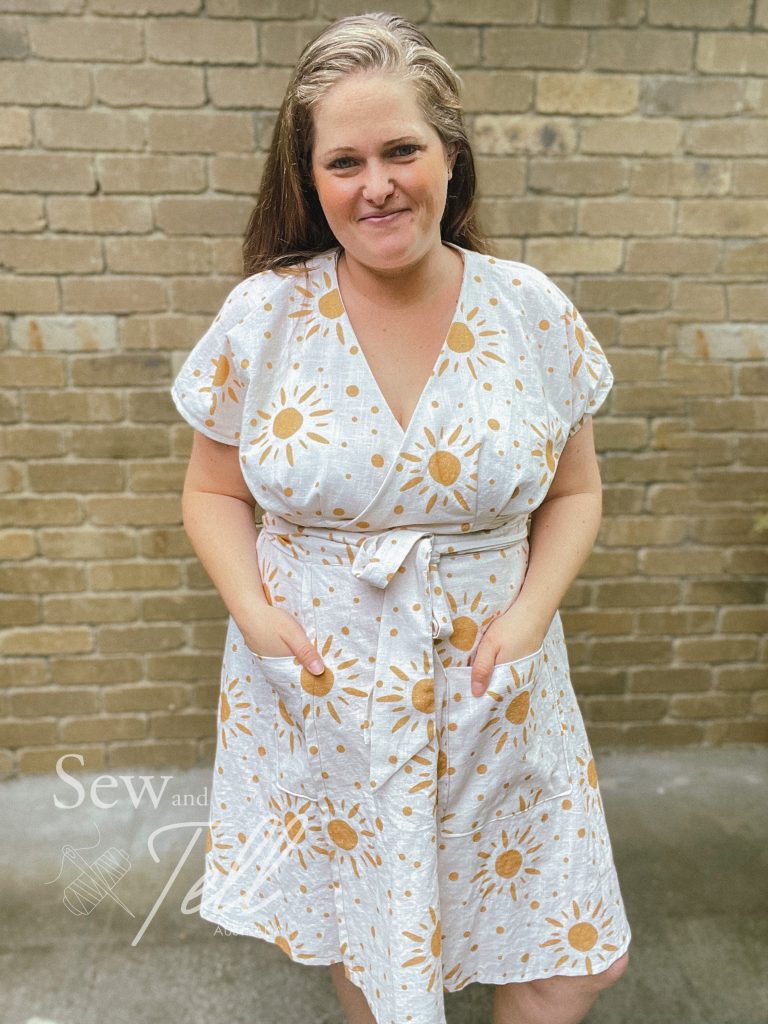
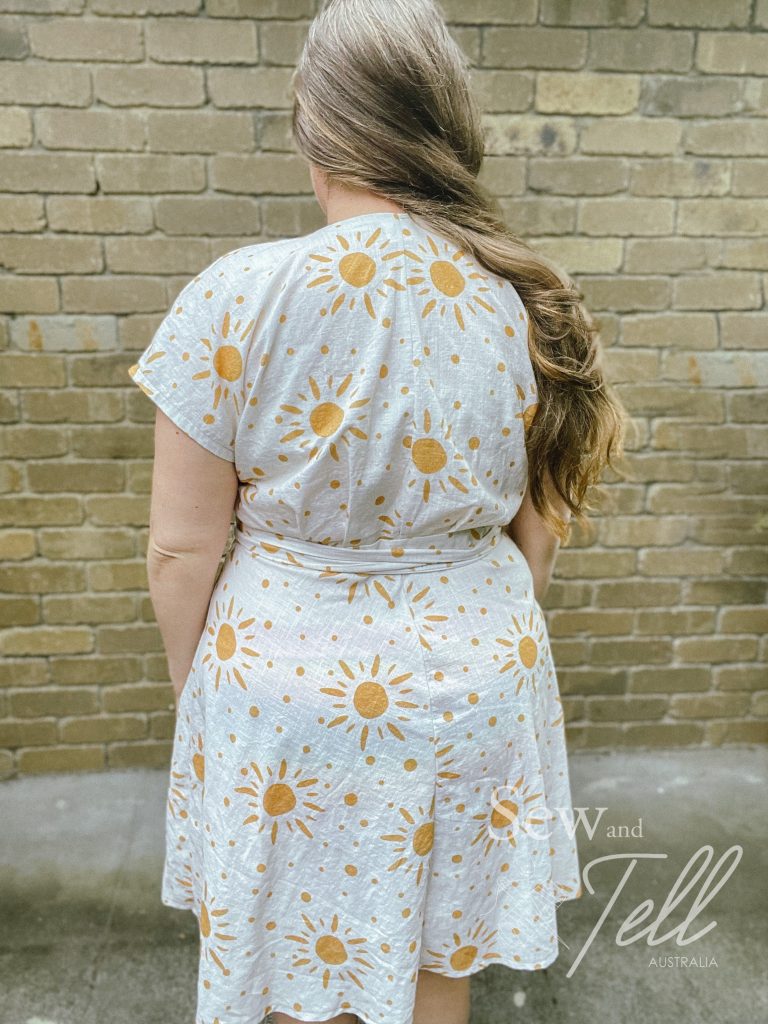
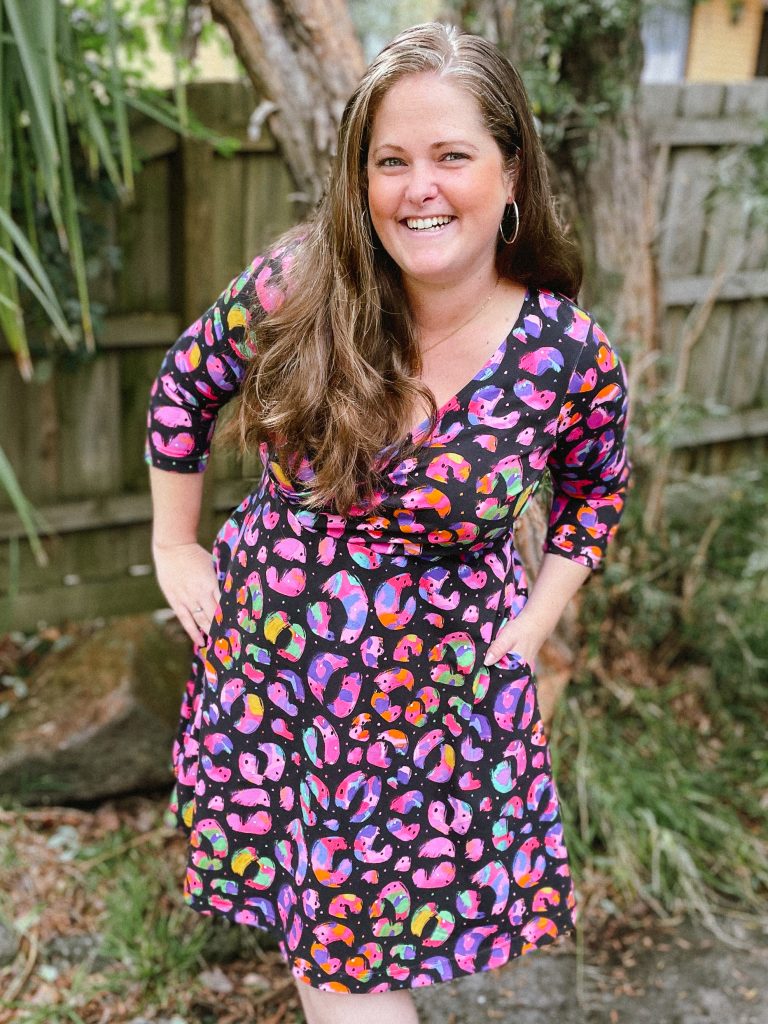
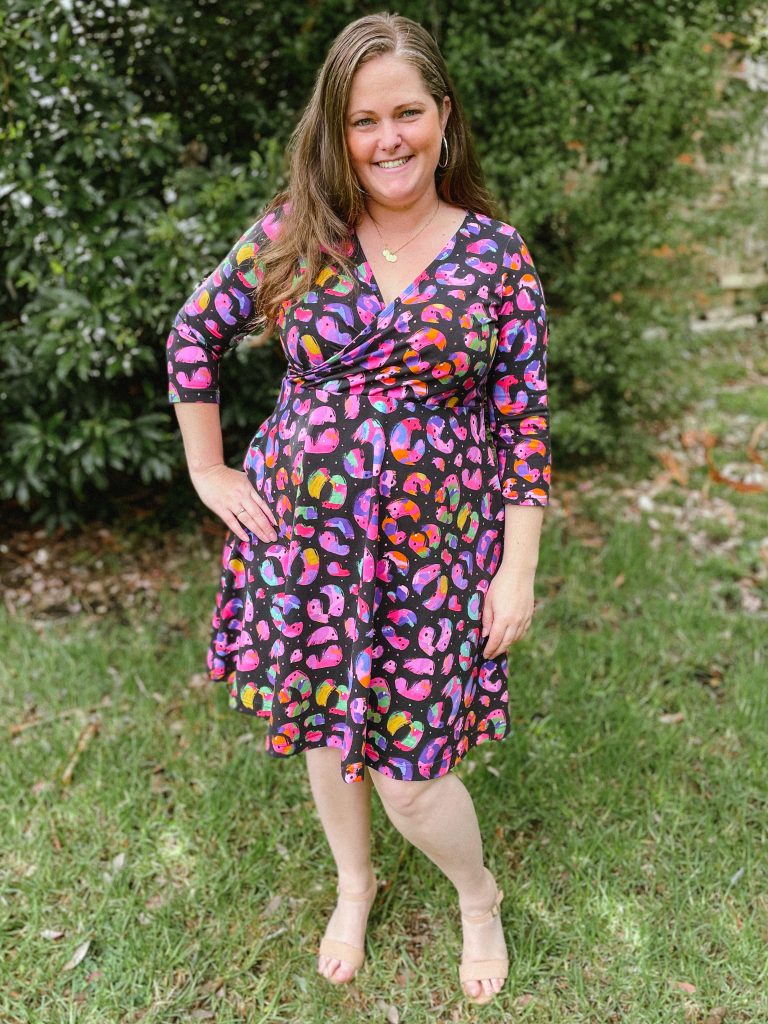
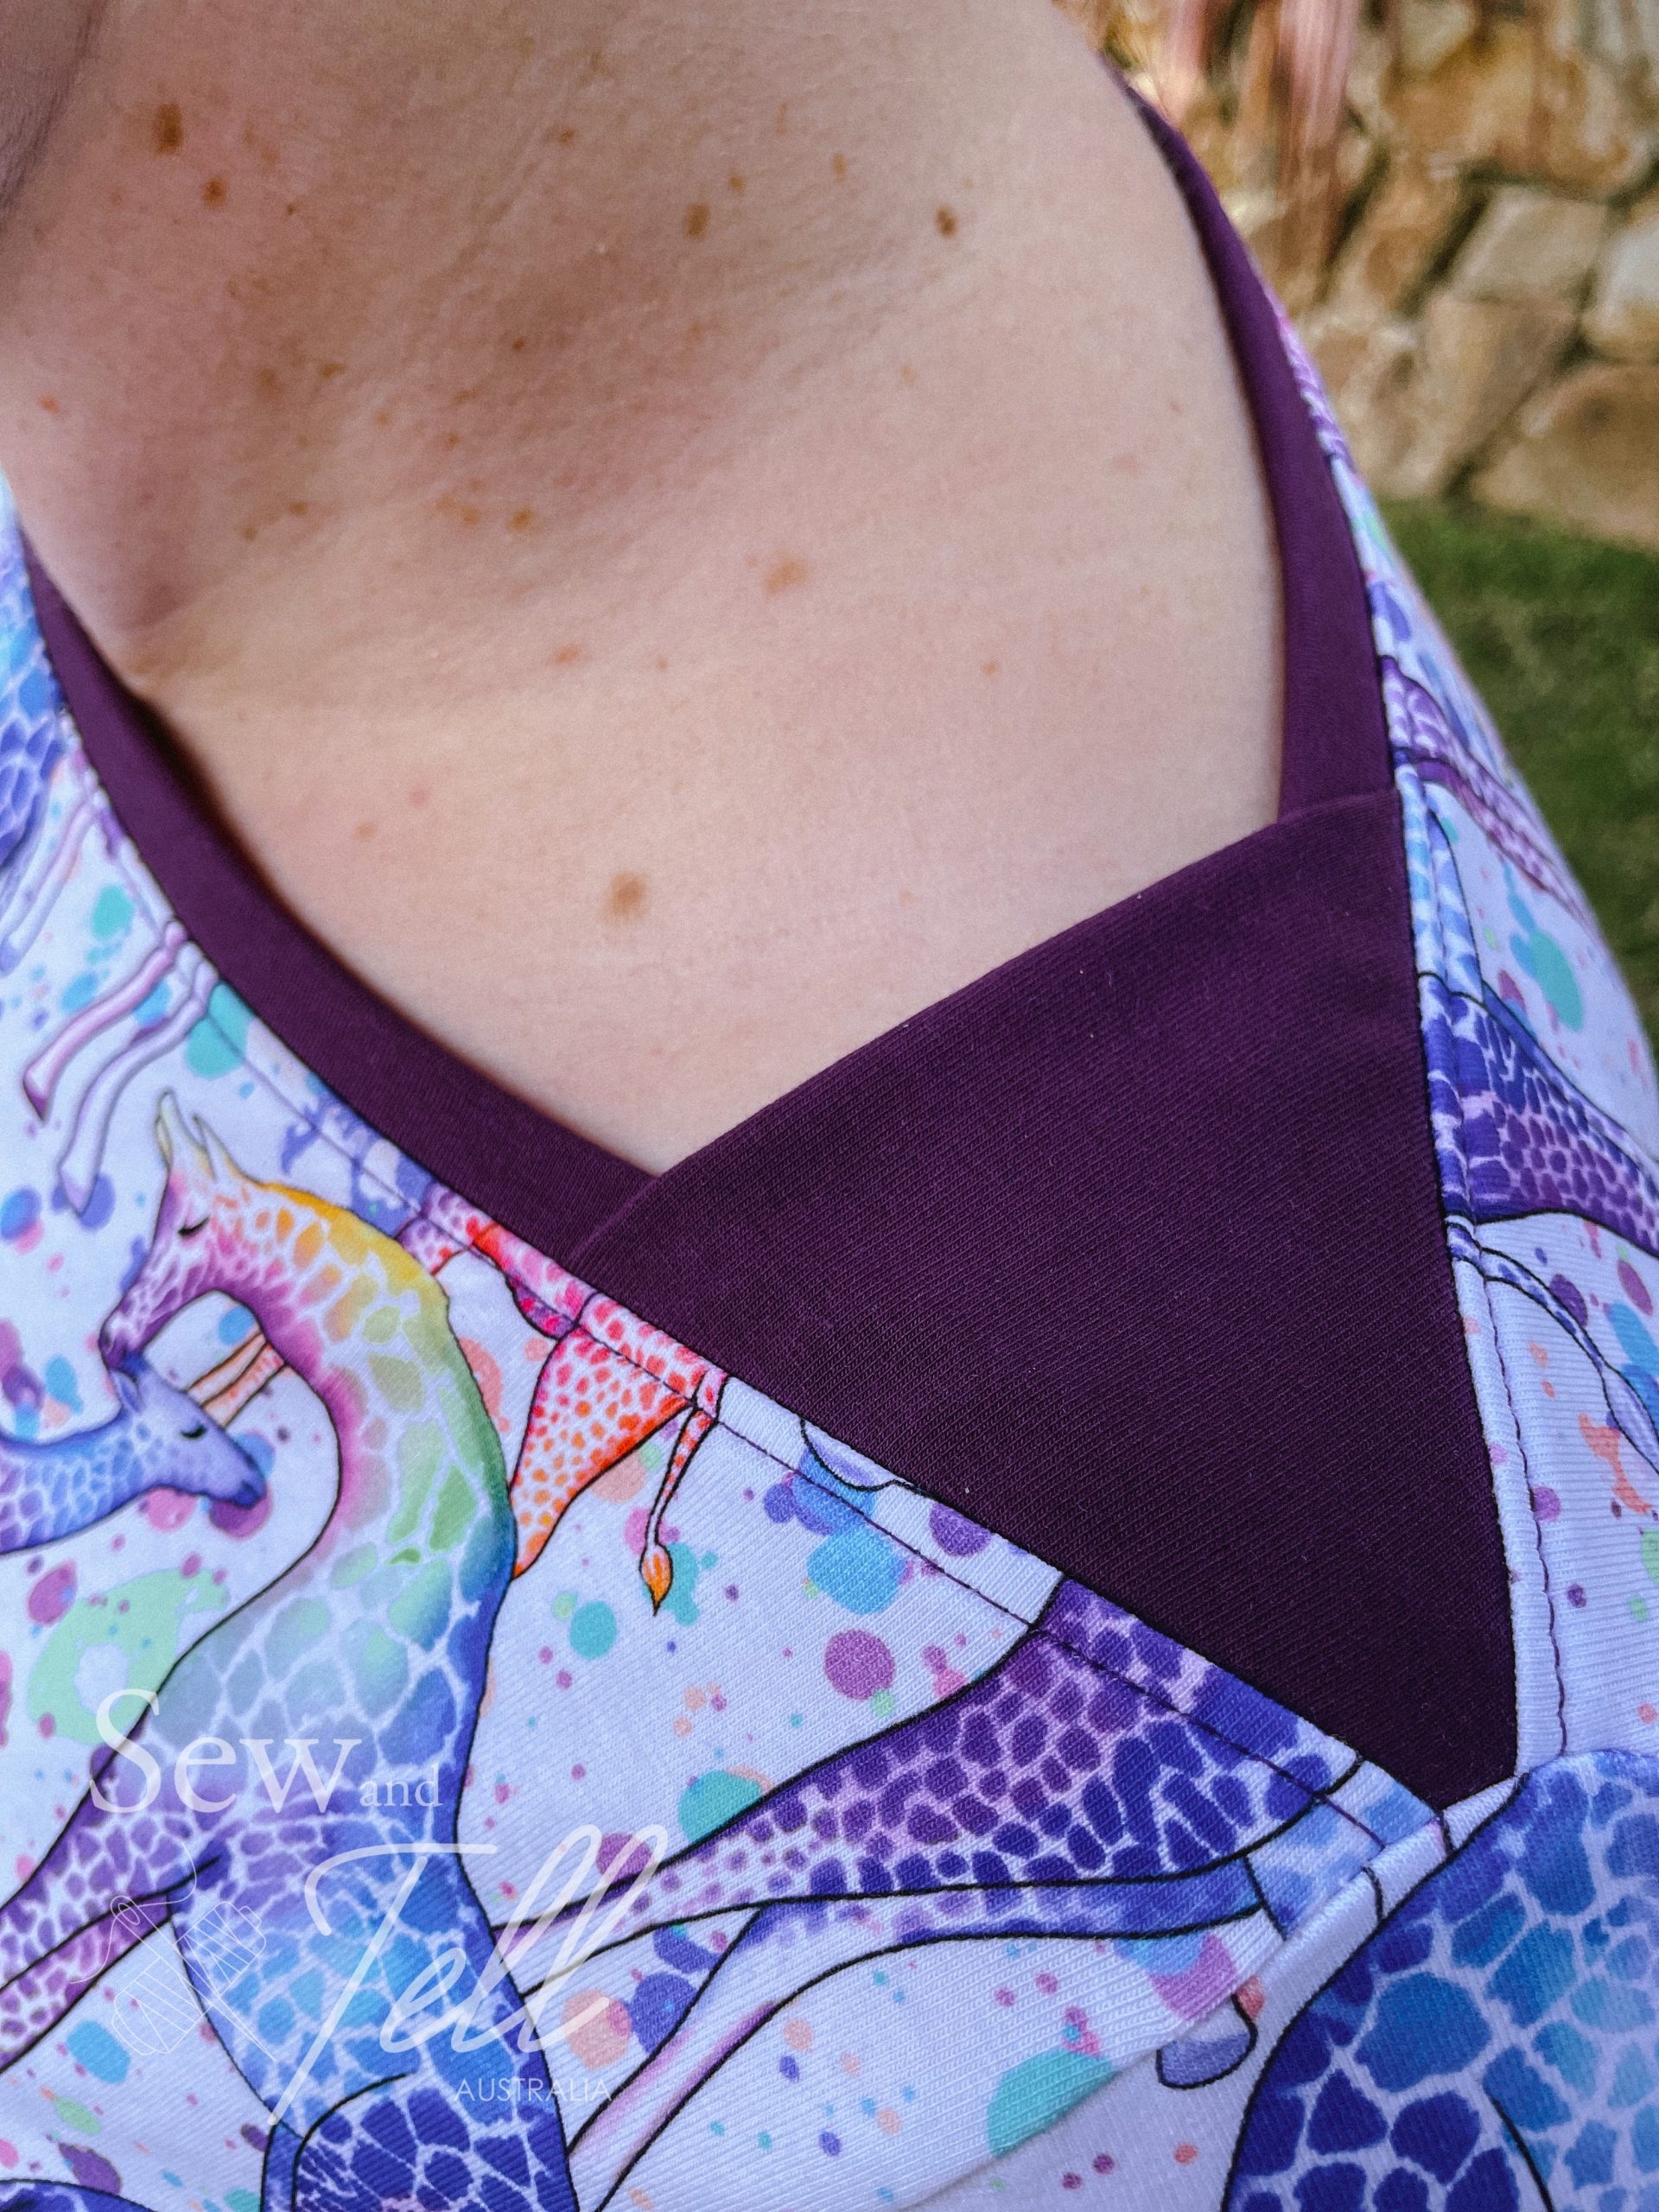
    Pattern: Elodie Wrap Dress
    Designer: Closet Core Patterns
    Fabrics: Linen blend from Spotlight
    Measurements: Bust: 44″; Waist 39″; Hips 48″
    Size made: 16 graded to 20
    Adjustments: Took an inch out of each shoulder seam and shaped the back
    Pros: Love the loose flowyness of this dress, as well as the wrap neckline
    Cons: I had trouble fitting the neckline with my boobs. I also misunderstood the instructions for the wrap tie part.

    Links:

    The Wrap Up:

    I bought this pattern quite a while ago with grand plans to make it for summer and never got around to sewing one up. So naturally I decide halfway through Autumn that it is the right time to finally get one done. haha

    This pattern is designed for woven fabrics and I chose a beautiful linen blend from Spotlight to try. This is quite a fabric hungry pattern so I think I ended up buying 3.5m for my dress and I closely followed the cutting guide so I didn’t run out of fabric. The linen worked well but I’d love to try it in a twill as well.

    This was my first time sewing a Closet Core pattern, despite owning a few of Heathers patterns, and I must say I’m pretty impressed. While they don’t have projector files, they do have A0 files that are layered so I was able to use those effectively.

    Being a curvier body, I used their 14-32 pattern range which is based off a curvier block and I think its a size D cup for breasts which suits my body better. I sewed up a 16 graded to an 18 at the waist and hips which was great for the waist and hips, but I had some issues with the cross over section not sitting properly over my boobs so I ended up taking an inch out of each shoulder seam and at the back neckline which helped correct it mostly.

    I did really love the pleats under the bust and at the back, I think they are a really nice feature and help give the bodice shape for the bust without using darts. Thats the first time I’ve used a pattern like that and I thought it was really effective. I do think I probably need more ‘space’ for my boobs, so I will have to research how to achieve that with this style.

    I also had some issues with the hole for the tie area. I don’t think I read the instructions properly to begin with and when it came time to open up the hole in the waistband to pull the tie through, I had a world of trouble as I had done it wrong. But, with my trusty unpicker and a little bit of creative sewing, I got it to work and it doesn’t look half bad either.

    I will definitely make this pattern again, I will just have to pay closer attention to the tie area for a cleaner finish next time.

    Gallery: