Exploring the world of stretch fabric sewing can lead to endless sewing opportunities. Particularly as stretch fabrics are used to make a large number of the ready-to-wear items that you see in stores. Their comfort and adaptability make them incredibly popular to wear. However, many people are afraid to get started with sewing stretch fabric sewing for fear of making mistakes.
Read the 7 myths below to learn why you no longer need to be afraid of sewing with stretch fabrics. You will quickly learn that stretch fabrics aren’t hard, they are just different.
Myth #1: You Need a Special Sewing Machine
Reality: There’s a common belief that you need a Serger (otherwise known as an Overlocker) to tackle stretch fabrics. However, this isn’t the case! Your conventional, normal domestic sewing machine is all you need to start sewing with stretch cotton. Getting to understand how your machine works, including what settings and needles to use with stretch fabrics is a game changer!
Myth #2: Stretch Fabrics Are Too Unpredictable
Reality: While stretch fabrics are celebrated for their elasticity and adaptability, these characteristics should not be viewed as barriers. With the right skills and knowledge, you can master stretch cotton lycra and create garments that are comfortable, stylish and perfect for the whole family.
Myth #3: All Stretch Fabrics Are the Same
Reality: There are an infinite number of styles, colors, and types of stretch fabrics, each with unique properties and applications. Examining various styles, like as interlock, rib knit, and jersey, will significantly boost the range and quality of your work. Understanding the variety of stretch materials is a first step in becoming successful with their use.
Myth #4: Quality Stretch Fabric is Expensive
Reality: High quality doesn’t necessarily come with a high price tag. There are plenty of affordable stretch fabric options that don’t skimp on quality. Doing some basic research and with a little fabric know-how, you can uncover the ideal stretch fabric for your project without stretching your budget.
Myth #5: Sewing with Stretch Fabrics is Only for people who have being sewing for a long time and mastered non stretch fabrics
Reality: The misunderstanding may deter beginners in particular. However, the reality is that even novices can become excellent stretch fabric makers with the correct guidance and a willingness to learn. The key is to begin with basic methods and work your way up to more complex ones as you gain confidence and skills.
Myth #6: Stretch Fabrics Stretch Out and Lose Shape Easily
Reality: A stretch fabric garment’s longevity and ability to maintain its shape are primarily determined by the stitching technique used. Making use of the right stitch types and finishes—such as using a serger for seams or your sewing machine’s proper stretch stitch—guarantees that your items will hold their shape and fit over time.
Myth #7: You Can’t Achieve Professional Finishes with Stretch Fabrics
Reality: A common misconception is that garments made from stretch fabric are bound to look homemade. However, techniques like twin needling, coverstitching, and careful topstitching can really boost the finished look of your stretch fabric projects. These finishing touches not only increase durability but also give a professional look to your sewing projects.
Stretch fabrics open a whole new world of fun and gorgeous sewing projects, all you have to do is start!
Hopefully by busting these seven myths, I have encouraged you to give stretch fabrics a go and begin to discover the joy of sewing with stretch fabrics.
Never let mistaken beliefs prevent you from discovering all of the possibilities that your sewing projects might achieve.
With the right guidance and techniques, the universe of stretch fabrics is yours to explore!
What next?
Do you want to sew stretch fabric more confidently?
Join a community of like minded sewists who share knowledge, advice and encouragement. All supported by step by step Masterclasses and exclusive content.
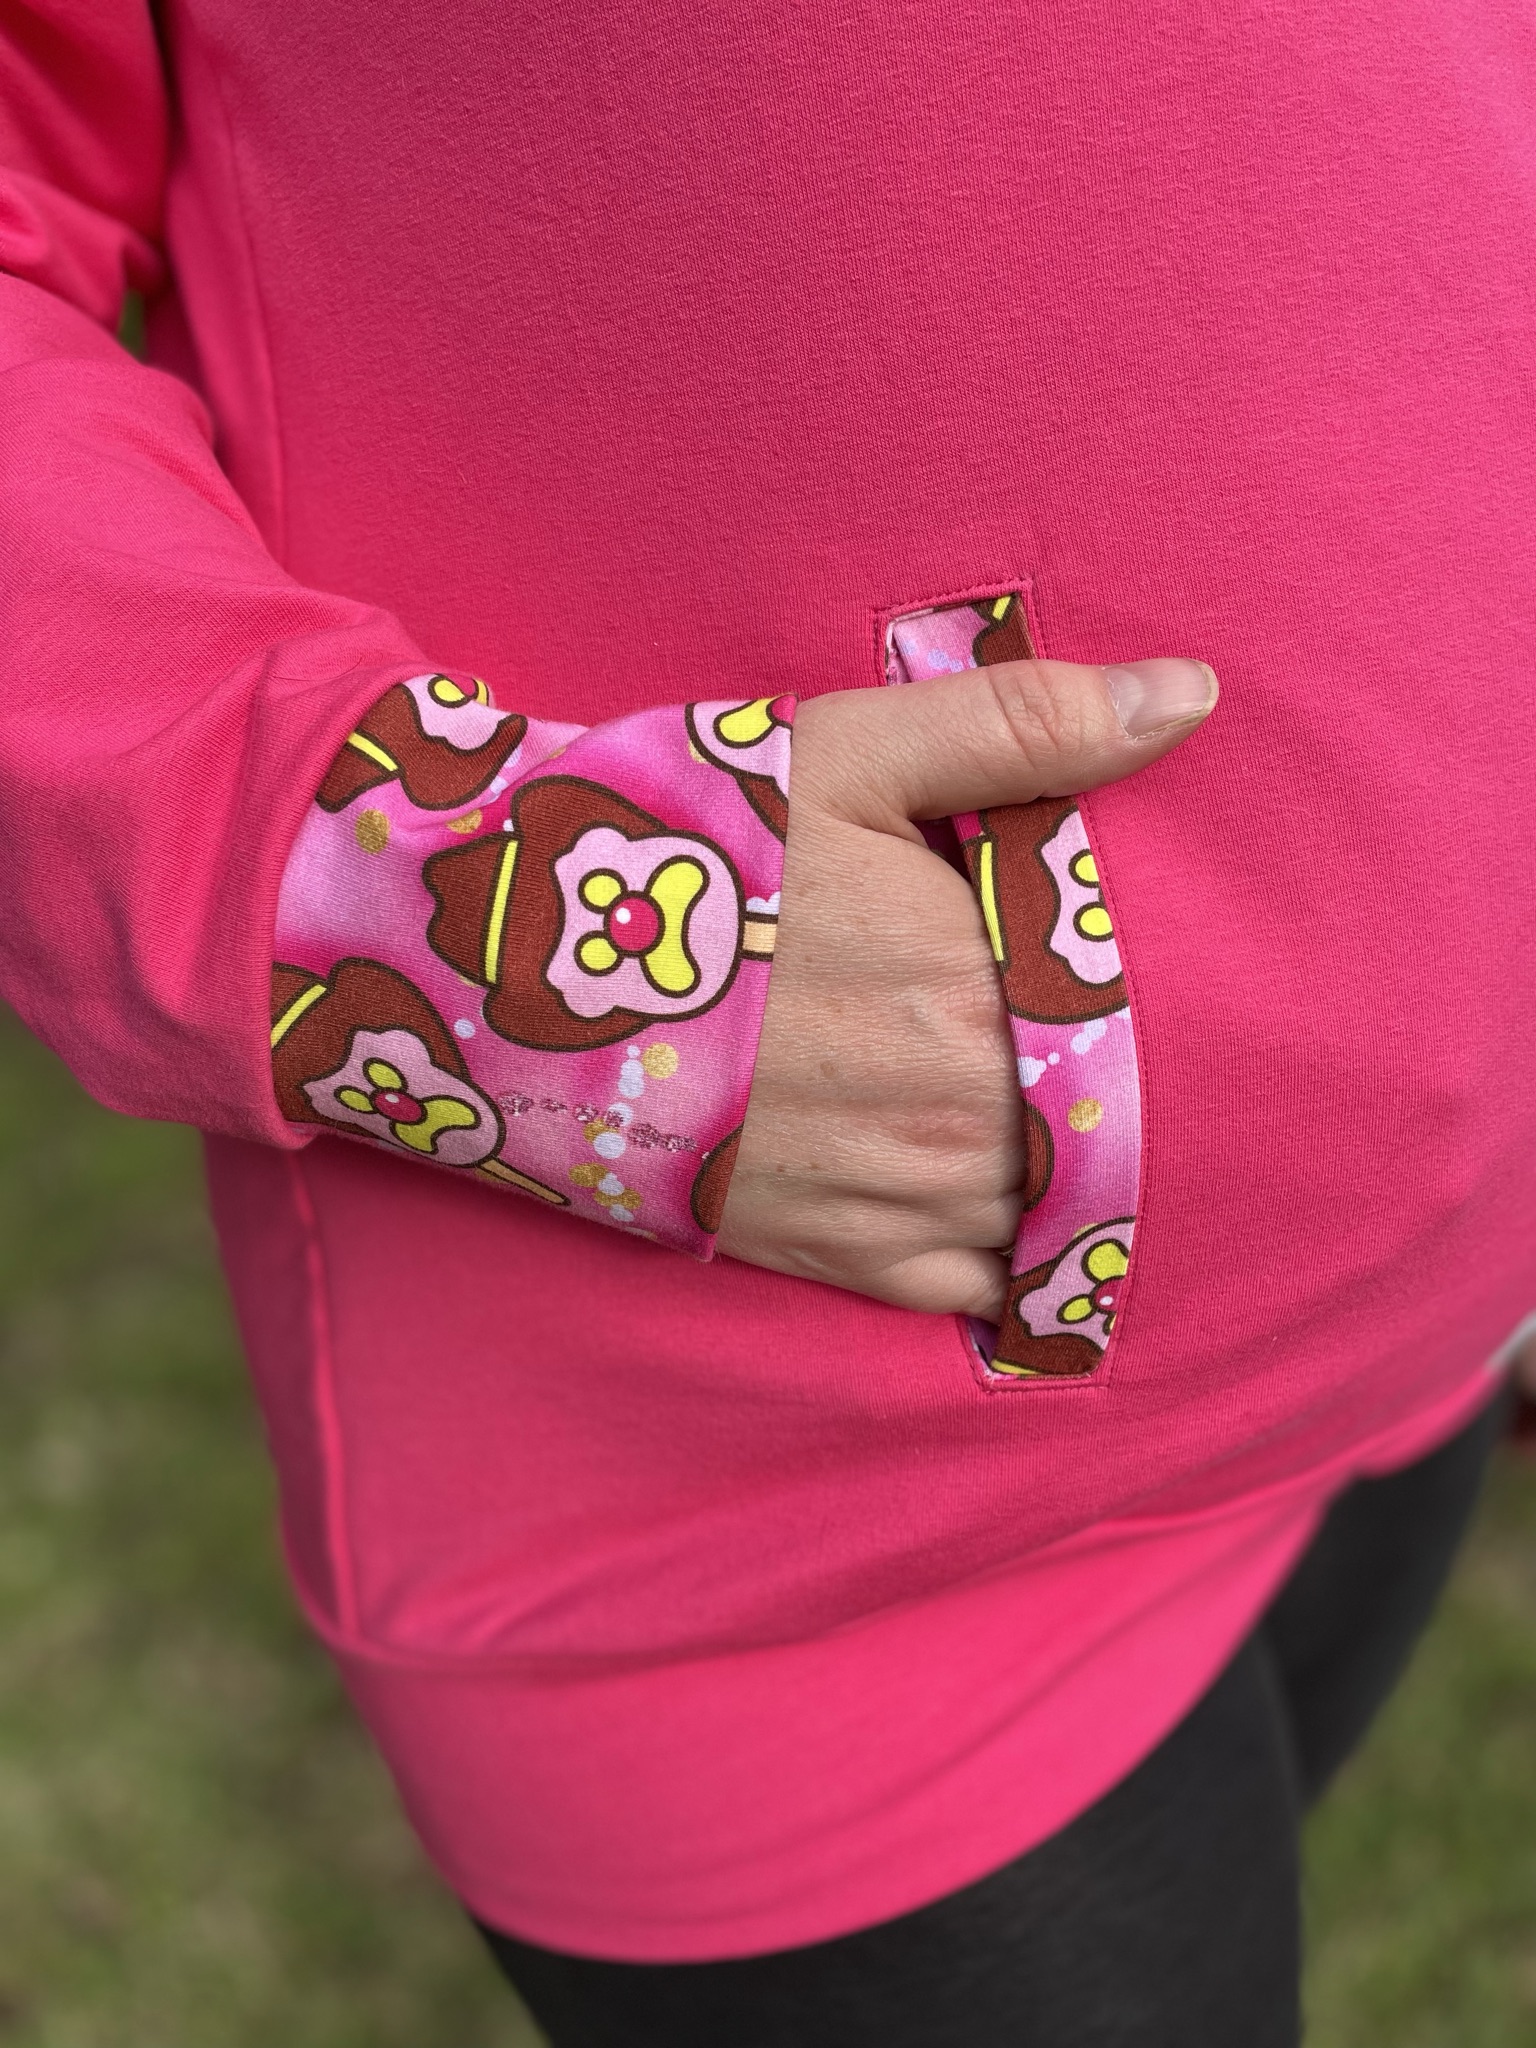
🧵 Let’s Talk Pockets: The Great Pocket Showdown! 🧵
Today, we’re diving into a pocket showdown, where it’s patch pockets, welt pockets, and inseam pockets duking it out for the title of “Ultimate Sewing Sidekick!” I often comment, if it doesn’t have pockets, I didn’t want it anyway, pockets are life! Let’s take a look at the top 3 and see which pocket will win the top pocket prize.
🌟 Patch Pockets: The Versatile Darling 🌟
Pros: – Simplicity at its best! Patch pockets are beginner-friendly and can be added to almost any garment. – Instant functionality. They’re like the handyman of pockets, always there when you need them. – Customize to your heart’s content! Play with shapes, sizes, and embellishments to make them uniquely yours.
Cons: – Style-wise, they can be a bit casual, so they may not be your go-to for dressier outfits. – If not securely attached, they can sag over time and lose their shape.
Pros: – Sleek and sophisticated! Welt pockets bring an air of elegance to your garments. – They are discreet but mighty. Keep your essentials close without compromising style. – Versatile placement. You can add them to pants, skirts, or even jackets for a polished look.
Cons: – Precision is key! Getting those corners perfect can be a tad tricky, especially for beginners. – Mistakes can be hard to undo. Once you cut that welt, there’s no turning back, so measure twice!
Pros: – Seamlessly stylish. These pockets blend into your garments like a secret agent at a fancy gala. – They’re spacious without adding bulk, making them perfect for dresses and slim-fit pants. – Comfort is king. Inseam pockets won’t disrupt the clean lines of your outfit.
*Cons*: – Placement matters! If not positioned correctly, they can be a bit awkward to reach. – Sewing them requires precision, and any uneven seams will be visible, so take your time.
There you have it! The ultimate pocket showdown ends in a tie because, in sewing, it’s not about one being better than the other; it’s about choosing the right pocket for your project. Patch pockets are your casual companions, welt pockets bring a touch of elegance, and inseam pockets keep things seamless.
Ready to continue the pocket adventure? Click below to join our membership and get an exclusive masterclass on the top 3 pockets and tips and instructions on how to sew them. Not to mention support and community from other incredible creatives. Let’s sew, chat, and create together! 🪡👗🧵
Achieving a flawless rolled hem on stretch fabrics can be a bit of a challenge. Unlike woven fabrics, stretch fabrics, also known as knit fabrics, have their unique quirks—stretchiness, curling edges, you name it. But don’t let these challenges deter you! A well-done rolled hem can transform your stretch fabric projects, giving them such a gorgeous and pro looking finish. Here are three pro tips to guide you:
1. Mind Your Thread Tension
Tension settings on your serger play a crucial role in how your rolled hem turns out. Too loose, and the fabric won’t roll properly; too tight, and you’ll get puckering. A well-balanced tension is key. Adjust your tension dials gradually, and always test on a scrap piece first. Your machine’s manual might offer some guidance, but remember, every stretch fabric is different. You’ll often need to trust your instincts.
2. Keep Your Cutting Blade Engaged
The cutting blade on your serger helps trim off the excess fabric as you sew, making sure that the hem rolls neatly. Some people disengage it, thinking they’ll achieve more control, but for most stretch fabrics, keeping it engaged ensures that the fabric is guided correctly and cut evenly. Again, practice on a scrap piece to make sure you’ve got the blade position just right.
3. Use a Wooly Nylon or Maxi Lock Stretch thread
For a rolled hem that looks smooth and feels soft, woolly nylon or Maxi Lock Stretch thread can be a game-changer. This type of thread has a bit of stretch and a fluffy texture, which fills in the gaps in the rolled hem, giving it a fuller, more professional appearance. The stretch in woolly nylon and Maxi Lock Stretch also accommodates the natural give in stretch fabrics, reducing the likelihood of popped stitches. Just thread it into your loopers (I use it in my upper) and you’ll see the difference it makes.
Ready for More?
These are exactly the kind of tips you’ll get in my exclusive sewing community, The Sewing Corner.
If you’d like to be involved in monthly live sew alongs, live sew together sessions and amazing guest experts, come join our community. Sewing can be a lonely hobby, but you don’t have to sew alone any longer!
Don’t miss out on this opportunity to improve your skills and achieve the results you’ve always wanted in your sewing projects. Click here to learn more and join.
Have you ever seen a type of sleeve mentioned and not known what it meant? Or looked like? In this article we delve into 5 different common sleeve styles and what they mean. You no longer have to wonder the difference between Raglan, Dolman or Set in as you will be able to instantly picture the style they are talking about.
Now let’s take a look!
Sleeveless:
Sleeveless designs speak to minimalism and uninhibited movement. By foregoing sleeves altogether, they create open armholes that showcase shoulders and grant unmatched ease of motion. This style has historical roots in warm climates and societies that prioritized practicality. From the simplest tank tops to the most intricate evening gowns, sleeveless styles continue to provide a blank canvas for creative experimentation in neckline design, accessories, and layering. My Favourite Sleeveless Patterns:
Set-in sleeves are probably one of the most common types of sleeves and seen in many ready to wear garments. In knit garments such as t-shirts and polos, they are fairly easily sewn in, however in some woven garments you need to ‘ease’ them into the arm hole. Their history dates back to the Victorian era, where they symbolized sophistication and grace. In today’s context, there are many variations of the set in sleeve such as capped, puff, petal & bishop. They are a stylish and great addition to many garments. My Favourite Set in Sleeve Patterns:
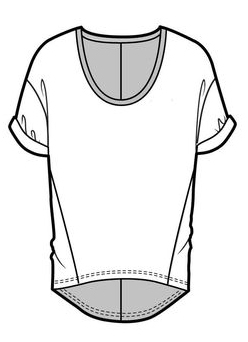
Dolman sleeves introduce a drapey and relaxed silhouette. Seamlessly integrating with the garment body, they often extend to the waist or hip, offering comfort and a touch of artistic flair. With origins in the Ottoman Empire and popularized in the 19th century, dolman sleeves continue to embody a fusion of comfort and exotic charm. They shine in casual ensembles, giving a bohemian vibe to tops, tunics, and dresses while providing ample room for fabric experimentation. My Favourite Dolman Sleeve Patterns:
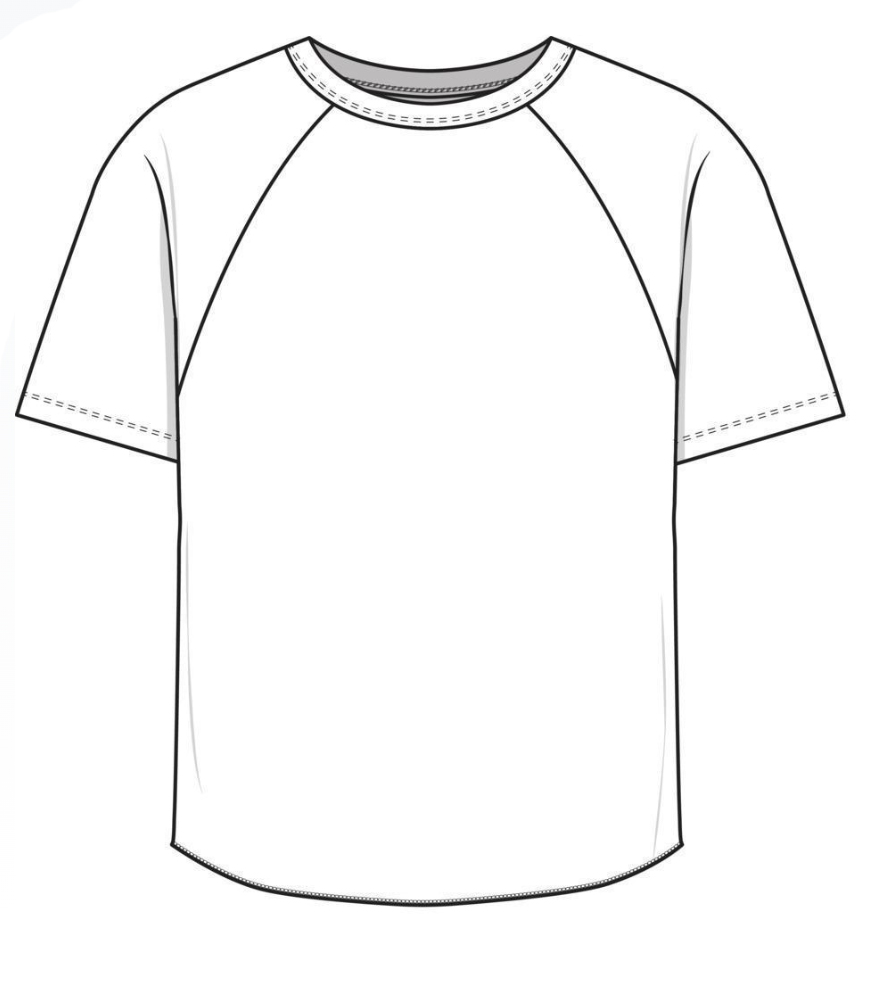
Raglan sleeves combine sportiness and style. Defined by a diagonal seam from neckline to underarm, they offer a generous shoulder fit and great arm motion. With historical origins tied to Lord Raglan’s military coat, this style gained prominence for its functional design and comfort, making it a go-to for sports attire. In modern times, raglan sleeves find their place in casual fashion, athletic wear, and outerwear, providing a relaxed fit suitable for various activities. My Favourite Raglan Sleeve Patterns:
Flutter sleeves bring a touch of whimsy and grace to any garment. Characterized by their loose, flouncy design, they create an enchanting fluttering effect around the arms. Historically, they evoke femininity and romanticism, gaining popularity in the late 19th and early 20th centuries. In contemporary fashion, flutter sleeves infuse dresses, blouses, and children’s wear with playful elegance, evoking a carefree aura and allowing for effortless movement. I am a big fan of the flutter sleeve. My Favourite Flutter Sleeve Patterns:
Hopefully this gives you a better idea as to which sleeve means what next time you see a sleeve term you are unfamiliar with.
Be bold and adventurous and try some new styles to see if they work for you. Many knit patterns come with a few different sleeve variations so I encourage you to give them a try. Sleeves are a great way to change the look of a garment without changing the pattern if you know the pattern fits you well.
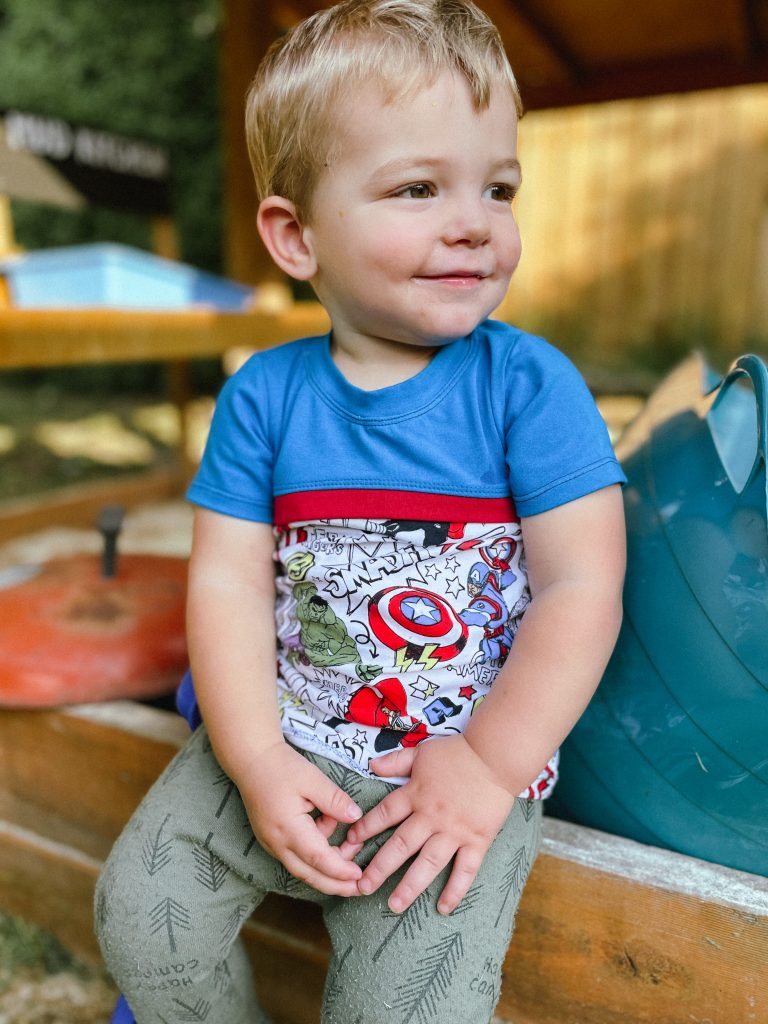
I love the kids discoverer tee. Its such a great, simple pattern with great colour blocking. It’s one of my go to patterns when making the kids basics.
Recently, I’ve been adding a little contrast knit binding at the front colour blocking, just to give the pattern a little something-something and I really think it jazzes it up a little. The best thing is, its really EASY to do! In this blog, I’ll walk you through all the steps you need to take to add your own contrast binding. If you haven’t already, grab the pattern here:
Two versions of the Kids Discoverer Tee with the knit binding addition
Let’s get started!
The first thing you need to do is cut out all your pattern pieces as per instructed in the pattern. You should have the front top piece, back top piece, 2 bodice pieces (front and back), sleeves, neckband and the optional cuff and waistband pieces if thats what you are doing, as shown below. (I chose not to do those pieces and will hem my sleeves and tee so they are not pictured)
The pieces you should start with
Once you have cut those pieces, you are going to take one of the bodice pieces and measure how wide it is across the top. I’m making the 2T and its about 12 inches from side to side.
Measure the top of your bodice piece as indicated here
You are now going to cut a piece of knit fabric that is going to be your binding. You want this to be about an inch longer than what you measured the top of your bodice piece to be anything from a 1-2 inches in width. For this tee I cut mine 2 inches wide, but I think I actually prefer the original knit binding I did on the black and grey tee which I’m pretty sure was only 1 inch wide. You just need to take into account that you are going to loose about 1/4 of an inch or more when sewing it on.
I used a clear quilting ruler to cut mine which made it really easy to mark out the 2 inches width and the length I wanted of 13 inches long.
Marking out my knit binding piece
Once you’ve cut your knit binding piece, fold it in half, wrong sides together and give it a press if you like. Then you are going to pin/clip it along the top of the bodice piece, raw edges together. It should look like the image below.
Baste the binding piece to the bodice piece with a long straight stitch on your sewing machine.
Clip/pin your binding piece to your bodice piece
Now lay your top front piece on top of the bodice and knit binding piece, aligning the raw edges so the knit binding piece is sandwiched between the bodice and the top front bodice piece. The edges of the binding will stick out at the sides but thats ok, we’ll trim them after. Pin/clip in place and serge them together.
Top front bodice pin/clipped to your bodice piece
Flip the front bodice piece up and press the seam toward the top. Top stitch the seam in place using your preferred top stitching method. I have used a cover-stitch but a stretch stitch or twin needle on a normal machine will look nice as well.
The seam has been pressed up and topstitched
Trim the sides to neaten up your front bodice piece.
Trimmed front bodice piece
Tadah! You can now continue with the instructions as indicated in the pattern.
Completed garment
As I mentioned above, have a try with different widths until you get the width of knit binding you are happy with. I think adding the binding gives this tee such a snazzy look and helps give it a little extra something!
Thanks for reading, I really hope it helped you add your own knit binding to your kids discoverer tee. Tag me on instagram with your makes, I’d love to see them! @sewandtellau
 Exploring the world of stretch fabric sewing can lead to endless sewing opportunities. Particularly as stretch fabrics are used to make a large number of the ready-to-wear items that you see in stores. Their comfort and adaptability make them incredibly popular to wear. However, many people are afraid to get started with sewing stretch fabric sewing for fear of making mistakes.
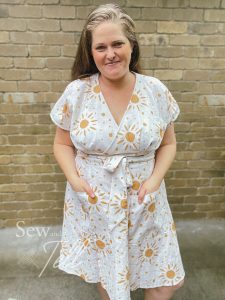
 Pros:
Pros: Pros:
Pros: 1. Mind Your Thread Tension
 3. Use a Wooly Nylon or Maxi Lock Stretch thread