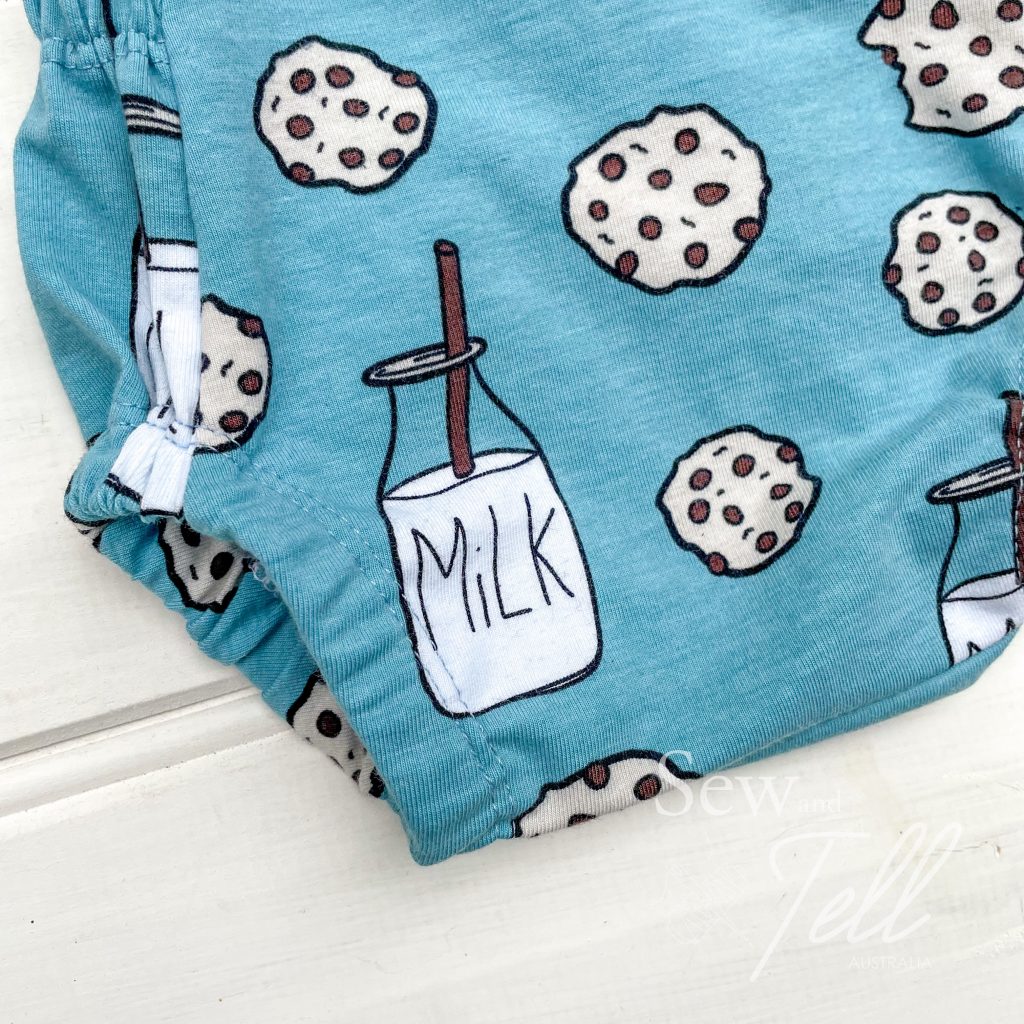
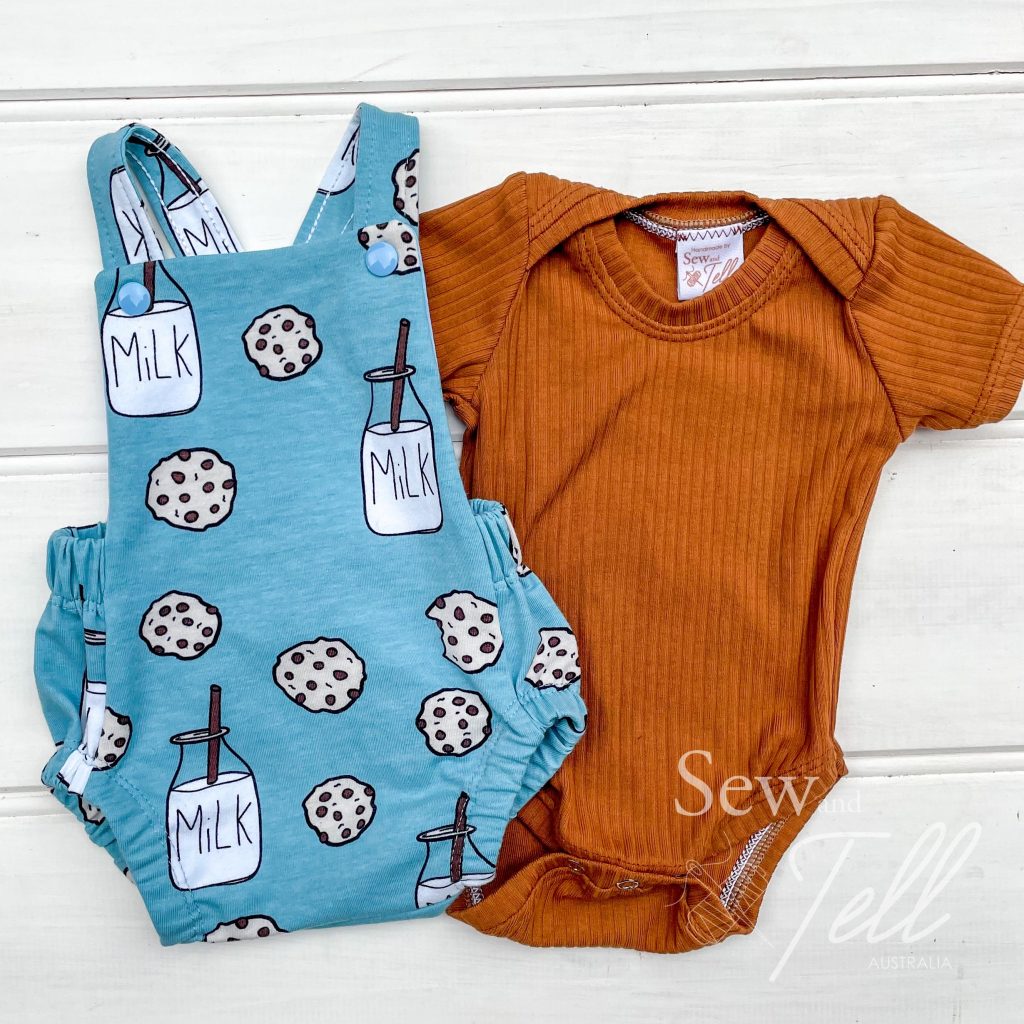
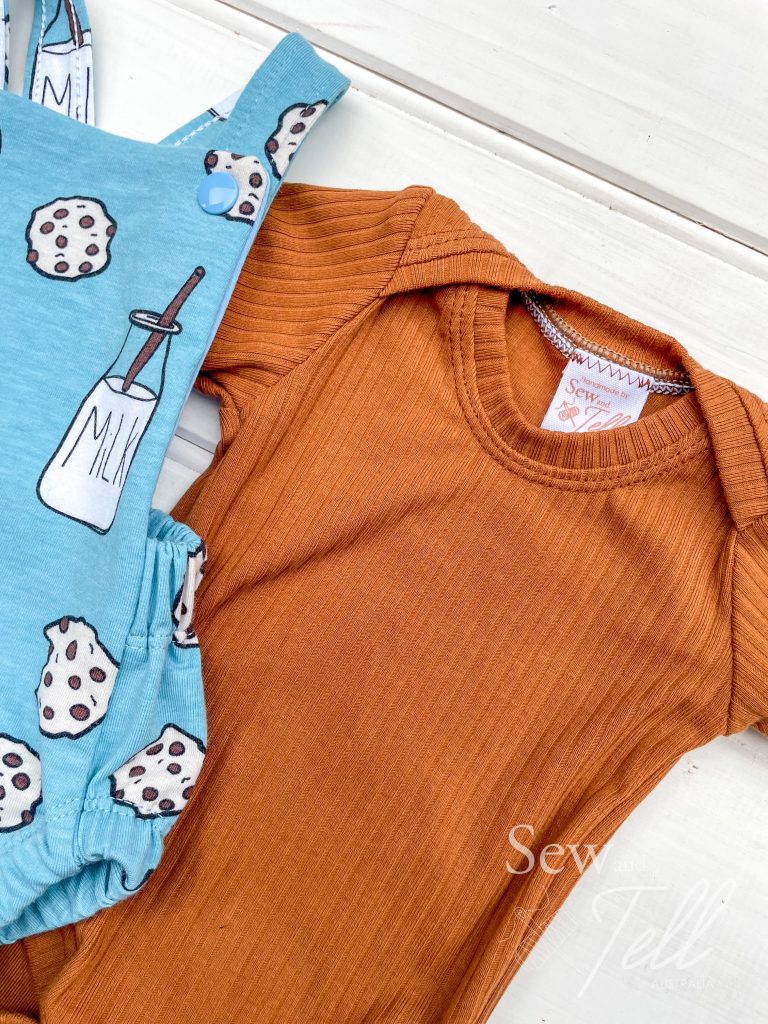
Pattern: 87 – Summer Romper Designer: Brindle & Twig Fabrics: Wattle Hill Fabrics Skill: Beginner Materials & Notions: Meant for knit fabrics, 2 x snaps for closure, Elastics Machines: Overlock machine / Serger – If you don’t own one, you can use a small zig-zag stitch in place of the serged seam. Normal Sewing Machine.
The number 87 pattern from Brindille & Twig, the Summer Romper is your perfect summer playsuit. Great to layer, it gives bubs freedom to crawl, walk, run or just kick their feet around on a warm summers day on a rug outside
Meant for medium weight knit fabrics, it comes in sizes preemie – 3T. See the video tutorial below that goes through step by step how to put this pattern together.
Pattern: Night Owl Pjs – Women’s & Kid’s Designer: Peek A Boo Pattern Shop Fabrics: RubyJam, Sew Unique & Spotlight Measurements: Various Size made: 2XL/3XL & 4 Adjustments: None Pros: So many pros. Love ay nightwear and the colour blocking is great. Cons: The pants don’t have pockets which is sad for me, but I added patch pockets and it was fine.
I love pyjamas. Like A LOT. If I could get away with wearing them as everyday wear, I would haha. So pretty much straight away, the night owl pjs are a winner for me. I’ve mentioned a few times how much I love colour blocking, so its also another win for me with that option.
I’ve made both the shorts and top version and also the nightie version. I loved the short and top version but because the legs are cut as one piece per leg, there is no side seam for pockets. I am a huge fan of pockets in everything so to get around this I added patch pockets on the butt and it worked out great. The nightie I made with a Rubyjam animal print across the top and an incredibly luscious bamboo lycra on the bottom. I bloody love wearing it and its so soft and delicious on my skin.
The kids night owls I made because I had a friend who’s 4 yo boy LOVES wearing nighties over traditional ‘boy’ nightwear, so steals his sisters. He was disappointed he couldn’t get nighties with trucks and diggers and other themes he enjoys. So of course I was happy to step in and fulfil his wish. I also managed to make a matchy with his mum as I figured with would be hard to get Ready to Wear Matchy. I heard great feedback about the fit and he finds them incredibly comfortable. So much so he crawled into bed with his parents the first night he wore them at 4am and kept saying ‘these are so comfy, I am so comfy’. The dad eventually got so tired of hearing how comfy they were he threatened to take them off him if he didn’t go to sleep. hahaha. I think this is my most favourite compliment EVER!
So its a big thumbs up for me on both the kids and womens night owl PJ’s. A definite wardrobe staple.
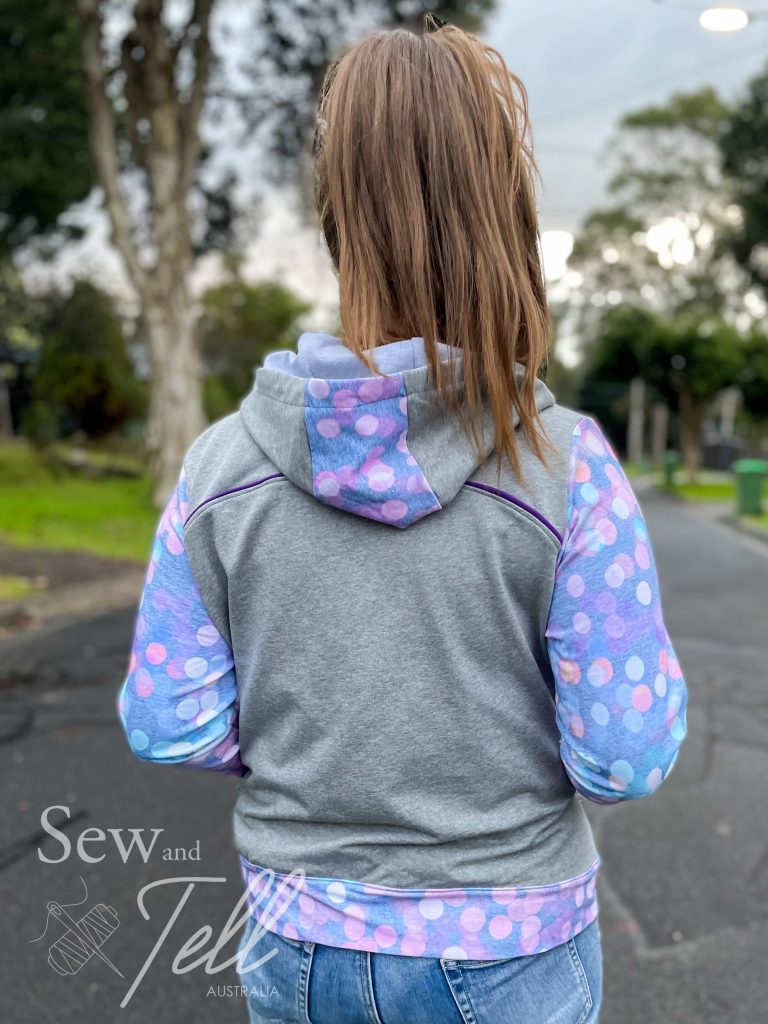
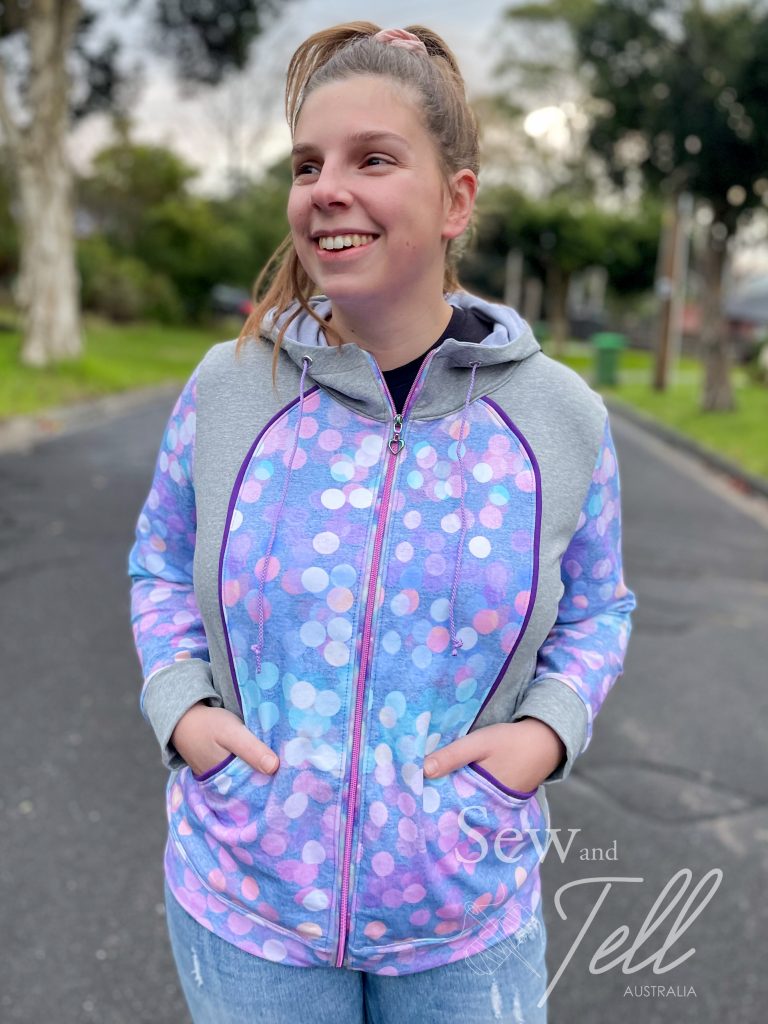
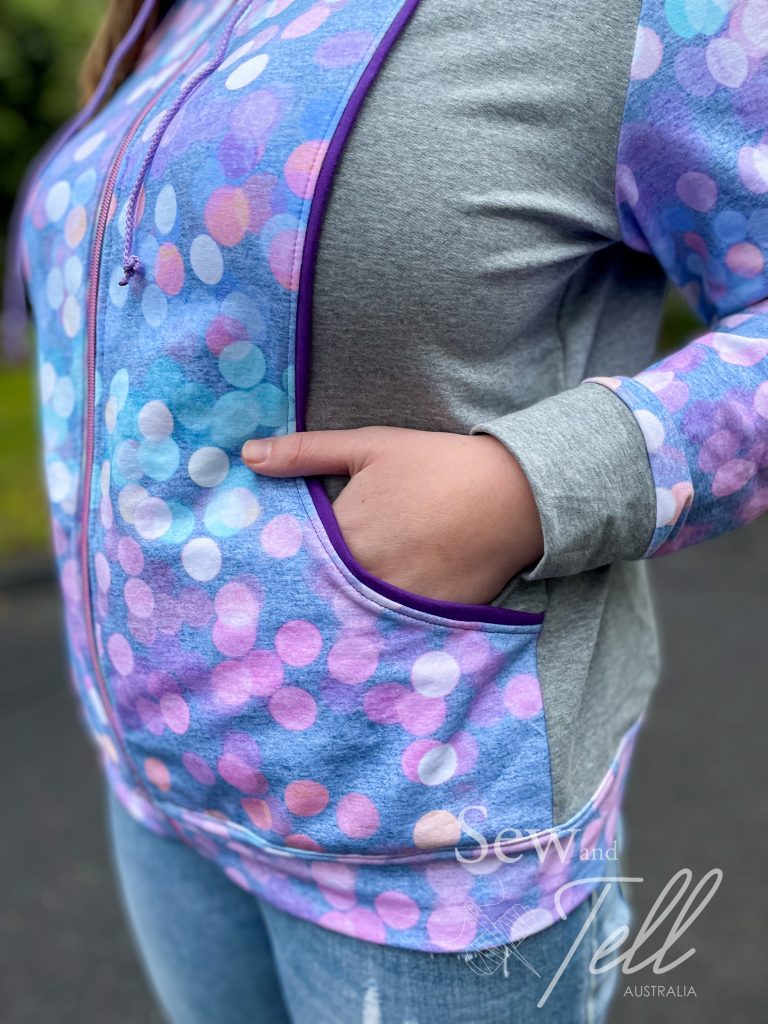
Pattern: Lumina Zip Up Hoodie Designer: Greenstyle Patterns Fabrics: French Terry Measurements: Bust: 44″; Waist 34″; Hips 41″ Size made: G, graded to an I at bust Adjustments: Only the grading at the bust Pros: This is gorgeous pattern for highlighting different fabrics. Cons: With the princess type seams over the bust it is a bit difficult to grade, but not impossible.
When I got this strike fabric assigned to me from Sew Unique, I really wanted to use it for myself, but I had other fabric that I also wanted to use for a jumper, the floral cheetahs and I didn’t really need 2 new jumpers so I asked my neighbour if she would like a new hoodie jacket for winter. She is still feeding her daughter so I wanted to make it feeding friendly and I knew this would be a great pattern to use the accent fabric and also a solid.
I bought Greenstyle Lumina a while ago and like with a lot of my patterns, I get them and then forget to make them for a while. Tell me I’m not alone haha. Now that I’ve made it up now though, I don’t know why it took me so long, I love it!!!
I did find this a challenge with the grading as my neighbour has quite a prominent bust but slimmer waist and hips. She did comment to me that she often doesn’t buy zip up hoodies as she needs to buy them big to accommodate her bust but then it looks baggy around the hips. So I was pretty happy to be able to custom make one just for her measurements. After all, thats a big reason we sew isn’t it?! To make clothes fit our bodies! However, as I mentioned, the grading was difficult to get right with the way the pattern pieces come together with the pocket on the front, but I think I did a pretty good job! I won’t lie though, when I make my version where I don’t have to grade I am looking forward to the straight size haha.
I also made my own separating zipper for this one and I don’t think I could have picked a more perfect zipper. The colouring on it suited the Winter Bokeh fabric so beautifully. I have a video on youtube detailing how to make a separating zipper from continuous zipper tape which I’ve linked above and can also been seen >>here<<. It is a bit tricky to get right though, so I often buy pre made separating zippers to save having to muck around with making one.
So, I think this the first of a few Lumina hoodies. Can’t wait to do the next one.
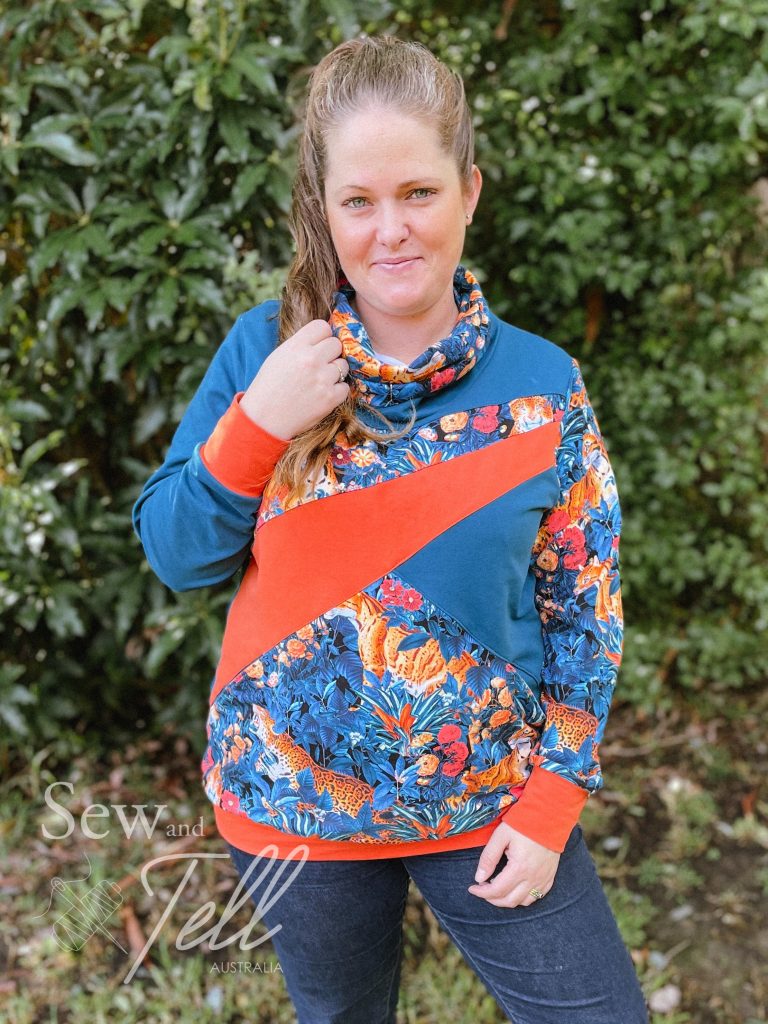
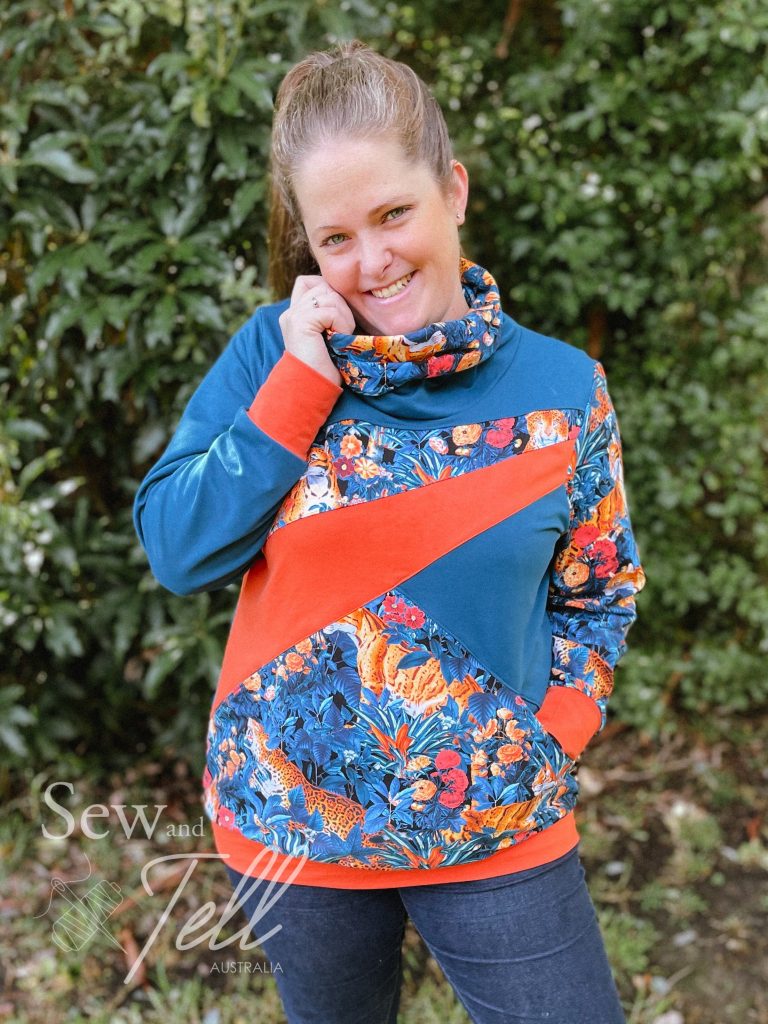
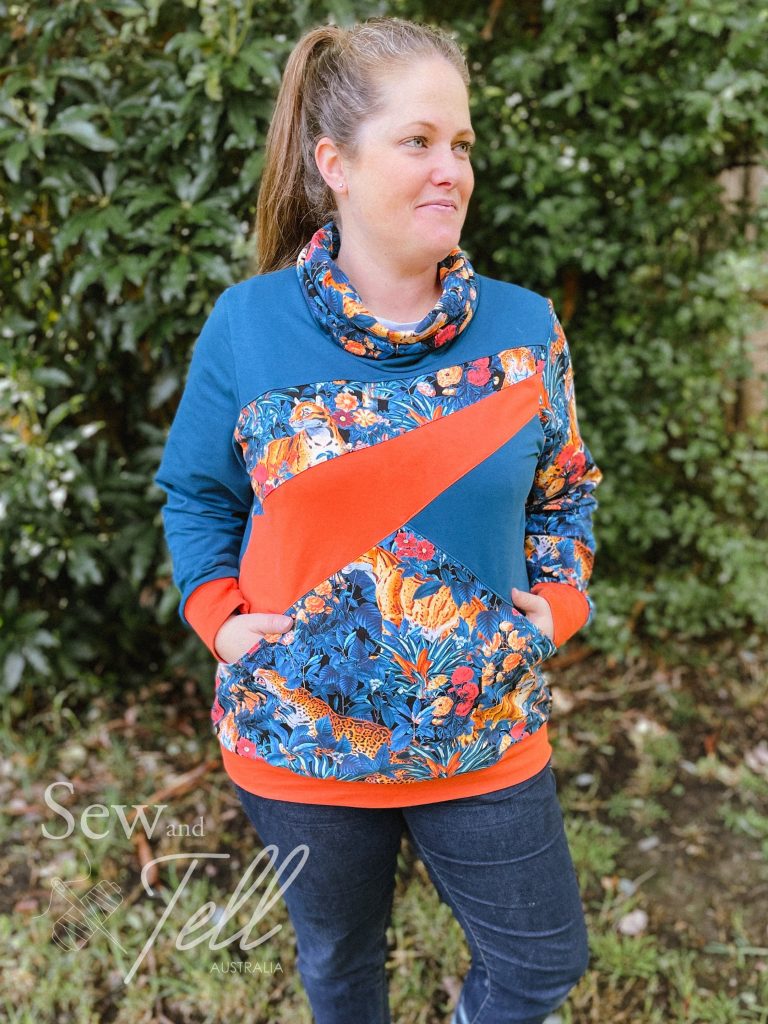
Pattern: Calypso Colour Block Top & Hoodie Designer: Sinclair Patterns Fabrics: Floral Cheetahs, Deep Teal & Rust French Terry from Sew Unique Fabrics Measurements: Chest: 44″; Waist 39″; Hips 48″ Size made: US 22 Adjustments: None Pros: It’s no secret I love colour blocking and this one is now a firm fave. Perfect to show off coordinating colours Cons: The front pockets required a bit of concentration but came out beautiful
I can not love this sew enough. The colour matching with the deep teal, rust and funky floral cheetah print as just so 🎉. Using a projector also meant I was able to get some pretty awesome pattern placement on all my pieces. Another tick for projector sewing! If you’re curious, my blog about it is here: Projector Sewing Blog
Sinclair patterns have some really beautiful patterns and this was no exception. I do sometimes find the construction of their patterns a little strange, but it always comes out so nicely, so I just have to trust the process sometimes! haha. The front pocket on this one is one example, I was a little skeptical how it would come together, but the way it blends into the front so seamlessly is gorgeous. I’m already planning more. There is never enough time to sew all the beautiful things!
I am also a huge fan of the cowl neck look. I love that its so warm and snuggly without the bulk of a hood. Hoods also are deceptively fabric hungry whereas cowl necks take much less fabric but still have a great look and are warm, especially with these Melbourne winter days!
This is a perfect pattern if you have limited accent fabric as its great to splice in with solids. I definitely encourage you to give it a go.
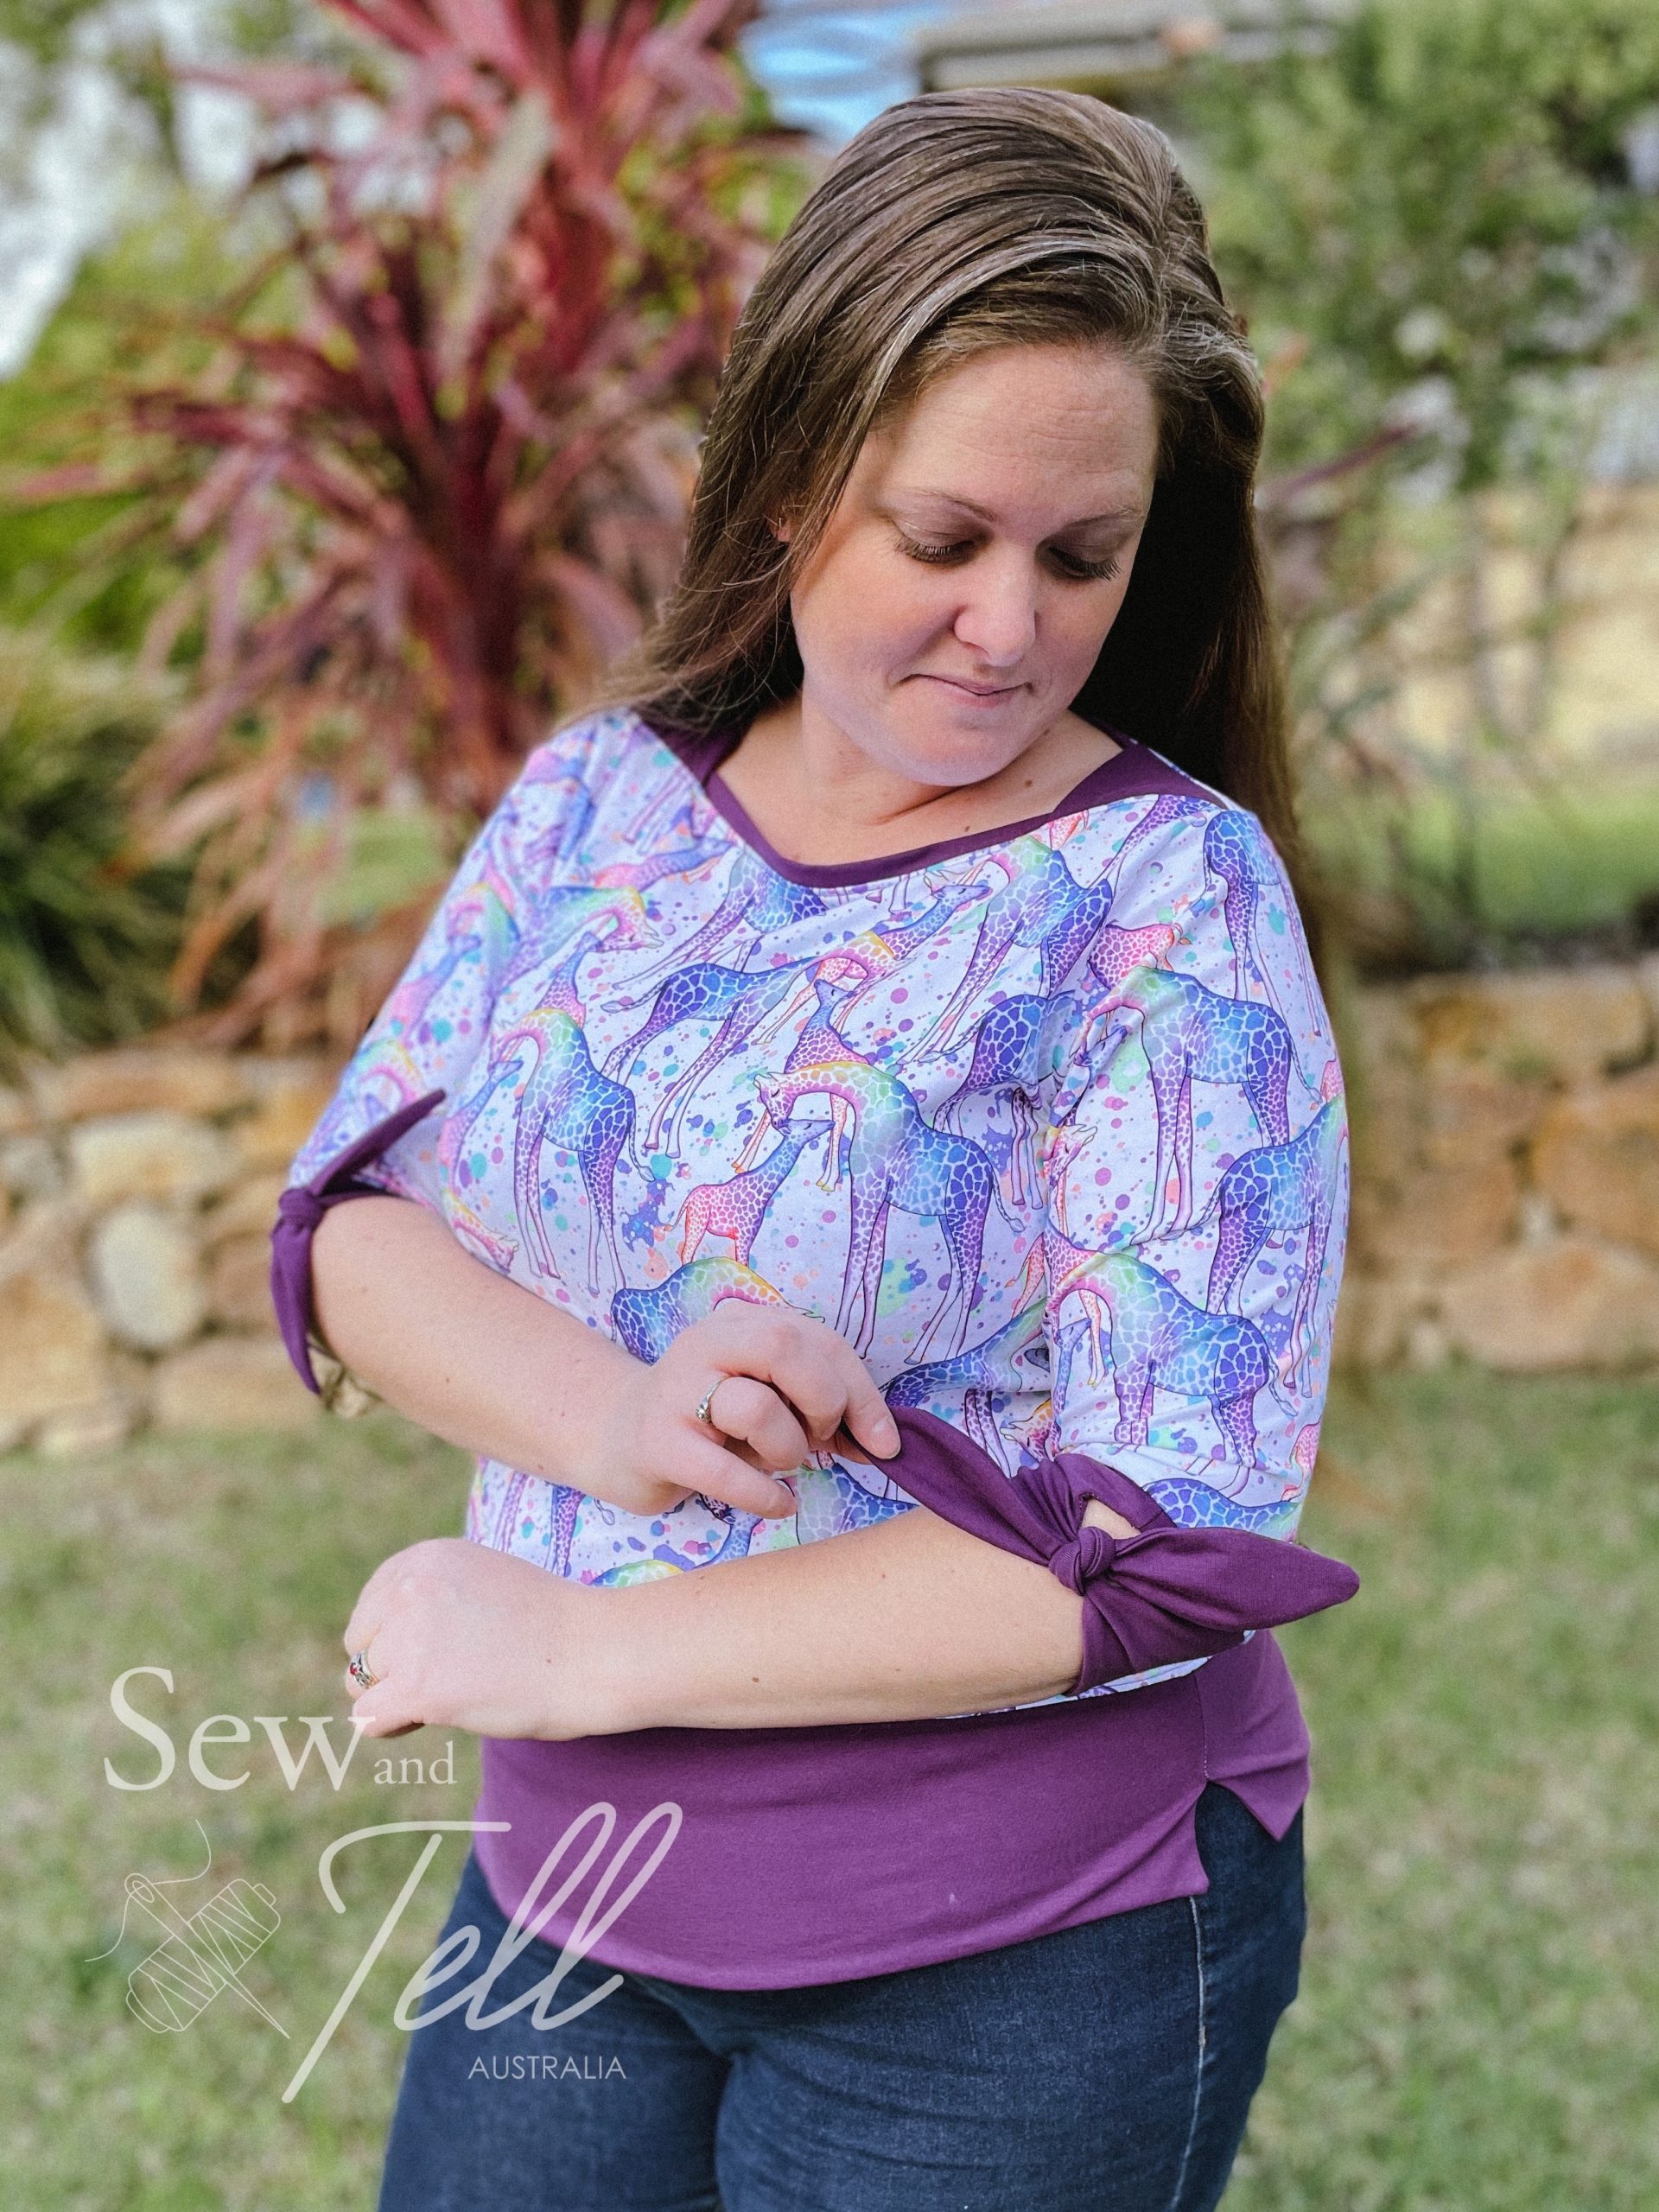
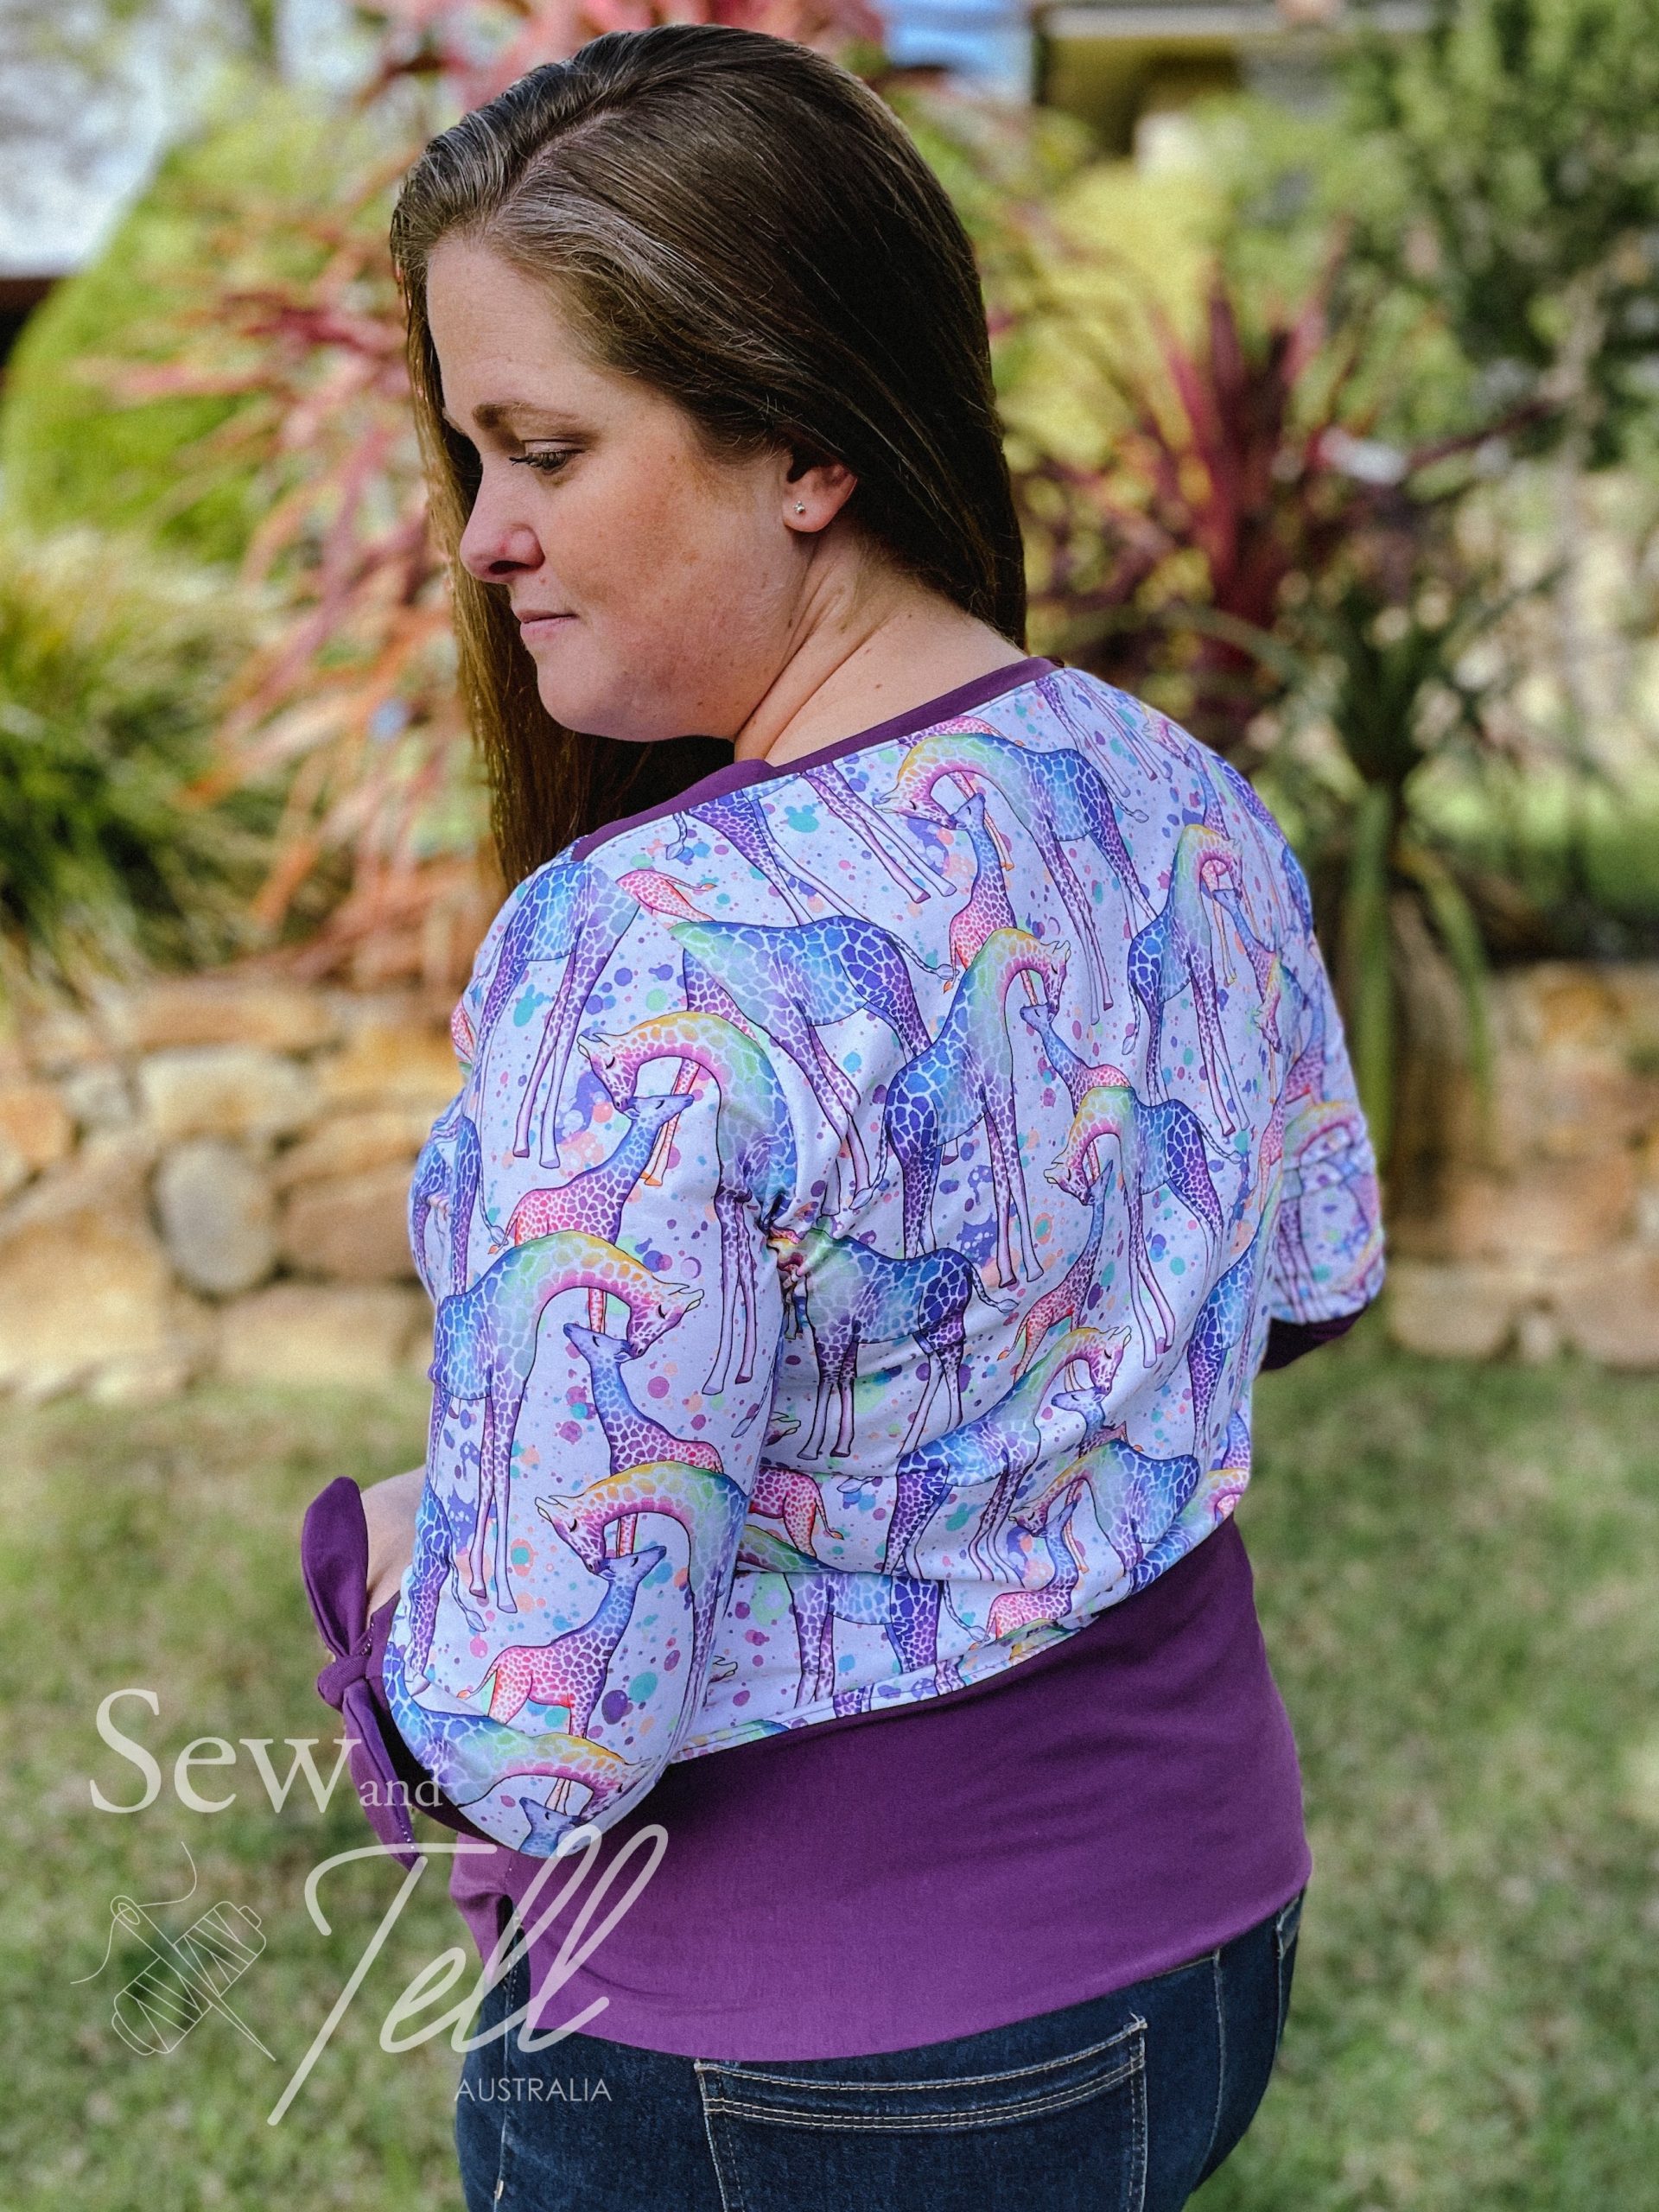
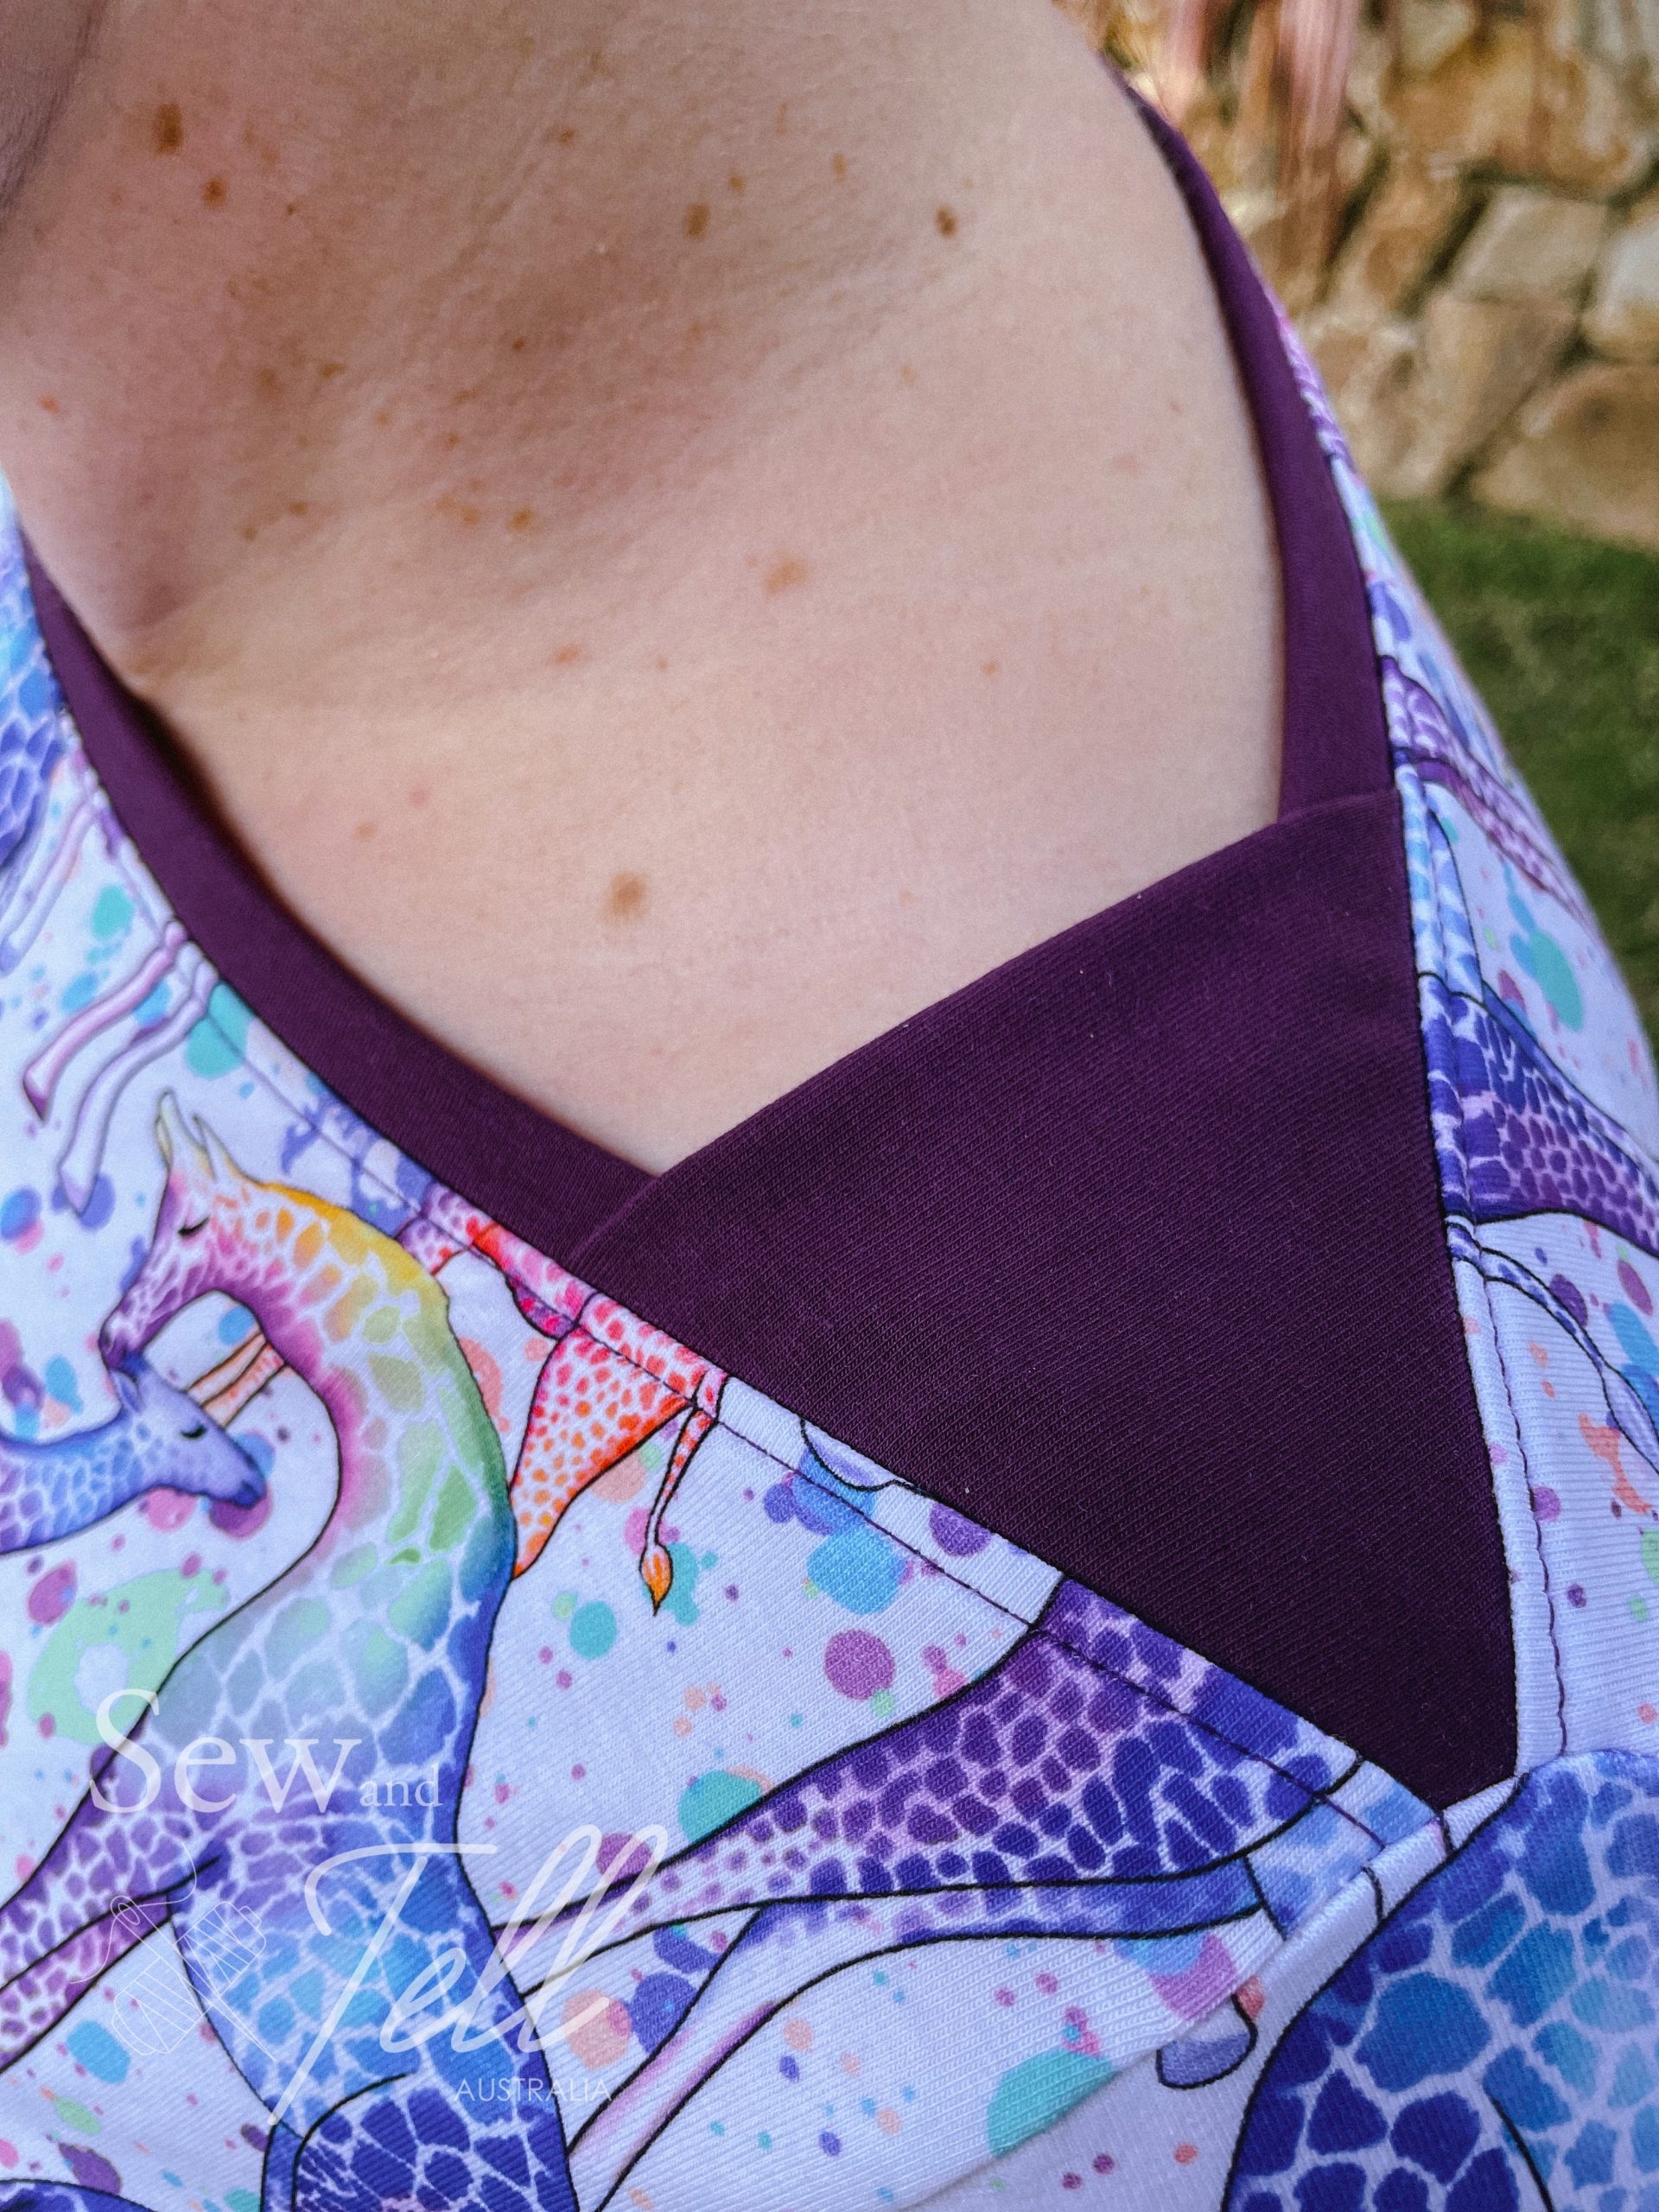
Pattern: Adele Boatneck Designer: Sinclair Patterns Fabrics: Sew Unique Fabrics Measurements: Bust: 44″; Waist 39″; Hips 48″ Size made: US18 Adjustments: None Pros: I really love the details on this one, it’s a fun pattern to make Cons: No real cons, I just wish I had sized out at my hips as its a bit tight over my tum and bum.
This was the first time I made the Adele Boatneck and I was really happy with the result. I really liked the details on the shoulders as well as the sleeve options and peplum version. As soon as I saw the fabric I used on this one, I knew I wanted to make the boatneck and I was not disappointed. I think it worked so well with this pattern.
I made the US size 18 which was great for the top half but I should have graded out more in the waist as it was a little tight over my waist and bum. Other than that though, the fit was great. I liked the way the neckline came together though I did it as a band and not as a binding. Even with the band though it is such a clean look and sits beautifully on the neckline giving that high boat look.
The other detail I liked is the seperate lower piece, giving it a kind of faux layered look. It helps to be able to use shorter cuts of fabrics on the top piece, which is great for if you have limited amounts. While the sleeve cuffs are not a style I would normally go for, and I might not do again, I am still glad I tried them.
So all in all I am very pleased with how this one came together and I would happily make it again.
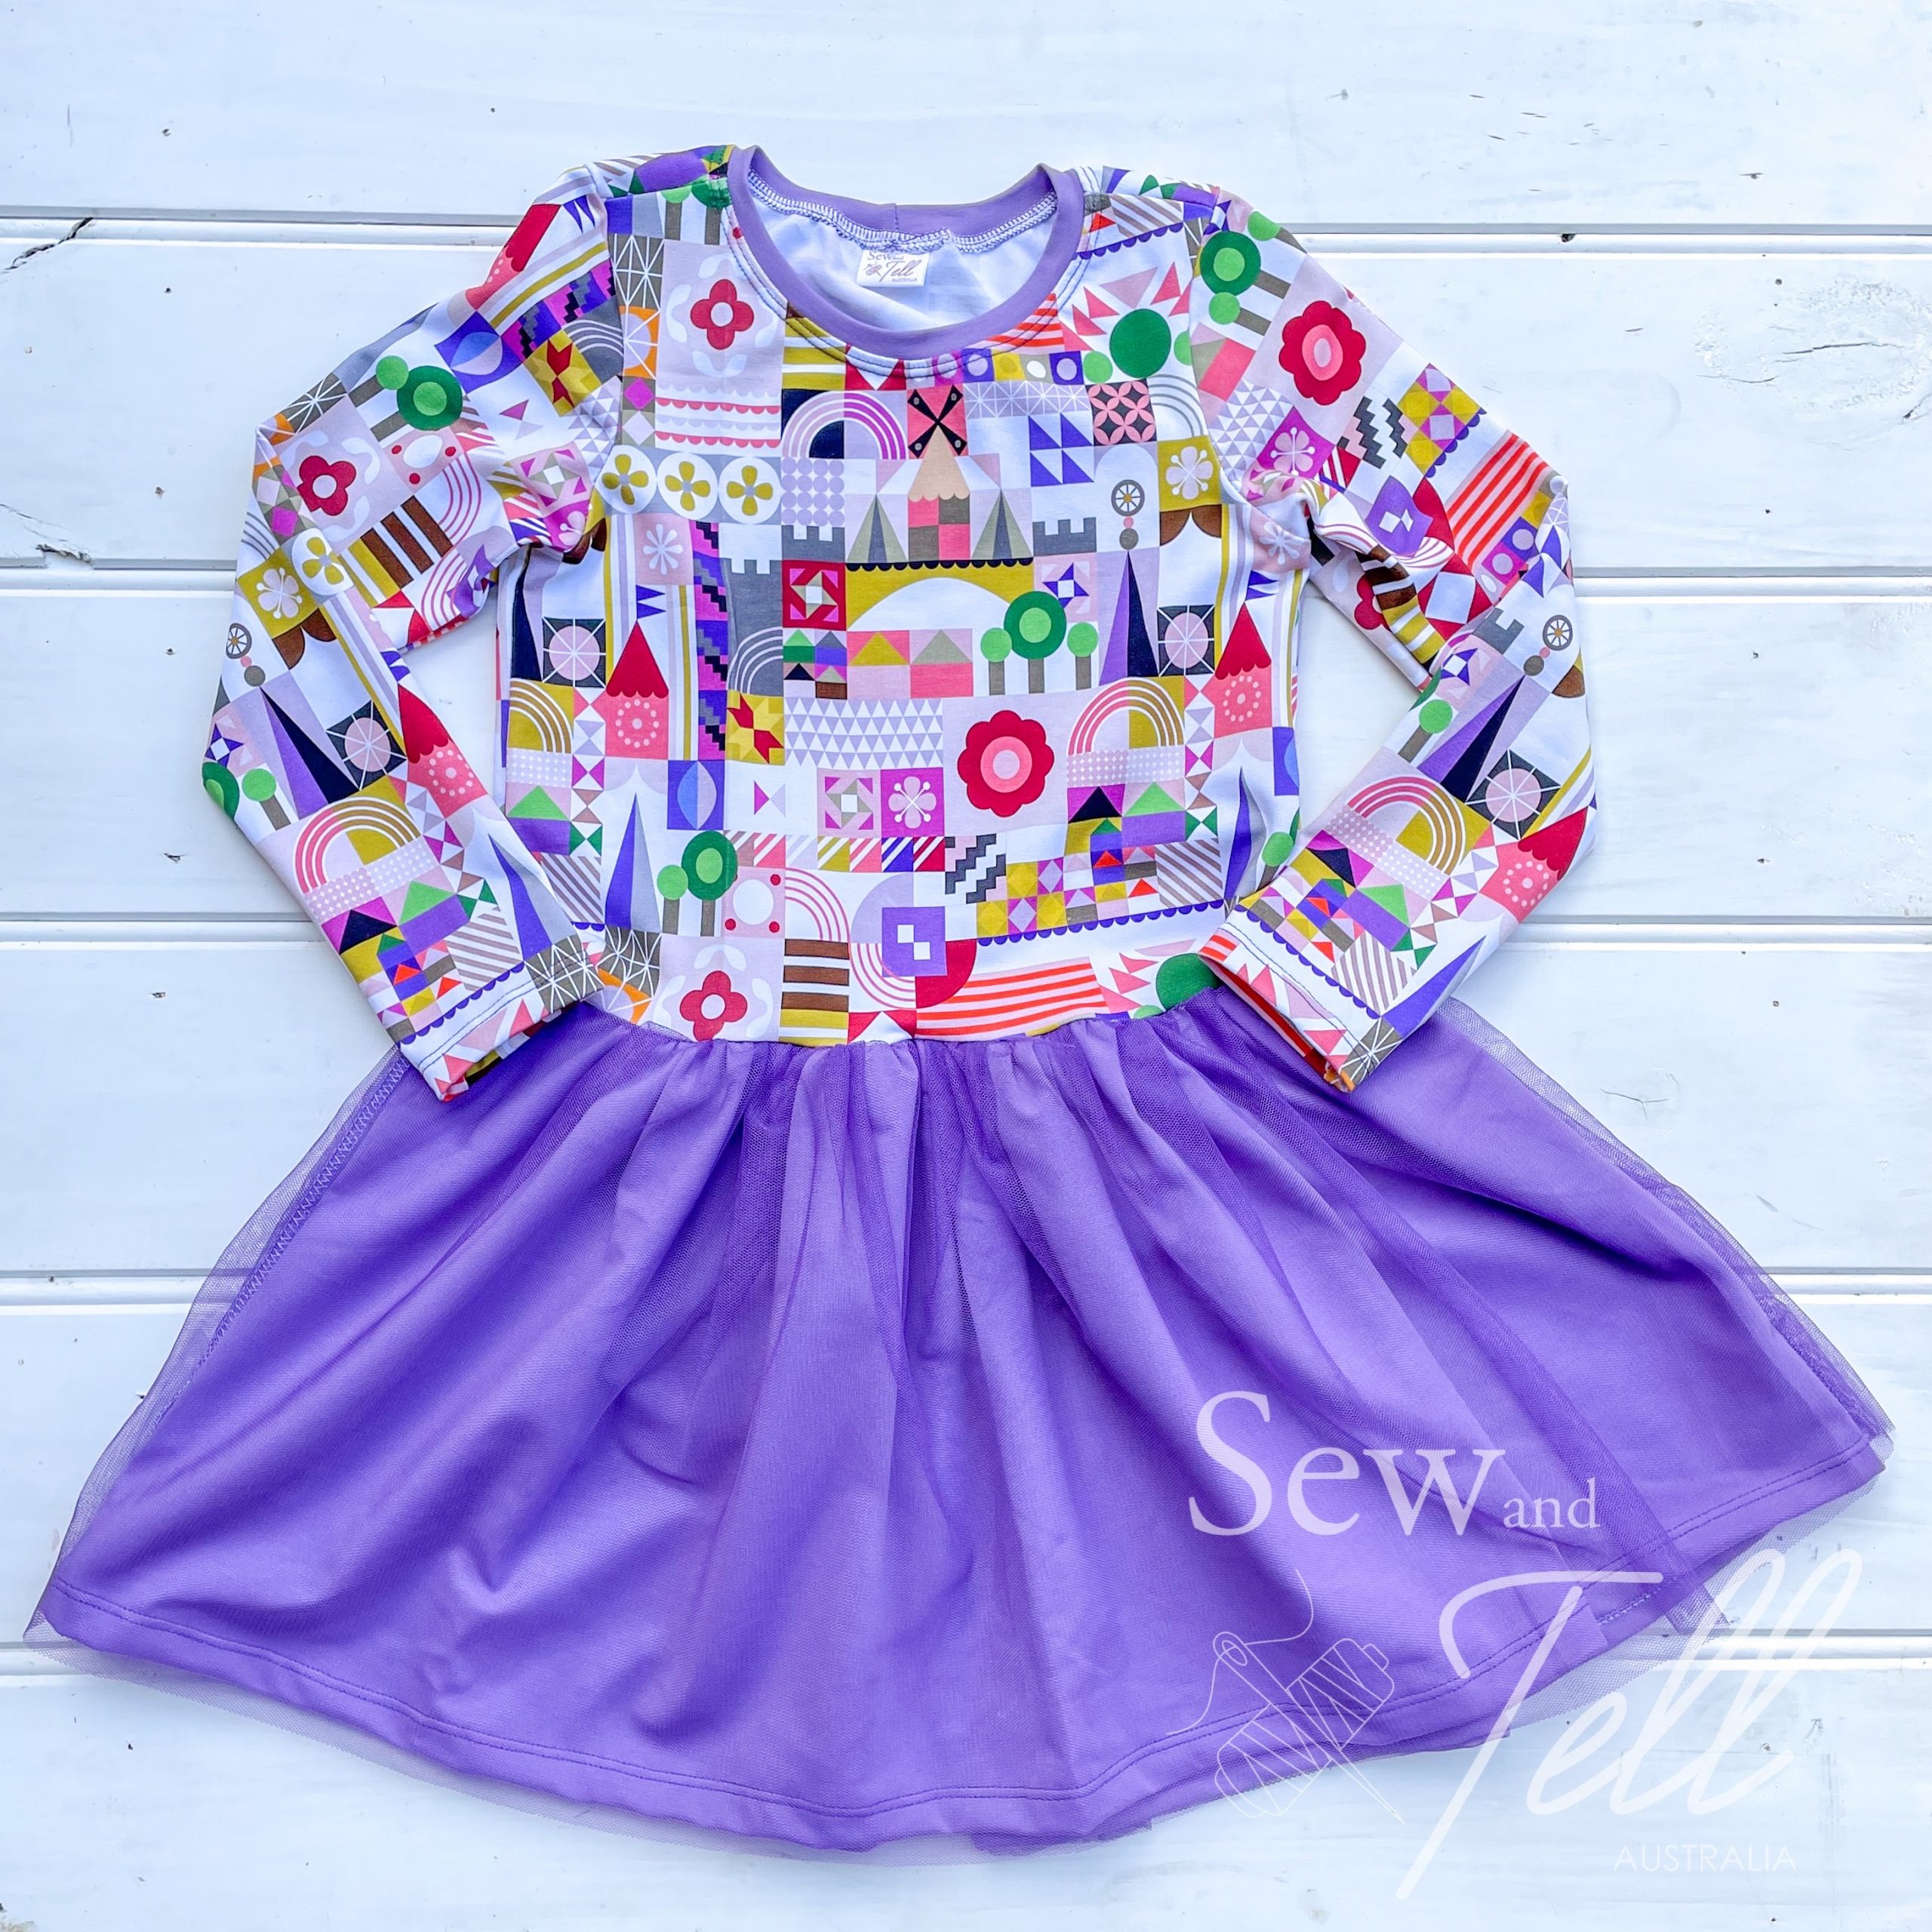
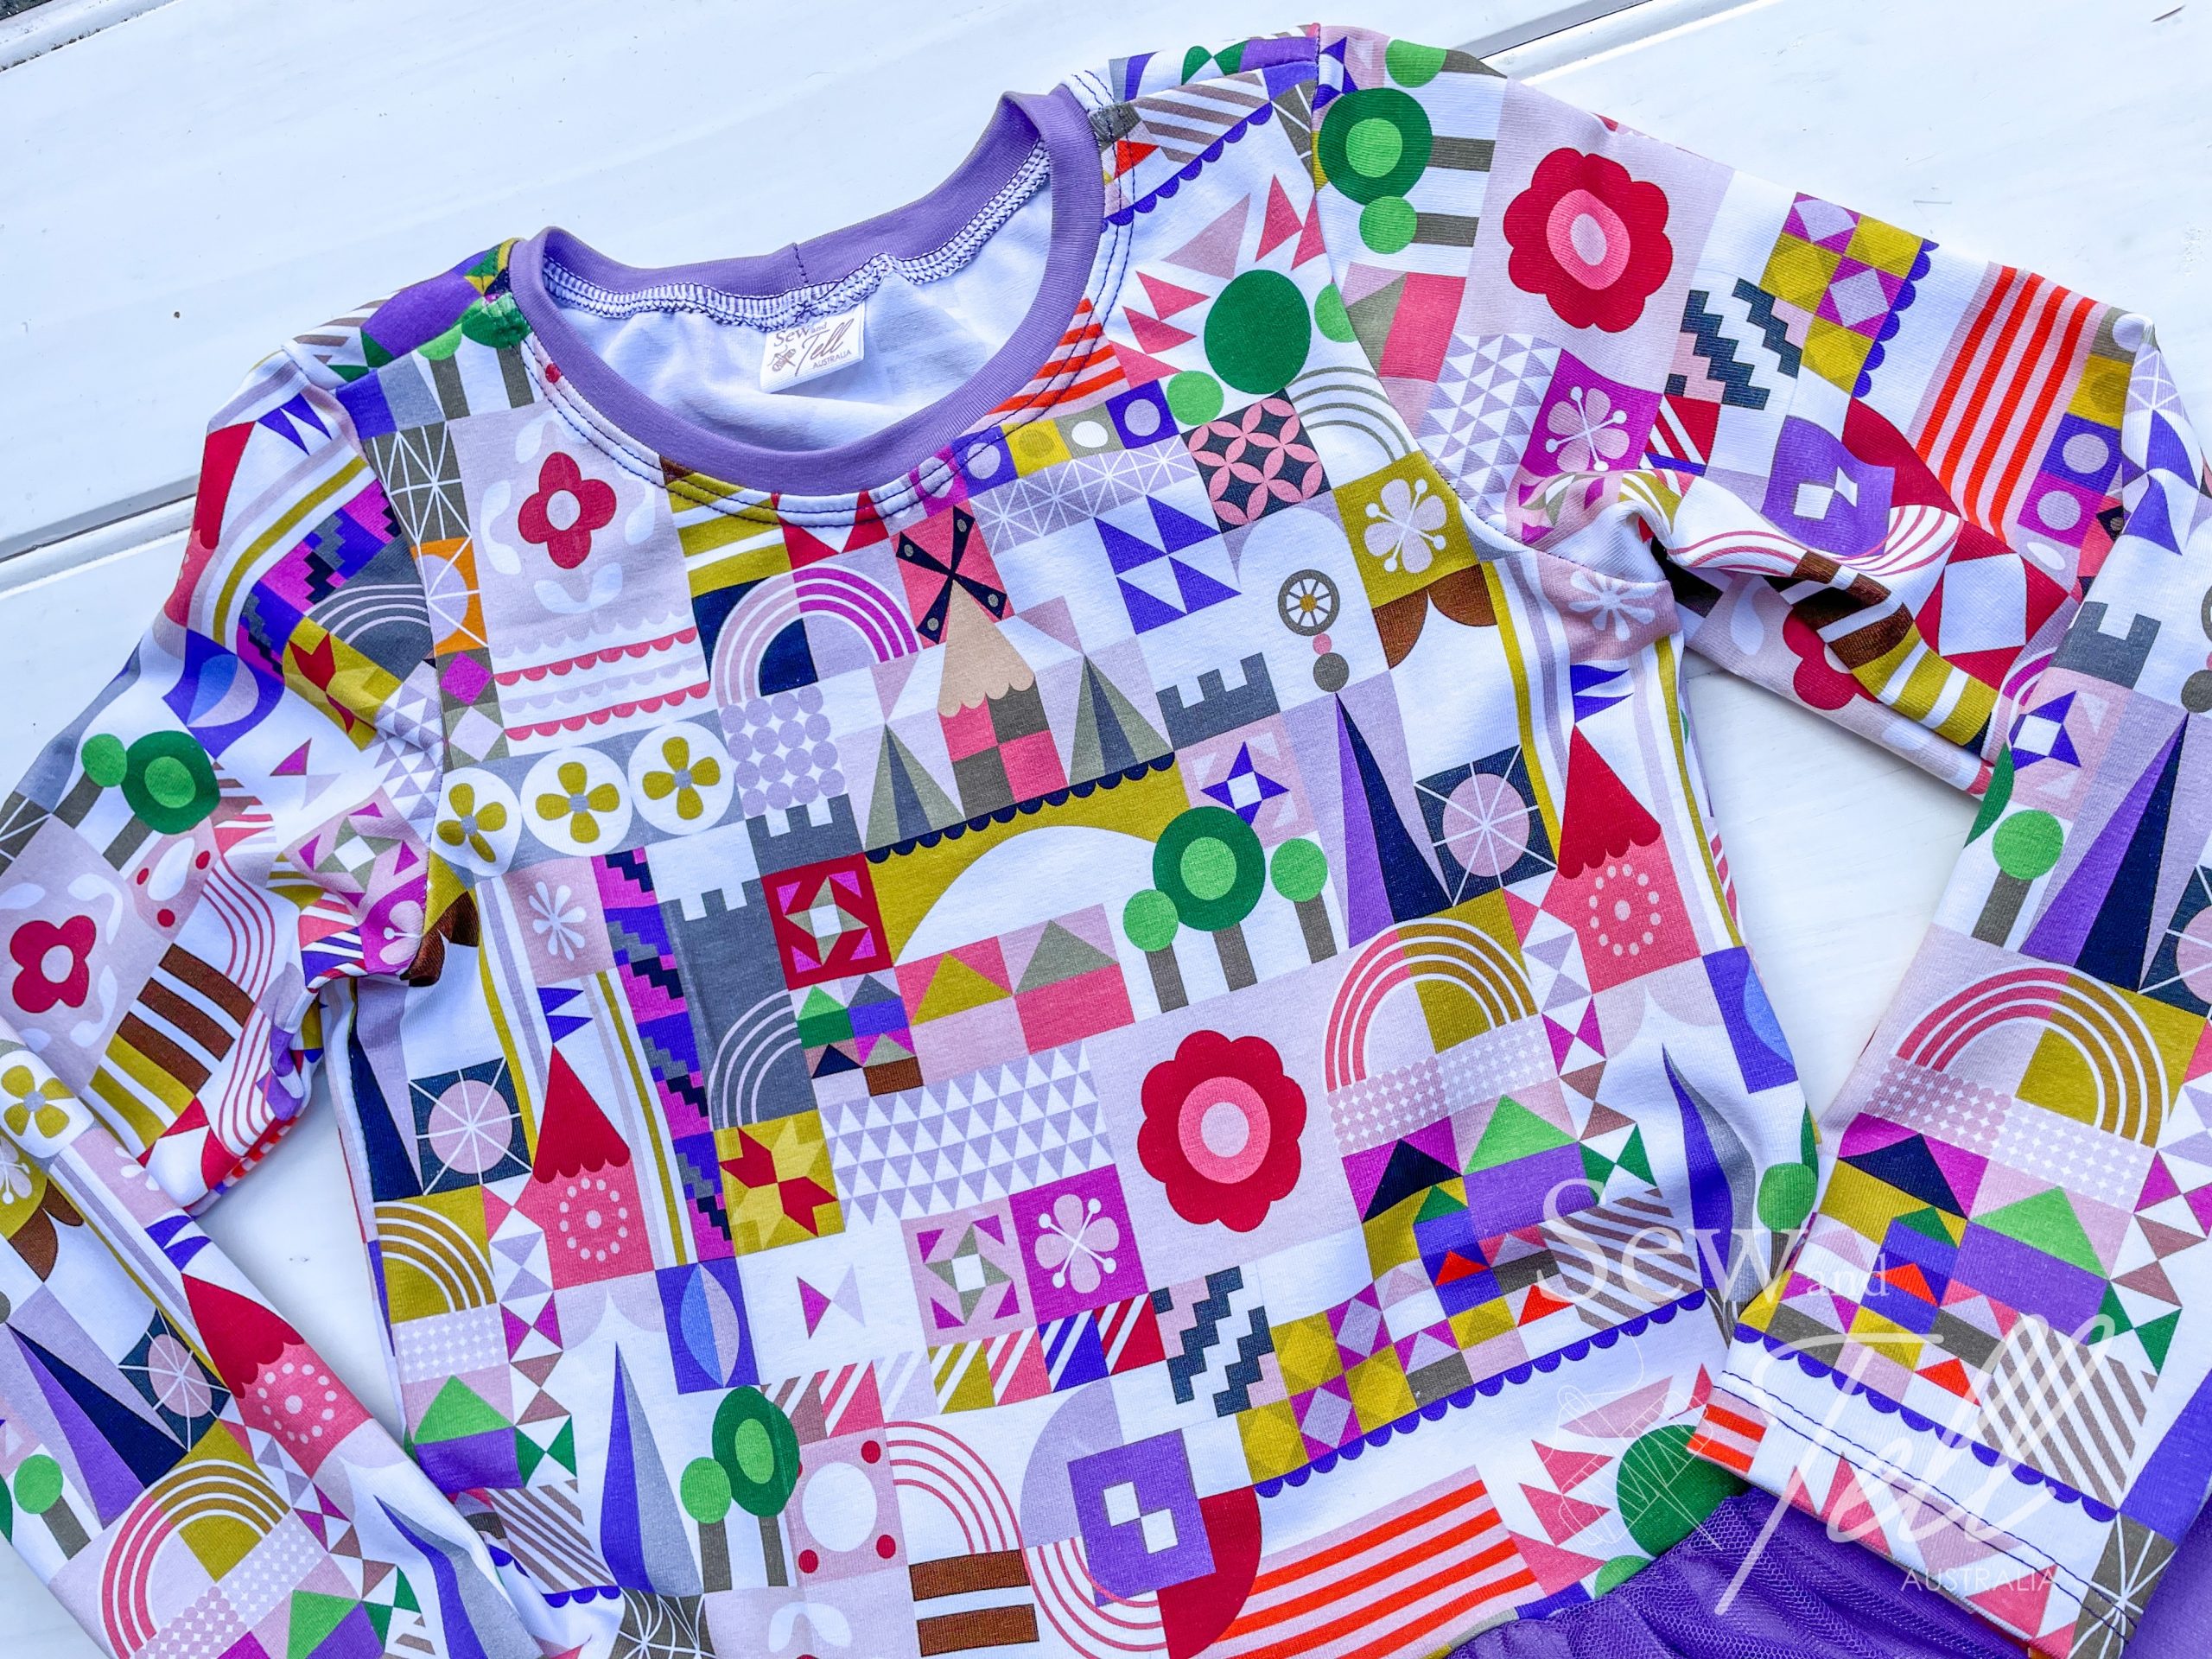
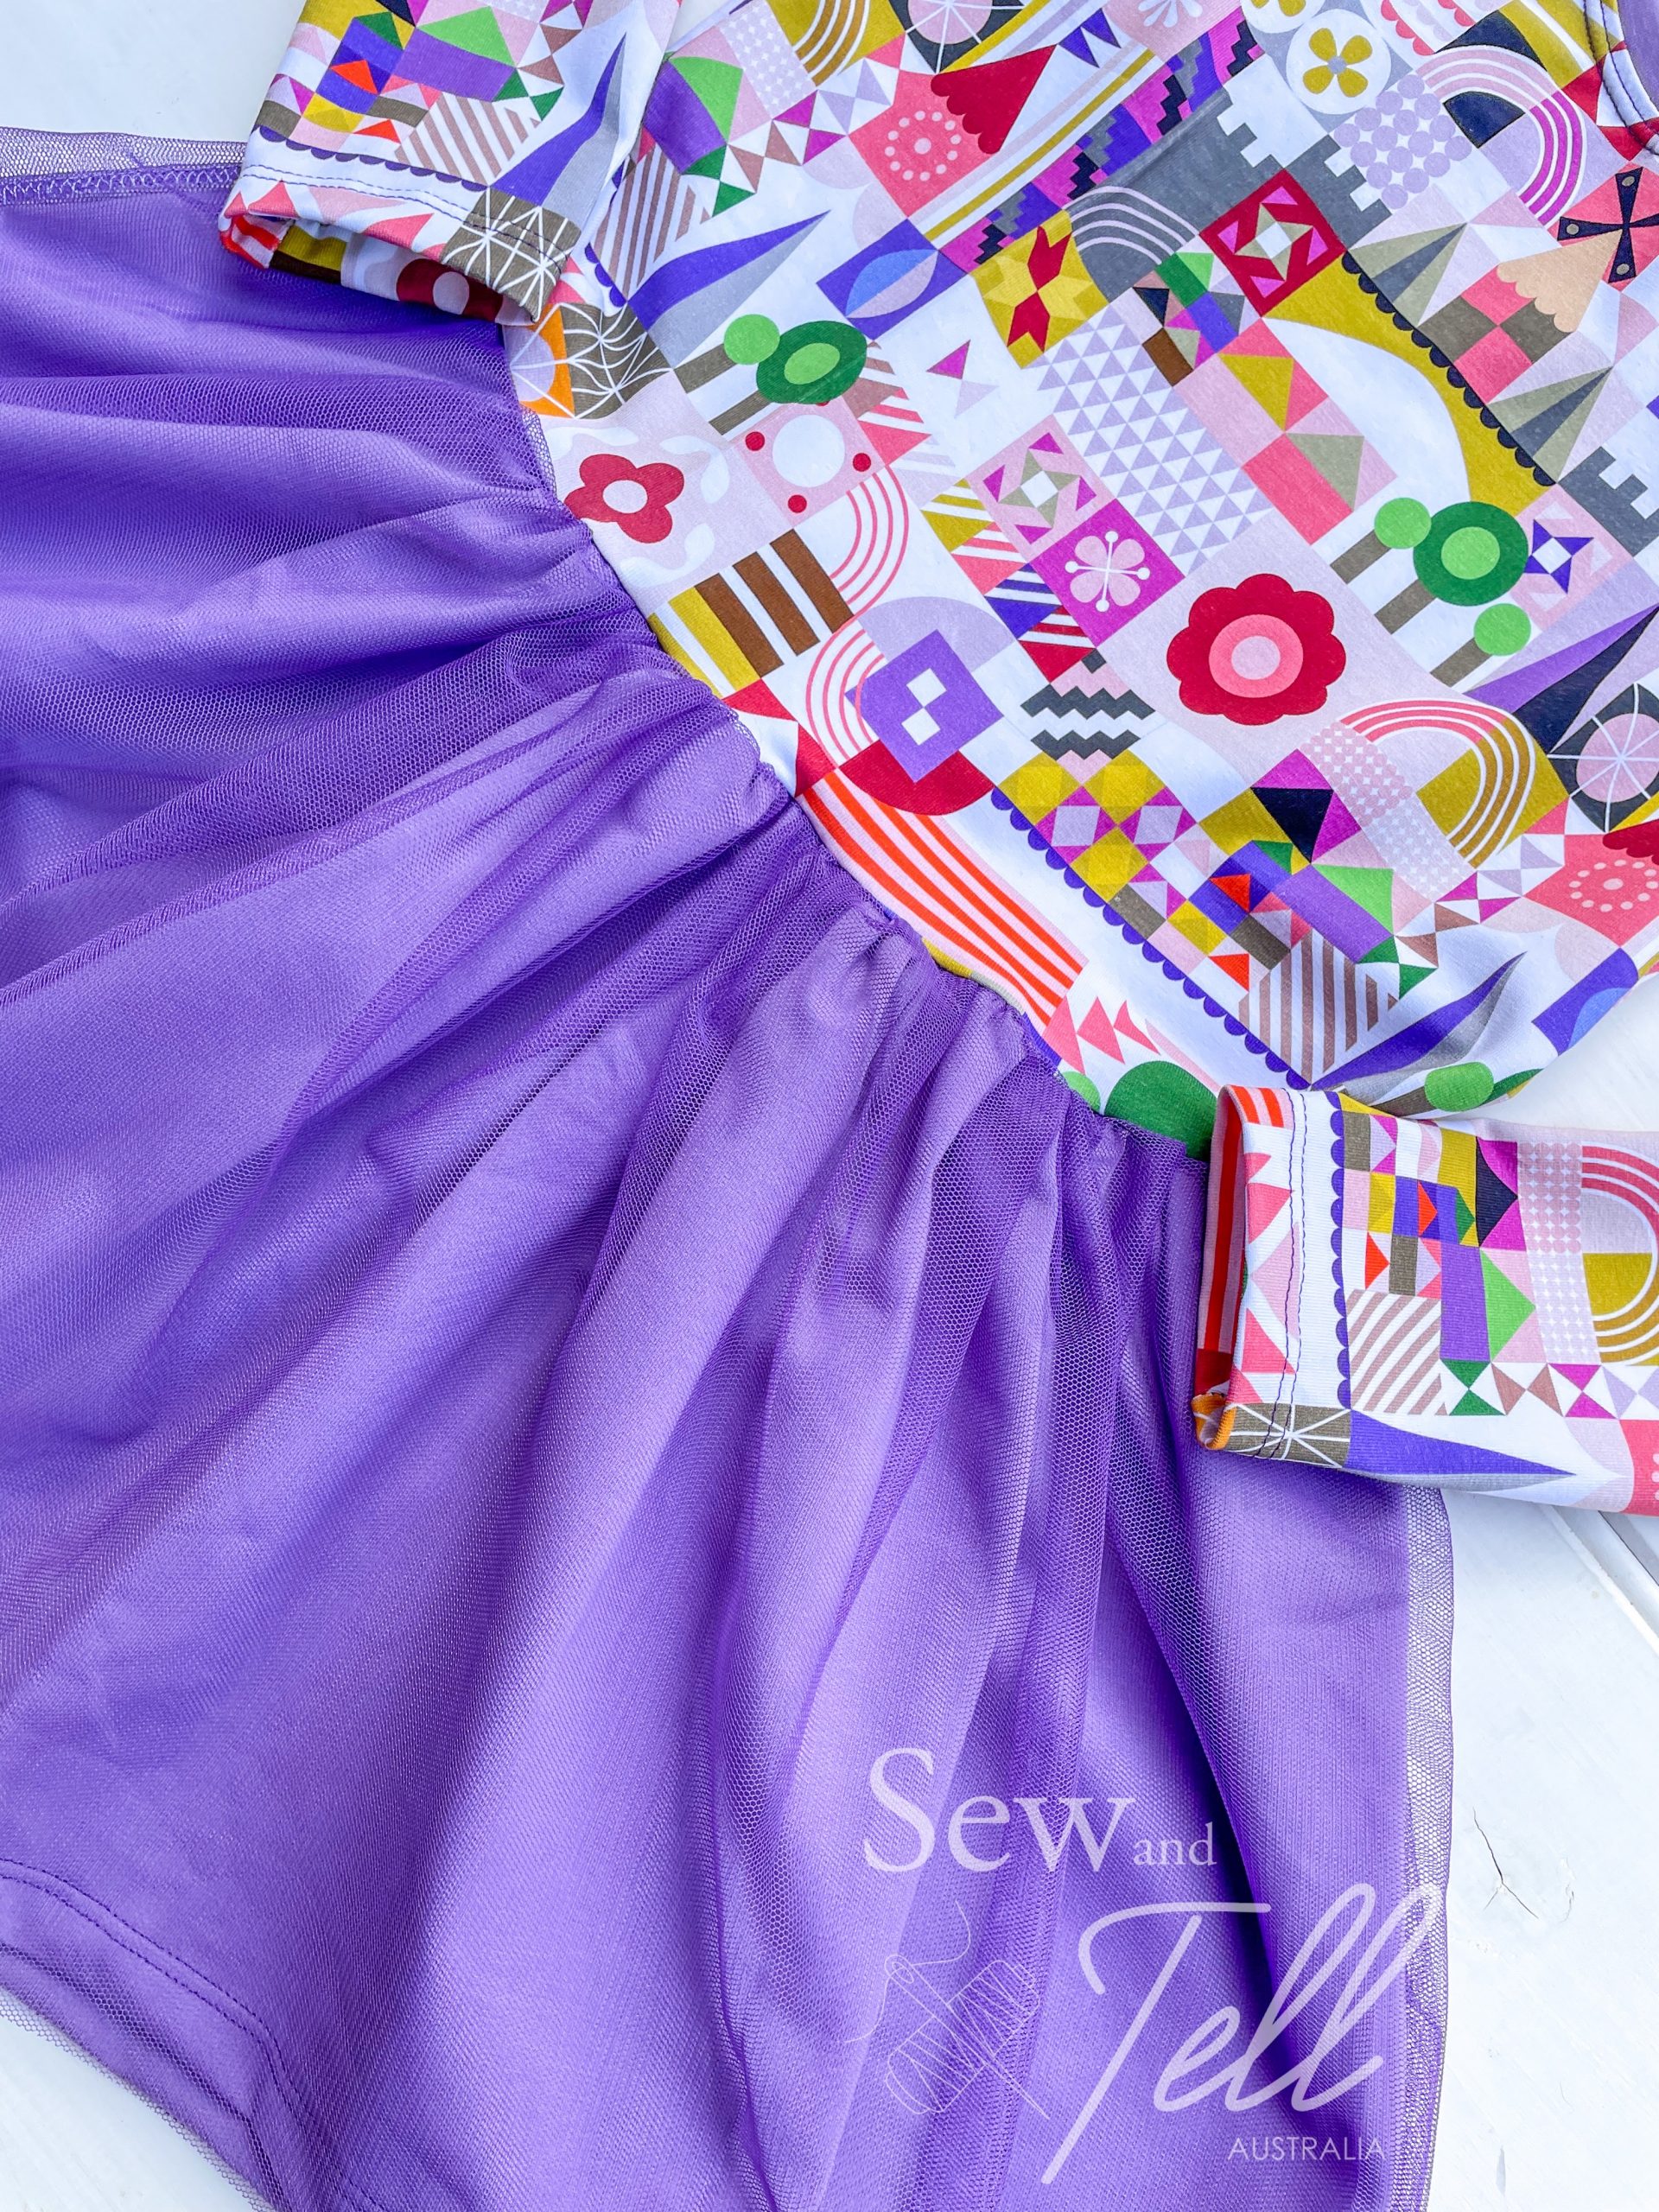
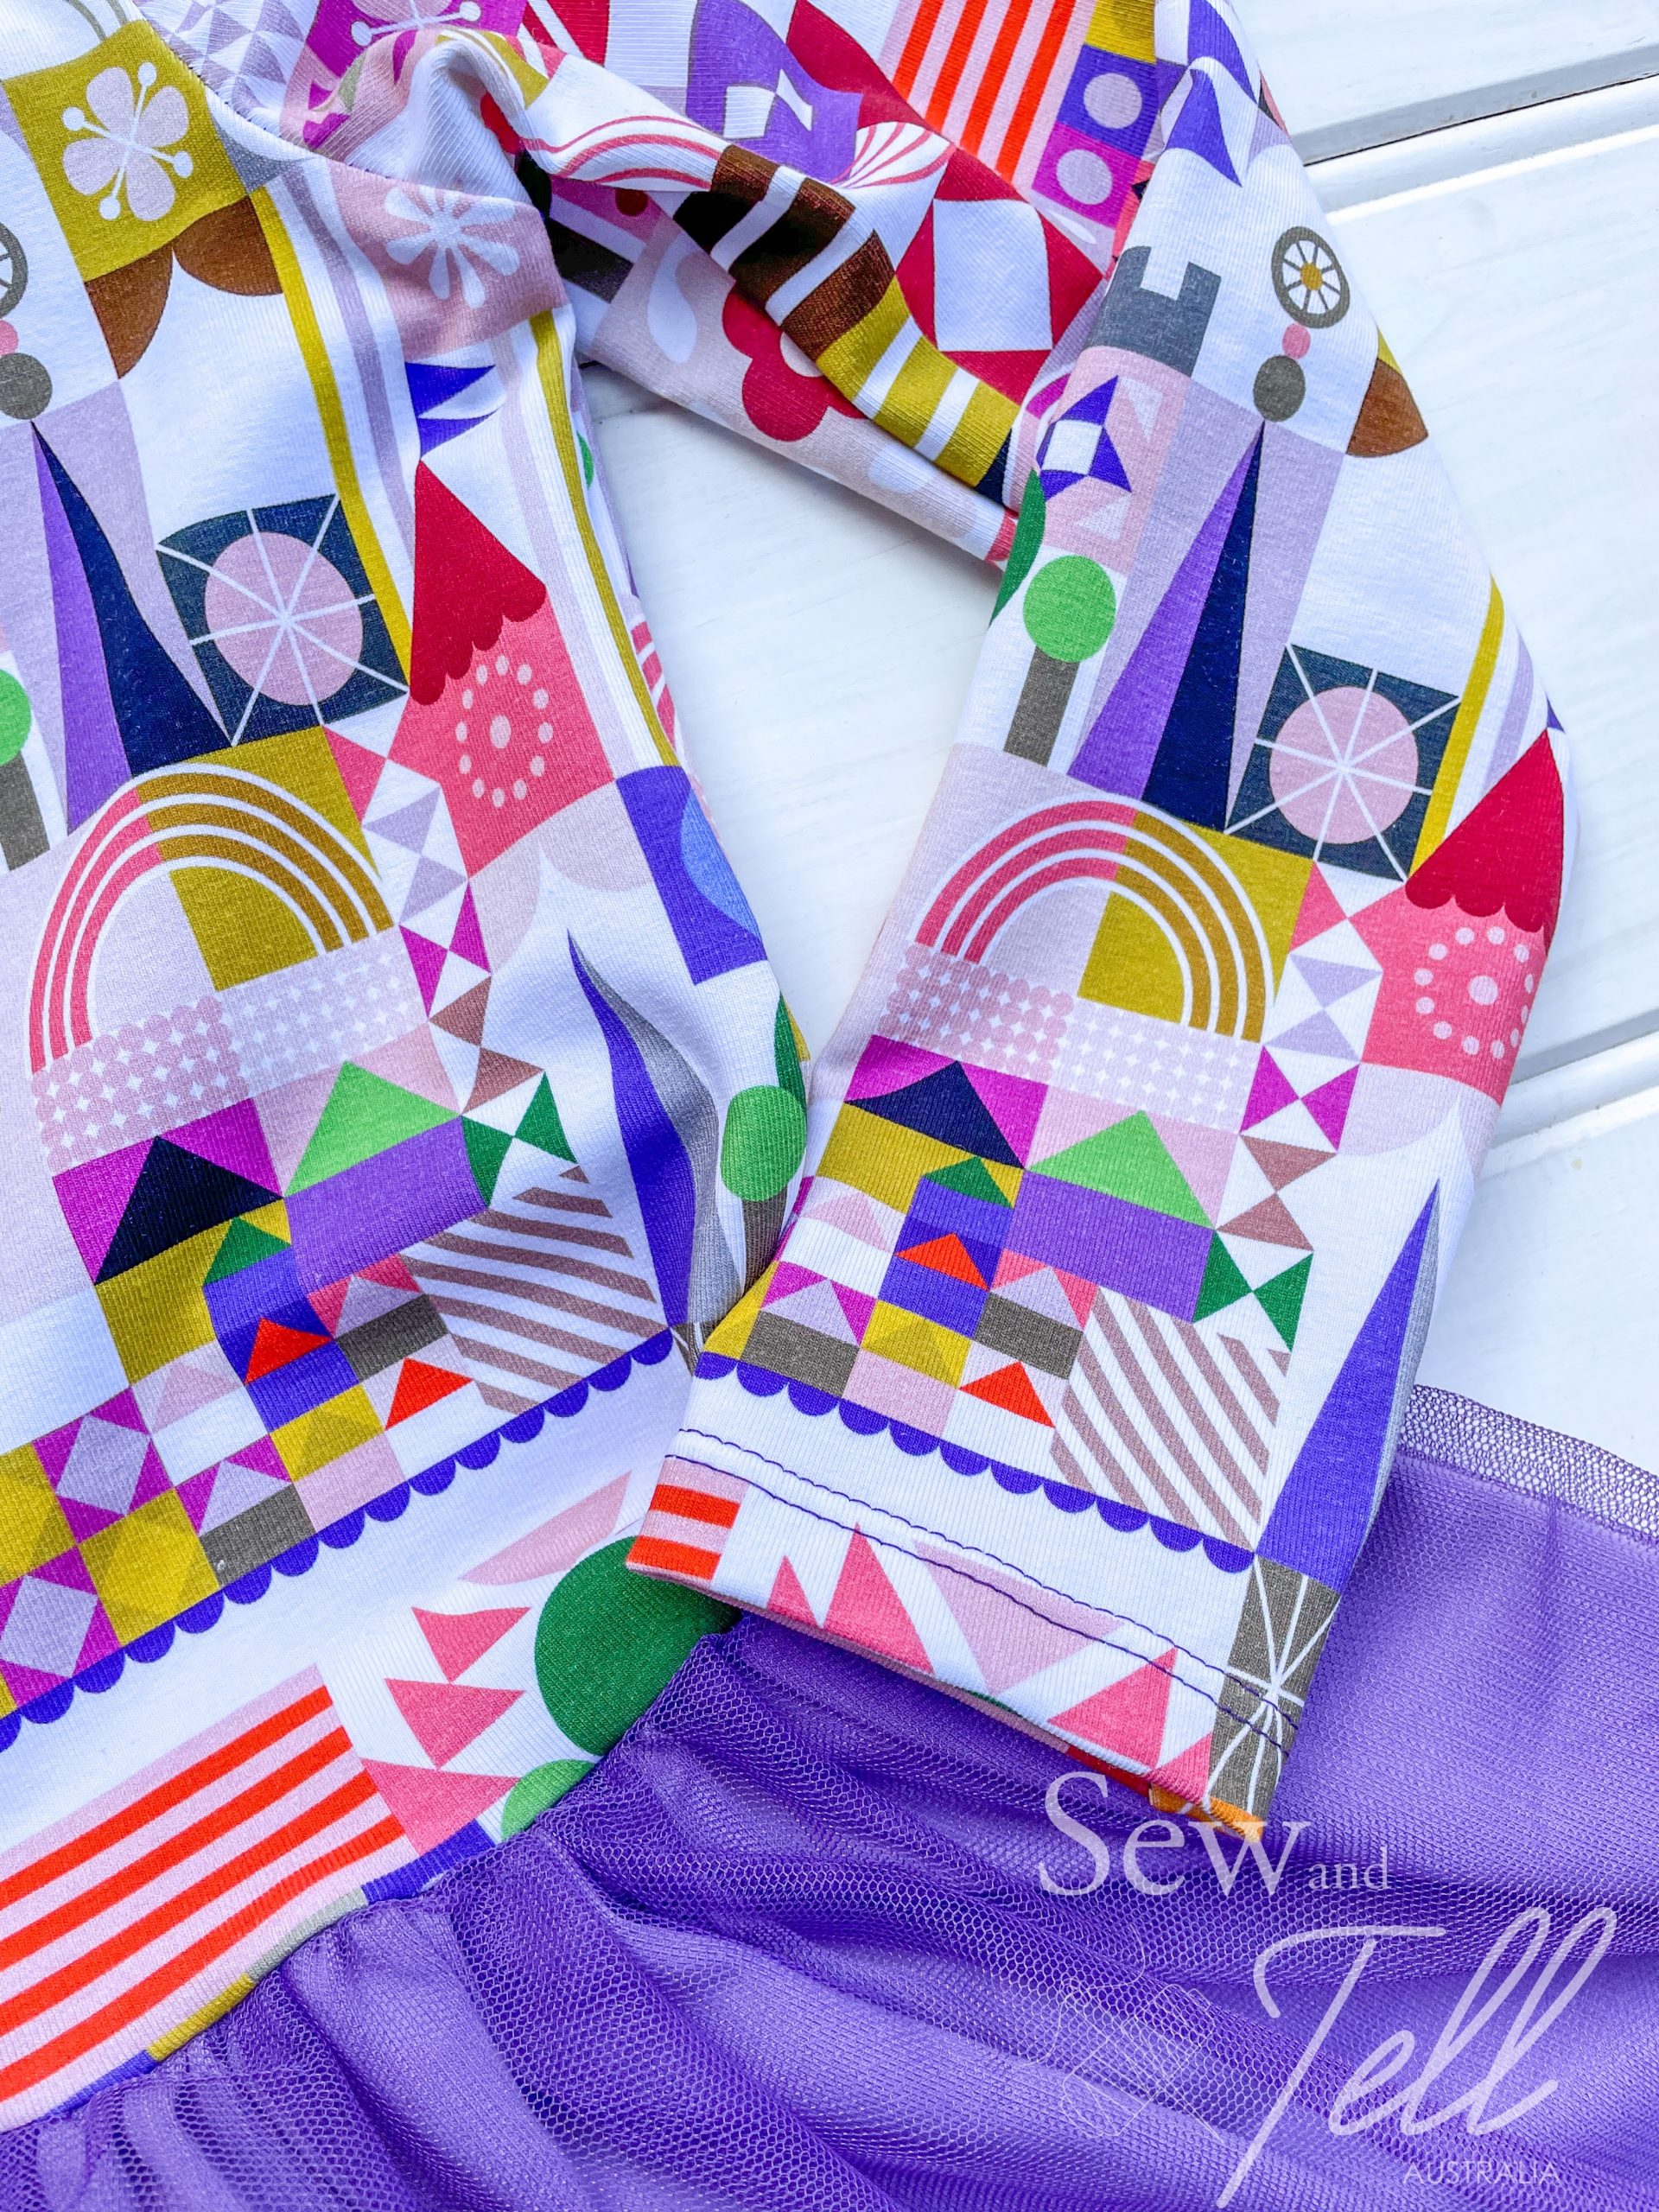
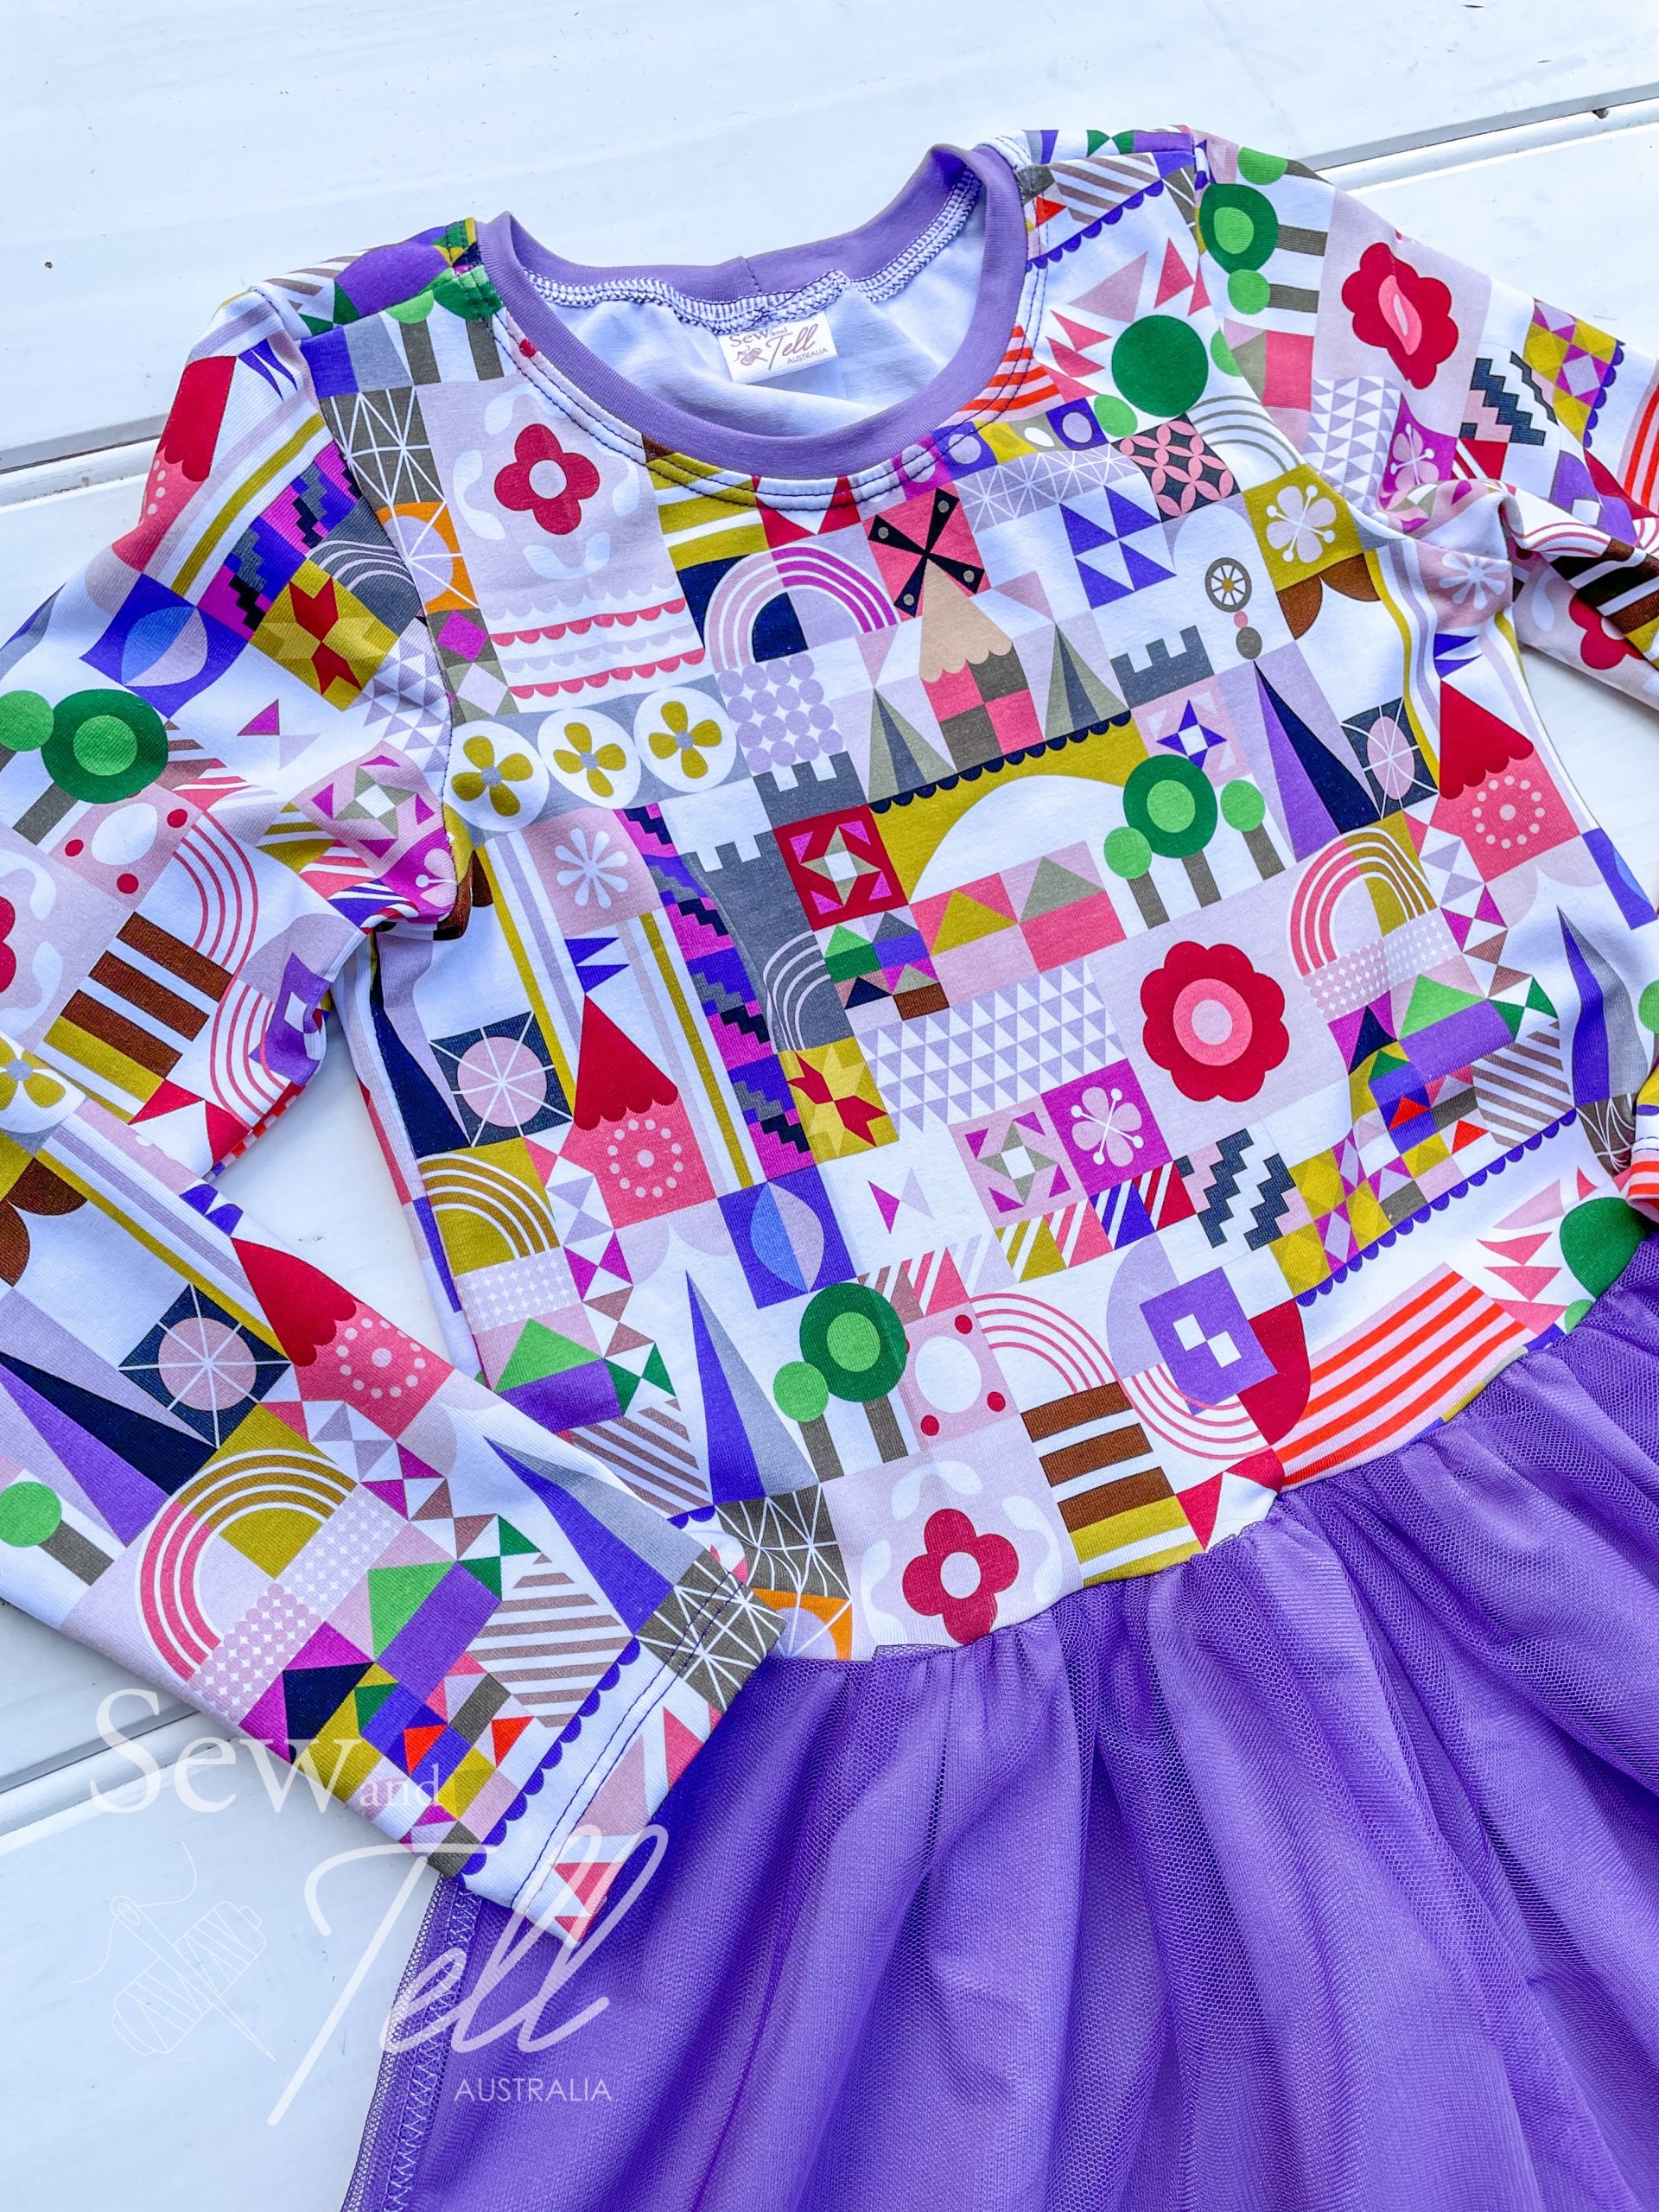
Pattern: Jaunty Knit Dress Designer: Tadah Patterns Fabrics: Cotton Lycra Accent Fabric – Clover & Co, Solid Cotton Lycra – Sew Unique Fabrics Measurements: Unsure – Its a gift Size made: 7 Adjustments: Added a tulle layer Pros: This is a very quick and easy dress to make. Perfect for gifts or to add to your child’s wardrobe Cons: Not a con, but it is quite a low waist line, I sometimes prefer my skirt to come out higher up the waist.
The Jaunty was on of the very first knit dresses I made for my daughter. It is such an easy and fun pattern, I have now made heaps! It was also some of the first times I used knit fabric and the jaunty made it so easy to create.
I love that there is the dual layer for the skirts, it creates a fun element that lets you play around with different fabric combos. I also have done a version with a tulle skirt and have recently done a version with a gathered tulle skirt over a solid cotton lycra underlay. I love the way it turned out and will definitely be making more of those versions.
Tadah Patterns are VERY easy to follow and have excellent written instructions. They were some of the first pdf patterns I used and in case you haven’t noticed, I am a big fan of Tadah. They will always be a firm favourite pattern maker of mine!