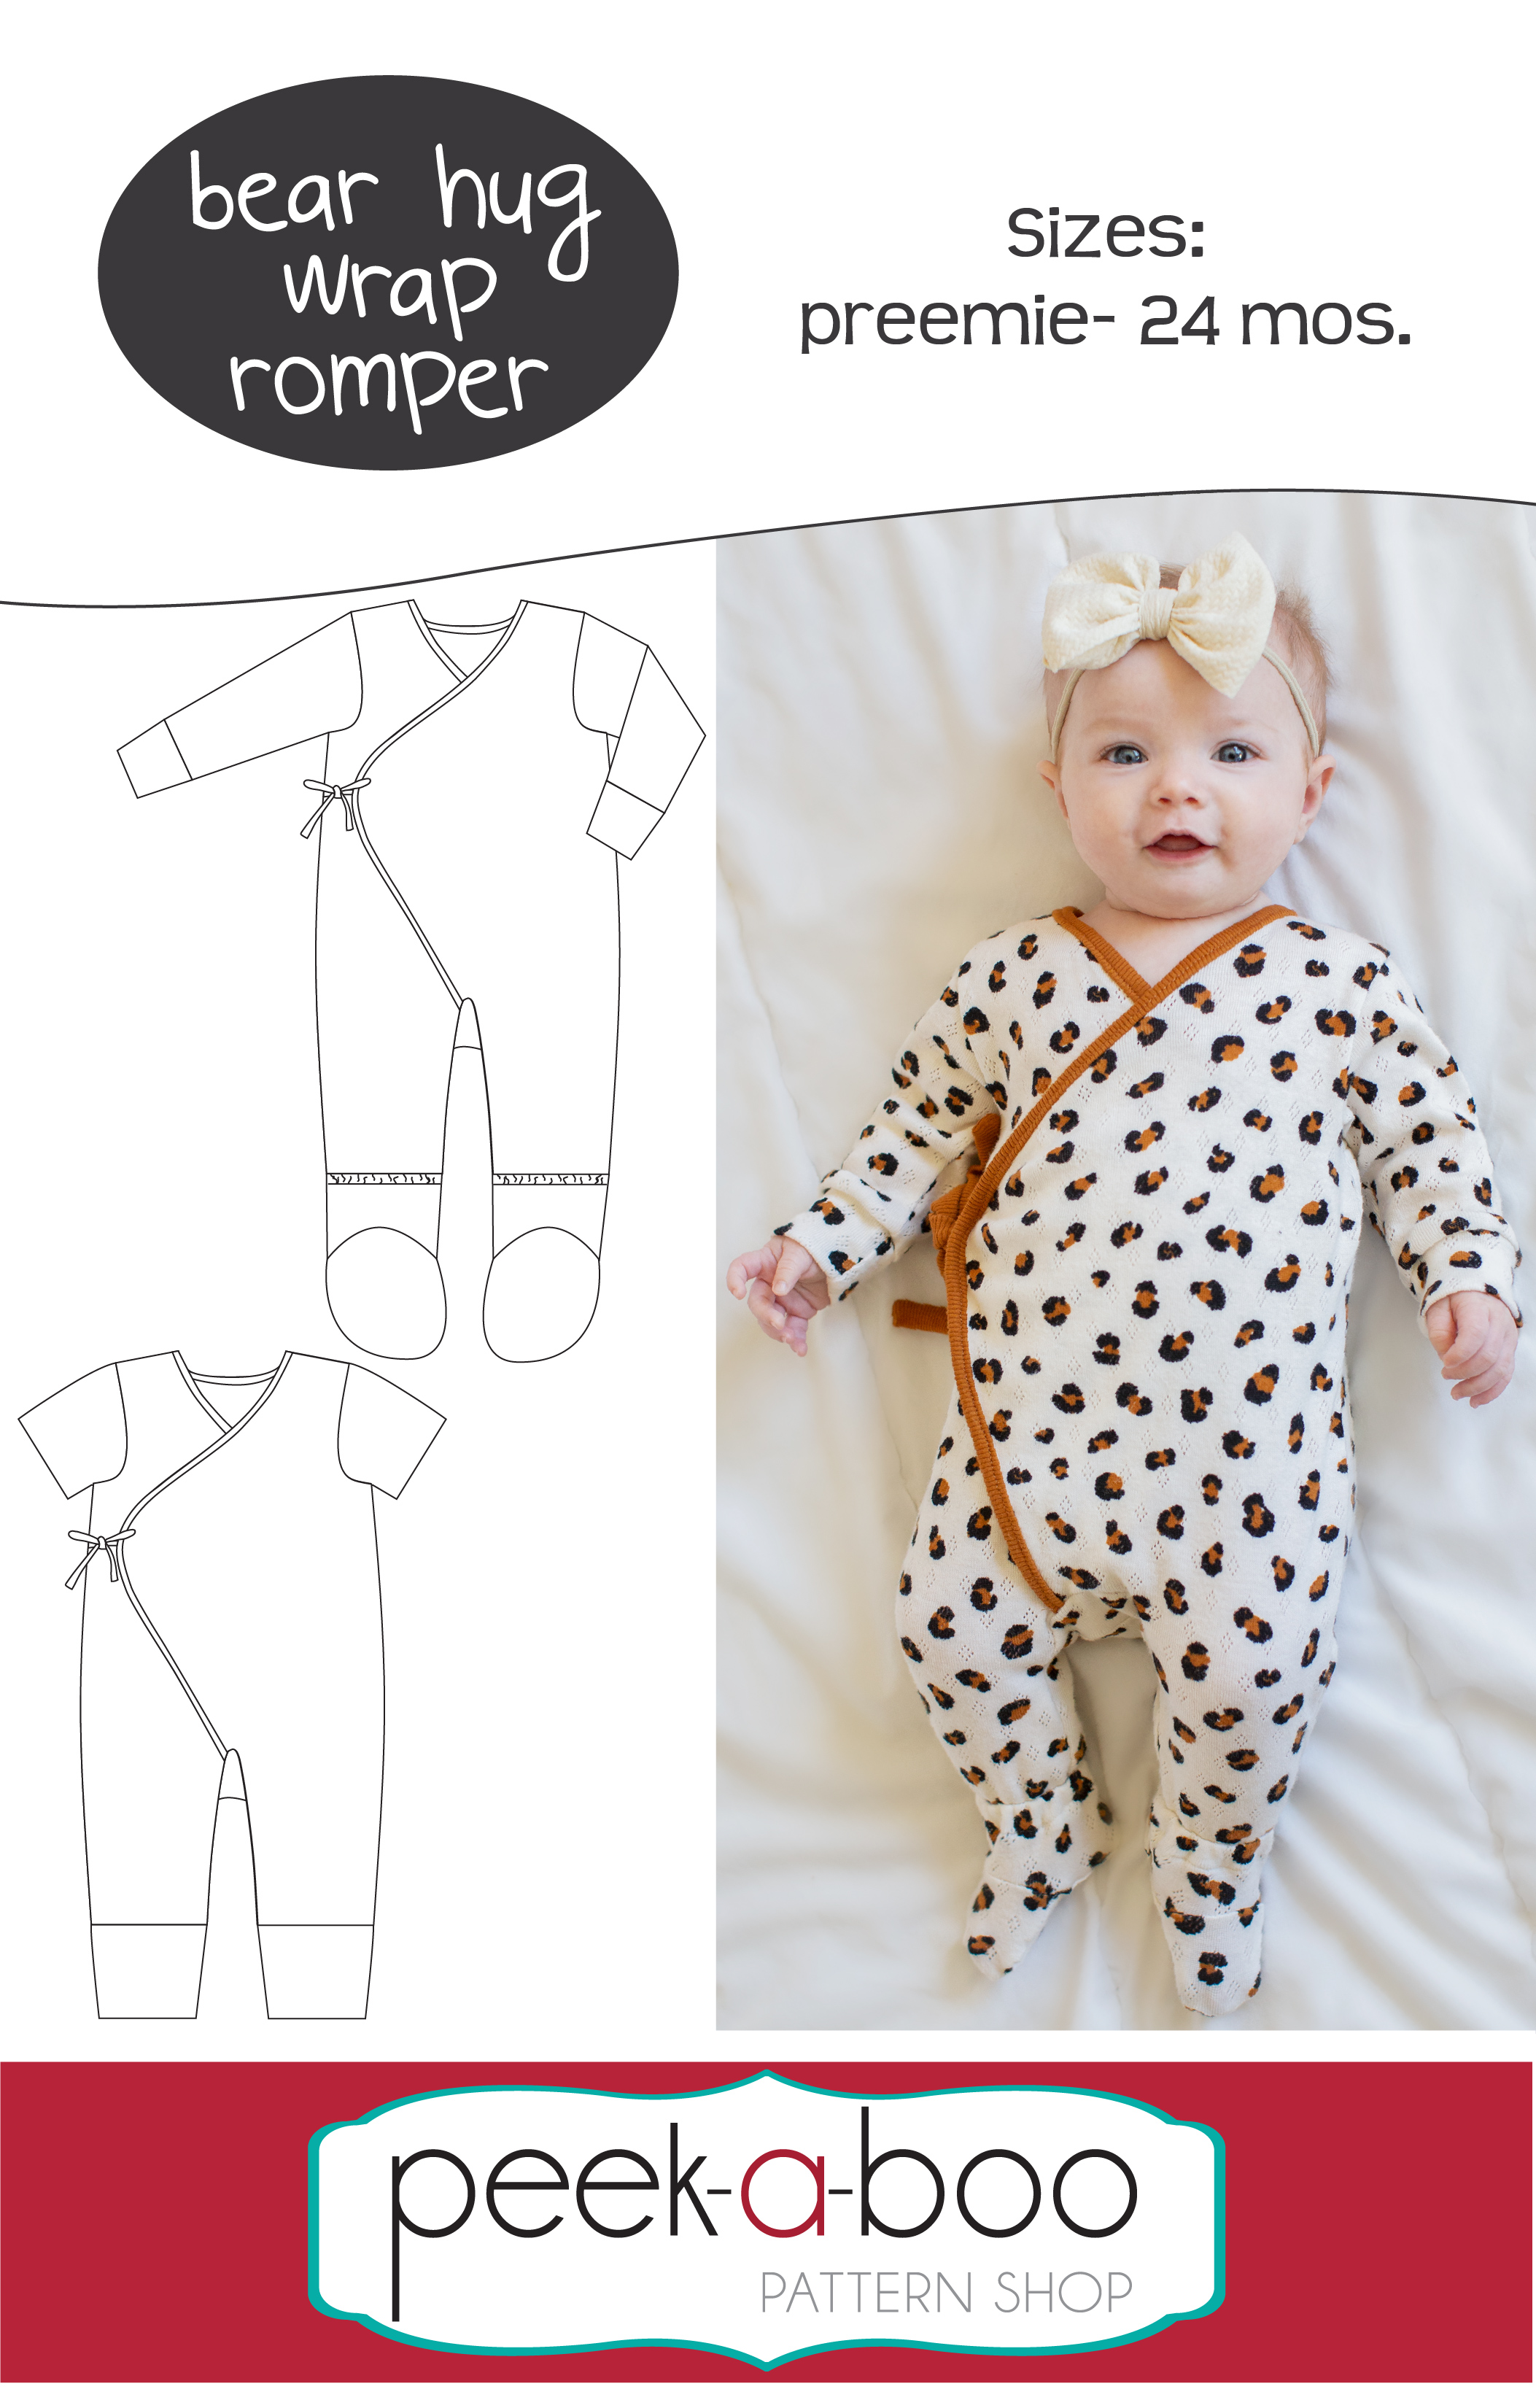
Video Tutorial of Bear Hug Wrap Romper
Learn to Sew

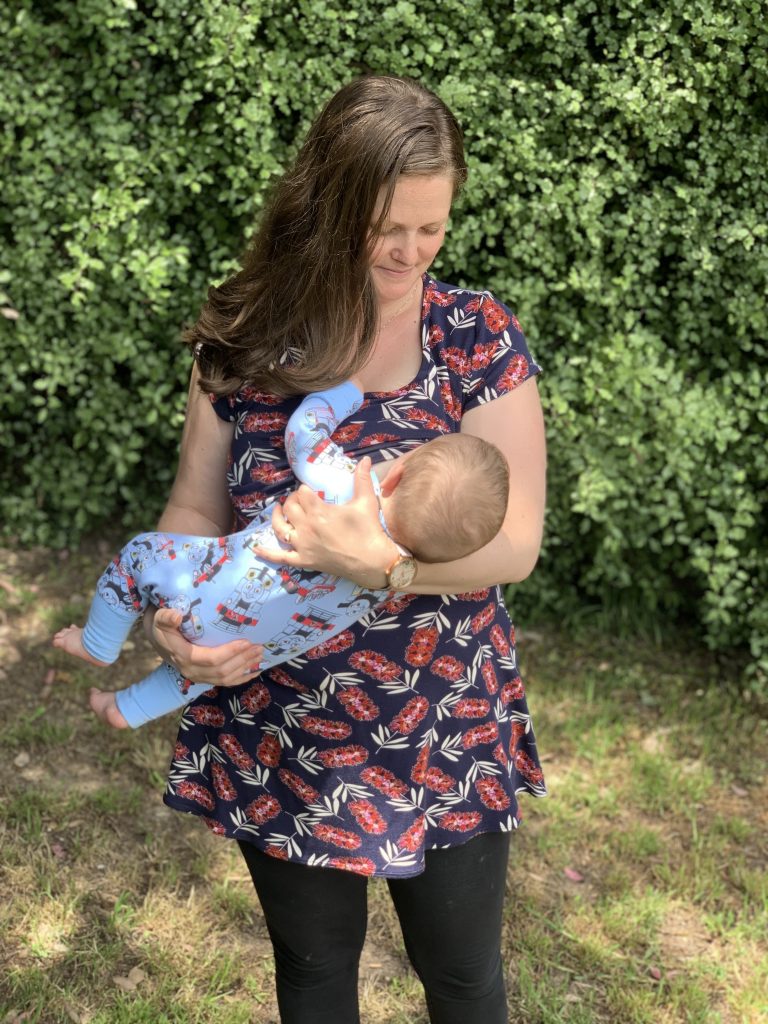

 I think this was one of the first patterns I ever tried of Peek a Boo as it had the nursing option and I loved it straight away.
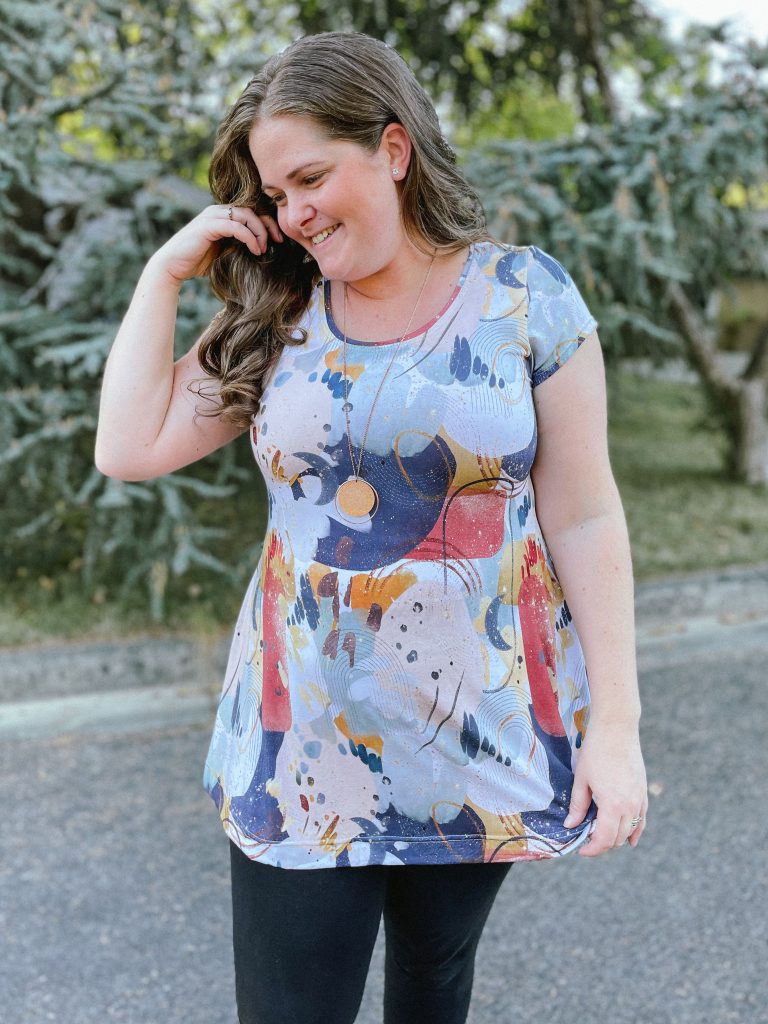
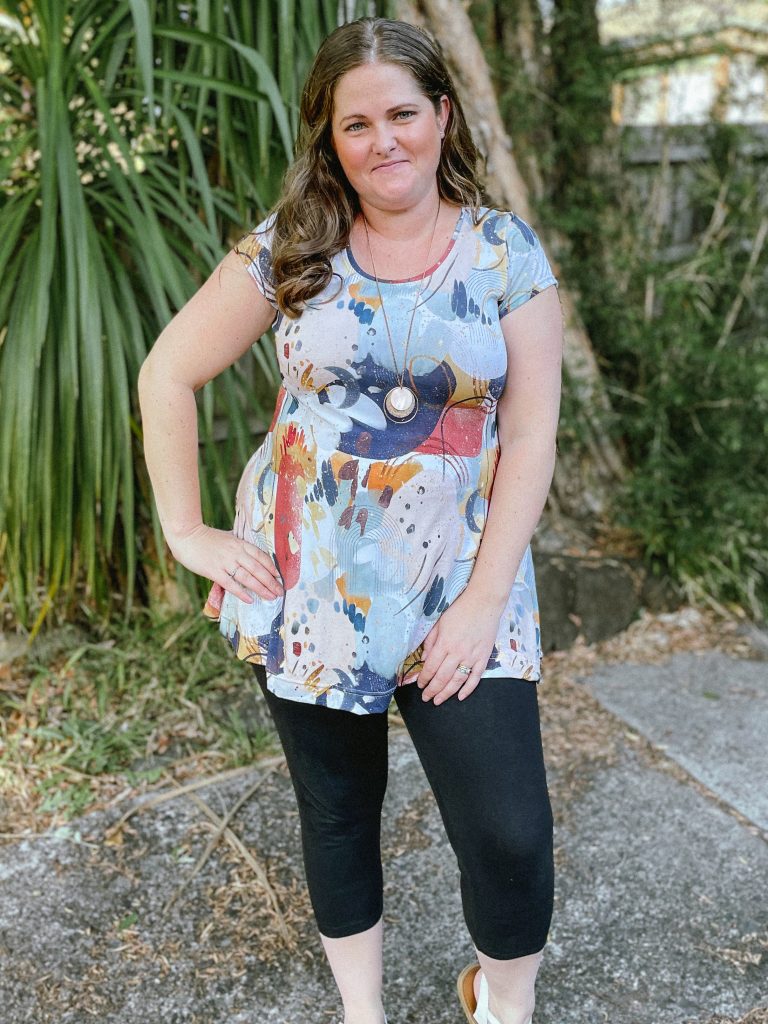
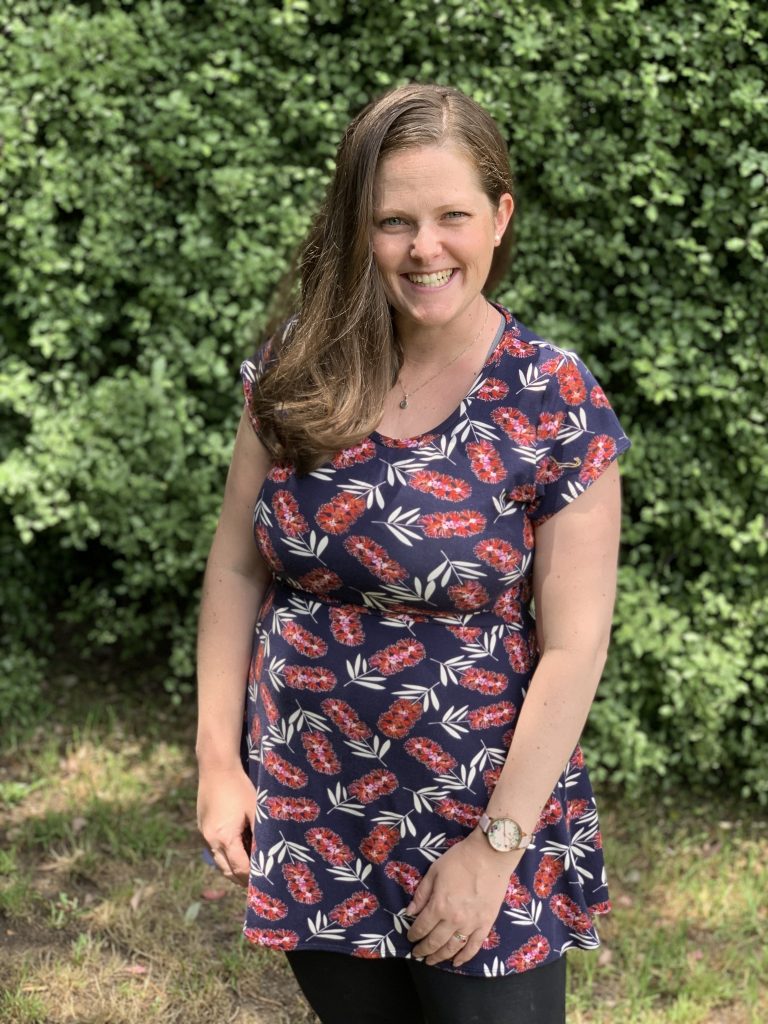
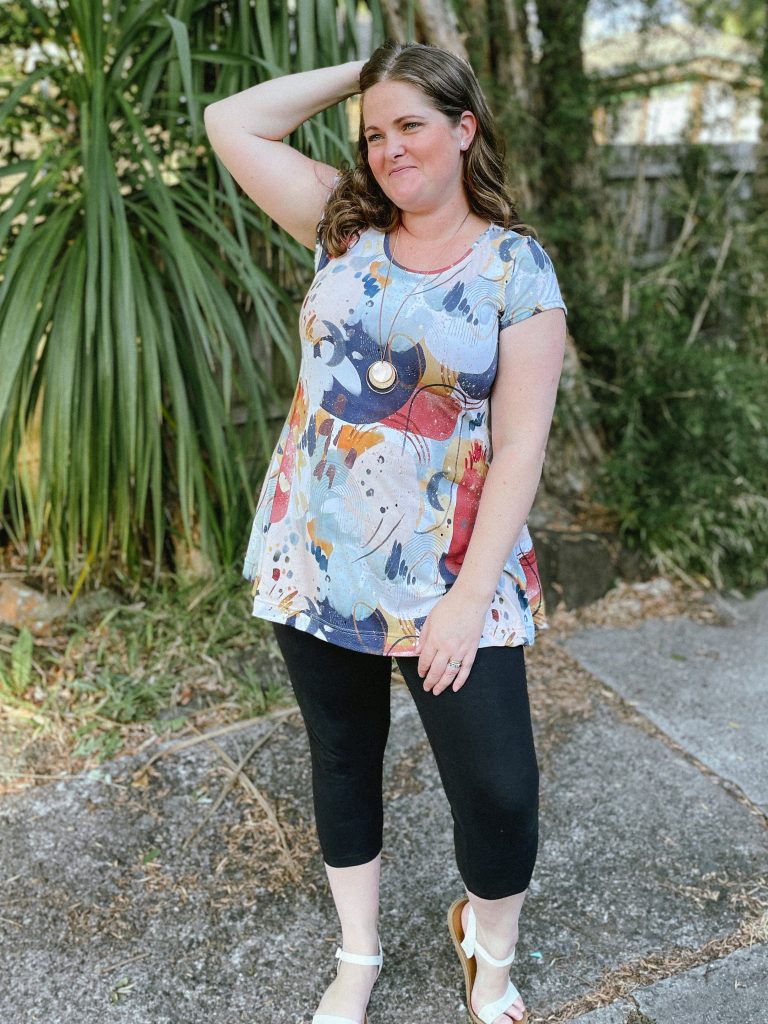
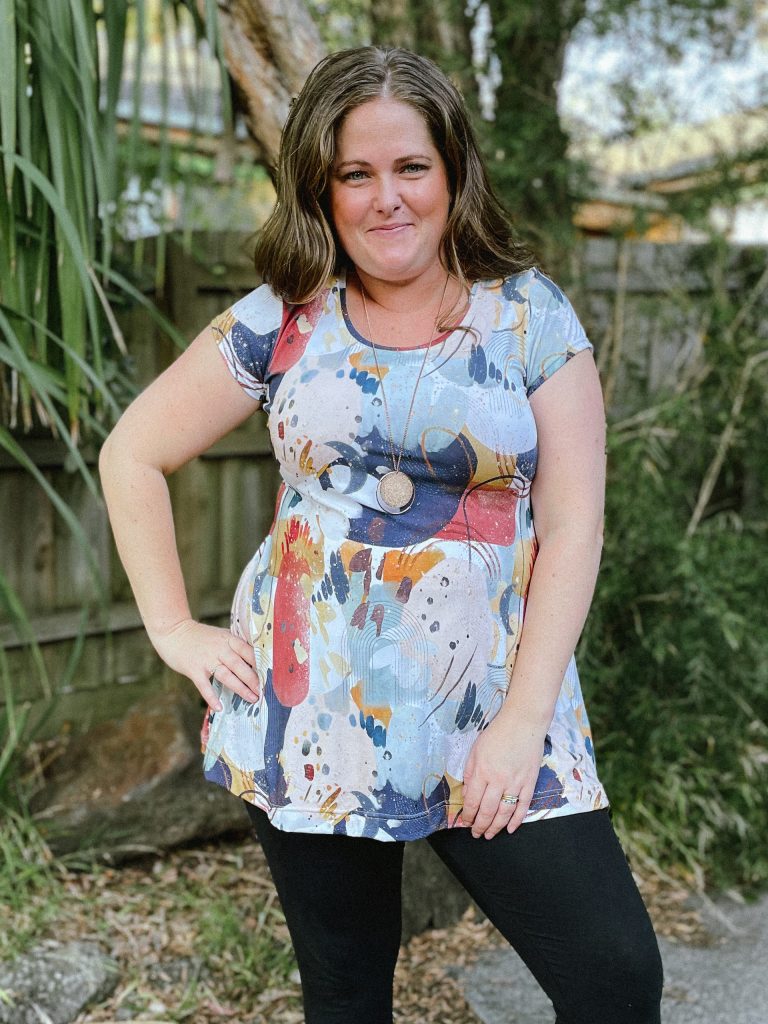
The fit and flare style really suits me and I love that their are a couple of different neckline options. Especially over the fringe months, I really enjoy a cowl neck for that little bit of added warmth, without having to carry a scarf around.
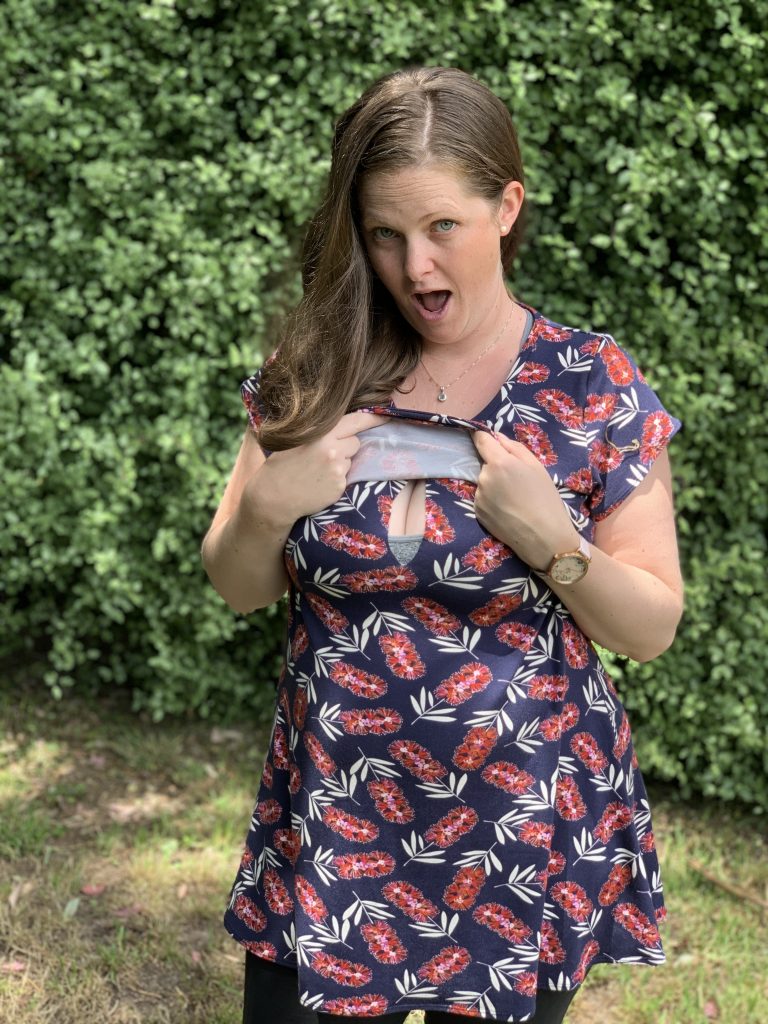
Like I mentioned as well, this has the option of nursing which is so nice to see. When I was feeding my son I had such limited choices in Ready to Wear clothing and it was kind of what sparked me to really give clothes for myself another go, so to be able to make stylish feeding friendly tops was amazing!
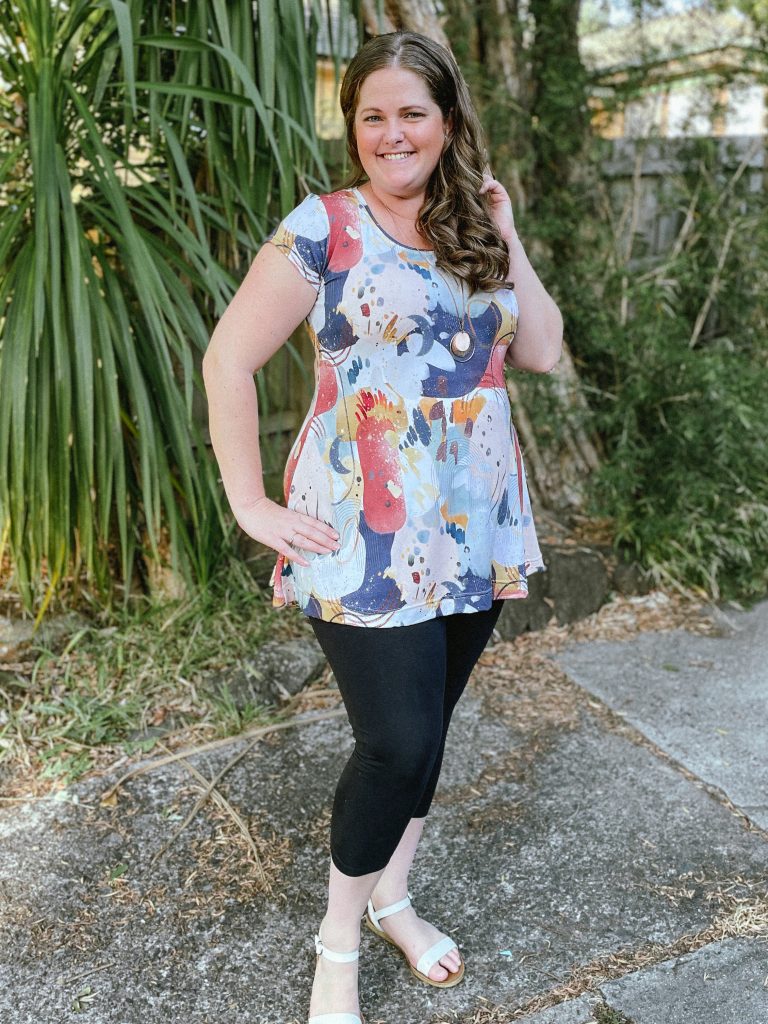
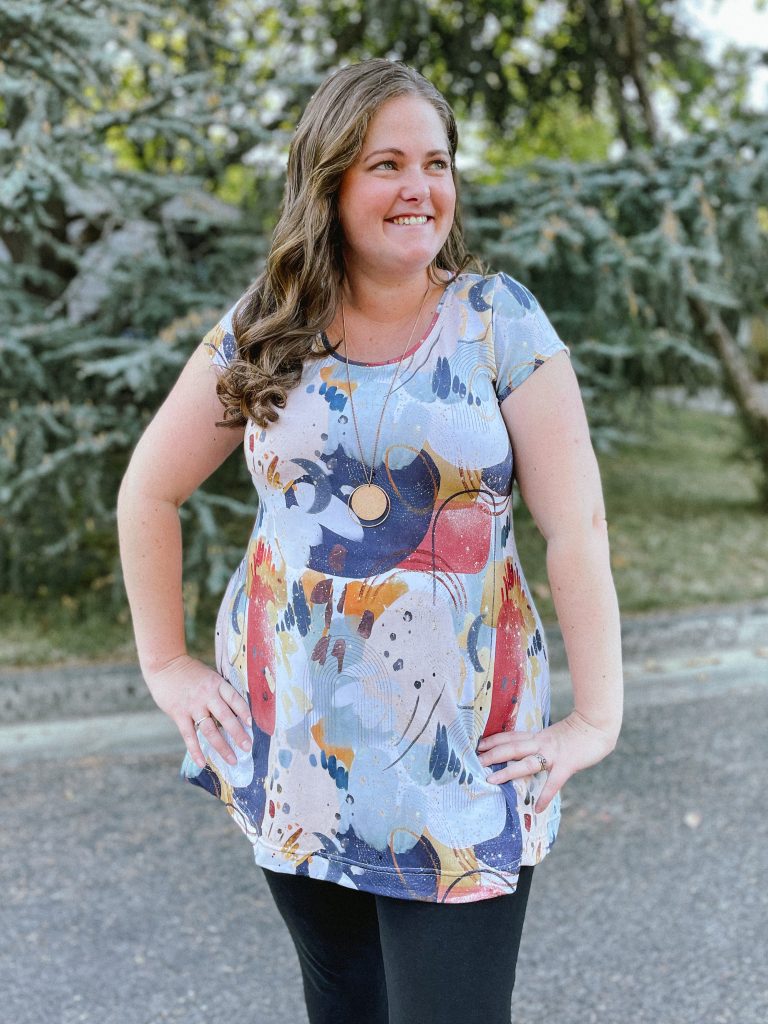
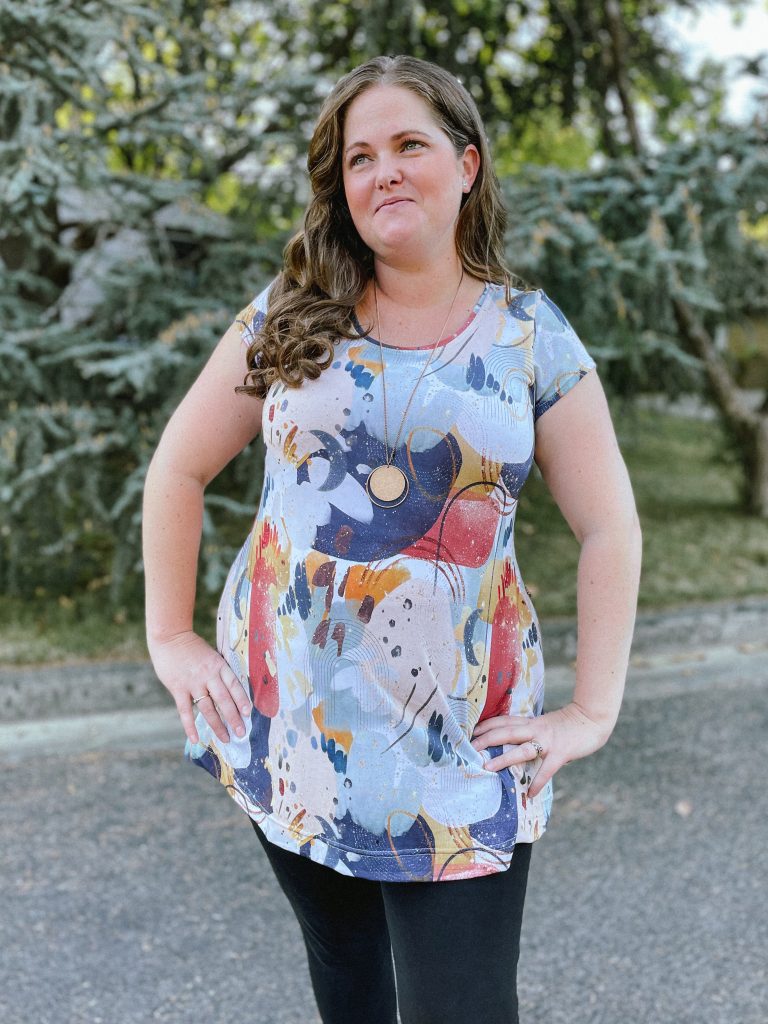
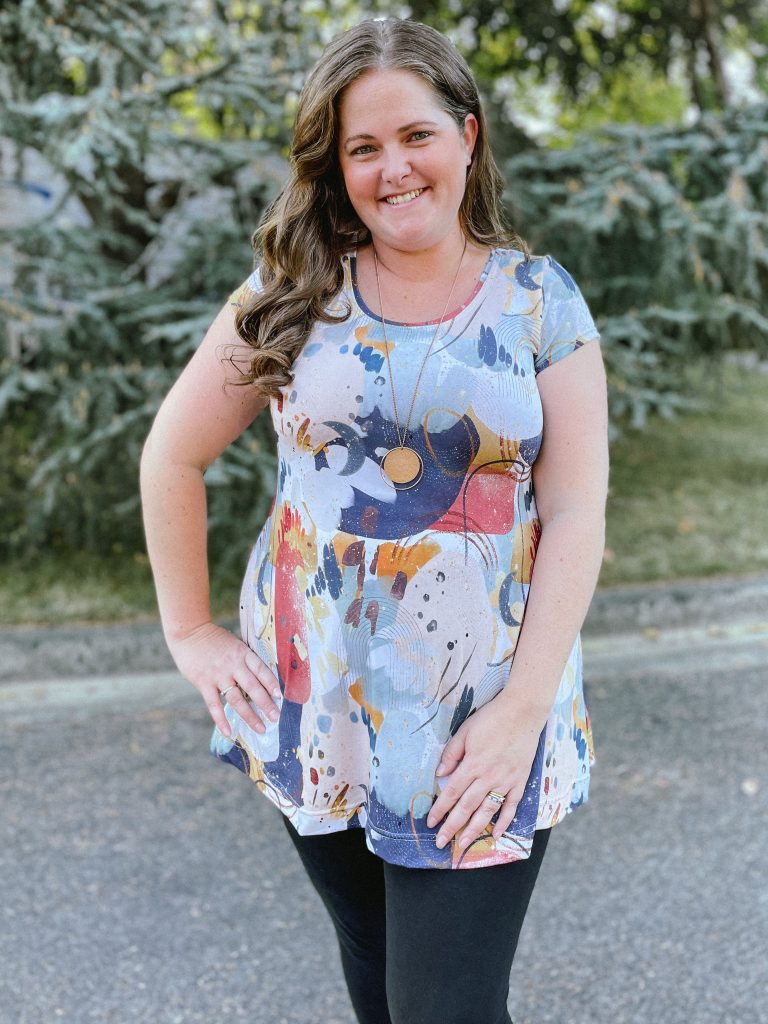
The fabric I made my latest from is a pre order I did with Clover and Co in Bamboo Lycra. I like that this fabric design and pattern can be paired well with both leggings and jeans, making it easy to dress up or down. Put a little crop jacket it with it and a pair of heels if you’re going out, or straight cut jeans and a pair of white sneakers and you’re day ready.
I 1000000% will be getting more of Clover’s bamboo lycra as well. It is DIVINE!!! SO soft and drapey to wear. I want all the bamboo lycra now.
This article contains affiliate links throughout
When my best friend told me she was pregnant earlier this year, I was so excited! I know how much she’s been waiting to make that journey from Maiden to Mother, so hearing that she was expecting her own bundle of love was beyond exciting for me.
I was also excited of course at all the fun sewing opportunities. I love gifting hand made and I knew she would really appreciate anything I made for her. I got to work straight away thinking about what I wanted to make and the materials I wanted to use.
The Wrap Up:
The first set I made was two Waves & Wild Patterns. A pair of Over it Alls and a Pick n Mix Tee.
Waves & Wild have some incredible kids patterns and are up there with one of my favourite pattern designers. Particularly the Over it Alls. I don’t even know how many of those I have made! They are so quick and easy and have a very generous size range. Newborn to Age 12.
I chose to use some of Clover & Co. Fabrics Lounge rib as it is so incredibly soft and is made from 95.4% Cotton and 4.6% spandex, making it super breathable. The print is called Midnight Soleil and I fell in love with it the minute I saw it.
I did the short version in 000 size, hoping that her bubba boy will get some wear early next year before the weather turns. I also chose to use plastic Kam snaps for the straps but I highly recommend interfacing or at least adding another square scrap of fabric for extra stability under the snaps. They get quite a lot of strain when pulling them off that if they are not properly backed, they will pull through the fabric over time.

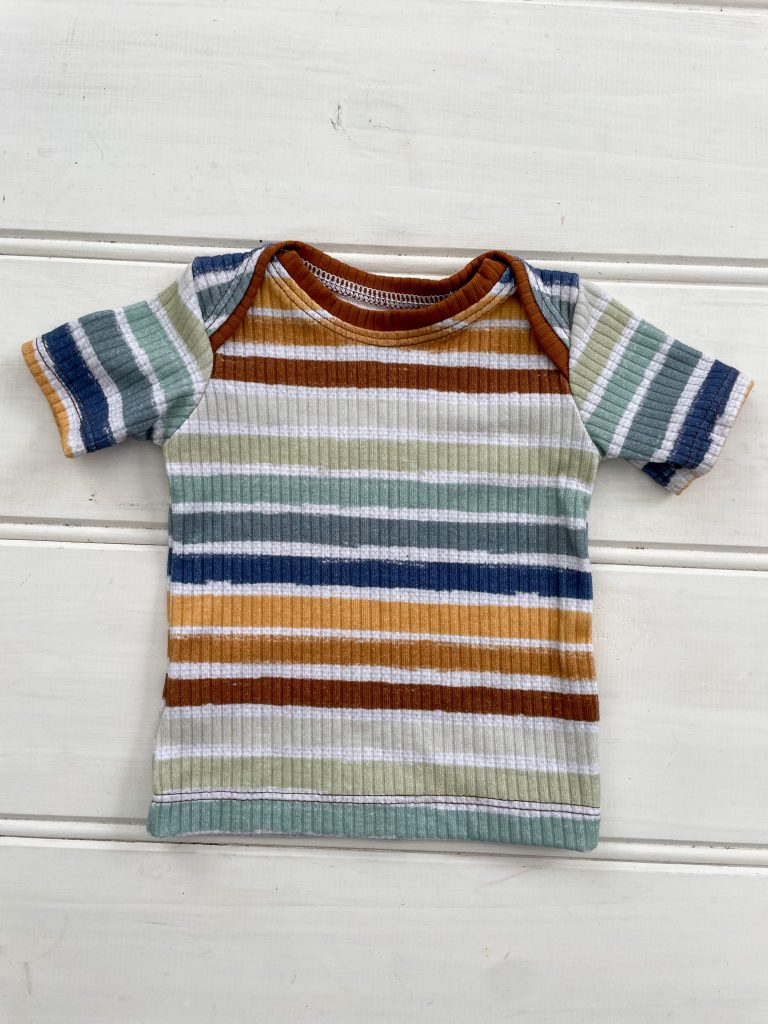
To pair with the Over it Alls I also made a teeny tiny size 000 Pick n Mix Tee. I chose this one for the envelope neckline which if you have kids, you’ll know if a lifesaver when they get covered in anything from poop to food. Not having to pull it over their head and spread it more in their hair, instead being able to peel off over their body is SO much easier!
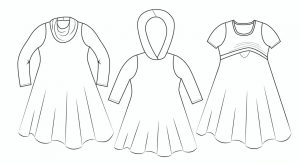
The awesome thing about the Pick n Mix is that within the one pattern there is also a sleep sack and body suit. The other necklines include snap neck and crew neck. You can also have either short or long sleeves and there is a handy fold over mitten option so those tiny little fingernails can’t scratch themselves.
Again I chose to make it from Clover’s Lounge rib, in their Stripes of Soleil print.


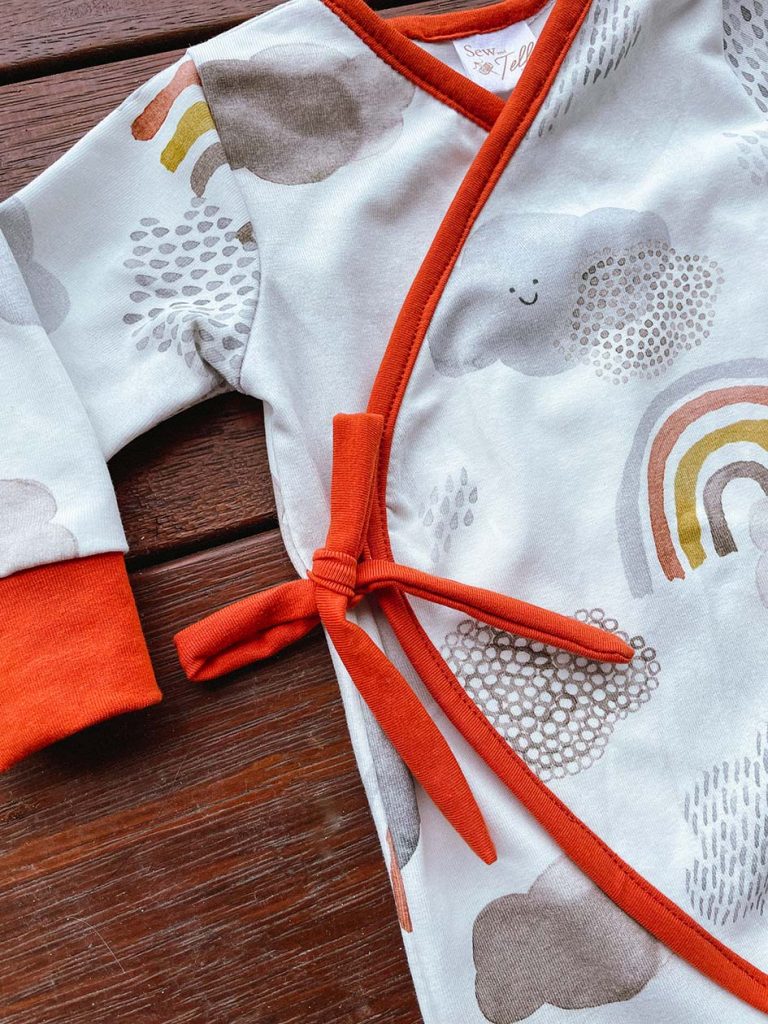
The next gift I made was one that I but a lot of thought into. Although my friend grew up here on the mainland, she now lives in Tasmania and is obviously where she is building her family. So through Clover & Co. I was able to use a fabric that has roots in Tasmania which I knew she would love.
The design, called Wattle, is from Clover’s NAIDOC round and is designed by local First Nations artist, Annie from Pia Designs. My friends partner has lived and worked with First Nations people out at Uluru, Alice Springs and they both have incredible respect for First Nations people so I knew this print would be perfect.
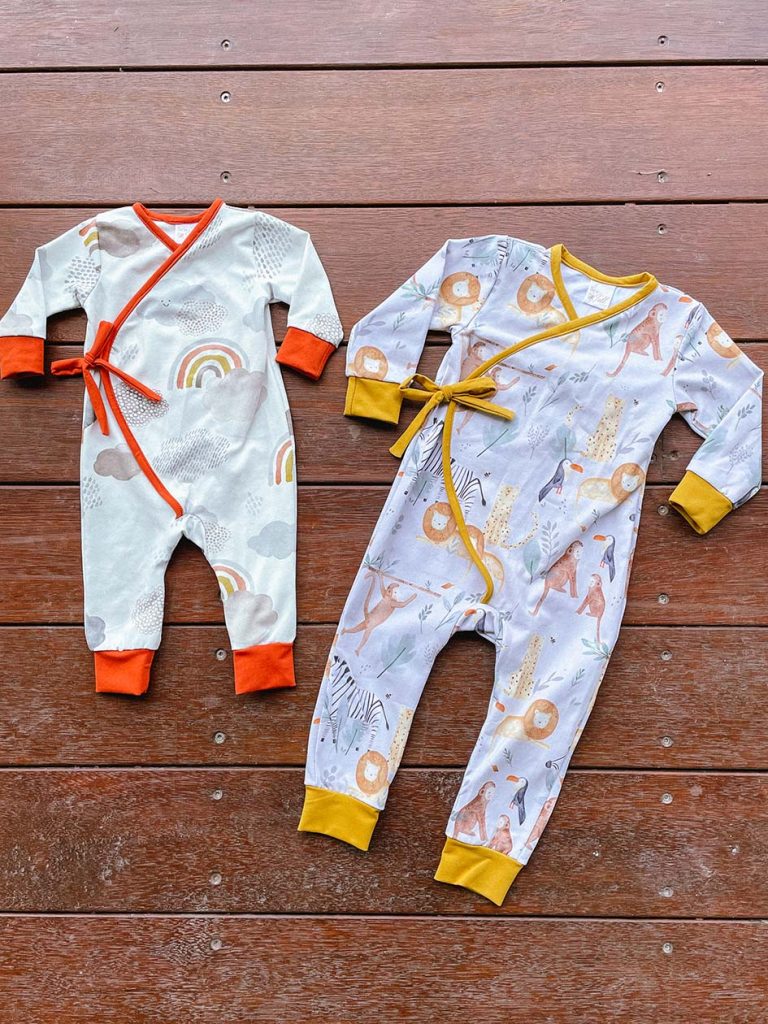
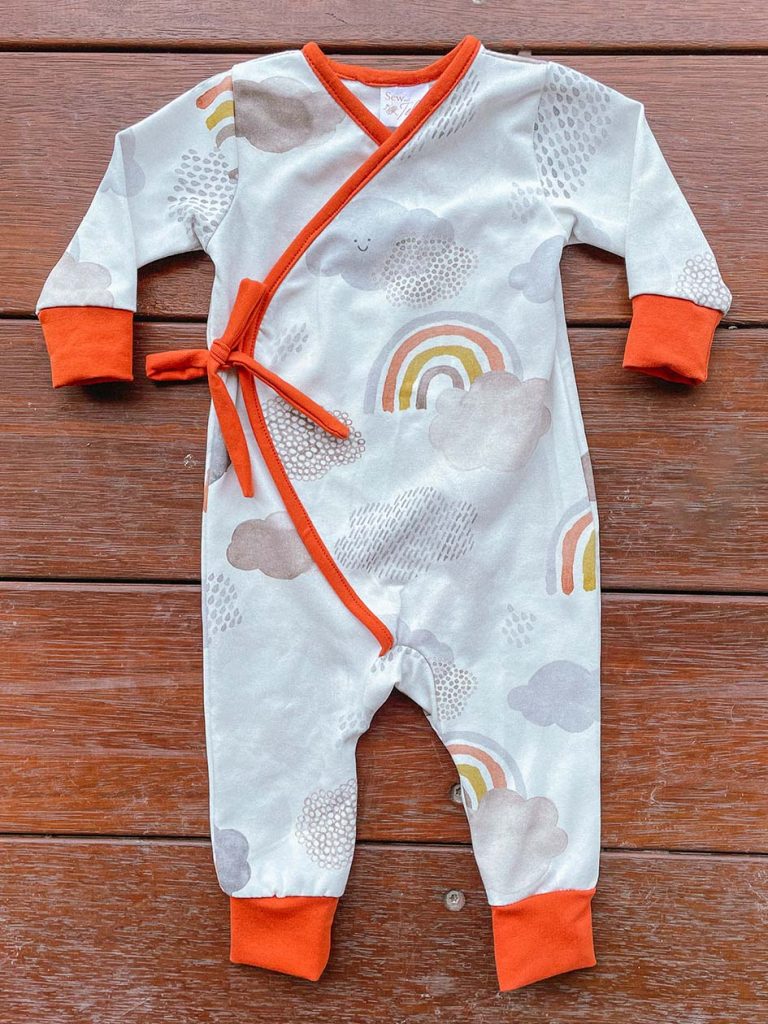
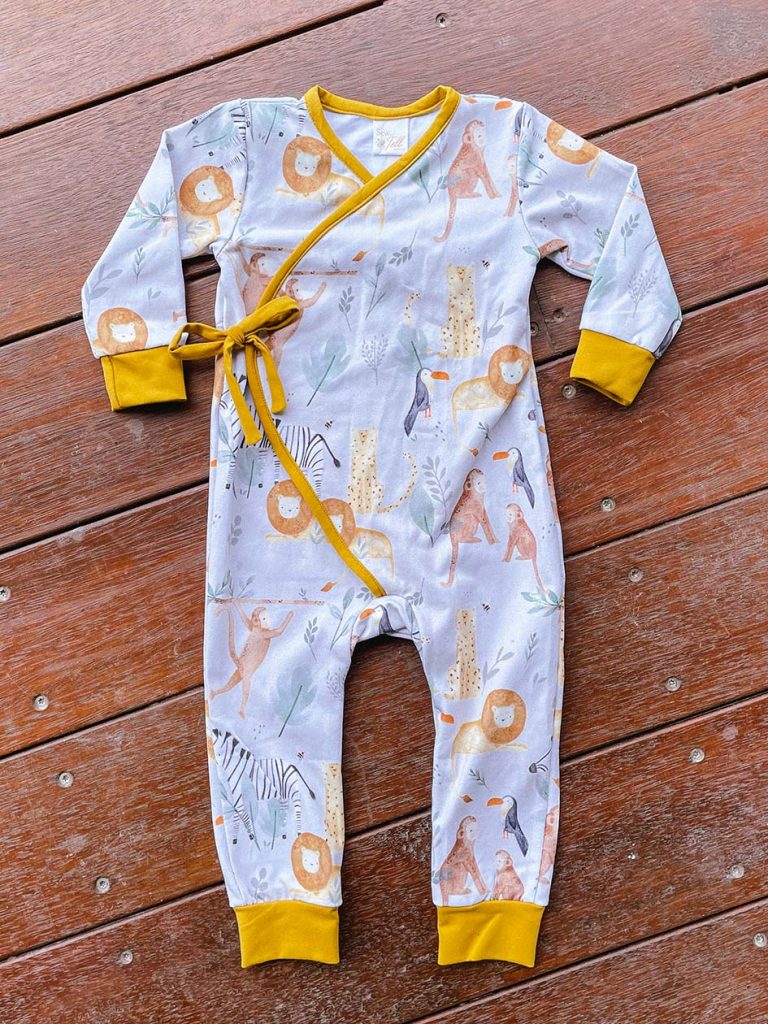
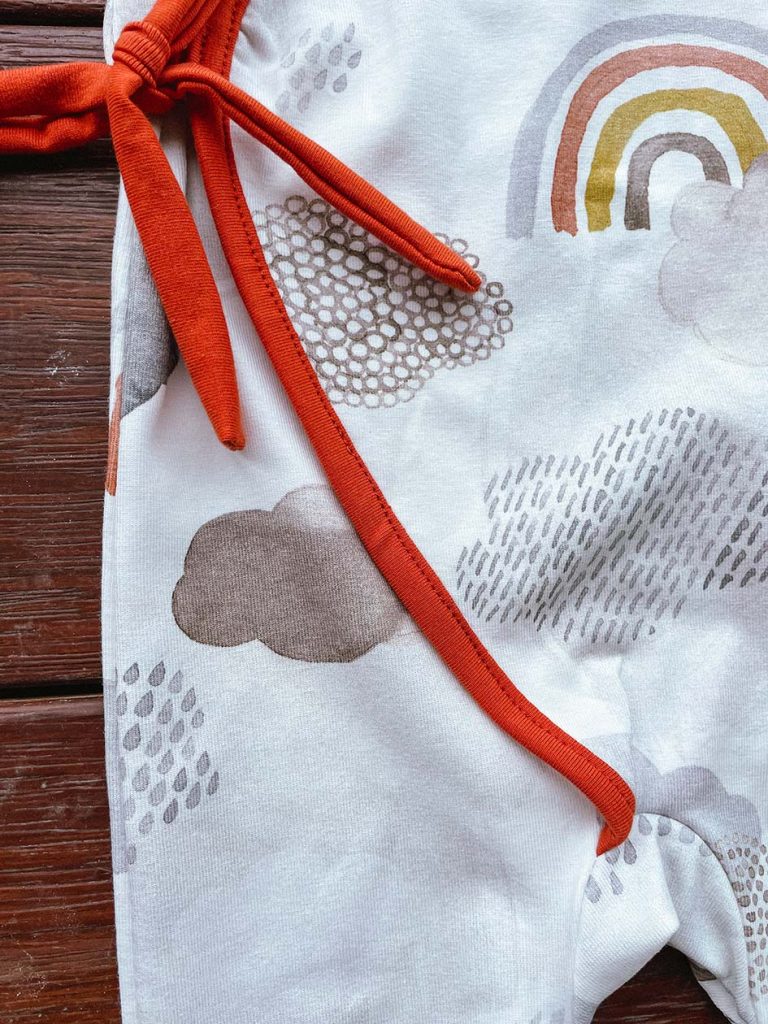
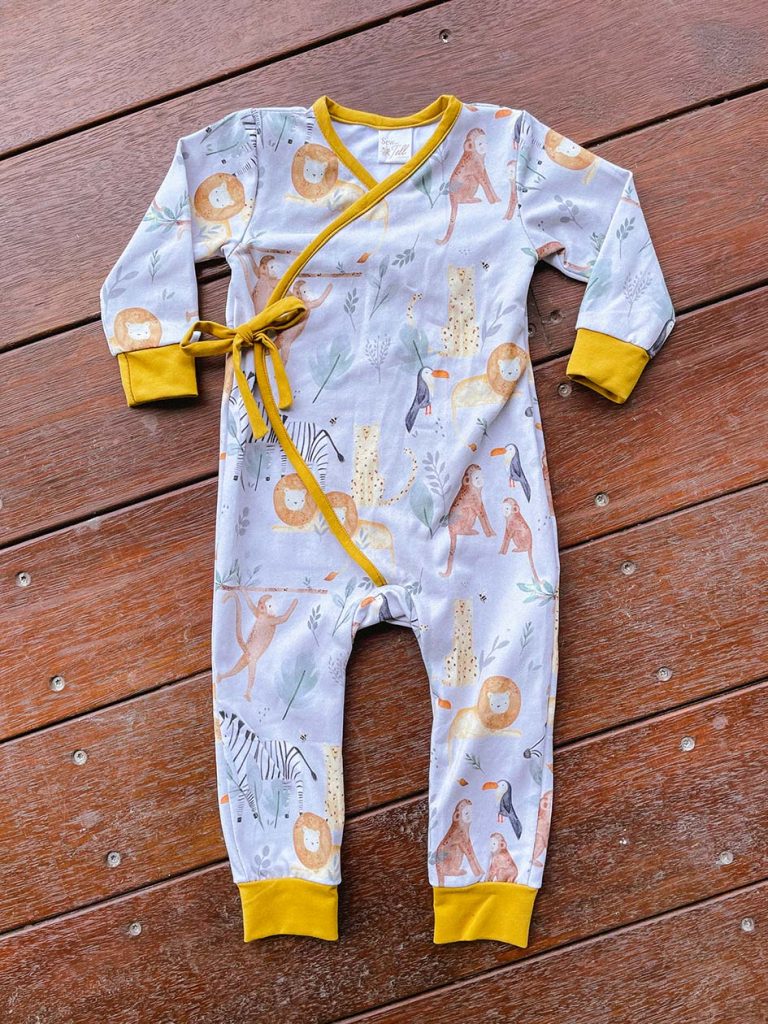
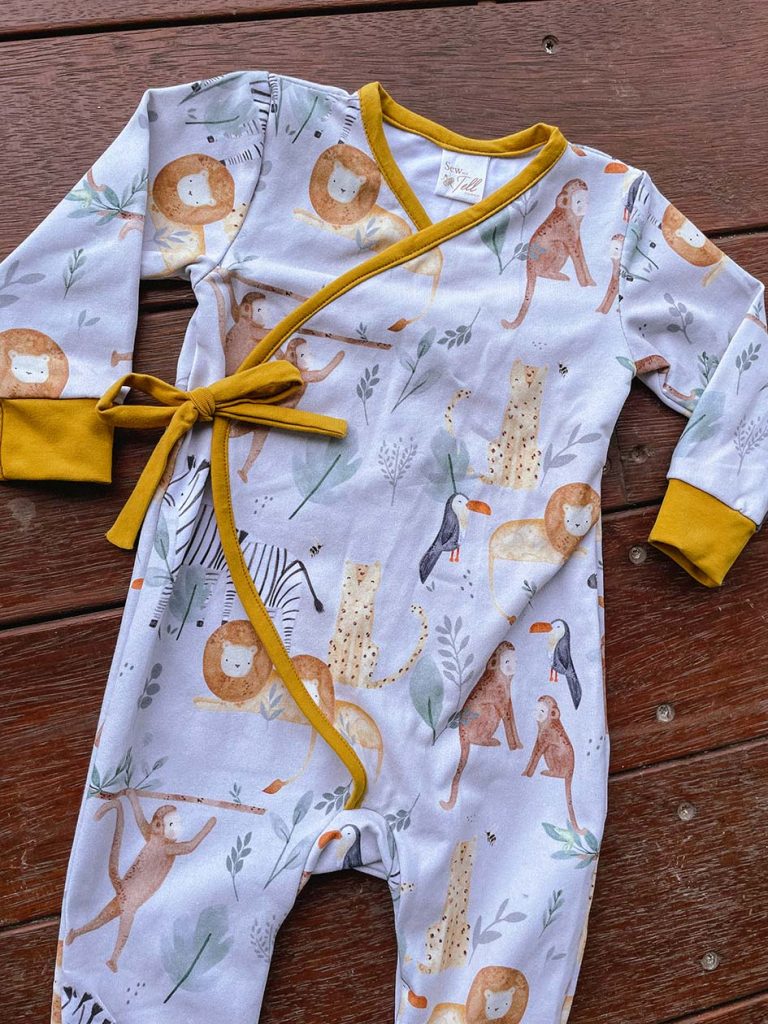
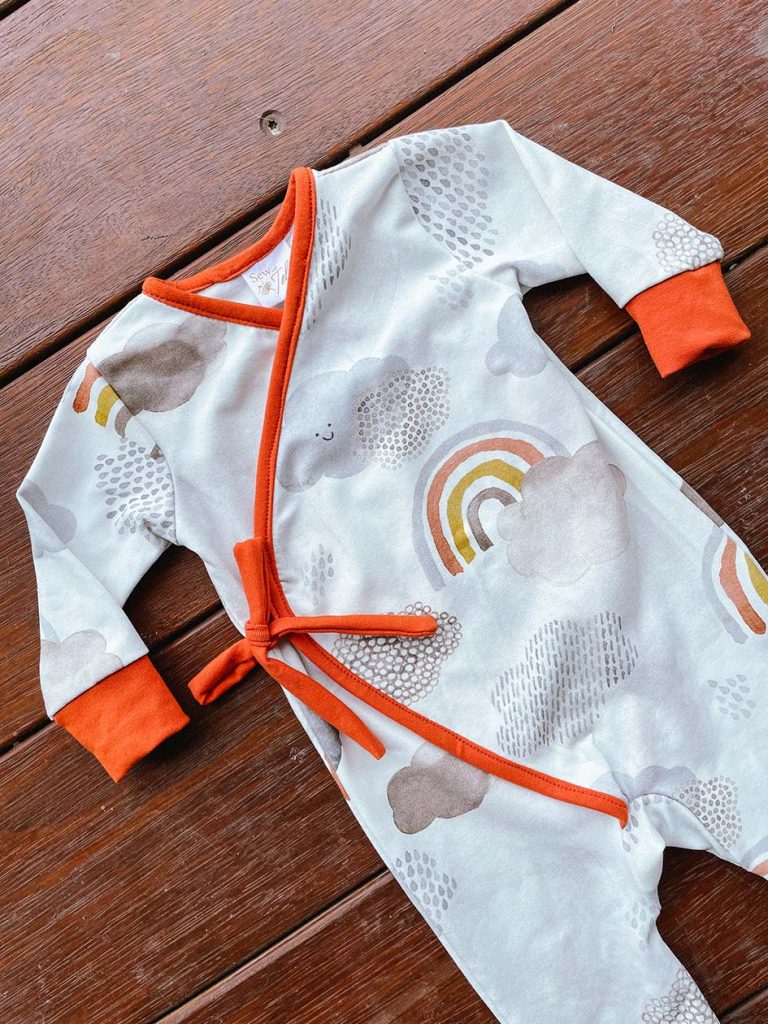
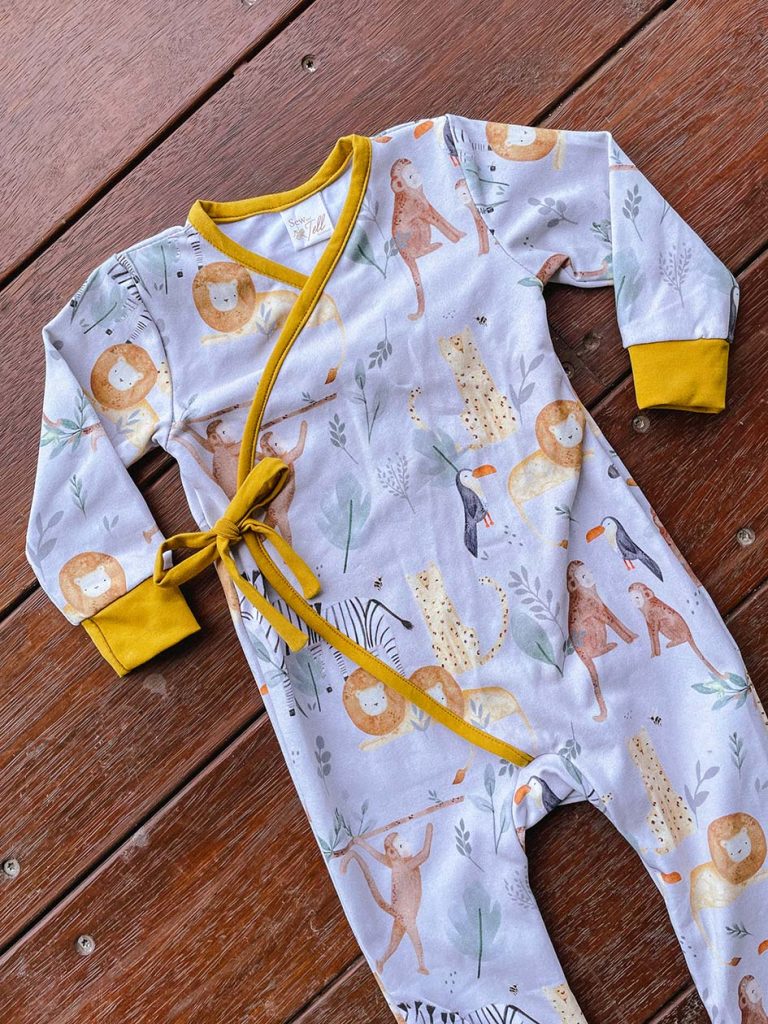
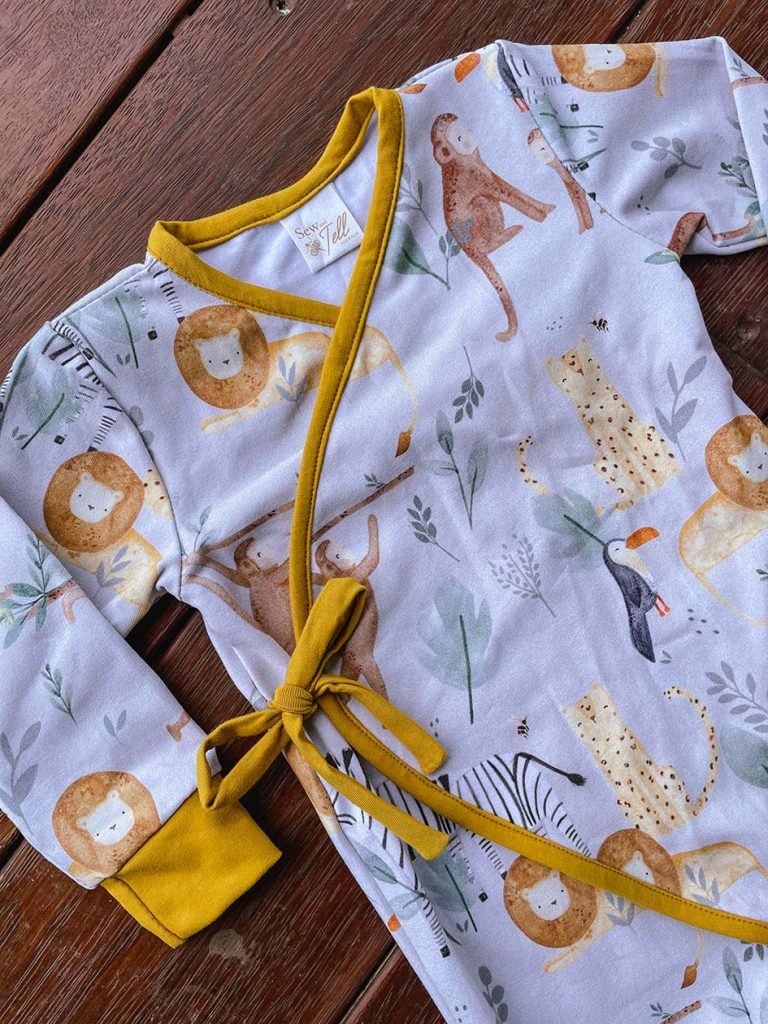
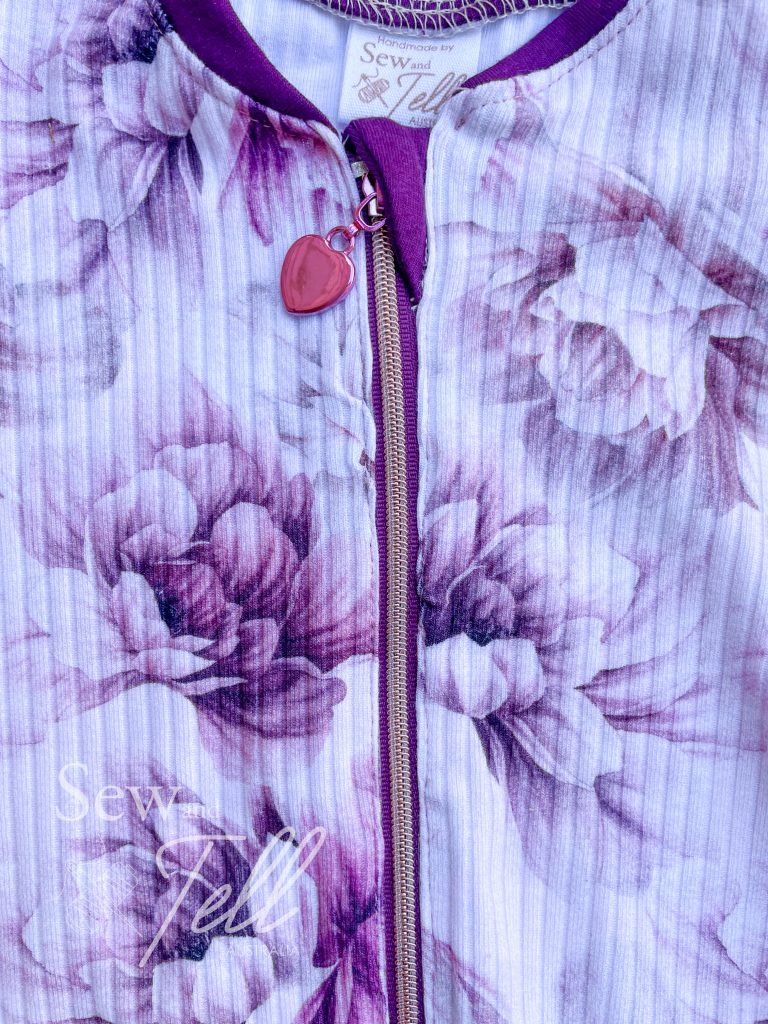
For this piece I chose to make a short leg Zippie from Peek A Boo Pattern Shop. I’ve done a pattern review before about the Classic zip PJ set, as its honestly one of my favourite sleepwear patterns to make. Both my kids LOVE their homemade zippies in funky fabrics. So much more than they ever did their Bonds ones. It also has a really generous size range of Newborn to 10/12.
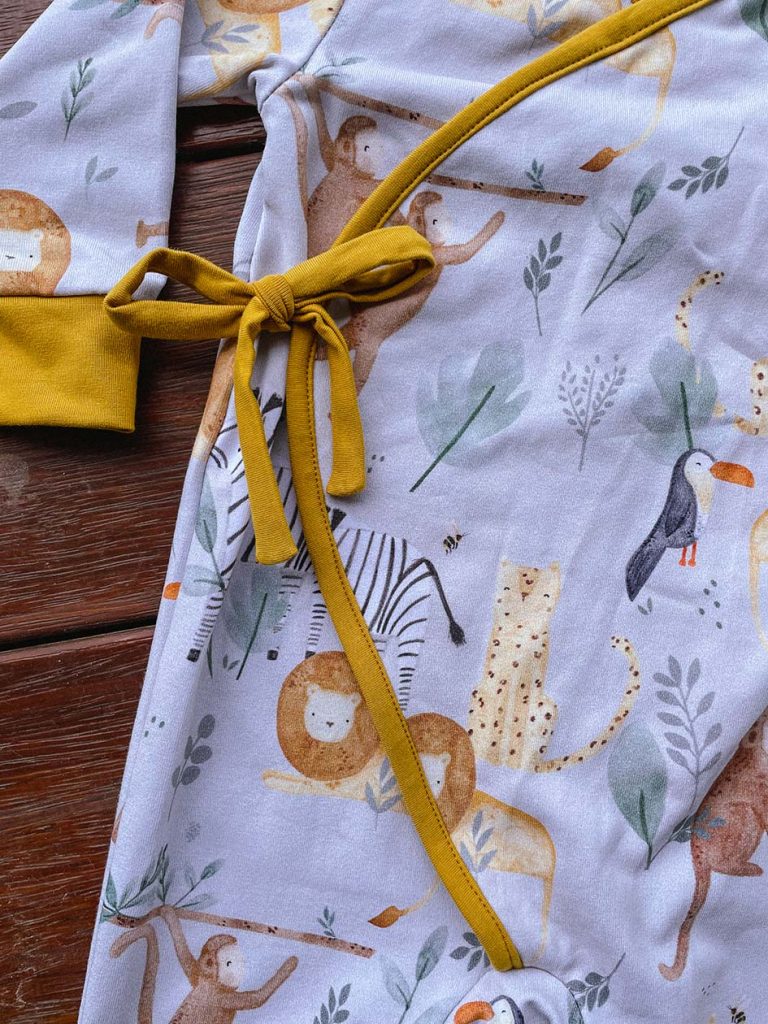
I was also able to use another incredible Australian supplier for this one, Dreamy Bag Hardware. Coincidently, another Tassie based business! I used their ‘Made in Tassie’ zip pull and number 5 zip tape. As the Made in Tassie pull is quite chunky, and I wanted to have a two way zip for ease of nappy changes, I chose to use a slim line pull for the bottom pull, still in the antique brass to keep it within the theme.
So all in all a very Tassie themed sew for my Tassie based friend with her soon to be Tassie born babe!


Seeing the joy on her face when she received these was so worth the trip down there, as was the beautiful 2 days I got to spend with her.
I can’t wait to see her little man in these!
Links:
Video tutorial of the Waves & Wild Over it Alls:
Pattern: Classic Zipper Pj’s
Designer: Peek A Boo Pattern Shop
Fabrics: Clover & Co Fabrics, Ruby Jam Fabrics
Measurements: Various
Size made: Various
Adjustments: None
Pros: So many pros, they are a great one piece zipper pj for kids of all ages
Cons: Not any really!


Links:
The Wrap Up:
Without doubt, the Classic Zip Pj’s are my go-to for any zippered Pj. I have made so many now cause I just LOVE them!!
I originally looked for a pattern because my daughter loved wearing the Bonds Zippies but she then grew out of their size range. I asked in a sewing group and as per usual the incredible sewing community delivered, suggesting the Peek A Boo pattern.
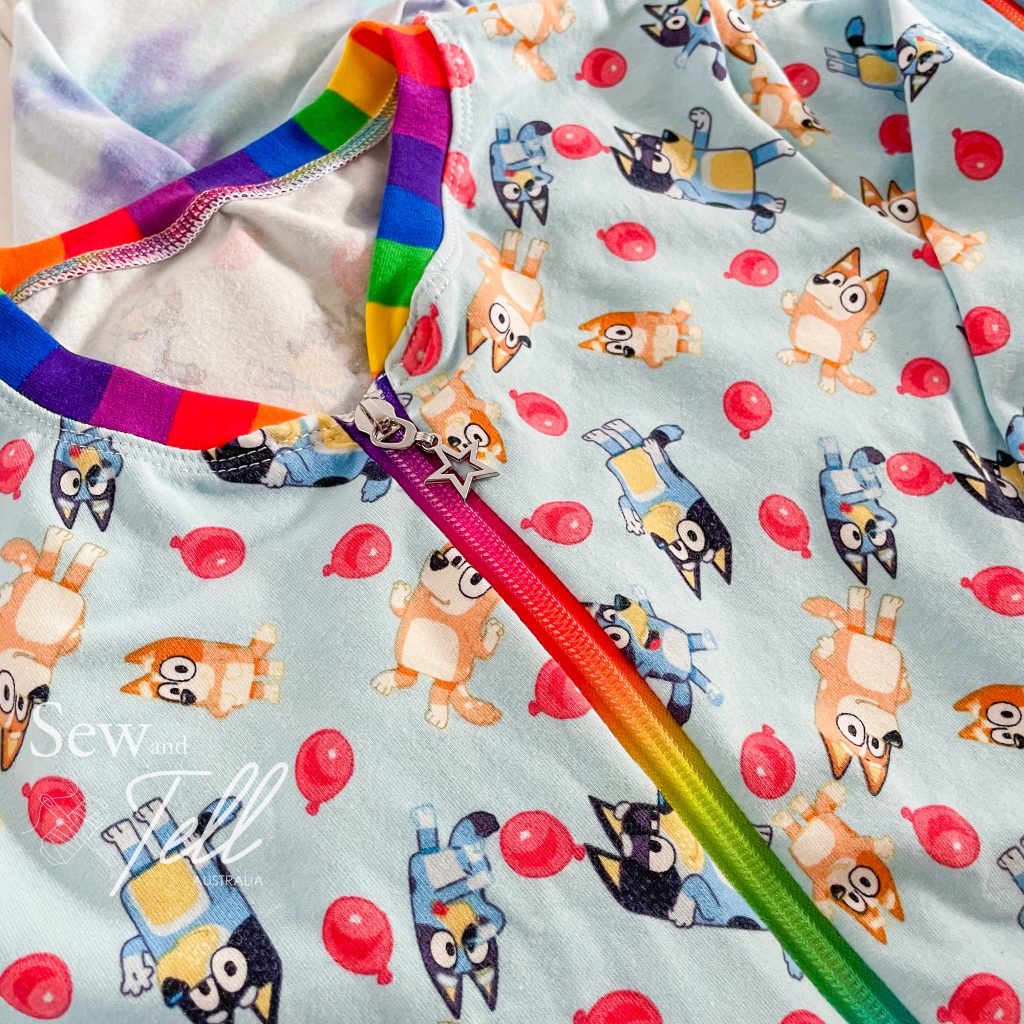
I love that there are 2 styles with the long and short zippie as well as long and short sleeve, so you can mix and match the leg and sleeve length options. There is also a zip guard option, but I tend to do more of a zip guard ‘tab’ if I want to include a zip guard, which just encloses the top of the zip, not the full length of the zip.
I have mainly made them from cotton lycra, but I did make a gorgeous newborn gift from a printed rib knit from Clover and Co fabrics and definitely fell in love with that. I also love using my own zipper tapes and zip pulls. its such a fun way to personalise them even further. I have some Star Wars fabric sitting there that I am going to make a gift from and bought a baby yoda zip pull to go with it. I can’t wait to finish that one and gift it.
One of my top tips for sewing this garment however would be to use washable double sided tape when installing the zip. It can be tricking sewing zips into stretch fabrics, but using a washable tape is a HUGE help. You can get it from more fabric/craft stores like Spotlight and also places Amazon stock it as well.
I have definitely got some great use from this pattern and consider it a staple for my kids wardrobe and I dare say you will too! Now where can I get an adult version….?! hehe
Gallery:


Pattern: Women’s Domino Dolman
Designer: Peek A Pattern Shop
Fabrics: Ribbed Knit from Sew Unique Fabrics
Skill: Beginner
Links:
The Wrap Up:
Have you ever seen a Tee pattern and thought, gee I love the colour blocking or shape on that, I wish they made it as a jumper pattern. Well, there is no reason you can’t use it as a Jumper pattern!
When I had this gorgeous rib knit to sew up from Sew Unique Fabrics, I knew that the Domino Dolman would be perfect for what I wanted with the colour blocking and dolman style sleeves, so I simply sized up! It can be hard to know how much to size up, but a big clue is by looking at the amount of ‘ease’ in a pattern.
Ease is the term used to let you know how tight or loose the final garment will be. For example, if the size chart says a size Large is for bust size 38″ – 40″, and then in the final garment size chart it says the bust size is 41″, then there is a built in ease of 1-3″, meaning the the garment will fit your bust of 40″ PLUS have an extra 1″ around the bust area.
So once you know the ease, you can work out how much to size up by. I wanted a fairly oversized jumper so I went up 2 sizes, but to be honest, I probably could have gotten away with just 1 size up as this pattern has a generous amount of ease. I’m still really happy with the result though!
Hopefully that helps give you a little confidence to think outside the box and not think if a pattern says it is a Tee, it only has to be a Tee. Patterns are whatever you want them to be 🙂
Gallery:


Pattern: Explorer Jacket
Designer: Peek A Boo Pattern Shopo
Fabrics: Forest Friends Softshell – Etsy. Solid Mustard softshell and cuddle fleece – Spotlight
Measurements: Chest: 21″; Height: 35″
Size made: 3T
Adjustments: I had to alter the lining which I’ll detail below
Pros: This is going to be the PERFECT winter. Its so cuddly and warm.
Cons: I chose to line it with cuddly fleece and had quite a few problems. I felt the instructions weren’t that clear on what to do if you were lining with a thicker fleece.

Links:
The Wrap Up:
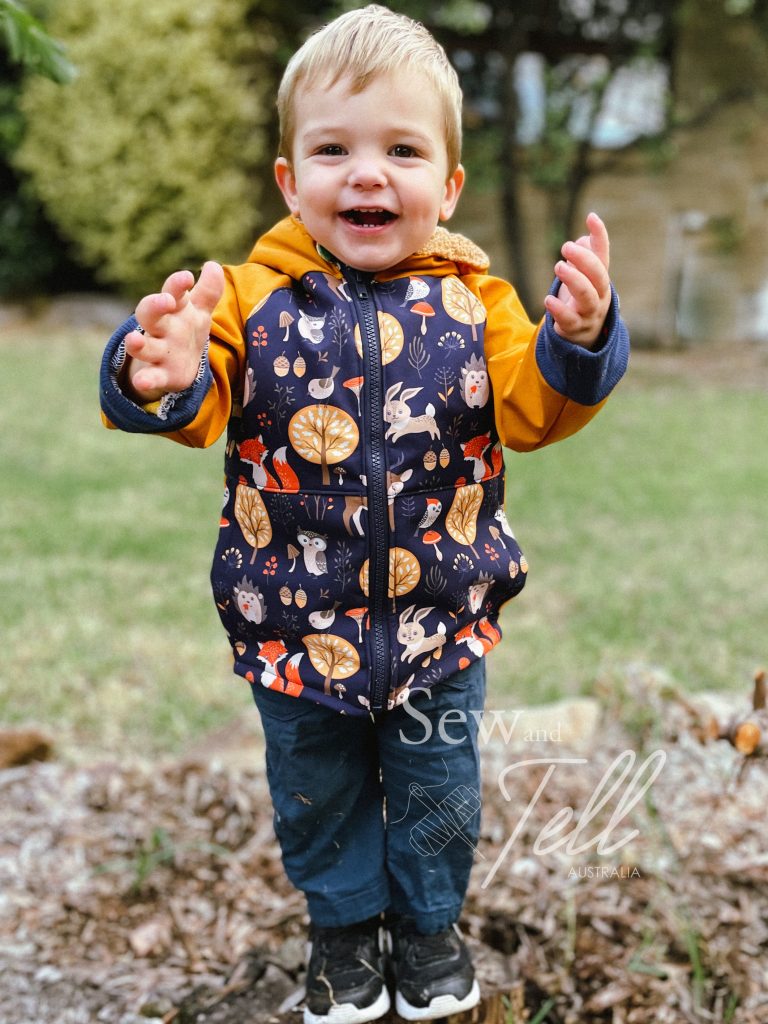
First up, I absolutely ADORE how this one turned out. It is an intermediate pattern and I definitely agree. I couldn’t finish this one while watching TV or being distracted by kids. It had a lot of little finishing touches that required concentration. But, with many things, the effort was totally worth it and I love how it turned out. Didn’t love the 5 needles I broke on the zipper installation alone, haha, but the end product was worth it.
Now, the tricky stuff. As I mentioned above, I broke 5 needles when installing the zipper. Was not a fun time, much cursing was said to my machine that I later had to go to her and apologise for being a bit cranky. I simply think my domestic machine struggled with the layers of soft shell, zipper tape binding, seams and cuddle fleece. I had to hand crank in a few areas as it was dicy. I even used a microtex needle to try and help pierce the soft shell fabric a little easier.
The second issue I had was that the pattern gave a tip to not use cuddle fleece in the sleeve lining as it would likely make the sleeve too bulky and stiff in addition to the soft shell (You can actually do the whole jacket unlined as soft shell generally has a fleecy underside which is fine). I agreed so I didn’t cut my arm pieces to line it and proceeded to sew up my lining as instructed. However, it became apparent when putting the jacket outing and lining pieces together that because of the raglan style sleeve it really wouldn’t work without some kind of arm lining. I was a bit stumped about this for a while and kind of put something together to make it work. It was only after I had done that that I realised I probably should have used a cotton lycra for the arm lining, sewing it to the cuddle fleece. I was just a little disappointed there wasn’t some kind of note next to the tip about not using cuddle fleece in the arms that look at using a lighter fabric instead.

I would also note that even though I sized up, using the cuddle fleece has added a certain amount of bulk and I probably should have gone another size again to account for that.
I have more planned, with no lining this time haha. I definitely think its a great winter jacket pattern. This little guy is certainly going to be the sunshine on my rainy days this winter.
Gallery:


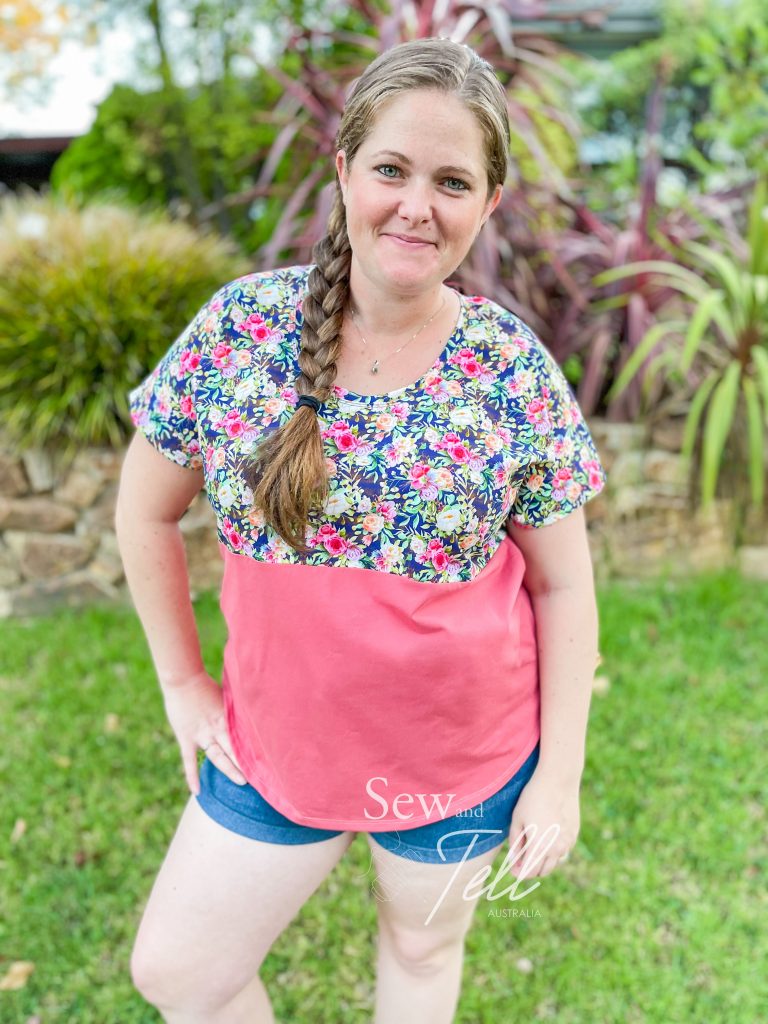
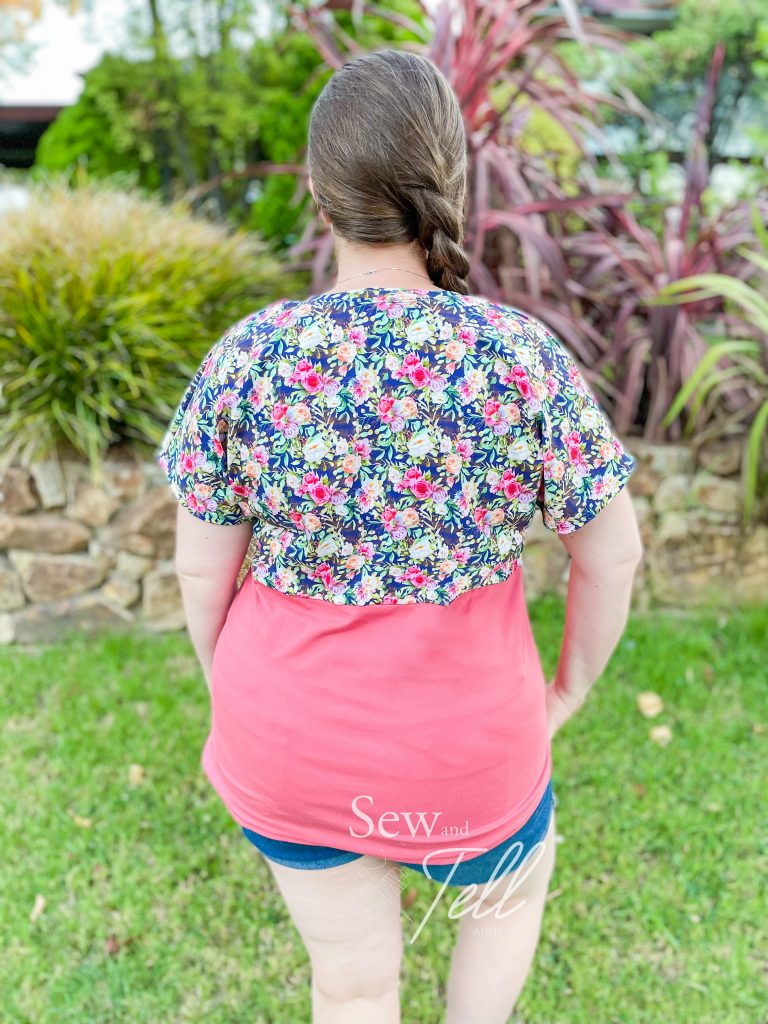
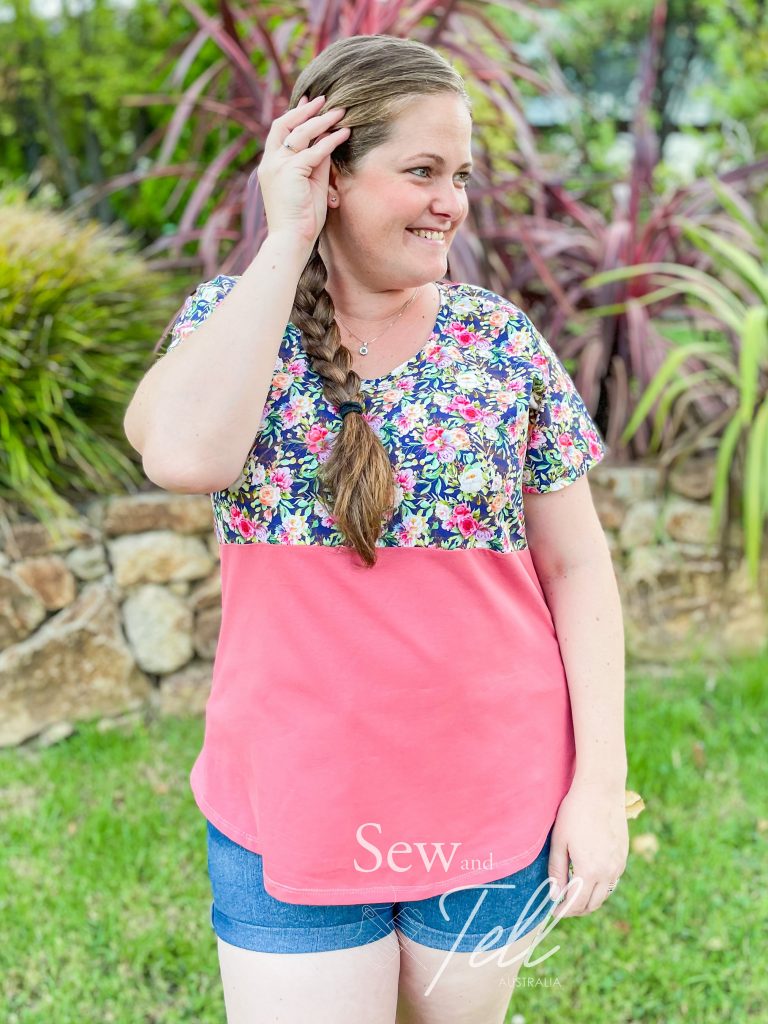
Pattern: Berkley Knot Top
Designer: Peek a Boo Pattern Shop
Fabrics: Bamboo Lycra
Measurements: Bust: 44″ Waist: 39″; Hips: 49″
Size made: 2XL
Adjustments: None
Pros: I love the built in knot option. It adds a fun feature.
Cons: No real cons, I had a little trouble with the top stitching on the knot, but it was user error, not the pattern

Links:
The Wrap Up:
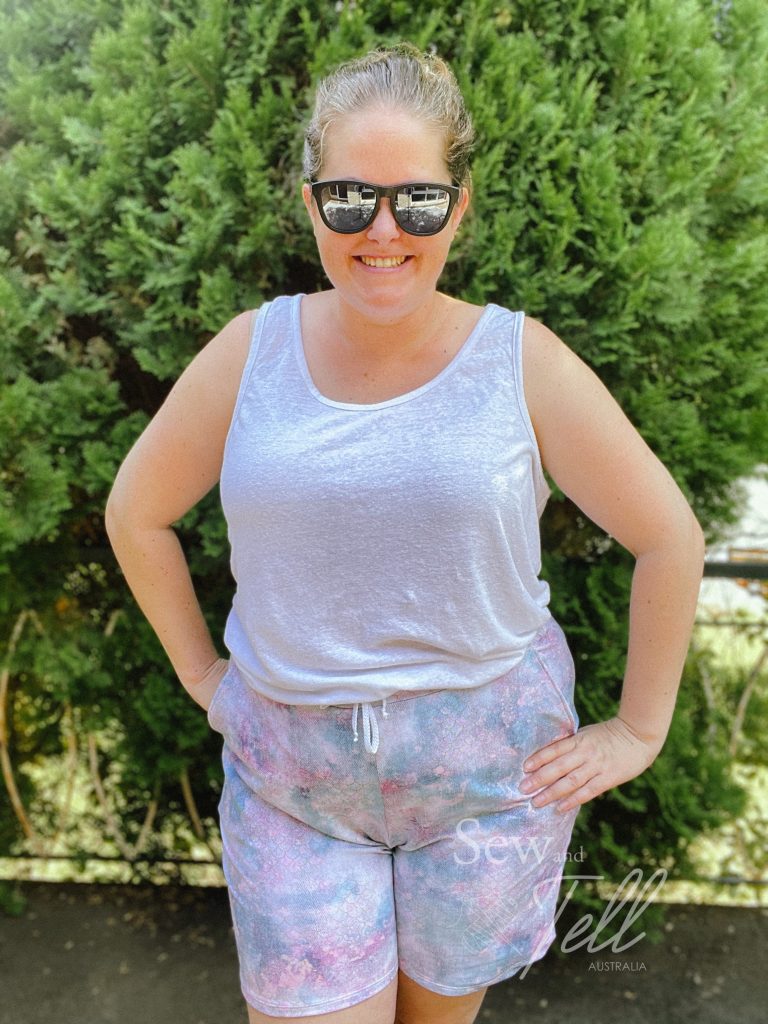
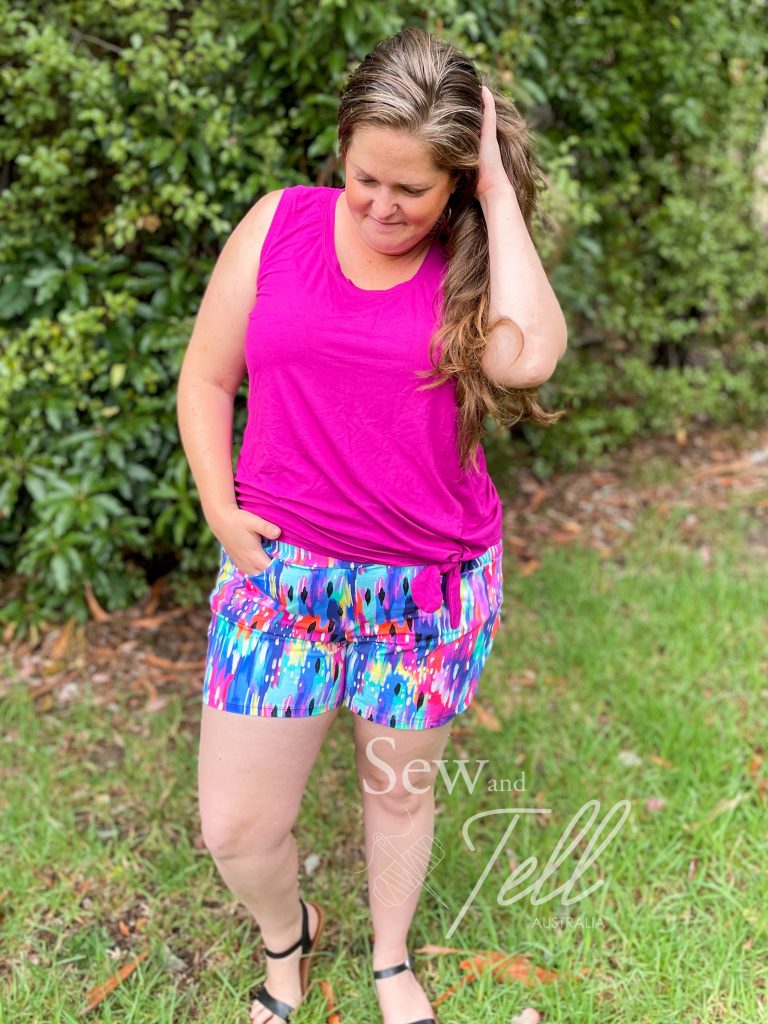
I’ve had this pattern in my stash for a while but never got a chance to make it. But when my Sew Unique fabric subscription came this month (read more about the program here), I knew the shorts I wanted to make and that this top would be the perfect piece to complete it.
It was a really quick sew, the hardest bit was facing the tie pieces, but even that wasn’t too difficult. I did make a mistake when top stitching however. After I had very carefully coverstitched all the way around the edge, I realised I shouldn’t have coverstitched those bits as they are faced and therefore don’t need it.
I think the whole thing took me about 40 minutes to make, so a very quick and easy sew.
I do want to make a note about my fabric choice. This was my first time trying Sew Unique’s bamboo lycra and oh my goodness. It is SO soft and delicious to wear. I have felt other bamboo lycras and this by far my favourite. I have already planned a nightie with the black I have sitting there as well.
I paired this top with a pair of Iris shorts which are SO comfy and the fabric pairing for that one is next level. I can tell this combo is going to get a good workout!


Pattern: Womens Domino Dolman Tee
Designer: Peek a Boo Pattern Shop
Fabrics: Accent fabric – Fabric By Missy Rose, Solid – Sew Unique Fabrics
Measurements: Bust: 45″; Waist: 39″; Hips: 48″
Size made: 2X
Adjustments: Took the sides in a little as it was very roomy
Pros: Such a quick sew! and I love the different colour block options. Nursing Friendly as well
Cons: It was very roomy in the 2X, I would normally make the XL, so will size down for my next one.

Links:
The Wrap Up:
When Amy from Peek a Boo Pattern Shop put the tester call out for this one, I applied straight away. I love a Dolman tee, and the options for this one in terms of colour blocking were super appealing to me.
According to my measurements I fell in the 2X size category, which I made, but to be honest I felt this pattern had quite a lot of ease so it felt very roomy to me. I ended up taking the sides in about an inch on either side which worked well.
It is an incredibly quick pattern to put together, especially with the dolman style sleeve. I can definitely see a few more in my future, it is a great way to mix and match solids and accent fabrics. Also a good way to use up smaller cuts of fabric on the top colour block.
A great essential tee to have in your pattern collection.


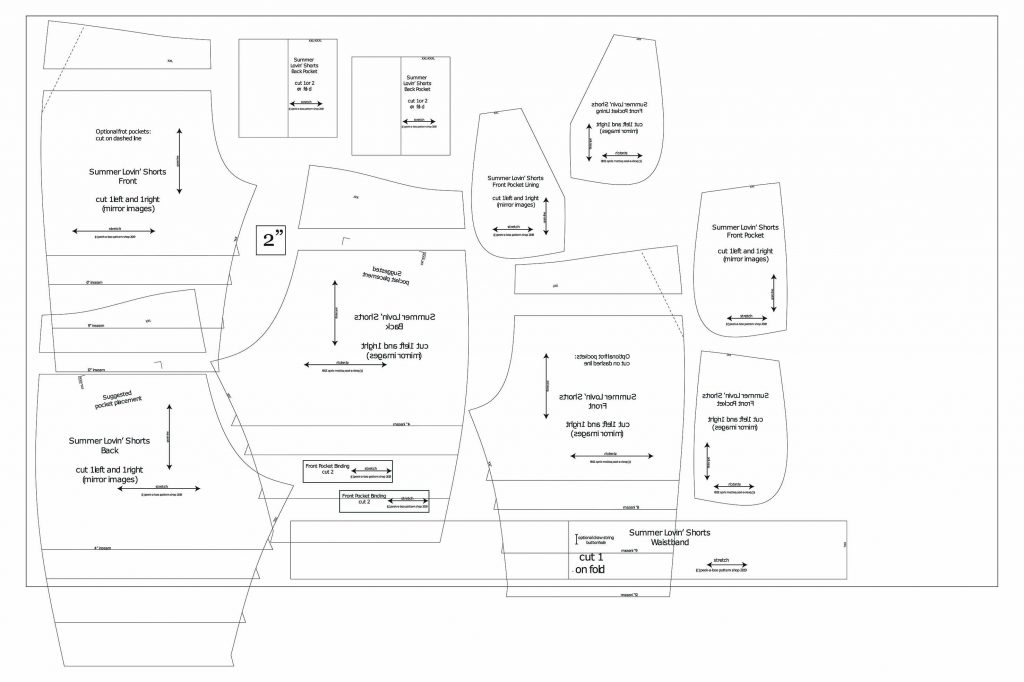
Pattern: Summer Lovin’ Shorts
Designer: Peek a Boo Pattern Shop
Fabrics: French Terry from Sew Unique Fabrics
Measurements: Waist: 39″; Hips: 47″
Size made: XXL
Adjustments: Adjusted the front and back rise by 1.5″
Pros: Very easy pattern and super comfortable. Perfect for, as the title suggests, summer shorts 🙂
Cons: No real cons, but a little size restrictive, it tops out at a XXXL. Hopefully they will revisit it to size up at some point.

The Wrap Up
After my recent success at seemingly cracking the code to my body for pants fitting, I was eager to try some other shorts and these seemed like the perfect comfy, loose summer shorts. I’ve also not made shorts from French Terry before but they are delicious! So soft and comfy.
The construction of these came together incredibly quickly which is always a bonus. If you are an experienced sewer, you should be able to put them together pretty much without looking at the instructions at all. The pockets are simple as are the back patch pockets. I originally cut the back pockets out but during construction I decided I didn’t want them anymore.
This was also the first time I used the program Inkscape to digitally make alterations to my pattern. It was incredibly helpful at playing ‘Pattern Tetris’ as well before I got to cutting. It was a bit of a bug bear of mine that I couldn’t lay out my fabric and place all my pieces down to try and get the most out of my fabric before cutting, but now that I am getting a better understanding of Inkscape, I will be able to do that again.
It is hard for me to learn a new program like this as I am a graphic Designer by trade and Adobe programs are my bread and butter. However, because I have fallen so hard for projector sewing, investing the time to watch YouTube videos on basic functions and how to utilise it is definitely worth it.
So I was able to add the 1.5″ to both rises in Inkscape fairly easily, my next challenge will be to do a Full Bust Adjustment in it. I think thats a while off though, I need to watch a bit more first. If anyone has any YouTube videos to suggest, feel free to comment them below or email me at sewandtellau@gmail.com
Now excuse me while I go make allllll the pants and shorts 🙌🏼
Gallery: