Month: May 2022

  • Pattern Hack – How to create a tunic length from a dress

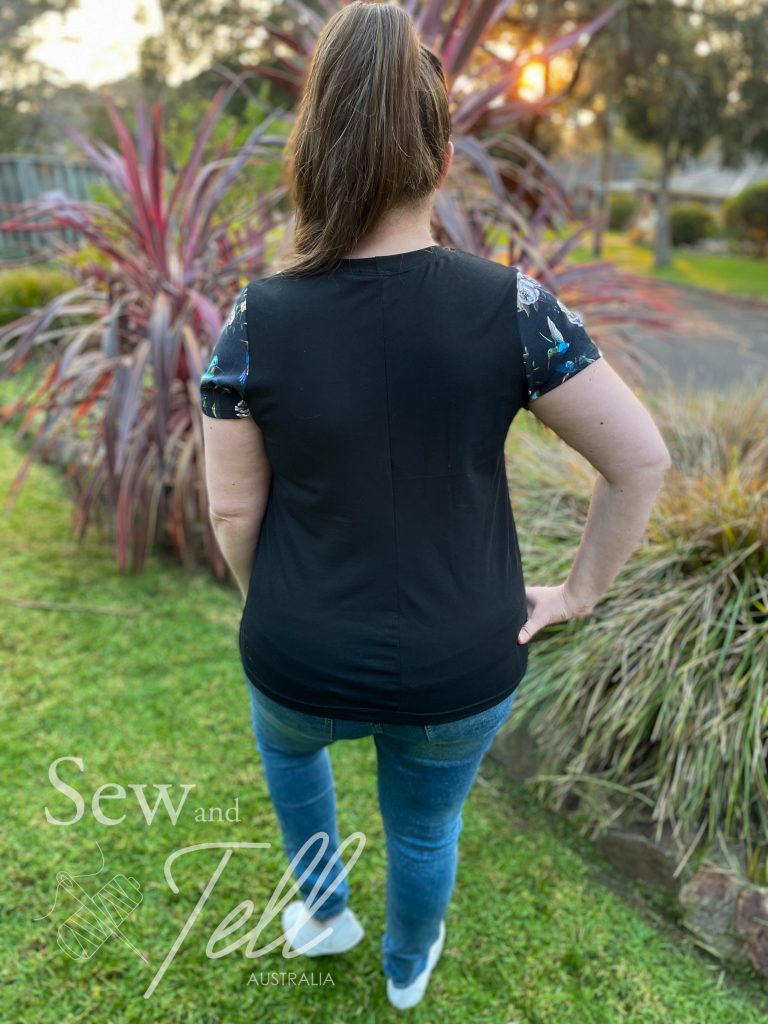
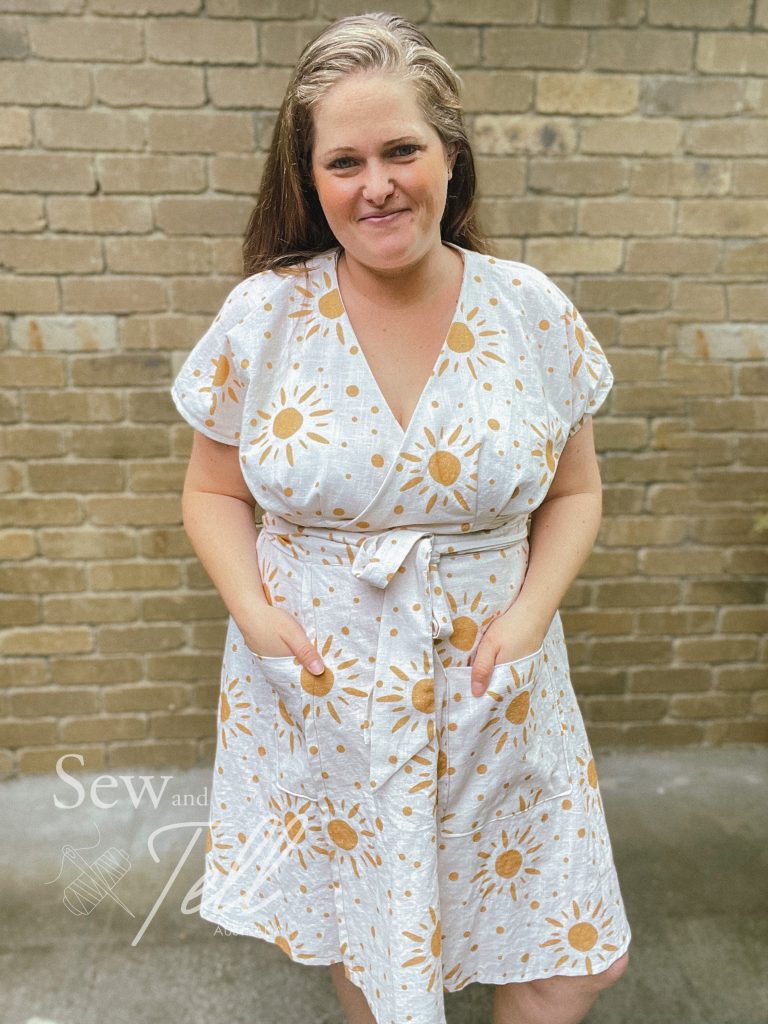
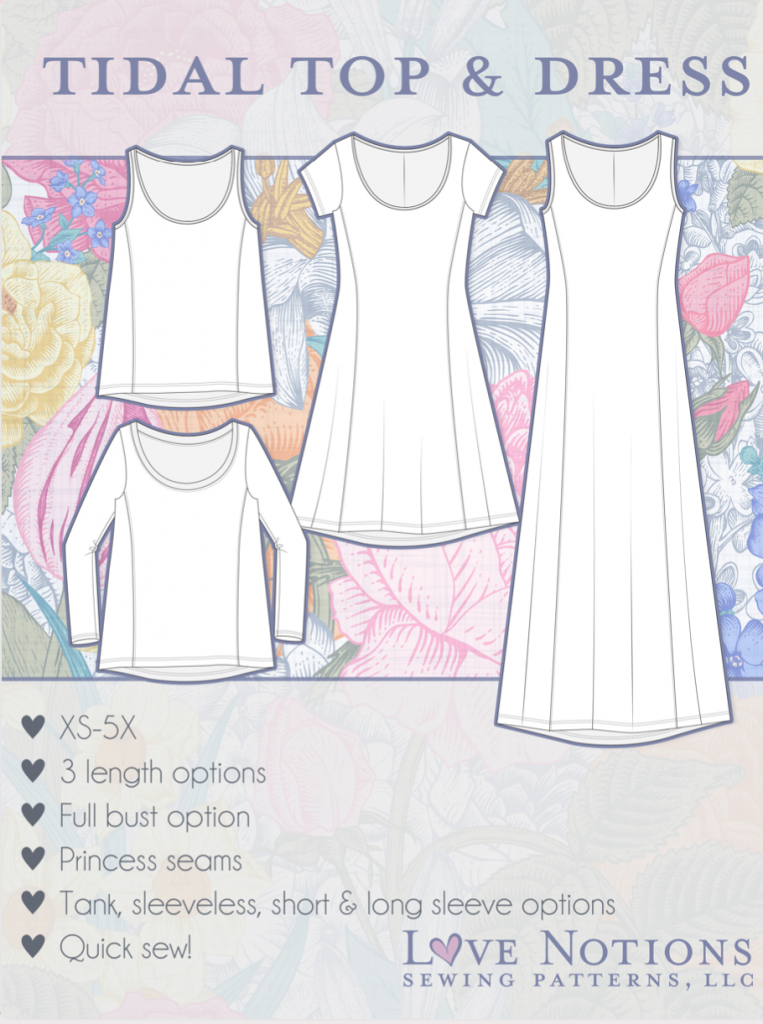
    Pattern: Tidal Dress & Top
    Designer: Love Notions
    Fabrics: Cotton Lycra
    Measurements: Bust: 44″; Waist 39″; Hips 48″
    Size made: XL graded to 2XL
    Adjustments: None
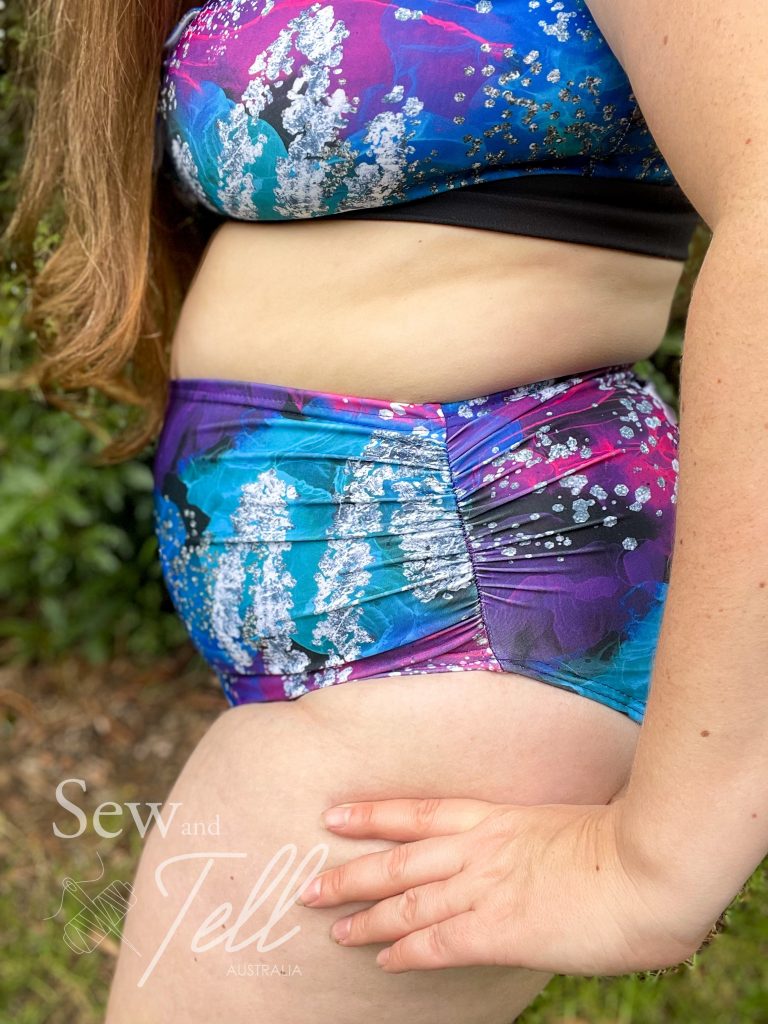
    Pros: I love the panel at the front on this, its great to give the illusion of a trimmer front section, especially if you use a darker fabric for the back panels
    Cons: I had some trouble with the grading and how it sat on my tummy. I think you need to be really careful when grading out given where the panel is.

    Links:

    The Wrap Up:

    I recently helped retest the Love Notions Tidal top and while I loved all the length options, I felt that it would lend itself really well to tunic length, so here are my top tips on shortening any dress pattern to tunic length!

    Decide on the length:
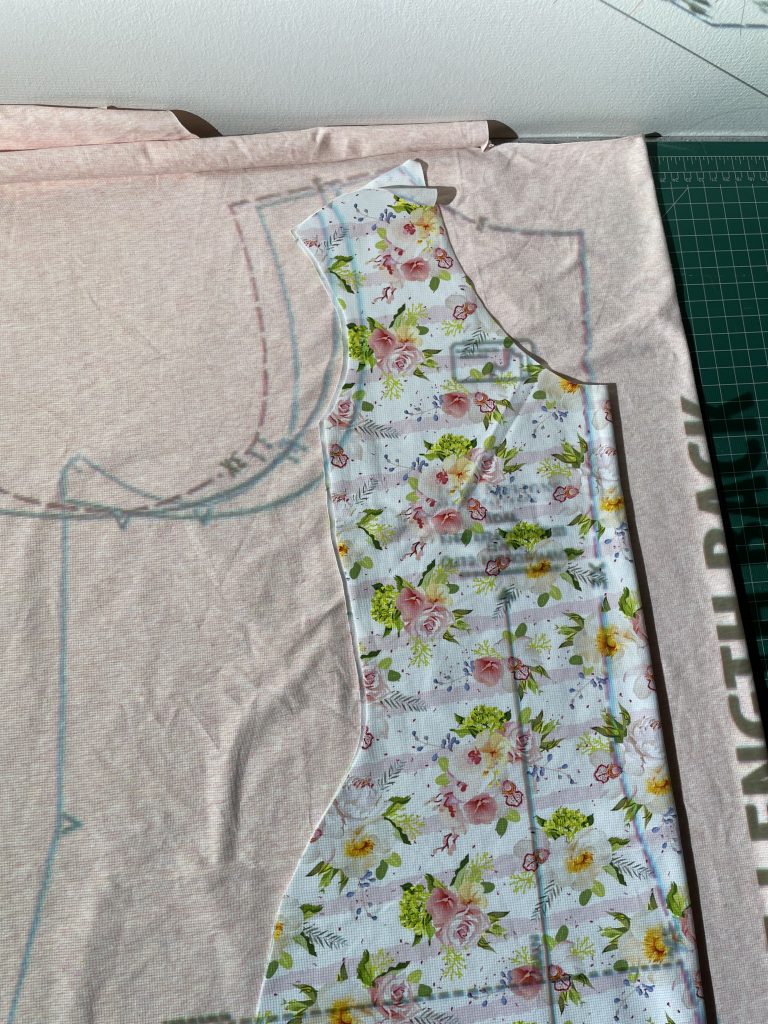
    Tunic length is typically longer than shirt length, but shorter than dress, so usually sitting somewhere at the top to mid thigh. I took the above knee piece and cut across the piece about 6 inches up from the bottom of the dress pieces.

    Once I had done that to the front, I loaded my back piece and sat the front piece I had already cut out on top of the back piece.

    I made sure that I lined up my shoulder pieces so that I would know where to cut it along the bottom.

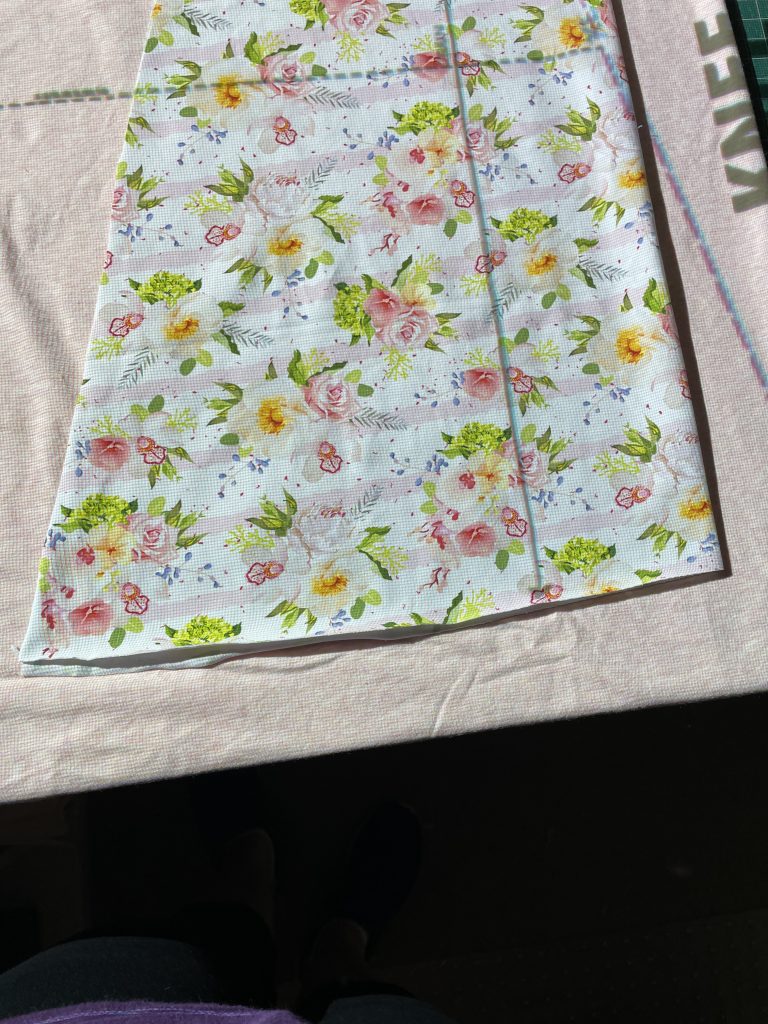
    Once you’ve cut your front and back pieces, you can carry on with cutting the other pieces as normal and put it all together as per the instructions. If the pieces don’t line up exactly, don’t worry too much, you can even them out before you hem it.

    I’m really happy with how the tunic length of this one turned out, as well as the normal shirt l made. The blocking on this one is so flattering, worth giving it a try for sure!

    Gallery:

  • Pattern Review of the Colour Block My Way Hoodie

    Pattern: Your Way Hoodie
    Designer: Ellie & Mac
    Fabrics: Wattle Hill Fabrics
    Measurements: Chest:21.5″; Waist 20.5″; Hips 21″
    Size made: 2T
    Adjustments: None
    Pros: This is a great jumper for heading into Winter. Colour blocking is always a win for me.
    Cons: The neckline was a little small in testing, but it was fixed for the final file.

    Links:

    The Wrap Up:

    Before I had a boy, I used to think that I wouldn’t be able to dress him up cute and fun like a girl, but I’m pleased to say, I was wrong.

    True, it is a different kind of cute and fun, but, especially because I make Ted’s clothes, I have control over the fabrics. I have stocked up the last two years on super cute designs to deck out his wardrobe. The forest friends I used in this test is a personal fave of mine. I bought the same print in Soft Shell last year and I was wrapped when I saw that Wattle Hill Fabrics had it in a French Terry. I was very excited to pull this one out for the finals of this test along with their jogging sweater fleece in these really earthy colours to compliment it.

    Pretty fabrics aside, this jumper was a super easy make and came together quite quickly. The fun ‘secret’ pocket at the front is a nice touch and perfect for any kid that likes to stash things away. Be it snacks, trucks, dirt… the options are endless! Haha, just don’t forget to check the pocket before you wash it!

    I’m also a fan of the dropped shoulders look and hood coming into the colder weather. Very happy with this make indeed!

    Gallery:

  • Pattern Hack – How to use a Tee pattern as a Jumper/Sweater

    Pattern: Women’s Domino Dolman
    Designer: Peek A Pattern Shop
    Fabrics: Ribbed Knit from Sew Unique Fabrics
    Skill: Beginner

    Links:

    The Wrap Up:

    Have you ever seen a Tee pattern and thought, gee I love the colour blocking or shape on that, I wish they made it as a jumper pattern. Well, there is no reason you can’t use it as a Jumper pattern!

    When I had this gorgeous rib knit to sew up from Sew Unique Fabrics, I knew that the Domino Dolman would be perfect for what I wanted with the colour blocking and dolman style sleeves, so I simply sized up! It can be hard to know how much to size up, but a big clue is by looking at the amount of ‘ease’ in a pattern.

    Ease is the term used to let you know how tight or loose the final garment will be. For example, if the size chart says a size Large is for bust size 38″ – 40″, and then in the final garment size chart it says the bust size is 41″, then there is a built in ease of 1-3″, meaning the the garment will fit your bust of 40″ PLUS have an extra 1″ around the bust area.

    So once you know the ease, you can work out how much to size up by. I wanted a fairly oversized jumper so I went up 2 sizes, but to be honest, I probably could have gotten away with just 1 size up as this pattern has a generous amount of ease. I’m still really happy with the result though!

    Hopefully that helps give you a little confidence to think outside the box and not think if a pattern says it is a Tee, it only has to be a Tee. Patterns are whatever you want them to be 🙂

    Gallery:

  • Pattern Review of the Chill Tee & Hoodie

    Pattern: Chill Tee & Hoodie
    Designer: Ellie & Mac
    Fabrics: Sew Unique Fabrics French Terry
    Measurements: Chest: 38.5″; Waist 35.5″; Hips 42″
    Size made: L
    Adjustments: None
    Pros: I love the colour blocking on this one. It’s a great casual tee.
    Cons: I think this is more suited toward a tee than a hoodie. If I was to make it as a hoodie I would size up at least 2 or 3.

    Links:

    The Wrap Up:

    I’ve made two Chill Tee & Hoodies now and they have both turned out great for hubby. I do prefer this as a tee however as I think it is too tight fighting for a traditional hoodie. The feedback my husband gave was that you would definitely need to size up at least 2 or 3 for it to be more comfortable.

    I do love the colour blocking on this one however, I think its a great simple one to showcase your fabrics without being too overpowering. It’s also a very quick and simple pattern to put together.

    The hoodie I made from a french terry and the chill tee is a cotton lycra. The french terry is part of the current release from Sew Unique Fabrics winter range, check out the the super cool bomber jacket I made for Ted that I did a write up for here.

    Gallery:

  • Pattern Review of the Kids Billie Bomber

    Pattern: Kids Billie Bomber
    Designer: Petite Stitchery Co
    Fabrics: Sew Unique Fabrics French Terry
    Measurements: Chest: 21″; Waist 20.5″; Hips 21″
    Size made: 2T
    Adjustments: None
    Pros: Is fully lined and has the option of either snap enclosure or Zip
    Cons: Being fully lined it is quite labour intensive, but so worth it.

    Links:

    The Wrap Up:

    I have had this jacket in my head for AGES! So when I had this strike fabric to sew, it was the perfect opportunity to help it come to life. I chose the Billie Bomber as I liked the size range it came in with the option of the baby bomber as well as the kids version.

    I love the ‘varsity’ type look and I thought it would be just the cutest on Ted, so I looked for a varsity font online (which I’ve linked above), measured the area I wanted it to go and then typed out the letter and projected it onto my panel piece to see if it was a good size. From there I traced it onto a piece of paper so I could use it as a template to cut out my white cuddle fleece and main fabric letter. Final stage was sewing each layer onto the panel in a normal straight stitch and voilá! Perfect!!

    Projecting the letter on my panel

    After I had done that I followed the rest of the instructions as per normal to make up the jacket. This was my first time doing a proper lined bomber style jacket and while it wasn’t overly hard, it was time consuming and I had to concentrate a lot on what I was doing. Especially as this is designed to be a fully reversible jacket, so there are extra steps to ensure all seams are enclosed and neat. I am pleased with the final result and glad to have added to my skill set. Plus I have a super spunky almost 2yo ready to rock this winter. Stop growing so fast baby boy!

    Gallery:

  • Pattern Review of the Elodie Wrap Dress

    Pattern: Elodie Wrap Dress
    Designer: Closet Core Patterns
    Fabrics: Linen blend from Spotlight
    Measurements: Bust: 44″; Waist 39″; Hips 48″
    Size made: 16 graded to 20
    Adjustments: Took an inch out of each shoulder seam and shaped the back
    Pros: Love the loose flowyness of this dress, as well as the wrap neckline
    Cons: I had trouble fitting the neckline with my boobs. I also misunderstood the instructions for the wrap tie part.

    Links:

    The Wrap Up:

    I bought this pattern quite a while ago with grand plans to make it for summer and never got around to sewing one up. So naturally I decide halfway through Autumn that it is the right time to finally get one done. haha

    This pattern is designed for woven fabrics and I chose a beautiful linen blend from Spotlight to try. This is quite a fabric hungry pattern so I think I ended up buying 3.5m for my dress and I closely followed the cutting guide so I didn’t run out of fabric. The linen worked well but I’d love to try it in a twill as well.

    This was my first time sewing a Closet Core pattern, despite owning a few of Heathers patterns, and I must say I’m pretty impressed. While they don’t have projector files, they do have A0 files that are layered so I was able to use those effectively.

    Being a curvier body, I used their 14-32 pattern range which is based off a curvier block and I think its a size D cup for breasts which suits my body better. I sewed up a 16 graded to an 18 at the waist and hips which was great for the waist and hips, but I had some issues with the cross over section not sitting properly over my boobs so I ended up taking an inch out of each shoulder seam and at the back neckline which helped correct it mostly.

    I did really love the pleats under the bust and at the back, I think they are a really nice feature and help give the bodice shape for the bust without using darts. Thats the first time I’ve used a pattern like that and I thought it was really effective. I do think I probably need more ‘space’ for my boobs, so I will have to research how to achieve that with this style.

    I also had some issues with the hole for the tie area. I don’t think I read the instructions properly to begin with and when it came time to open up the hole in the waistband to pull the tie through, I had a world of trouble as I had done it wrong. But, with my trusty unpicker and a little bit of creative sewing, I got it to work and it doesn’t look half bad either.

    I will definitely make this pattern again, I will just have to pay closer attention to the tie area for a cleaner finish next time.

    Gallery:

  • Video Tutorial of the Brindille & Twig Harem Romper

    Pattern: 85 – Harem Romper
    Designer: Brindle & Twig
    Fabrics: Forest Friends – Spotlight; Solid Cotton Lycra – Sew Unique Fabrics
    Skill: Beginner
    Materials & Notions: Meant for knit fabrics, 4 x snaps for closure
    Machines: Overlock machine / Serger – If you don’t own one, you can use a small zig-zag stitch in place of the serged seam.

    Links:

    The Wrap Up:

    The number 85 pattern from Brindille & Twig, the Harem Romper is an easy, ADORABLE, casual pattern. It’s a fun day project that will look good in almost any fabric. Also perfectly unisex!

    Meant for medium weight knit fabrics, it comes in sizes preemie – 6T. See the video tutorial below that goes through step by step how to put this pattern together. A great staple for those cooler months and perfect to layer with your longer sleeve tees.

    Gallery:

  • Pattern Review of the Fit To Be Tied Bikini Top & Busy Bee Bottoms

    Pattern: Fit To Be Tied & Busy Bee Bottoms
    Designer: Rad Patterns & Patterns for Pirates
    Fabrics: Accent Fabric – Sew Unique Fabrics, Swim Lining and Power Netting – Textile Offcuts Lilydale
    Measurements: Bust: 44″; Waist: 39″; Hips: 48″
    Size made: Top – L; Bottoms – XXL
    Adjustments: I took about 2 inches out from each shoulder strap
    Pros: Making your own bathers is second only to making your own undies. Having bathers that feel good to wear and don’t send a blow to your self confidence is a HUGE pro
    Cons: Working with swim fabric is tricky, but with lots of clips it is doable

    Links:

    The Wrap Up:

    Fit To Be Tied Top:
    Being larger busted, it can be hard to find bathers that fit well and have me feeling comfortable. I like to show a little cleavage, I think it helps draw attention away from my tummy and I actually don’t mind my boobs. But it can be hard to find the proper amount of coverage. This bather top is the perfect amount blending of all the thing I love and has 3 cup sizes.

    I made the Large with the full bust cup and really like how it turned out. My first test pair that I made was a little long in the straps though, so I ended up taking about 2 inches on both shoulder straps and it helped a lot.

    I used swim fabric from Sew Unique which has a gorgeous vibrancy and doesn’t go see through when it gets wet and lined it with a plain white swim lining.

    One of my favourite things about this pattern is the little tie detail. I think it looks so cute and adds the right amount of detail to give this pattern a bit of pizazz. There is a bottoms and one piece option for this pattern as well which has tie pieces at the thighs, but I preferred a different bottoms pattern.

    Busy Bee Bottoms:
    I think swim bottoms are probably one of the hardest things to get right and feel comfortable and confident in. Especially if you are carrying a little extra weight like I am. I am super self conscious about how my tummy can look in bathers, and am particularly concerned people will think I’m pregnant and ask me when I’m due. (I’ve had it happen more than once urgh)

    The first pair I made were an unlined high waisted pair with ruching at both the sides and front and back. While they were ok, and the ruching looked cute, I felt that the high waisted actually made my tummy look worse. Once they were pulled up over my tummy it made it look much more rounded and unflattering. I also thought that because I hadn’t lined them, there wasn’t as much support in there keeping everything ‘in’. I had a look at some of my RTW bathers and they seamed to all have the power netting in them as a lining so I thought I would line my final pair in the netting.

    I also thought I would try sizing down one size as I was on the cusp of the XL and XXL, hoping it would help hold everything in a little better. So the final pair I made were Midi’s, ruched at the sides and fully lined with power netting.

    In the end I think I probably should have left it at the XXL as once I lined it with the power netting they because a little tight which you can probably see in the photos. I have another pair planned and I will be keeping them as the XXL. The Midi and side ruching however were the perfect choice. I am actually planning another pair now with a colour blocked front panel and centre side ruching which I think will be ever more flattering. Once I’ve made them I will do a tutorial on how to achieve the look and I’ll be sure to link it here.

    In a world of bathers that just keep creeping higher and higher up your bum with the cuts they do, it’s nice to finally have a pair with full bum coverage, a flattering front and cute bikini top. I can’t wait to wear these to my sons swimming this week ❤️

    Gallery: