Inspiration, Tips & Tricks

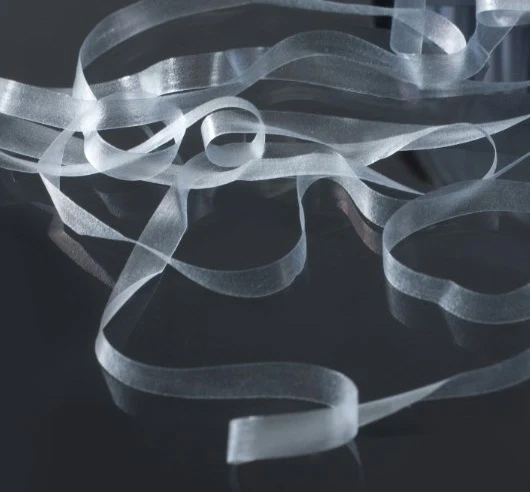
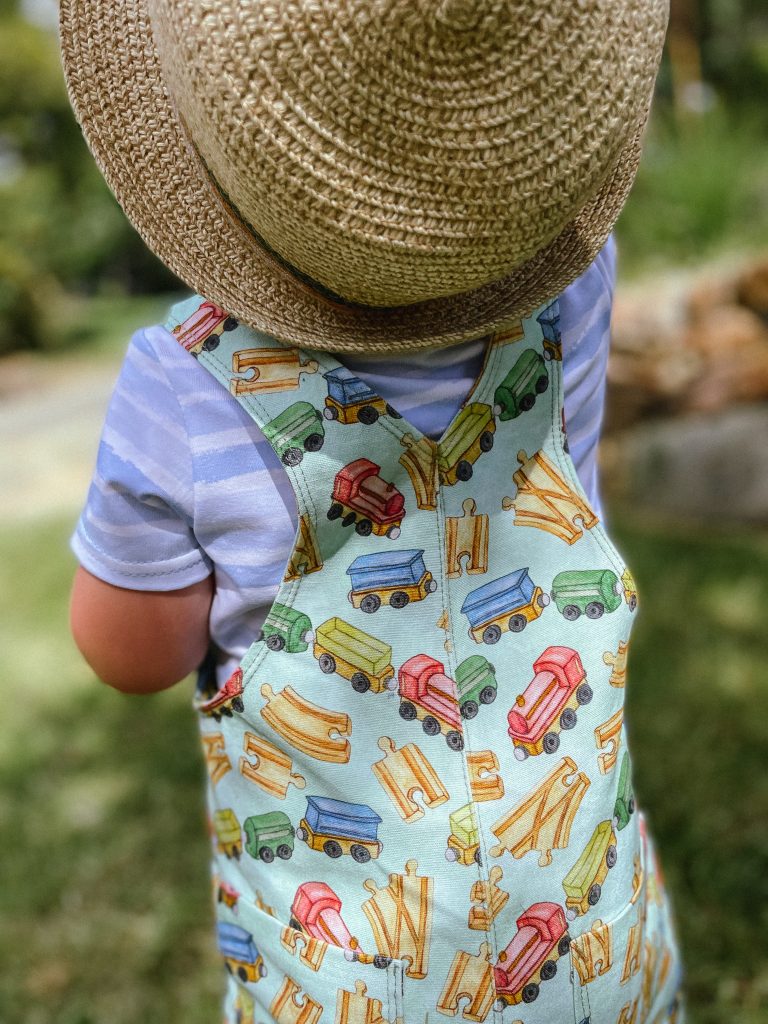
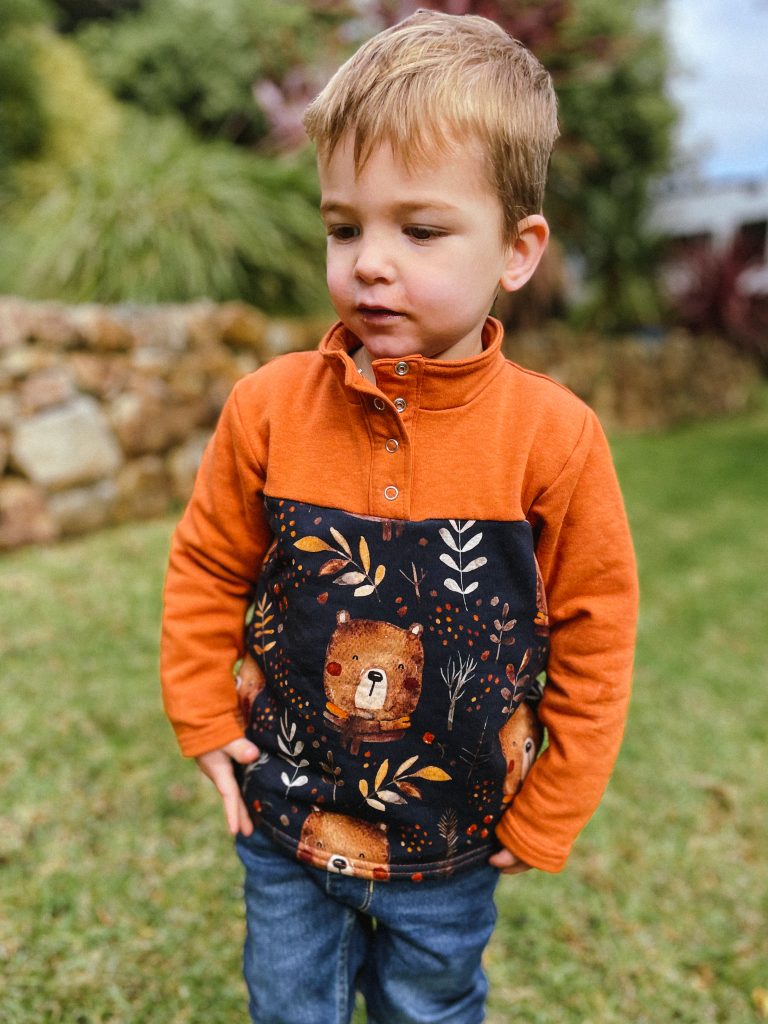
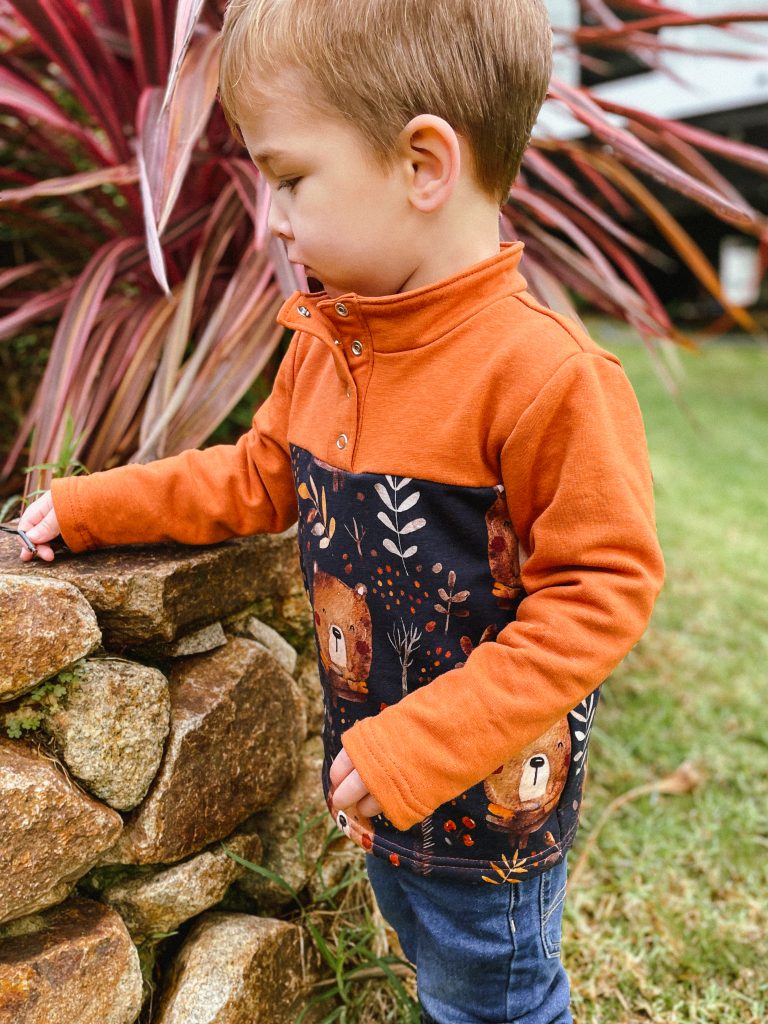
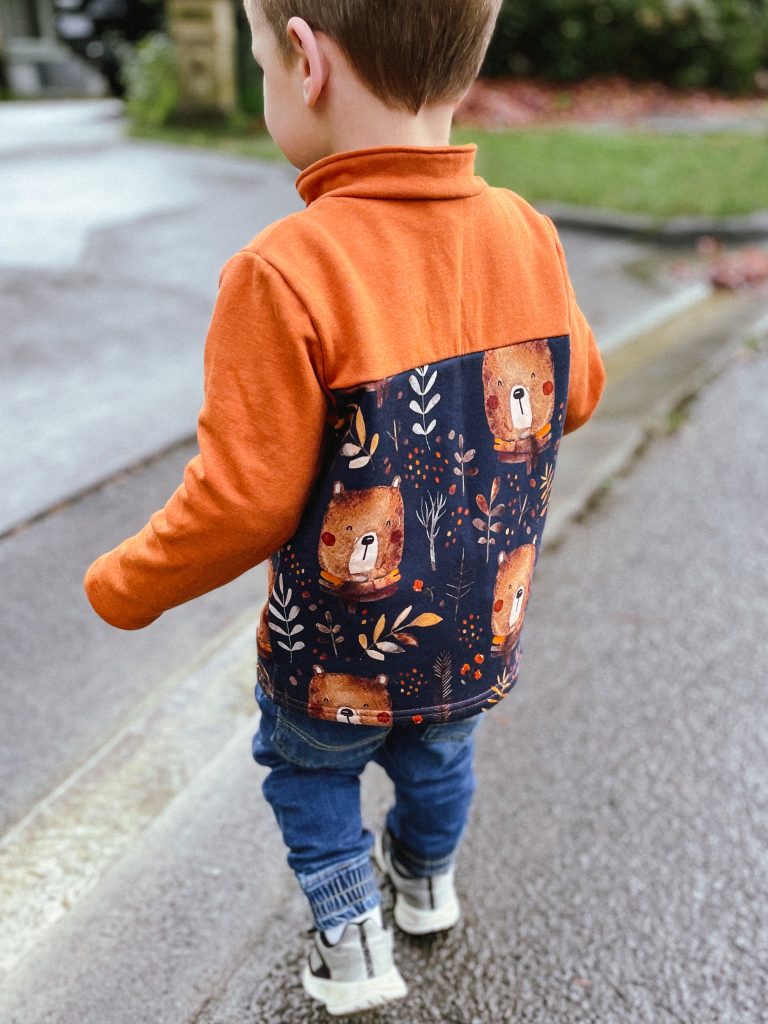
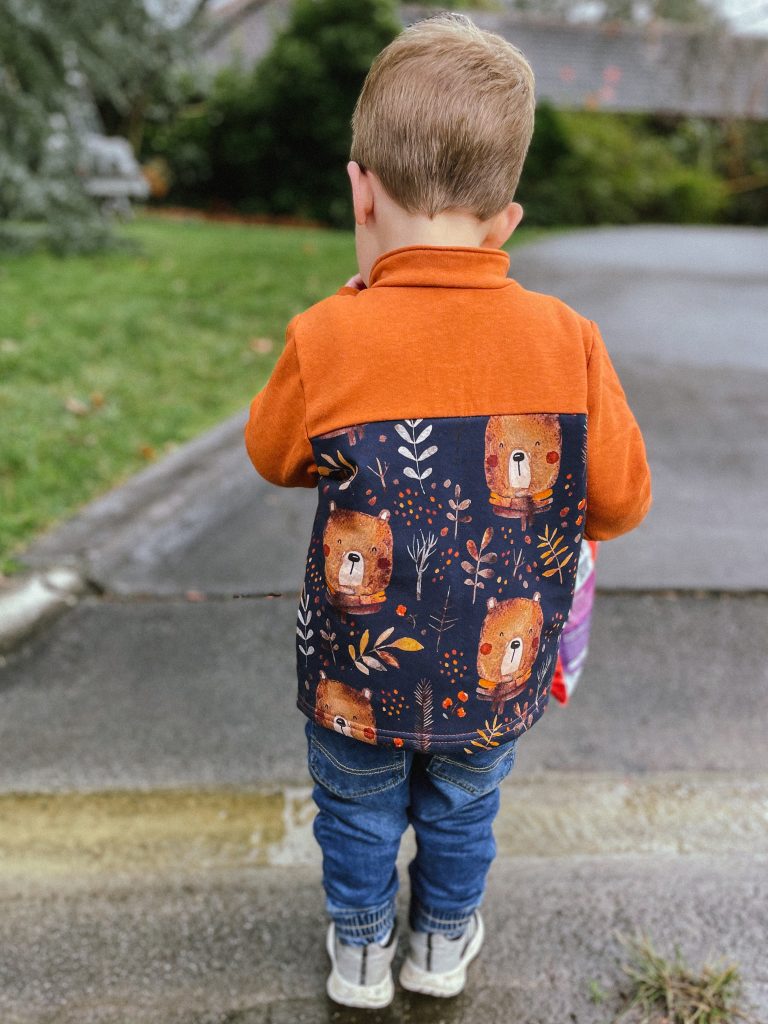
  • Stretching the Limits: The Magic of Clear Elastic in Sewing

    Today, we’re about to unravel one of the best-kept secrets in the sewing world: clear elastic. Whether you’re a seasoned stitcher or just beginning your sewing adventure, this unassuming, translucent material is about to become your new best friend. Clear elastic brings a bit of magic to your sewing projects, and we’re here to spill the beans on why it’s a must-have in your toolkit.

    The Pros of Clear Elastic:

    1. Stabilizing Stretch Fabrics:
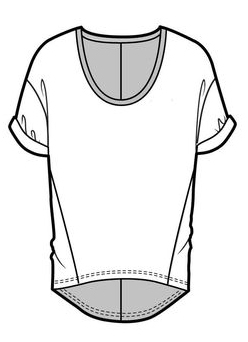
    Imagine sewing a comfy T-shirt, only to have it stretch out of shape after a few wears. Clear elastic comes to the rescue! It stabilizes stretch fabrics like a pro, ensuring your creations maintain their shape and fit.

    2. Hidden Support:
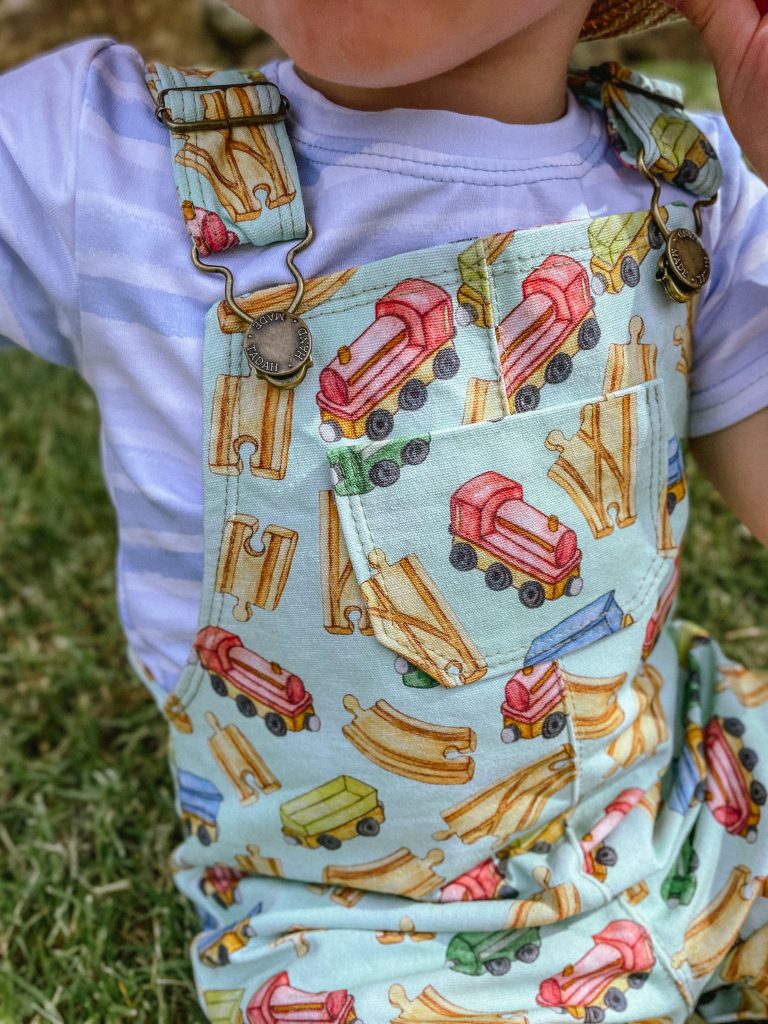
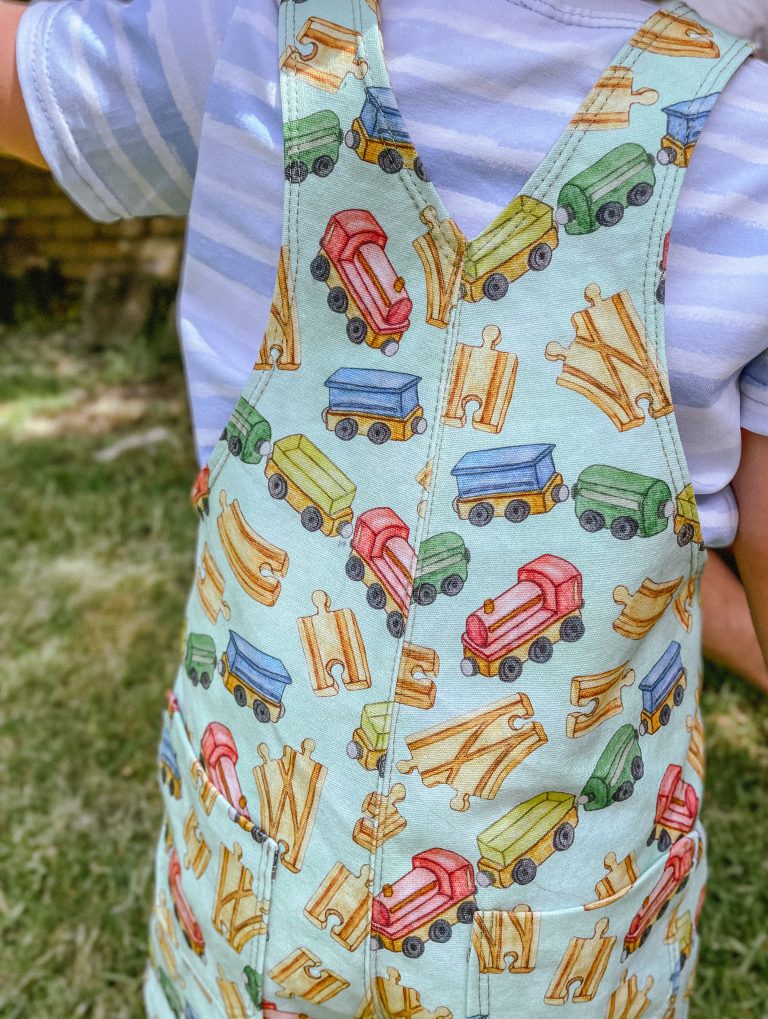
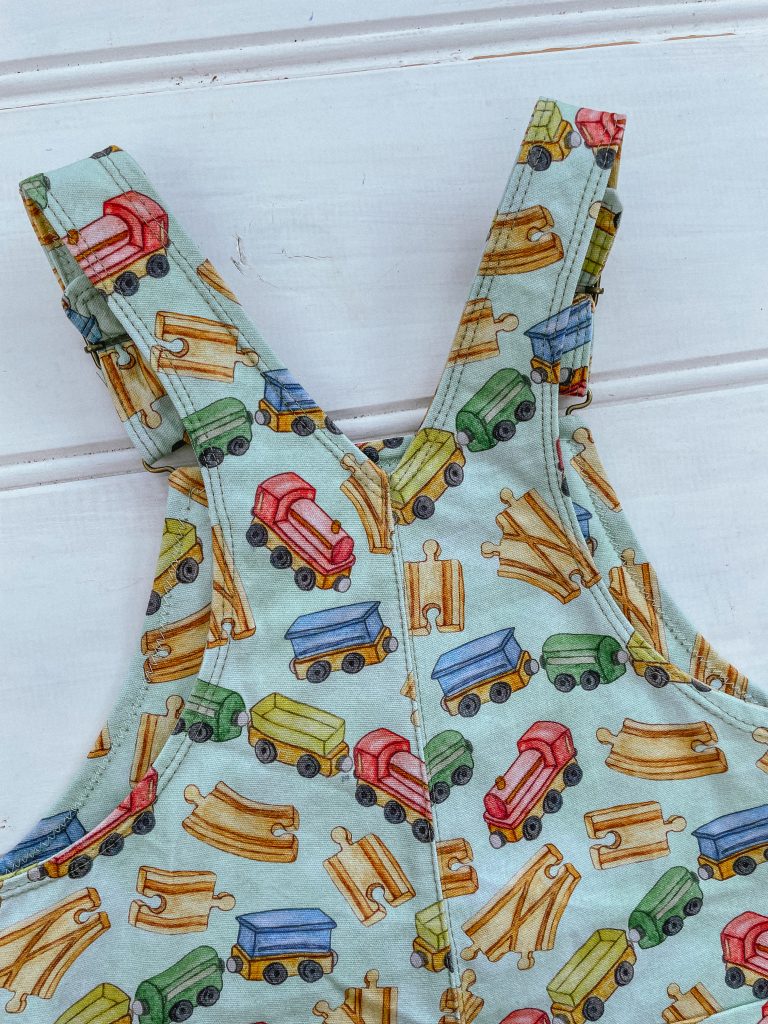
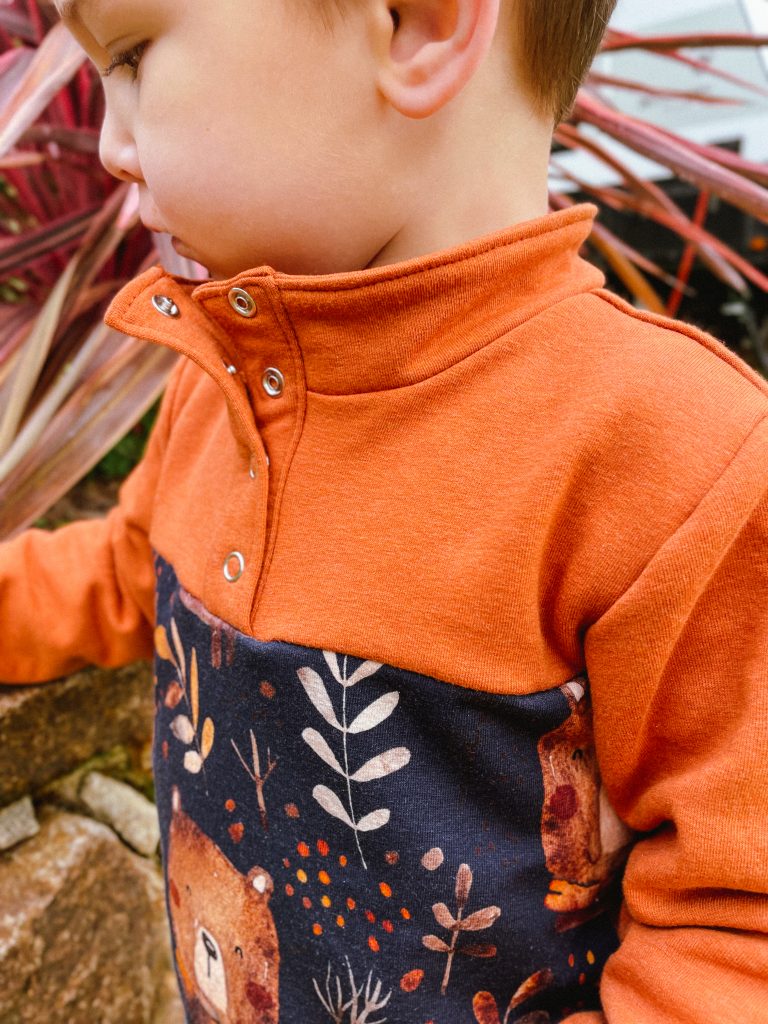
    Clear elastic has a superpower – it’s virtually invisible when sewn into fabric. This makes it perfect for those behind-the-scenes jobs, like providing support in swimwear, lingerie, or anywhere you want hidden strength without visible stitching lines.

    3. Durability:
    Let’s face it; we want our sewing creations to stand the test of time. Clear elastic is not only strong but also durable, so you can count on your projects lasting for many sewing seasons to come.

    4. Easy to Sew:
    You don’t need to be a sewing wizard to work with clear elastic. It’s beginner-friendly! You can stitch it right into your seams or apply it with zigzag stitching along the fabrics’ edge. Easy-peasy!

    5. Preventing Shoulder Droop:
    Ever had a dress or top where the shoulders start drooping over time? Clear elastic can be your hero here. It helps to prevent stretching and sagging, so your garments look fresh and perky.

    Tips for Sewing with Clear Elastic:

    1. Use a Stretch Needle:
    Your sewing machine will love you for this one. When working with clear elastic, use a stretch or ballpoint needle. It helps prevent skipped stitches and fabric damage. I use a size 90/14.

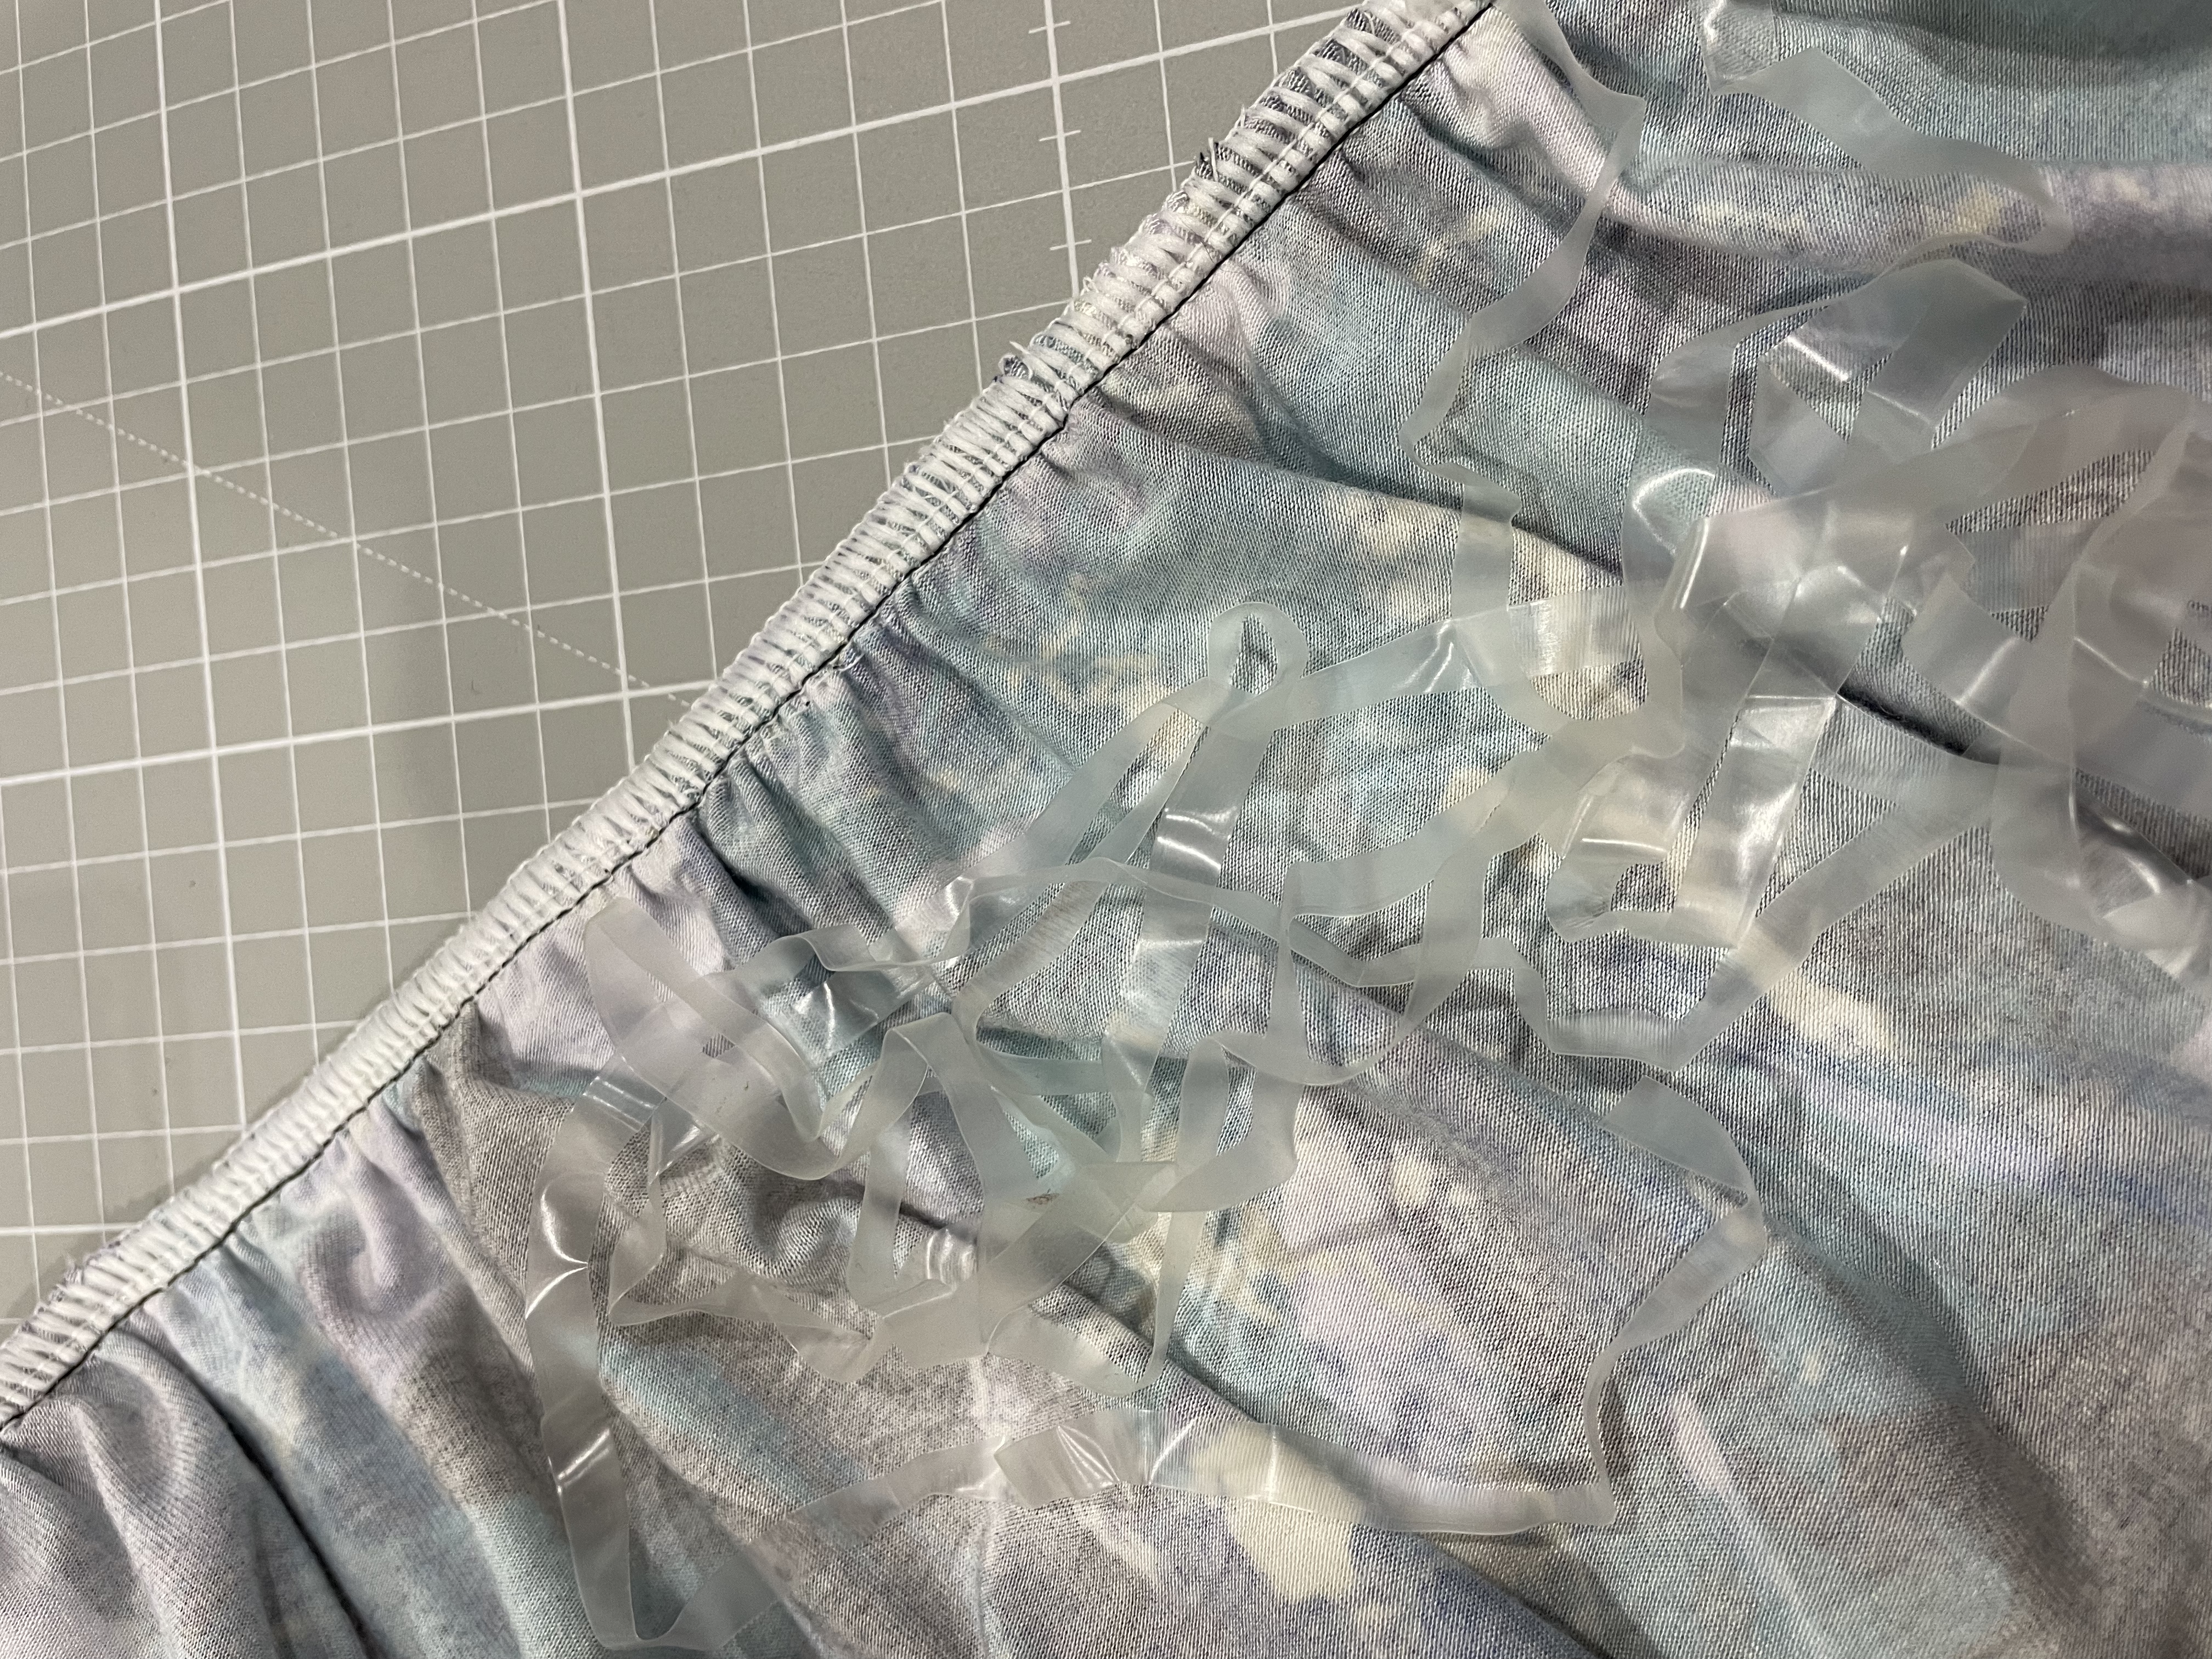
    2. Keep it taught as You Sew:
    Here’s a nifty trick: ever so gently stretch the clear elastic as you sew it to match the fabrics’ stretch. Basically keep it really taught while sewing. This prevents puckering and ensures a comfy fit. Also don’t forget to secure the start and finish with a back stitch!

    3. Practice on Scrap Fabric:
    If you’re new to clear elastic, don’t worry! Practice on scrap fabric first to get the hang of it before diving into your main project. This will give you the chance to check the tension settings as well and make any adjustments if needed.

    4. Get Creative:
    Clear elastic isn’t just for seams. Get imaginative and use it in different ways, like adding it to cuffs, necklines, or waistbands for that extra structure and flair.

    And there you have it, folks – the not-so-secret magic of clear elastic in sewing. It’s versatile, invisible, and oh-so-helpful in keeping your sewing creations looking sharp. So, the next time you’re stitching up a storm, don’t forget to let clear elastic work its wonders. And when it’s time to care for your precious creations, remember this tip: consider hand washing or using a gentle cycle to prolong the life of your elastic and your hard work.

    Happy sewing!

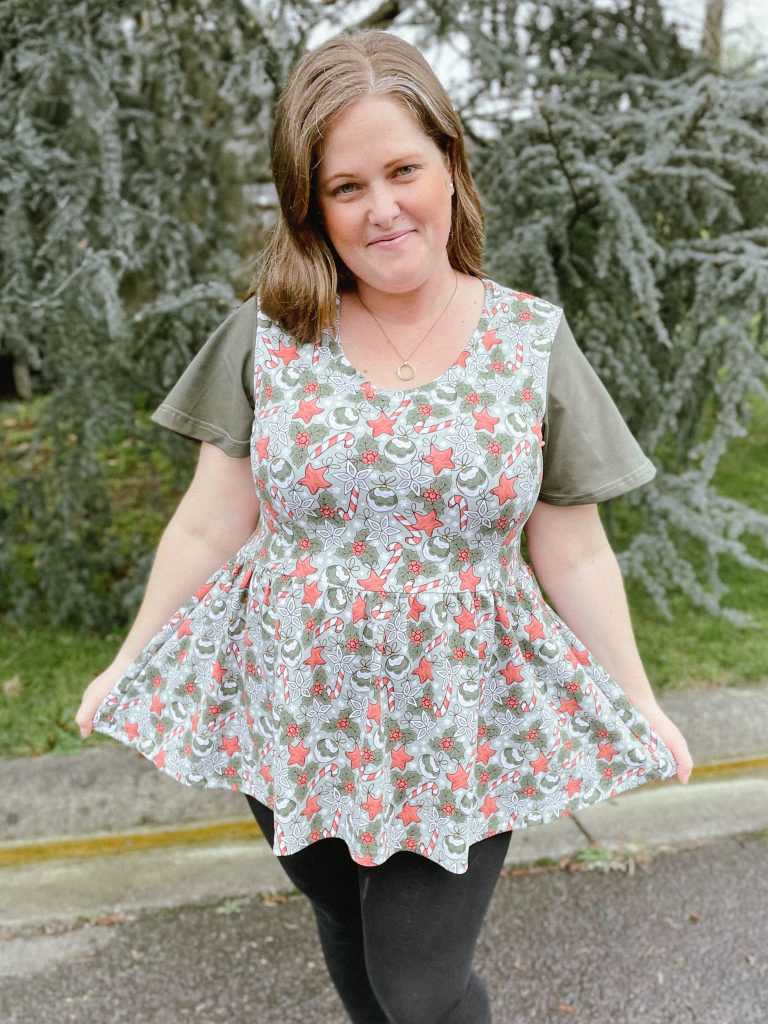
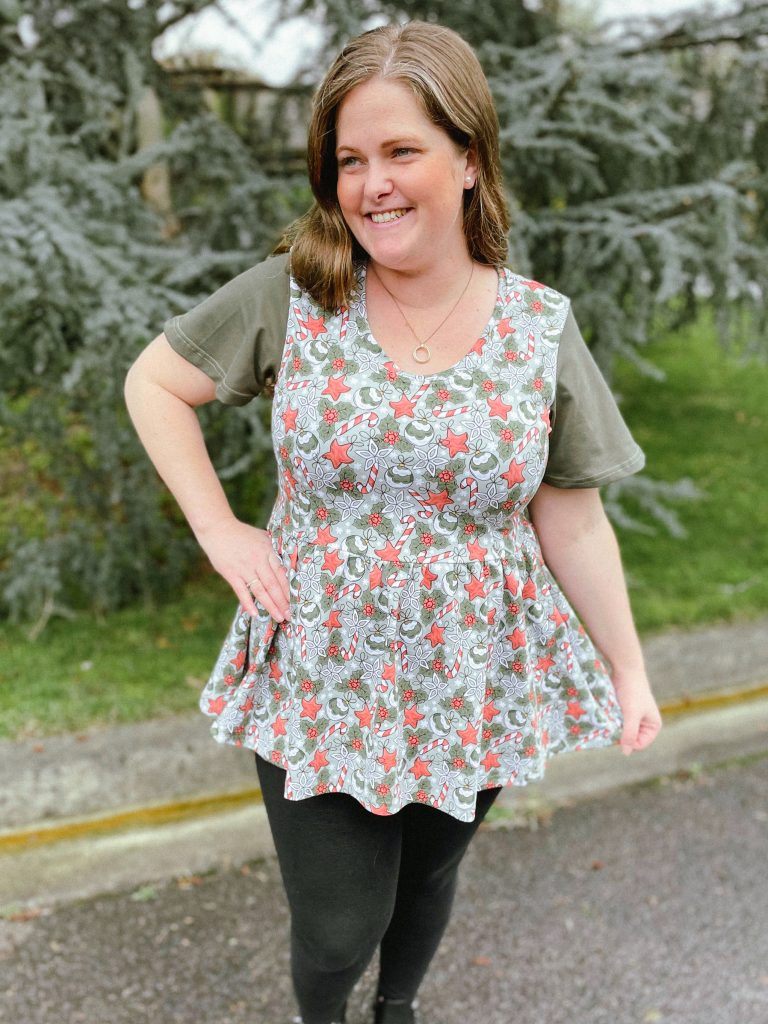
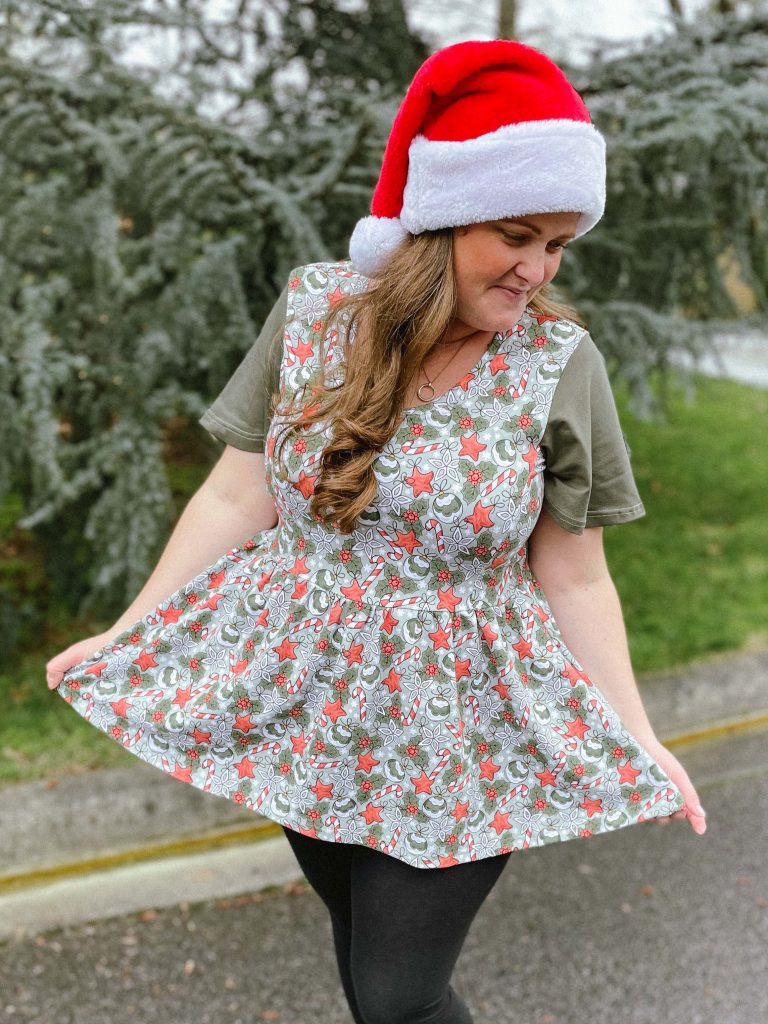
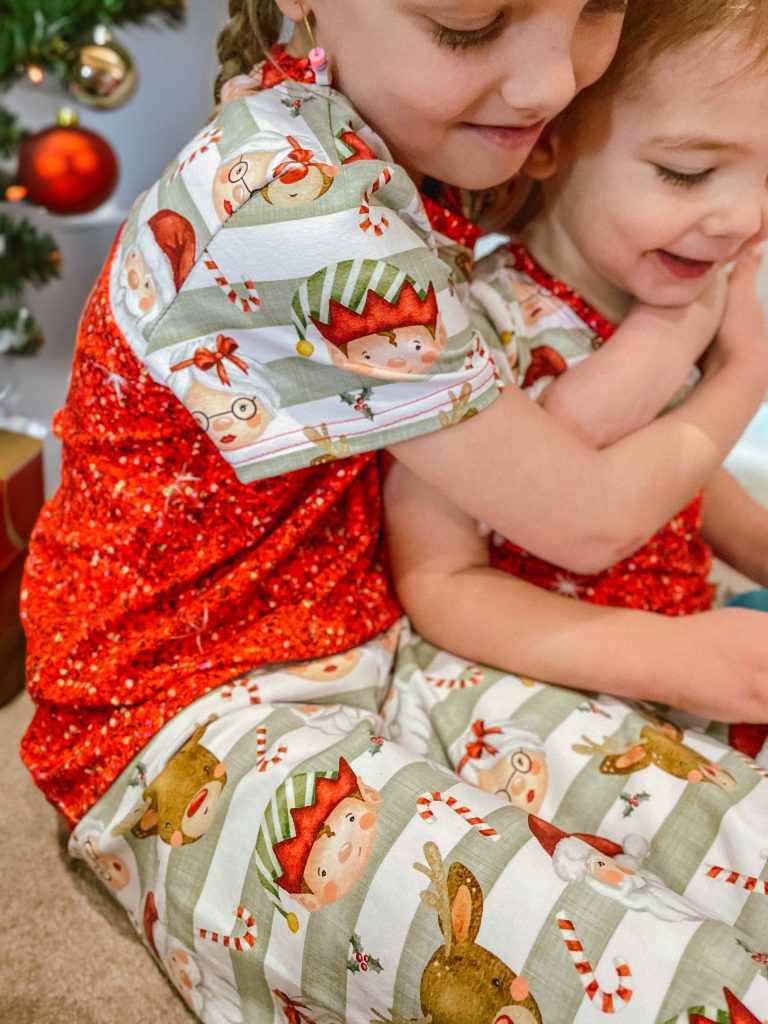
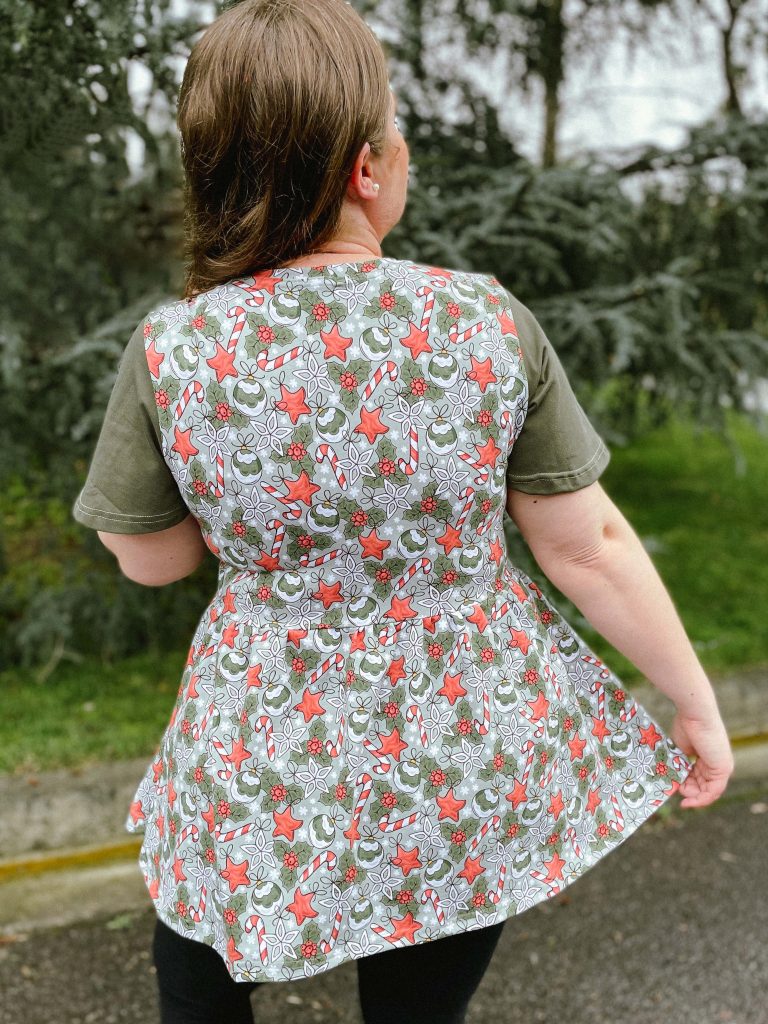
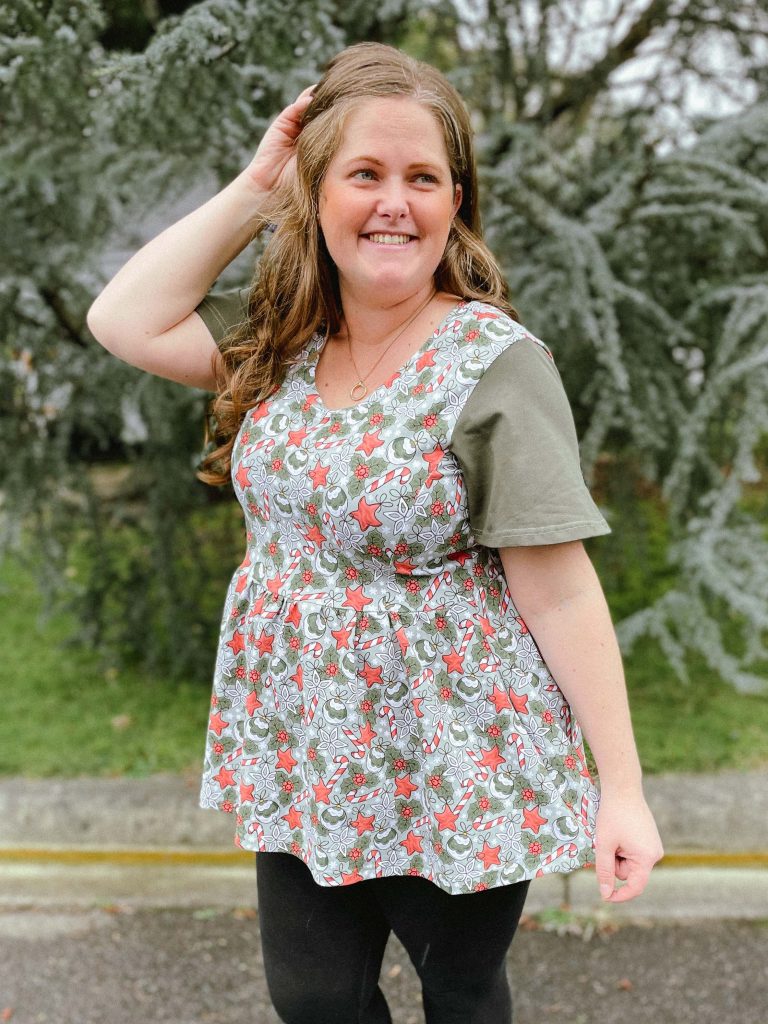
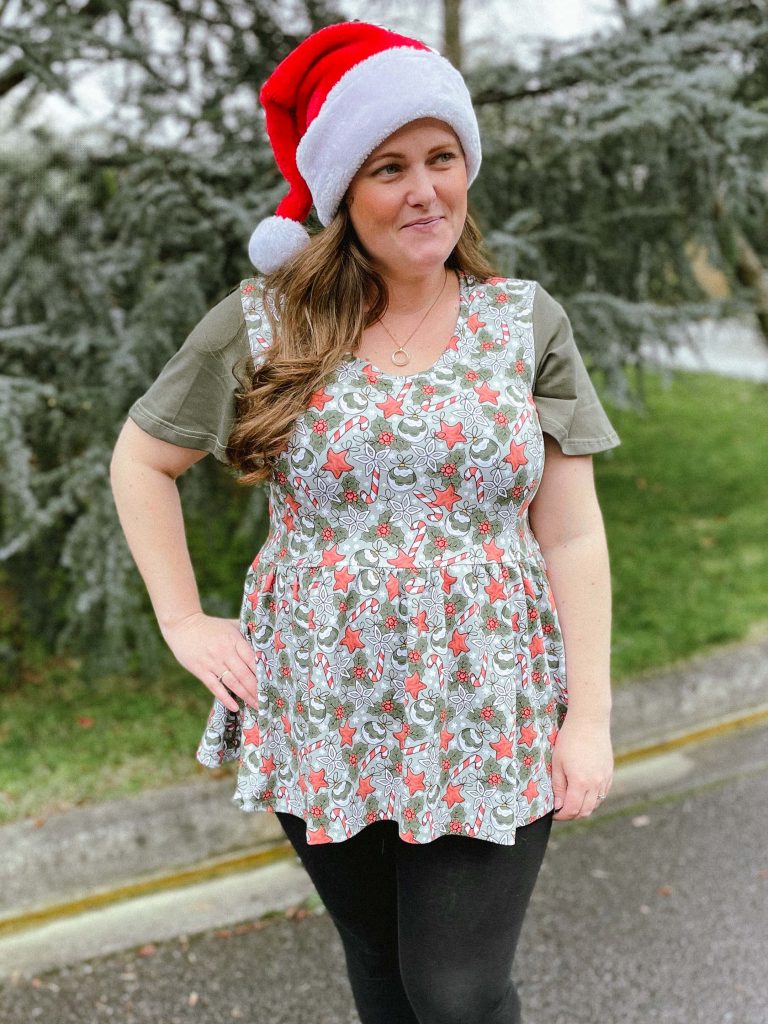
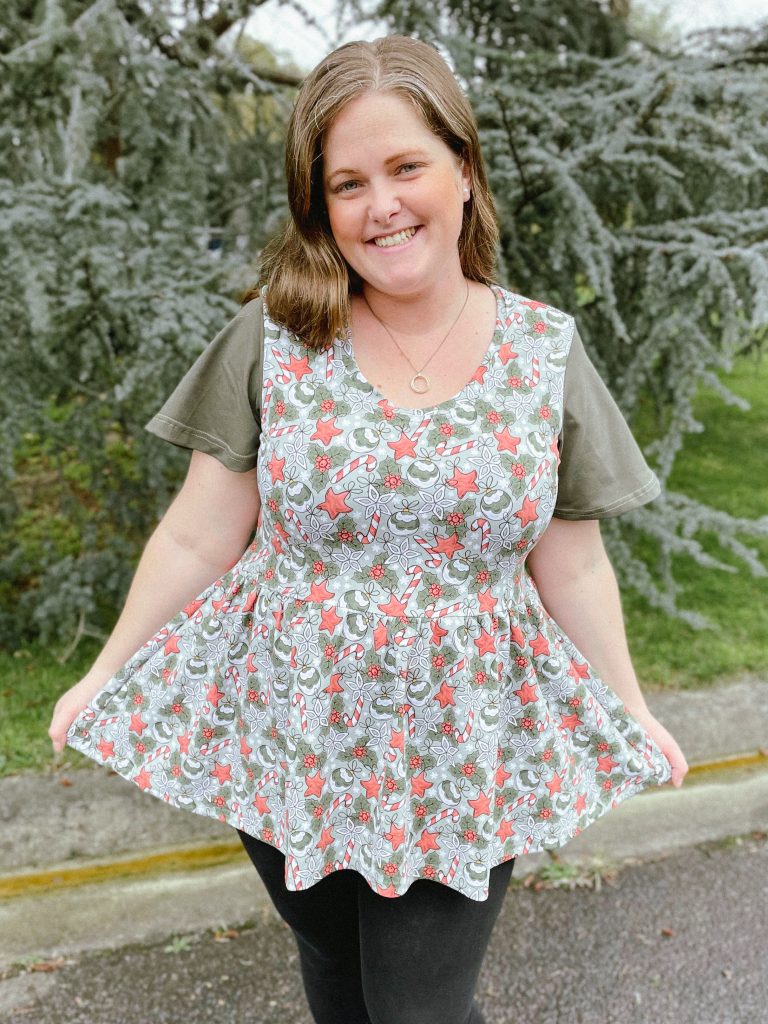
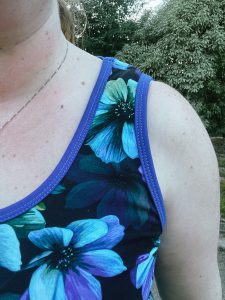
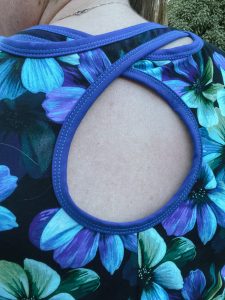
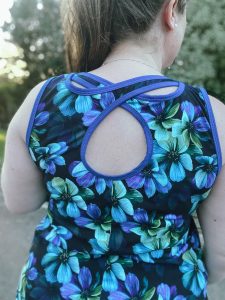
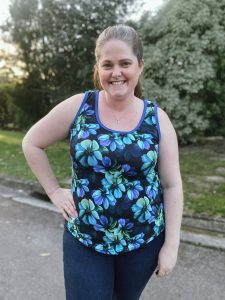
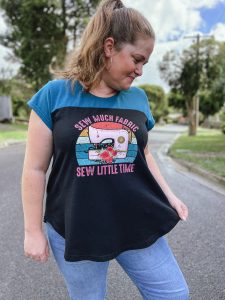
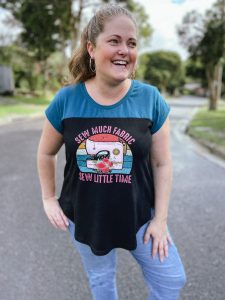
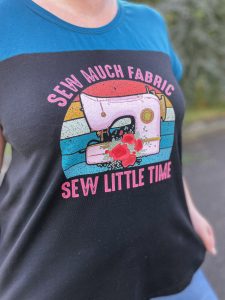
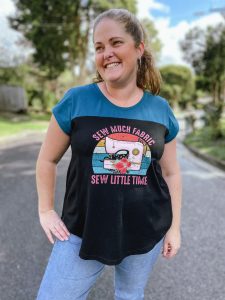
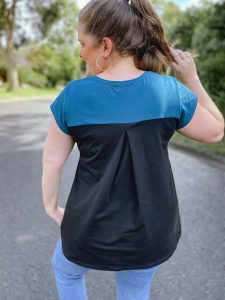
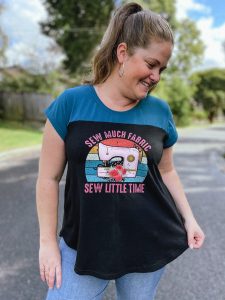
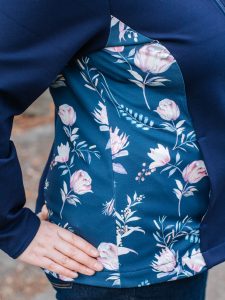
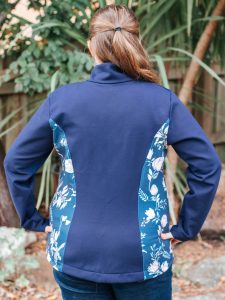
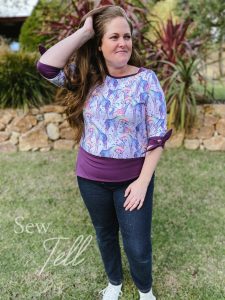
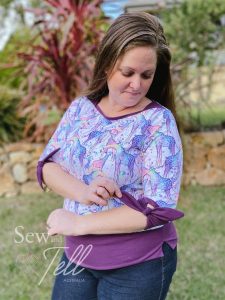
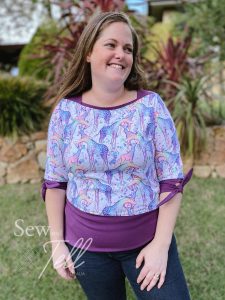
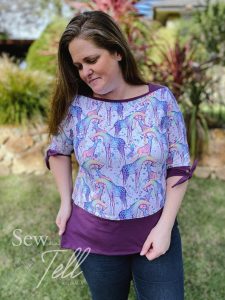
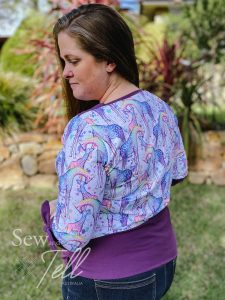
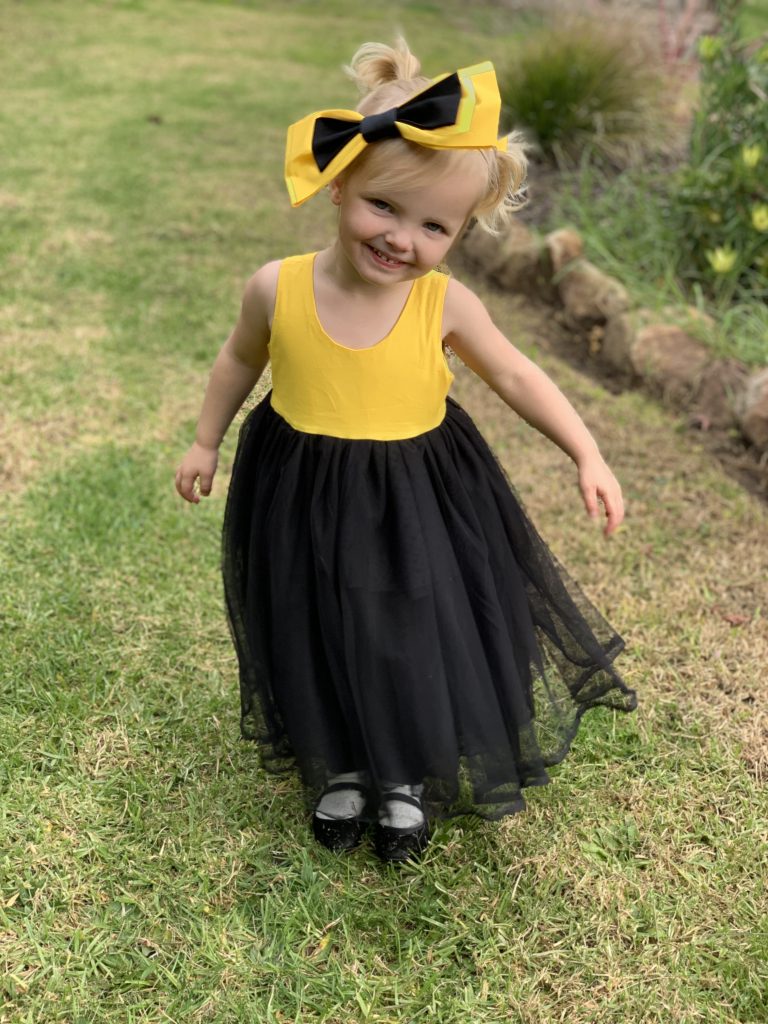
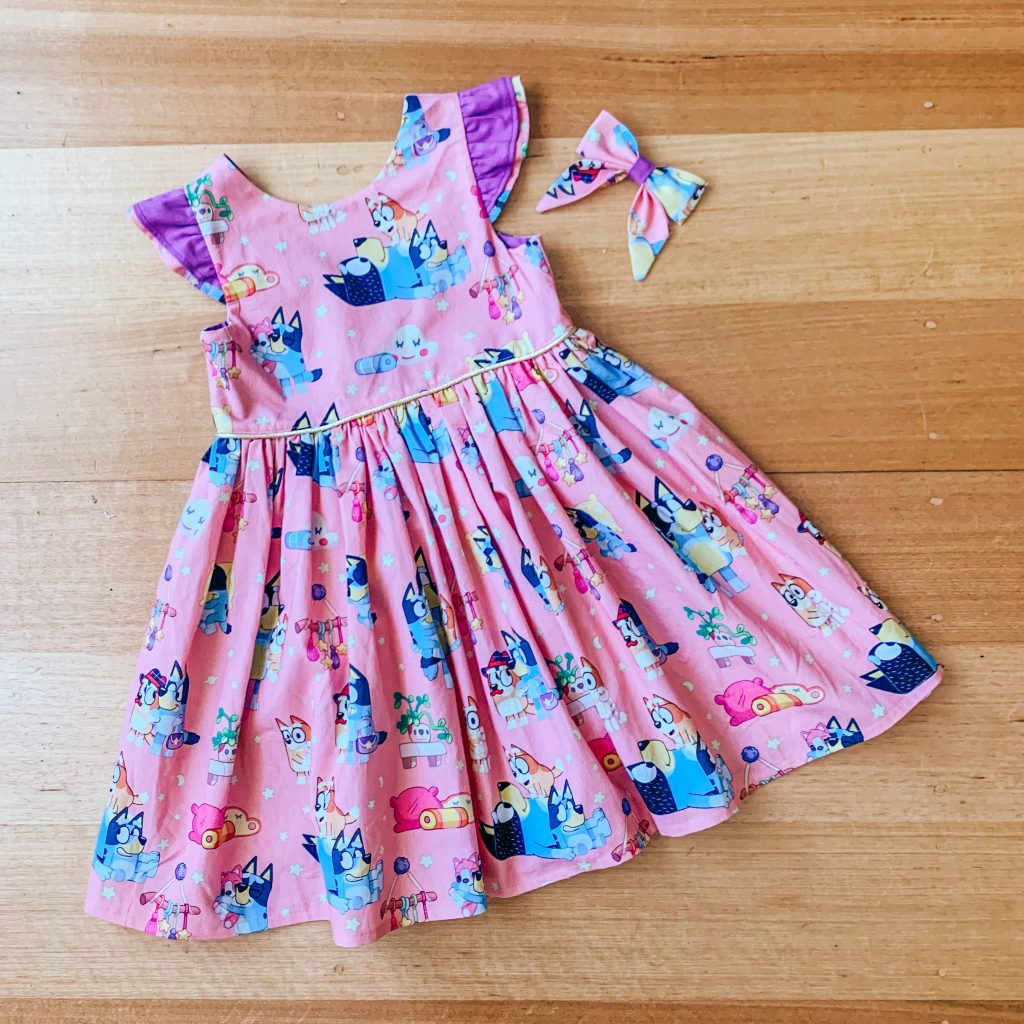
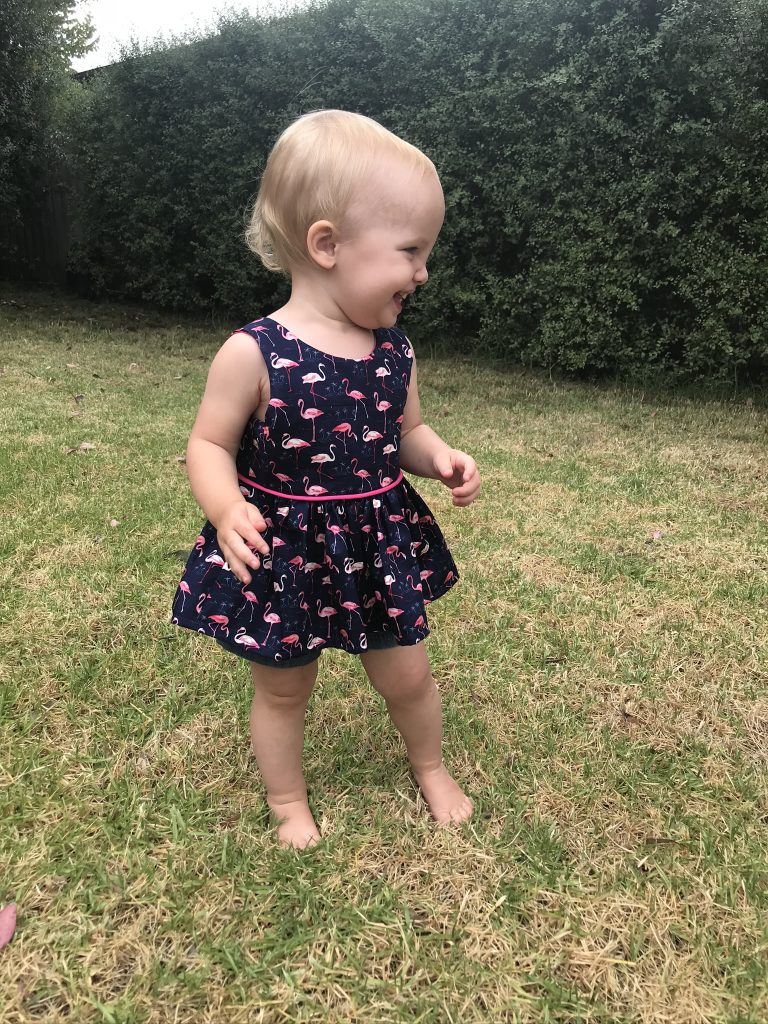
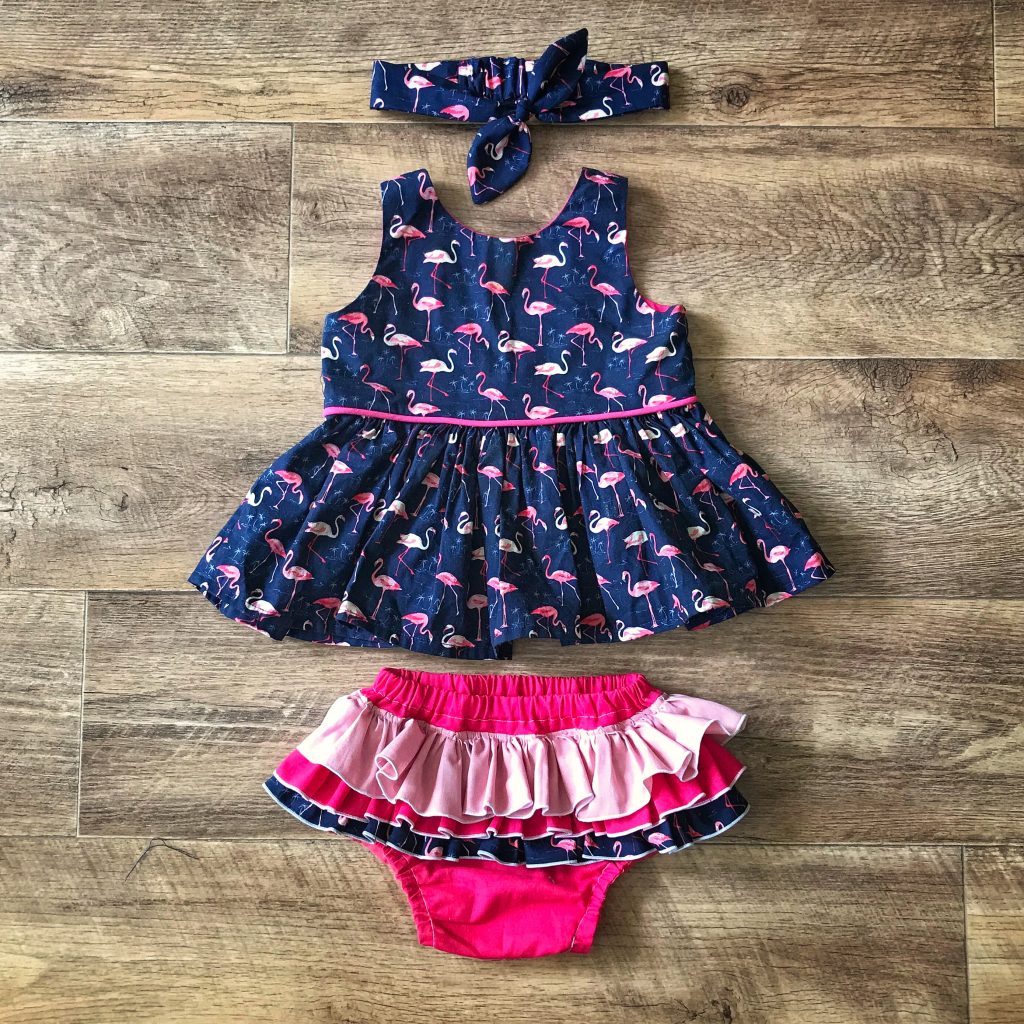
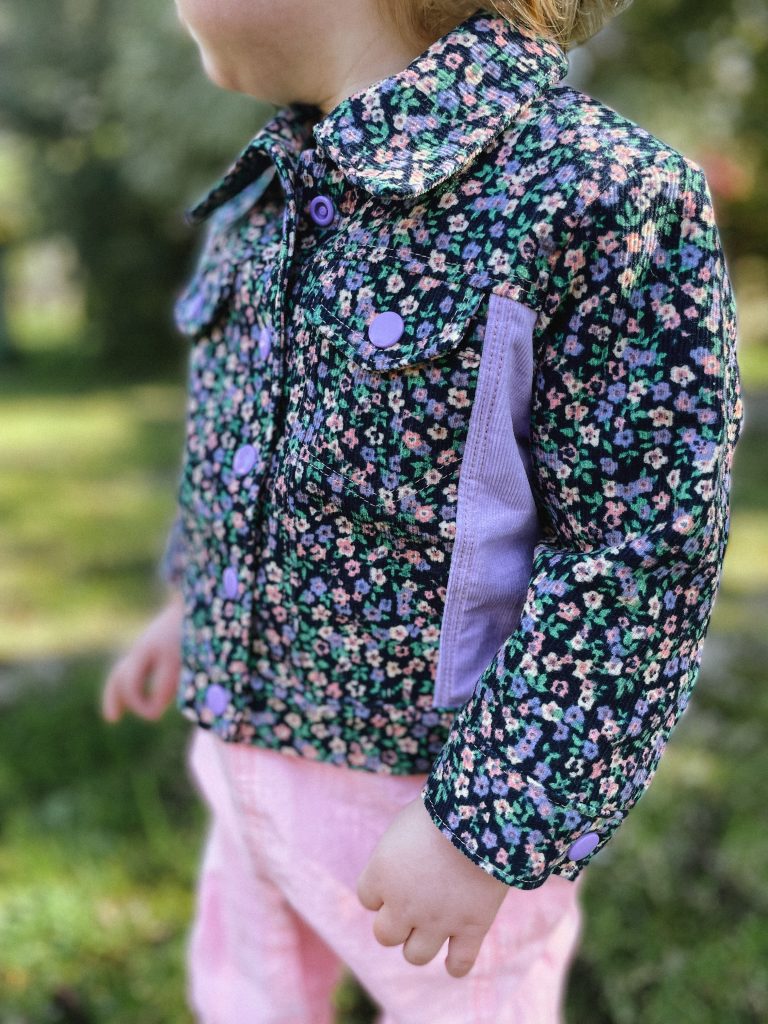
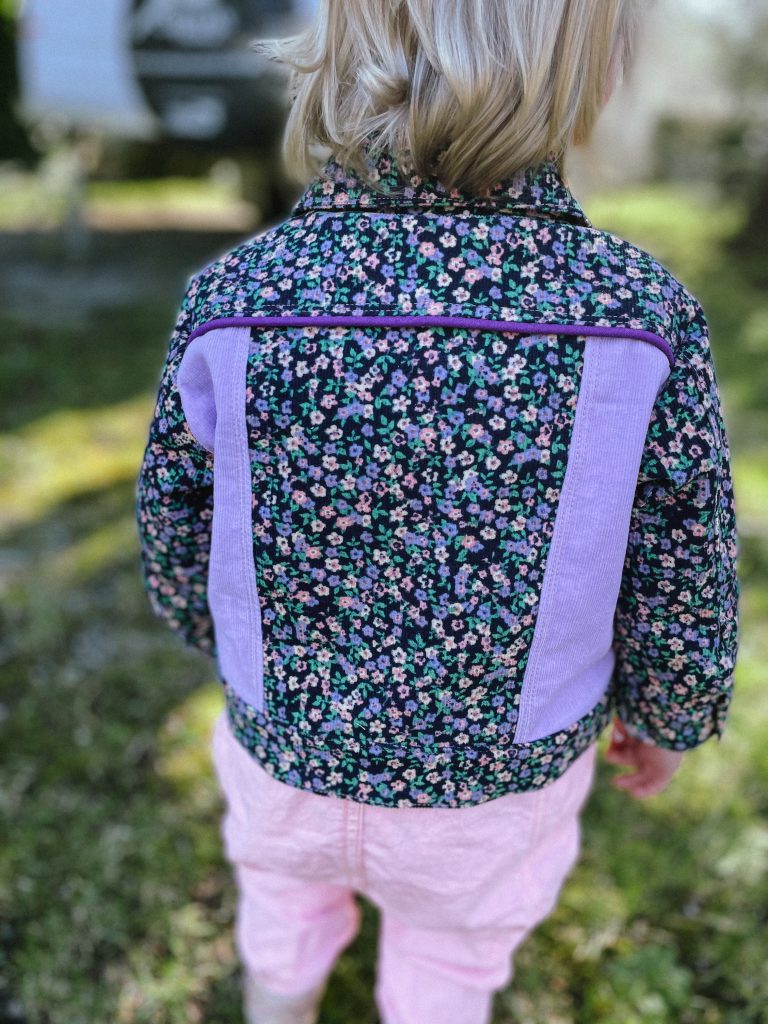
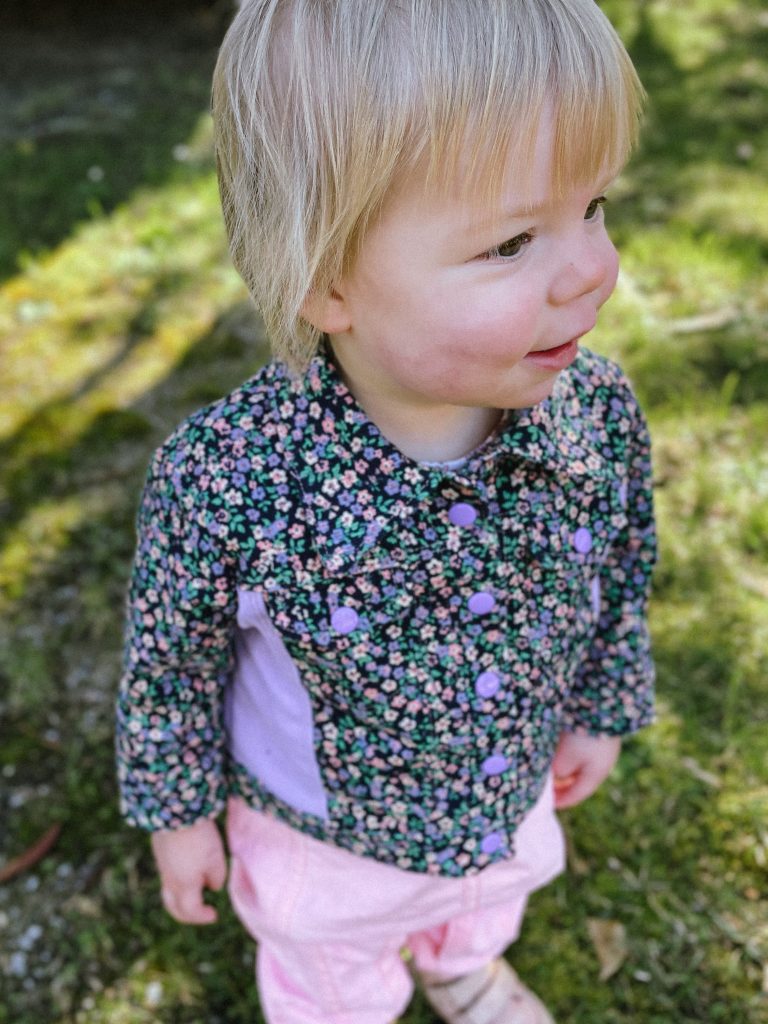
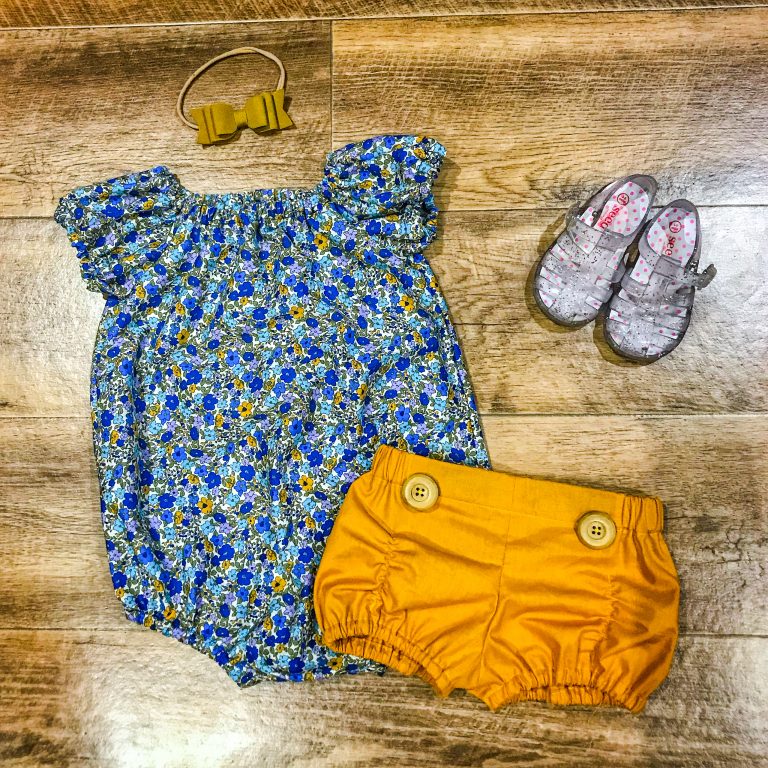
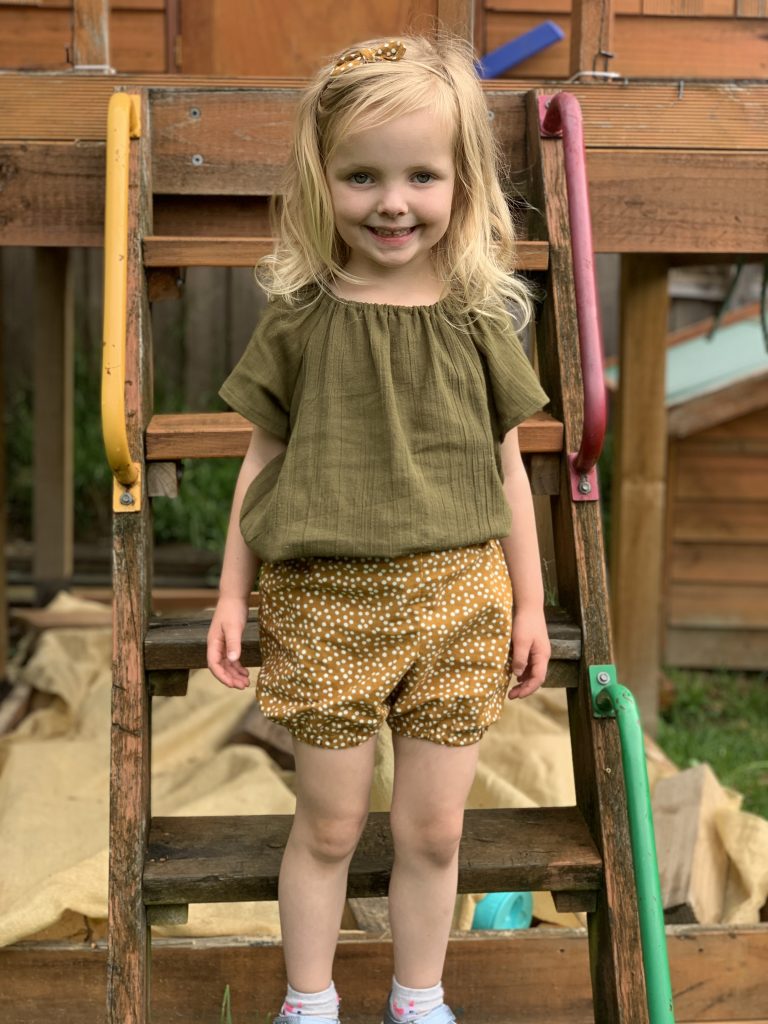
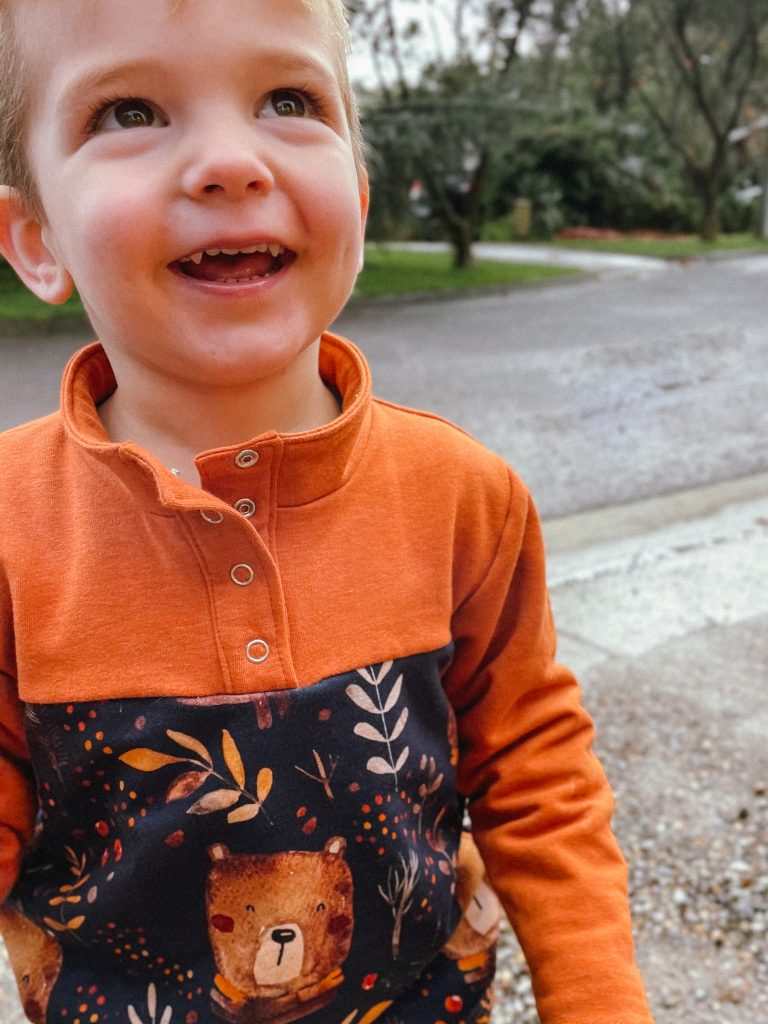
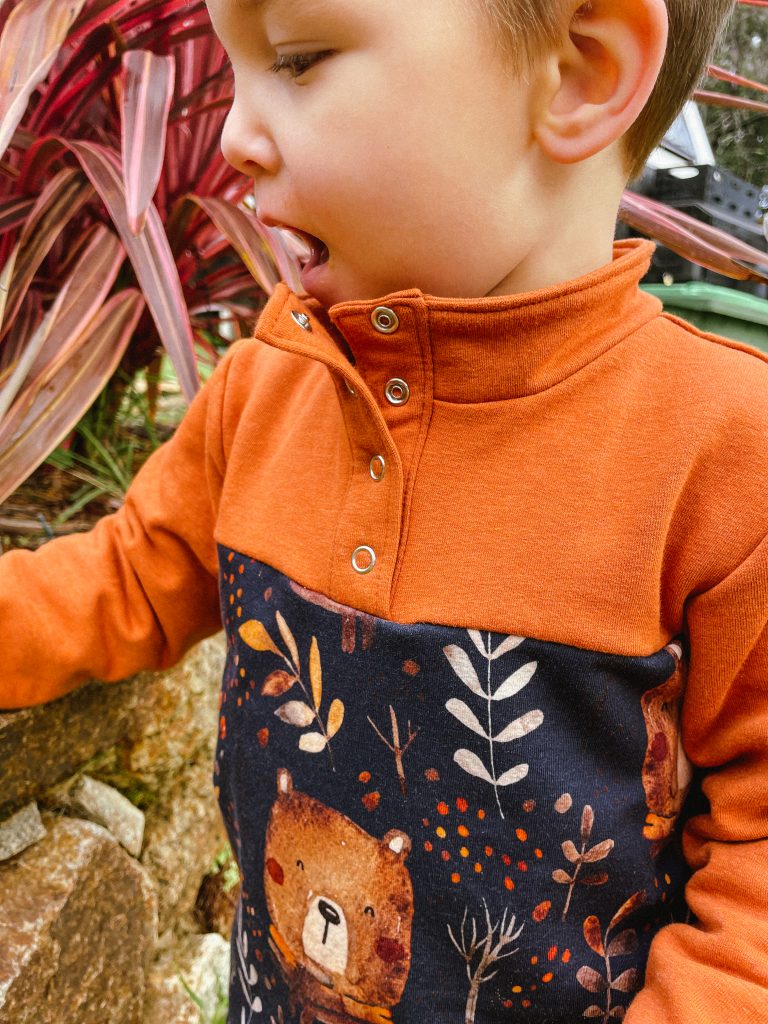
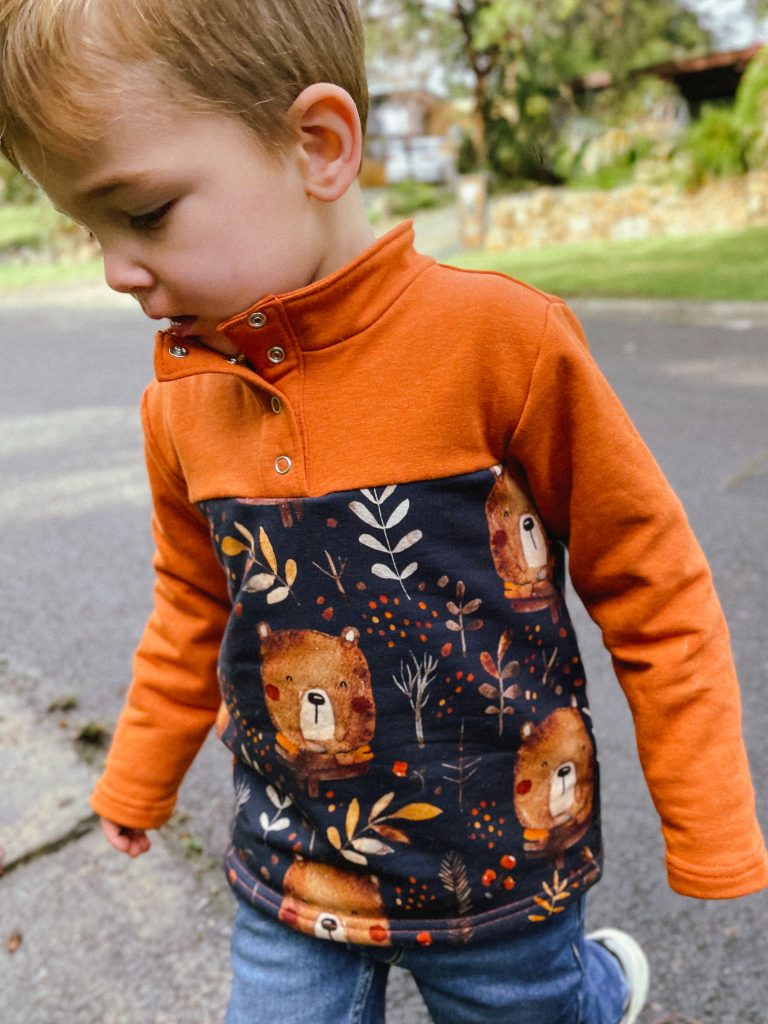
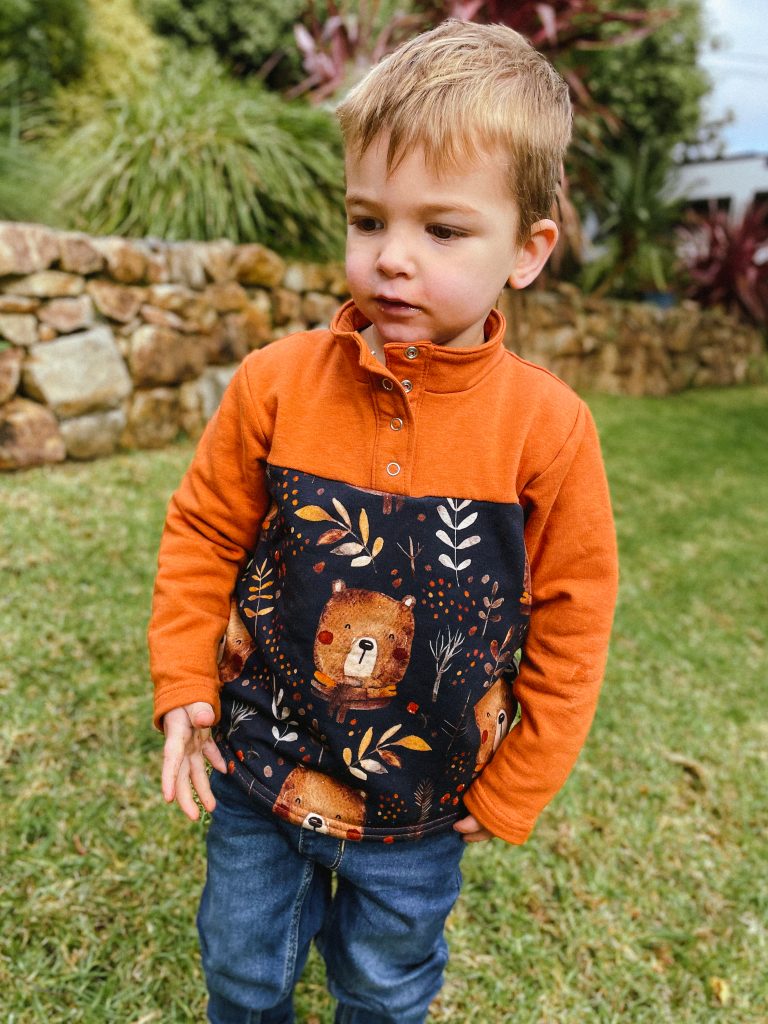
    My latest creation, the Diana Top using clear elastic in the neckline and bodice at the skirt for extra stability.

  • The 5 things I do before EVERY project

    My Pre-Project Ritual: 5 Essential Steps Before Diving into Sewing

    Today I thought I would share the top 5 steps I do before every project. These rituals will help you get the most from your projects and ensure you have the best chance at sewing success! Ready? Let’s dive in!

    1. Double-Checking Measurements

    “Measure twice, cut once” is an old adage that holds true for a reason. Before anything else, I always check my measurements. Our bodies change, and what was accurate a month ago might not be today.

    Why it matters:
    Precision: Ensuring a garment fits perfectly starts with accurate measurements.
    Avoiding Waste: Double-checking prevents wasting precious fabric on ill-fitting pieces.

    2. Assessing My Fabric Stash

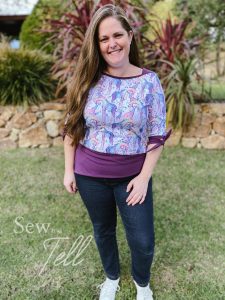
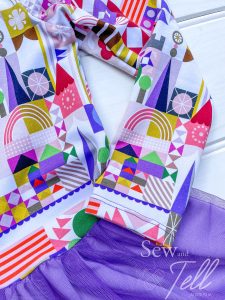
    Next, I rummage through my treasured fabric stash. It’s not just about choosing a pretty pattern; it’s about matching the fabric’s drape, weight, and stretch to the project’s requirements.

    Why it matters:
    Sustainability: Making use of what I already have is eco-friendly and budget-friendly.
    Harmony: The right fabric can make or break the final look of a garment.

    3. Picking the Perfect Thread

    You might think, “It’s just thread,” but the thread can be the silent hero (or villain) of any sewing project. I love making sure that I have matching thread colour.

    Why it matters:
    Aesthetics: Coordinating thread ensures seamless (pun intended!) integration.
    Professional Touch: Matching thread is a simple step you can do to really level up your projects.

    4. Prewashing Fabrics

    Ok, Ok. I confess! While it’s advisable to prewash all fabrics, I don’t always wash my knits. I DO however make it a point to prewash my woven ones. This eliminates any surprises like unwanted shrinkage or colour bleed.

    Why it matters:
    Consistency: Fabric, once sewn, should maintain its shape and size.
    Color Integrity: Prewashing can help set dyes and prevent colour bleeding in the finished garment.

    5. Crafting a Toile for New Woven Patterns

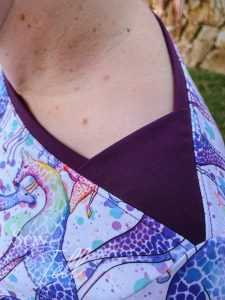
    Lastly, if I’m working with a woven pattern I haven’t tackled before, I make a toile (or a test garment). It’s an initial version of the final garment made from cheaper fabric (like calico as pictured), allowing me to adjust and perfect the fit.

    Why it matters:
    Tailored Fit: Ensuring the final garment will fit like a glove.
    Learning Experience: Making a toile allows me to familiarise myself with the pattern’s nuances without the pressure of ruining my good fabric.

    Starting sewing projects is always an exciting adventure. By following these five rituals each time, I set myself up for sewing success. I hope these insights offer some inspiration for your own pre-project rituals!

  • Sewing Like a Pro: Mastering Twin/Double Needle Techniques

    Setting Up Your Machine for Twin Needling Success

    In this article, we’ll be sharing three practical tips that can make a real difference in your twin needling endeavors. Whether you’re a seasoned pro curious about this technique or a beginner looking to learn something new, these tips will help you achieve clean, professional-looking results. So, grab your needles and let’s dive into the world of twin needling!

    Tip 1: Use the correct twin/double needle type

    Making sure you are using the right twin/double needle can make a big difference. I only use Schmetz Needles and they have a Universal and a Stretch type. Both come in various widths but I am a fan of the 4 in stretch for hemming and necklines. If you find you are getting skipped stitches, check that you are using correct type for the fabric you are sewing and that its a fresh needle. 

    Tip 2: Keep your top threads separate

    It’s always a good idea to have one of your top threads behind the needle bar and one in front. This helps keep them separate and getting tangled and causing problems.
    I usually put my left thread in front and my right needle behind but it is totally personal preference!

    Tip 3: Have a play with the tension and stitch length

    One of the biggest complaints people have is that their stitches are ‘tunneling’.
    Tunneling is when their is a ‘bump’ between the two lines of stitches. It usually happens when your tension isn’t right. 
    My biggest piece of advice is to have a play with the settings for your machine. I generally find on my machine a stitch length of 3-3.5 and a tension of around 4-5 is what works best.

    When your tension is right, your underside should look like a zig zag stitch like the picture on the right. If your tension is wrong, you bobbin thread may be too tight or look straighter.

    BONUS TIP

    My bonus tip is….
    A blast with your steam iron fixes a manner of all sins! haha. Obviously check that your fabric is ok with the iron first, but honestly, giving your seams a good press and steam after can help smooth any tunnels and give it a nice clean finish.

    Want more help with your twin needling?

    I actually filmed a whole master class on twin needling in my membership The Sewing Corner. To watch that and many other skill builder tips and tricks, join my community below.

  • Sinclair Birthday BOGO fun!

    Go Shopping with Buy One Get One Free

    Sinclair is having a birthday, and to celebrate they are having a Buy One Get One Free sale!
    Sinclair have some fantastic patterns. See my recommendations below on some of my favourites.

    Gaia Knit Tank Top

    I love how versatile this top is. You can wear it as a sports style top or casual top with jeans. The keyhole at the back is such a gorgeous feature.
    The knit binding on the can be a bit tricky if you’ve not done it before, but take it slow and you can get beautiful results.

    Ivy Colour block Top

    I’m a big fan of colour blocking, and this top makes it easy to do. This is also perfect to use with panels. You can show them off and still use other colours to compliment your designs.

    Betty Faux Wrap

    I love wrap dresses, and the faux style of this makes it easier to wear. The pleats at the front are a very interesting feature.

    Calypso Colour Block

    This is SUCH a fun sweater. I love the colour block pieces and the way it is constructed. I definitely think it’s worth the time to top stitch all the pieces, it gives it a beautiful finished look.

    Juno Jacket

    One of my fave features on this jacket is the gorgeous princess seams on the front giving you a flattering fit and the shaping on the back enhancing that as well. I made this 2 seasons ago and I still wear it quite often. I think it might be time to make another actually!

    Adele Boatneck Top

    This was not a style I would normally make for myself, but I am actually really glad I did! It came out great and I enjoyed trying something a little bit different. I love the boatneck details and I actually really loved the tie sleeves. 

    Some of my other recommendations are the Skylar, any of the kids clothes, Demi Raglan, Marley Dolman Top, Violet Top. The list goes on!

    Just make sure you shop before the sale ends 11:59pm August 25th PST.

  • Sensational Sleeves: Five Key Sleeve Styles and What They Mean

    Have you ever seen a type of sleeve mentioned and not known what it meant? Or looked like? In this article we delve into 5 different common sleeve styles and what they mean. You no longer have to wonder the difference between Raglan, Dolman or Set in as you will be able to instantly picture the style they are talking about.

    Now let’s take a look!

    Sleeveless:

    Sleeveless designs speak to minimalism and uninhibited movement. By foregoing sleeves altogether, they create open armholes that showcase shoulders and grant unmatched ease of motion. This style has historical roots in warm climates and societies that prioritized practicality. From the simplest tank tops to the most intricate evening gowns, sleeveless styles continue to provide a blank canvas for creative experimentation in neckline design, accessories, and layering.
    My Favourite Sleeveless Patterns:

    Set-In Sleeves

    Set-in sleeves are probably one of the most common types of sleeves and seen in many ready to wear garments. In knit garments such as t-shirts and polos, they are fairly easily sewn in, however in some woven garments you need to ‘ease’ them into the arm hole.  Their history dates back to the Victorian era, where they symbolized sophistication and grace. In today’s context, there are many variations of the set in sleeve such as capped, puff, petal & bishop. They are a stylish and great addition to many garments.
    My Favourite Set in Sleeve Patterns:

    Dolman Sleeves

    Dolman sleeves introduce a drapey and relaxed silhouette. Seamlessly integrating with the garment body, they often extend to the waist or hip, offering comfort and a touch of artistic flair. With origins in the Ottoman Empire and popularized in the 19th century, dolman sleeves continue to embody a fusion of comfort and exotic charm. They shine in casual ensembles, giving a bohemian vibe to tops, tunics, and dresses while providing ample room for fabric experimentation.
    My Favourite Dolman Sleeve Patterns:

    Raglan Sleeves

    Raglan sleeves combine sportiness and style. Defined by a diagonal seam from neckline to underarm, they offer a generous shoulder fit and great arm motion. With historical origins tied to Lord Raglan’s military coat, this style gained prominence for its functional design and comfort, making it a go-to for sports attire. In modern times, raglan sleeves find their place in casual fashion, athletic wear, and outerwear, providing a relaxed fit suitable for various activities.
    My Favourite Raglan Sleeve Patterns:

    Flutter Sleeves

    Flutter sleeves bring a touch of whimsy and grace to any garment. Characterized by their loose, flouncy design, they create an enchanting fluttering effect around the arms. Historically, they evoke femininity and romanticism, gaining popularity in the late 19th and early 20th centuries. In contemporary fashion, flutter sleeves infuse dresses, blouses, and children’s wear with playful elegance, evoking a carefree aura and allowing for effortless movement. I am a big fan of the flutter sleeve.
    My Favourite Flutter Sleeve Patterns:

    Hopefully this gives you a better idea as to which sleeve means what next time you see a sleeve term you are unfamiliar with.

    Be bold and adventurous and try some new styles to see if they work for you. Many knit patterns come with a few different sleeve variations so I encourage you to give them a try. Sleeves are a great way to change the look of a garment without changing the pattern if you know the pattern fits you well.

    Have a little fun with some sensational sleeves!

  • Knit Basics – A Great Staple for your stash!

    If you’re looking for some staple fabrics to keep in your stash, the knit basics range from Wattle Hill is a great place to start.

    Get Ready to Feel the Love with Every Stitch!

    So, imagine this: a fabric that’s as soft as a cloud, stretches like your morning yoga routine, and feels like a warm hug. The European Knit Basics range is a dreamy collection that’s practically begging to be transformed into your next favorite outfit. That’s the magic of the Knit Basics range.

    European Knit Basics from Wattle Hill Fabrics are the ultimate sewist’s delight. These premium knit fabrics are sourced straight from Europe. Think of a fabric that’s not only soft against your skin but also stretches like a dream. 

    Pj’s and clothes that look a million bucks!

    I used the Teal/Petrol 1mm stripes to make my son some super comfy Pj’s and a basic pink to make my daughter a pair as well. Both loved them and couldn’t wait to wear them to bed. I finished off the waistbands with a super soft waistband elastic from Wattle Hill as well.

    You don’t have to just stick to PJ’s though, here are some other pattern ideas that every wardrobe needs.

    ~ Tshirts
    ~ Joggers
    ~ Tank Tops
    ~ Shorts
    ~ Baby’s wear

    The possibilities are endless!

    Make sure you check the range today. Don’t forget to see their range of matching ribbing as well. Perfect for neckbands, waistbands and cuffs. 

  • Tadah Patterns Turns 10!

    My Favourite Tadah Patterns

    If you haven’t seen, Tadah are having a massive 40% off site wide to celebrate their 10th birthday! Amazing!!

    Tadah were actually the very first PDF patterns I ever used. I had previously only used paper patterns from the big 4 and while I was a competent sewer, I found them lacking in instructions and often had trouble finding my size from the pattern draws at the craft store. After my friend Laura (@eveningseamstress) started using Tadah to sew for her daughters and gushed to me about how easy they were I decided to give these PDF patterns a go. I have never looked back!!

    My very first Tadah pattern was the Baby Tea Party in romper view and I had a very clear vision of how the fabrics would work and how it would look on Jemma who was then about 13 months old. They are honestly some of the best drafted patterns for kids (and adults!) and the instructions make it SO EASY to follow. 

    Tadah are still on high rotation in my garment making and I’ve now become quite good friends with Lauren who is such an incredible human with an absolutely beautiful soul. I just love how sewing brings together the most wonderful people ❤️

    It’s hard to choose a favourite but I’ve listed a couple below that are well worth adding to your pattern stash if you don’t already have them. Happy shopping and happy 10th birthday Tadah!

    *sale runs until midnight August 4th 

    Tea Party

    Without a doubt my most made Tadah pattern. I have made so many of these in all the different views and styles, I reckon I could do a the Tea Party with my eyes closed now haha. It was hard to choose only a few of my makes to share, but trust me you need to add this one to cart ASAP.

    Jaunty knit Dress

    The jaunty was one of my first forays into knit garments and what prompted me to buy my own overlocker as well. I had been borrowing my mums and realised they weren’t as scary as I initially thought🙈
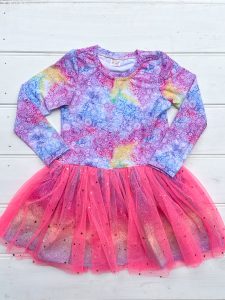
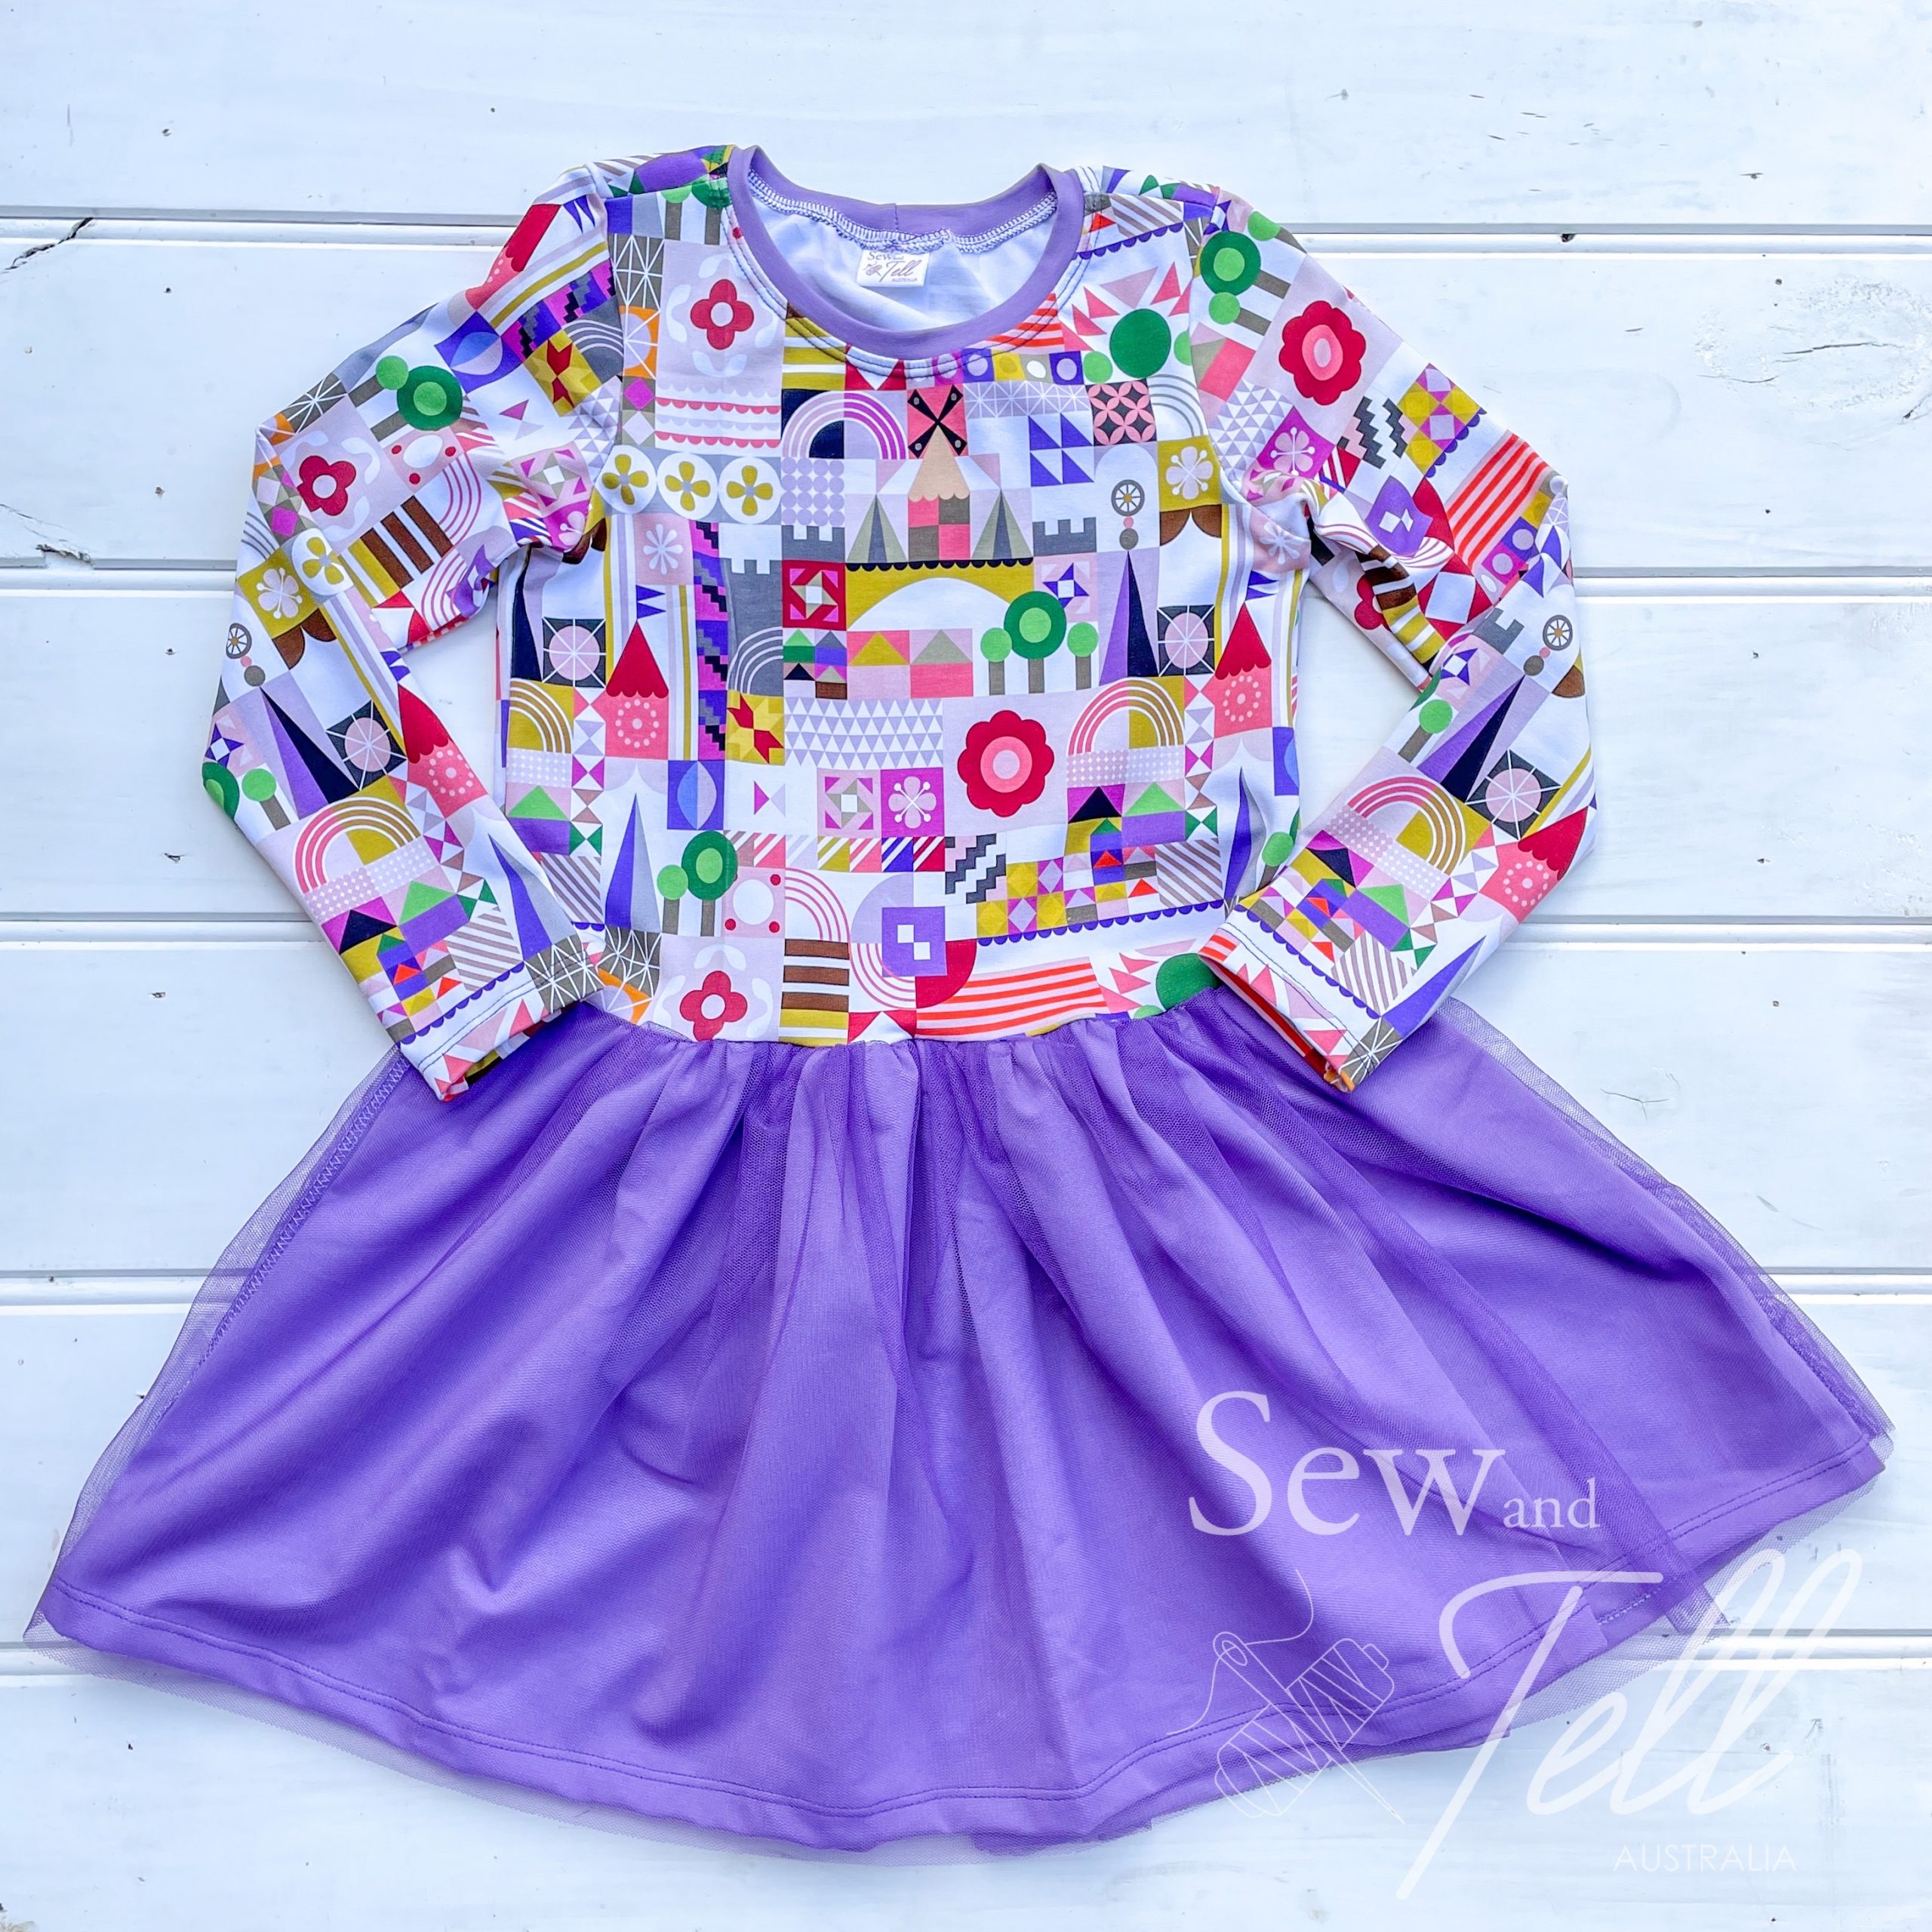
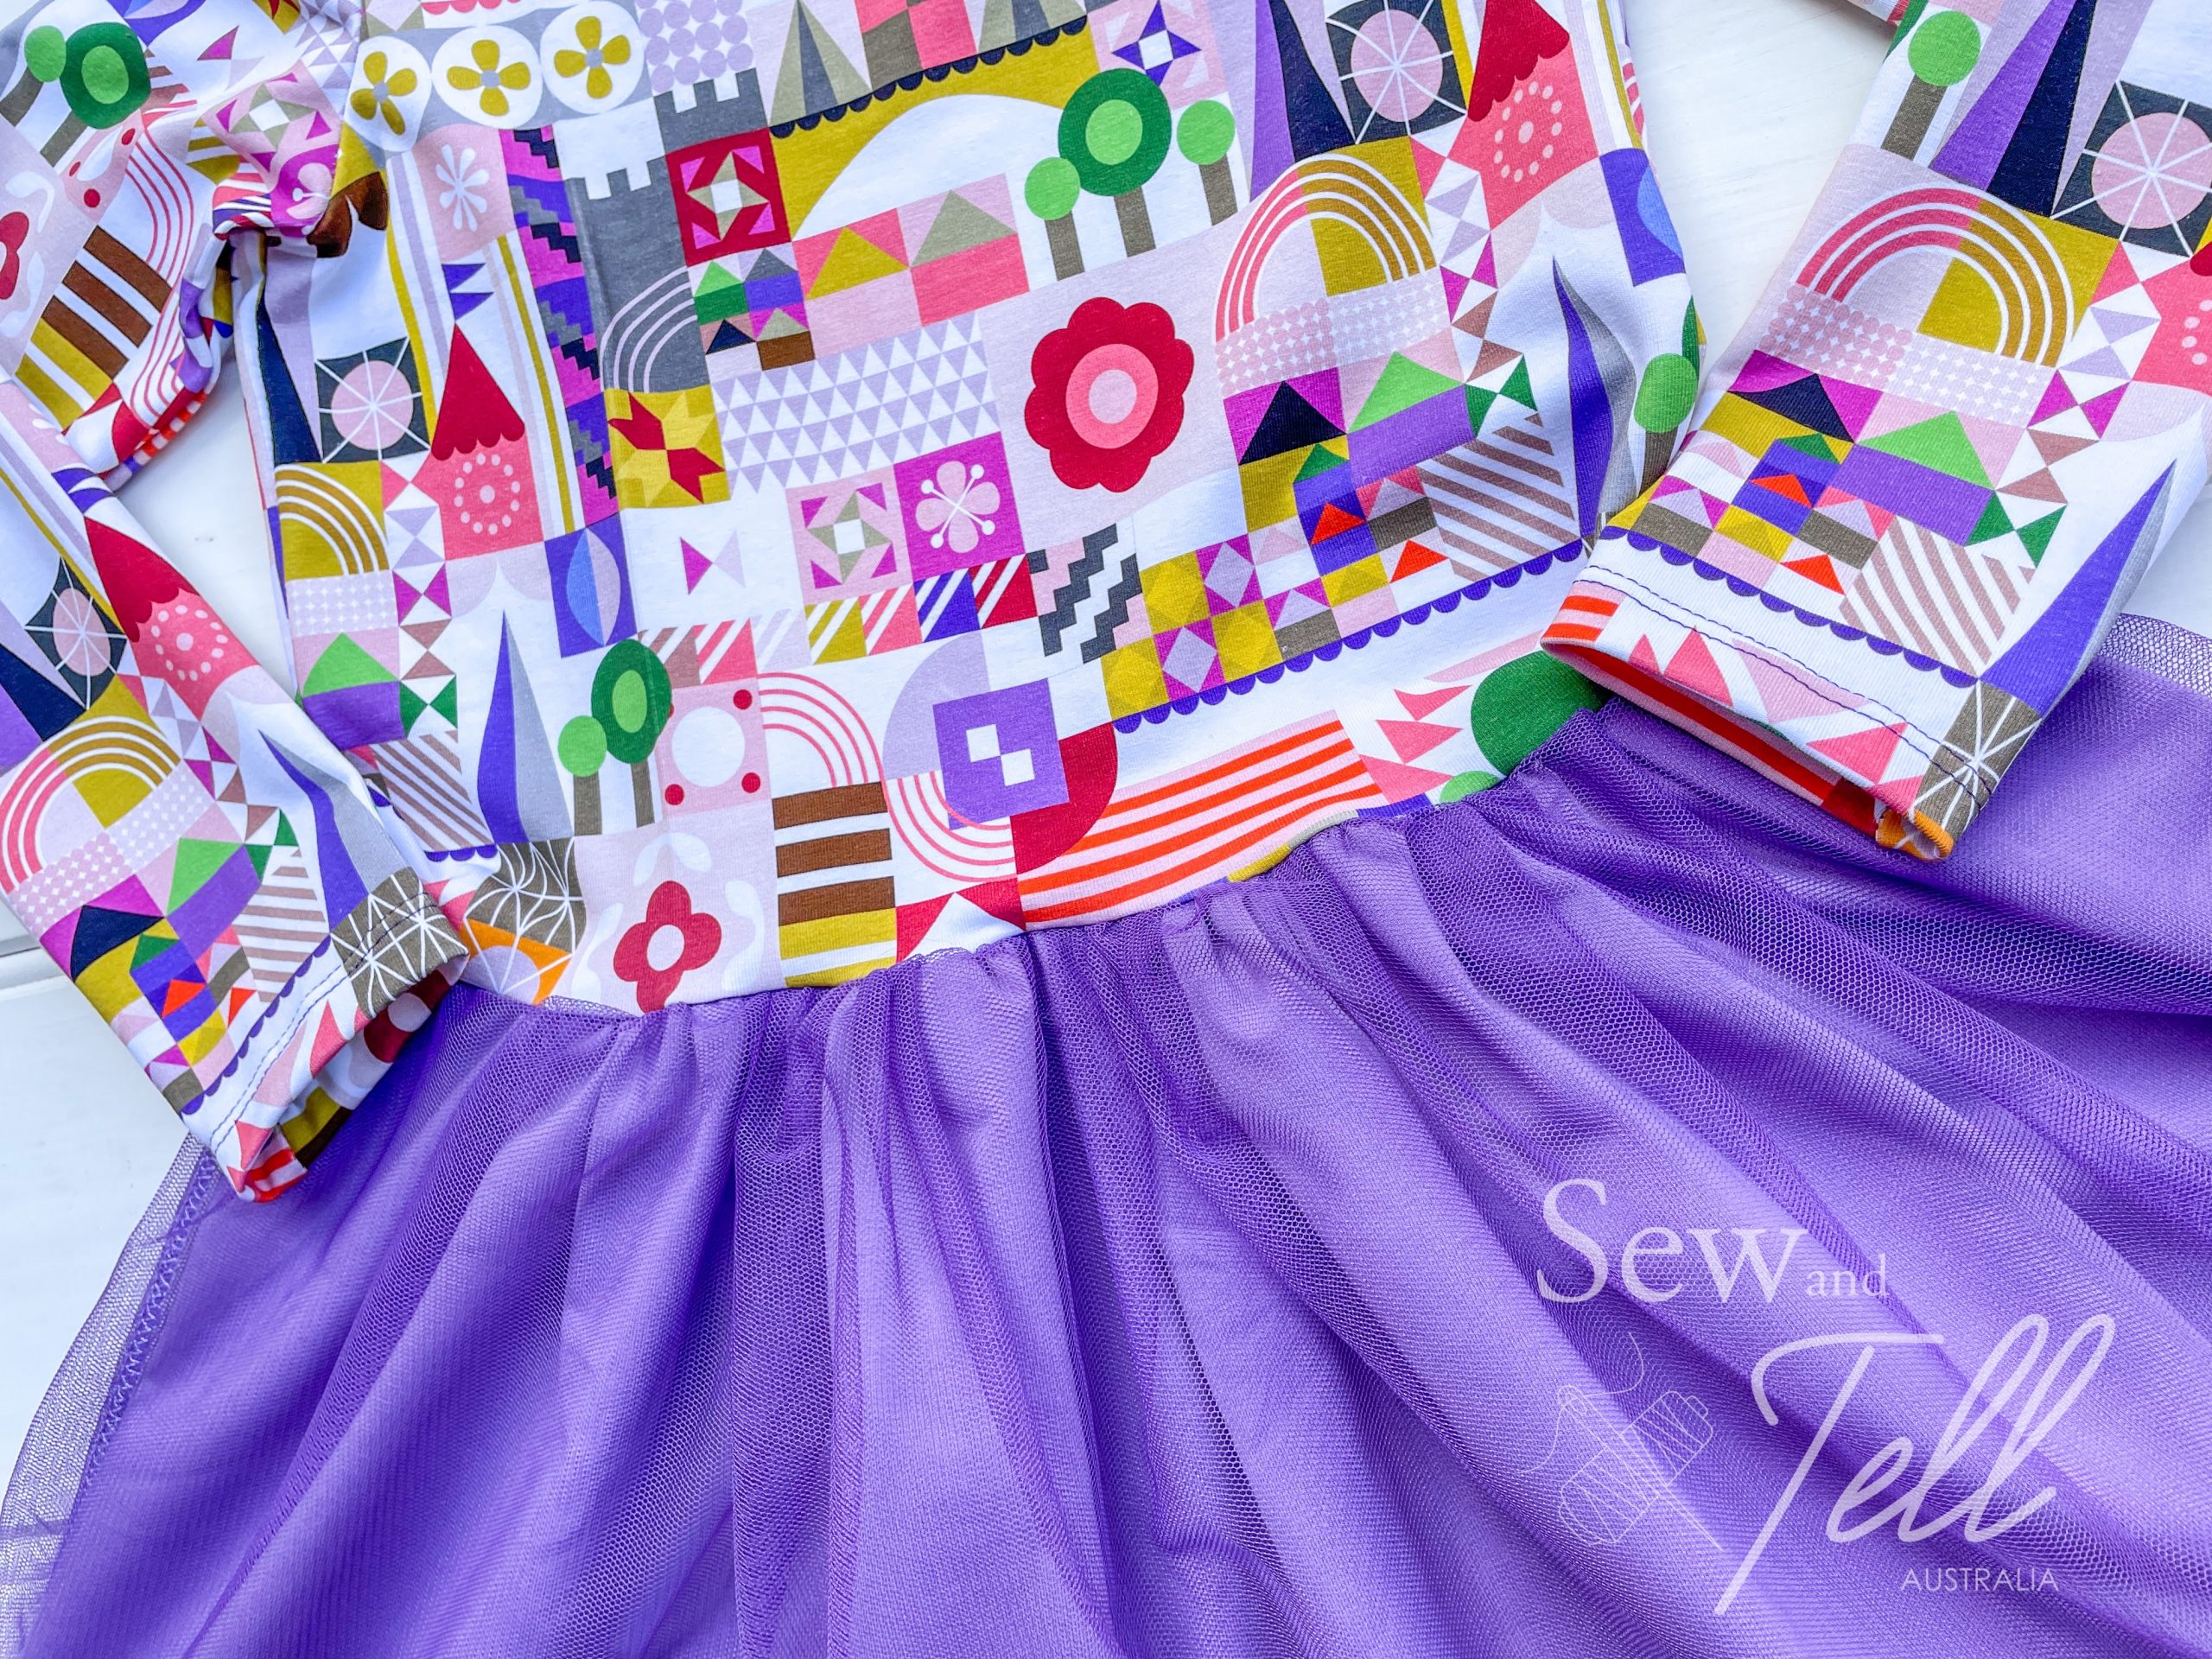
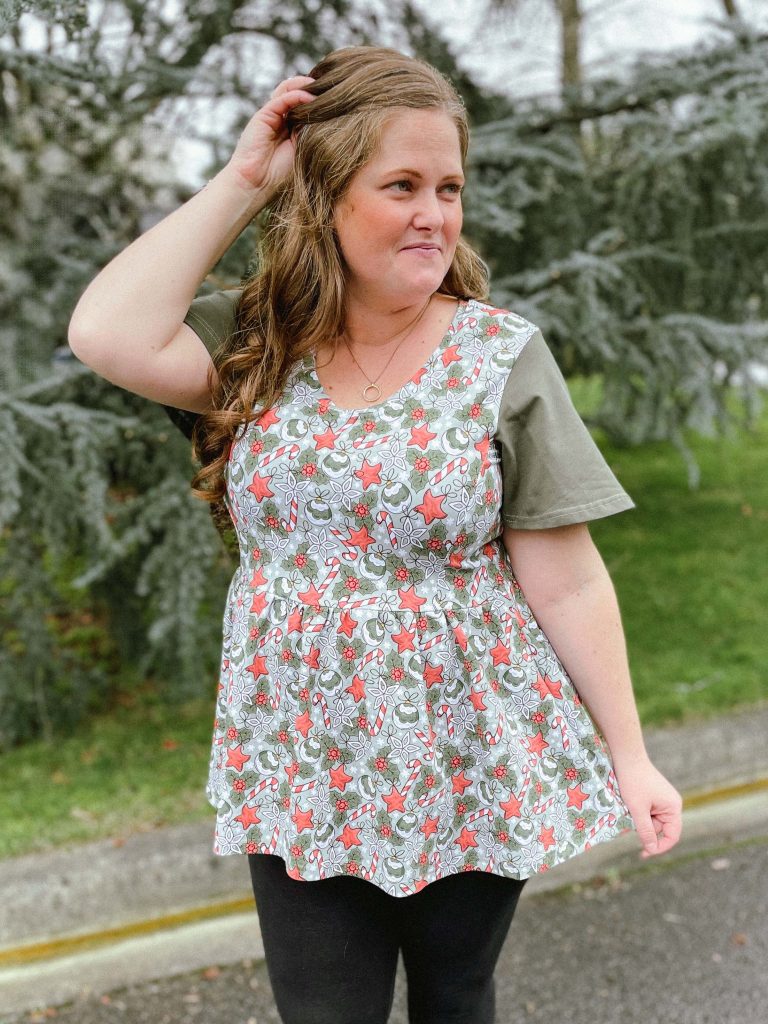
. I like the double skirt option and have done a few where I have added a tulle layer to great effect as well.

    Street Jacket

    I think this might have been one of the first patterns I helped test for Lauren. It is SUCH a cute style and works well with a variety of fabric styles. Im a fan of them in corduroy but it can work equally as well in a drill or even a cotton. I have some colourful leopard sitting there from The Telarie that is earmarked for a street jacket for Jemma 😍

    Everyday Overalls

    I LOVE overalls on kids. They are so cute and a great way to layer with fun tops and prints underneath as well. I originally got the Vintie Overalls from Tadah and made a few for Jemma but when Lauren was testing the Everyday overalls I put my hand straight up to test for Ted. It is definitely a more advanced pattern than the Vinties, so if you want a simpler first pattern, try the Vinties but get the everyday overalls at the same time cause they are too cute to pass up.

    Troop Shirt

    The Troop Shirt was the first pattern I made for Ted and I was so daunted by it. I was worried that if I had a by I wouldn’t have anything to make him, but I was so wrong. I also thought shirts were really hard, but they are actually really simple. As long as you go slow and follow the extremely easy instructions, your little one will have a smart looking shirt in no time. 

    Flexi Shorts & Seaside Romper, Dress & Top

    The Flexis were another firm fave of mine when Jemma was younger. The flat front hack with ruched legs by Tanya from Sewvolution was my fave thing to do and paired with a Seaside playsuit, I made many an adorable Tadah set. 

    The Seaside I liked as it wasn’t as fitted as tea party romper, but still so so cute. Perfect for younger kids who get their shirts all untucked, the playsuit option meant it was all tucked in and looked great.

  • Pattern Review of the Kodiak Pullover

    Pattern: Kodiak Pullover
    Designer: Peek A Boo Pattern Shop
    Fabrics: Cotton Lycra and Sweater knit from Wattle Hill Fabrics
    Skill level:  Confident Beginner
    Size made: 4
    Adjustments: None
    Pros: Super cute and easy to colour block, I love this one to compliment your winter wardrobe.
    Cons: The placket can be a little tricky to get looking neat, but take your time and baste if you need to.

    Pattern Review Recap

    Let me tell you, the Kodiak Pullover is a perfect addition to any winter wardrobe! I sewed up a size 4 for my little one, and boy, oh boy, did it turn out amazing. I combined a super cute bear cotton lycra with an ochre/rust Jogging sweater knit to give it that extra pizzazz. It is a combo that made my heart melt and fall in love with making clothes for my kids all over again.

    I enjoyed every moment of creating this pullover and I’d gladly do it all over again. Here’s a nifty trick I used as well: since the cotton lycra was a tad thin, I decided to cut the pattern pieces from both fabrics for the front and back bottom piece and treat them as one during assembly. It gave it extra warmth and you can’t even tell they are separate pieces!

    Now, let’s talk about the placket. It may look a bit daunting at first glance, but fear not! With a little patience and taking your time, you can make it look absolutely fabulous. If you need a little extra help, go ahead and baste stitch it together first. Trust me, it’ll make your life so much easier.

    In summary, the Kodiak Pullover is a winner in my book. The pattern is a joy to work with, the fabric choices are endless, and the final product is simply heart-melting. 

    Definitely a ‘Beary’ cute garment 😉 

    What next?

    CONQUER SEWING STRUGGLES!

    Stop wasting fabric on ill-fitting disasters. Discover the secrets to sewing with confidence. Let me guide you to sewing success!

  • Reignite Your Sewing Mojo: Finding Inspiration for Your Next Project

    Sewing is such a great way to unleash our creativity and create unique and personalised items. However, even the most passionate sewers can occasionally find themselves in a rut, struggling to find inspiration for their next project. Let’s take a look at these 4 tips to help get you back in the sewing chair. 

    1. Jump on social media for inspiration.

    Sometimes having a browse on dedicated sewing facebook groups or instagram sewing accounts can be a great way to kick start your creative streak. Seeing what others are doing and being inspired by real people, can help give you that little nudge to try what you’re seeing

    2. Shop your stash

    If you find yourself not knowing what to do next, sometimes going and having a look through your fabric stash can really help spark ideas for projects to do. You don’t just have to shop your fabric stash either. Looking through your pattern stash (let’s be honest, patterns can also be ‘stashed’ haha) is another way to be inspired to jump back into sewing. 

    3. Remake an old favourite

    If you have a pattern that is your absolute favourite, go back and make it again. Being able to just cut the pattern out, sew it up and know that it’s going to fit and feel good on you can be a big motivator. And who doesn’t love your favourite tee pattern in 5 different bases when you know you’re going to look fab in it!

    4. Go for a quick win

    Sometimes you just need a quick win to get you over the hump of being in a sewing slump. Make a pillowcase, sew up a new cushion cover for the couch or some other quick easy project and watch your creativity come back. You don’t always have to be going for the big projects for sewing time to be worthwile.

    Finding yourself in a sewing rut is normal, even for the most experienced sewers. Remember that inspiration can be found in unexpected places. By reflecting on past projects, engaging with sewing communities,shopping from your stash and trying some quick win projects, you can reignite your sewing mojo and get back to creating beautiful items in no time. Embrace the journey of rediscovering your sewjo, and enjoy the process of bringing your creative visions to life!

  • Christmas Pre Order with Frankie Bear Fabric

    Who doesn't love Christmas?!

    Jingle bells, jingle bells, let’s prepare to deck the halls!

    It might not be Christmas yet, but what better way to prepare to get into the holly-jolly groove than by diving into a world of enchanting fabrics? Brace yourselves, because Frankie Bear Fabric is bringing you an exclusive collection of Christmas-themed fabric that will make your heart skip a beat. Your favorite designs will be available to pre-order on your preferred fabric base, making it easier than ever to get exactly what you want for Christmas! You need to hurry though, the pre-order window is open until July 12th 2023, with a delivery set for September, giving you plenty of time to sew up merry creations!

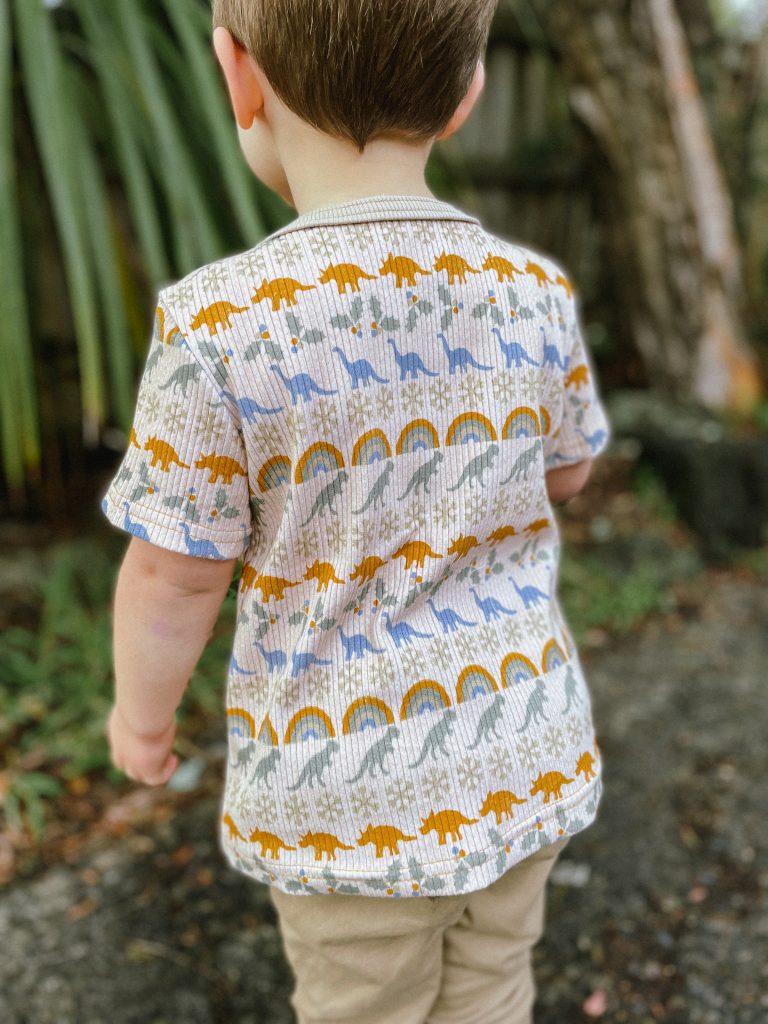
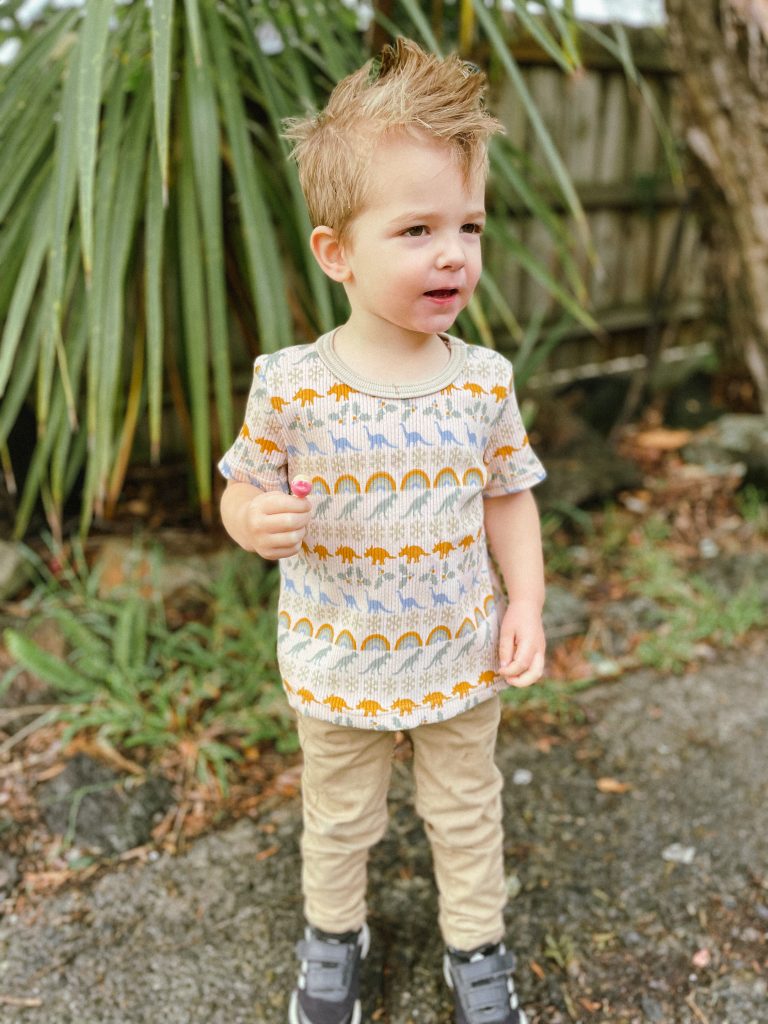
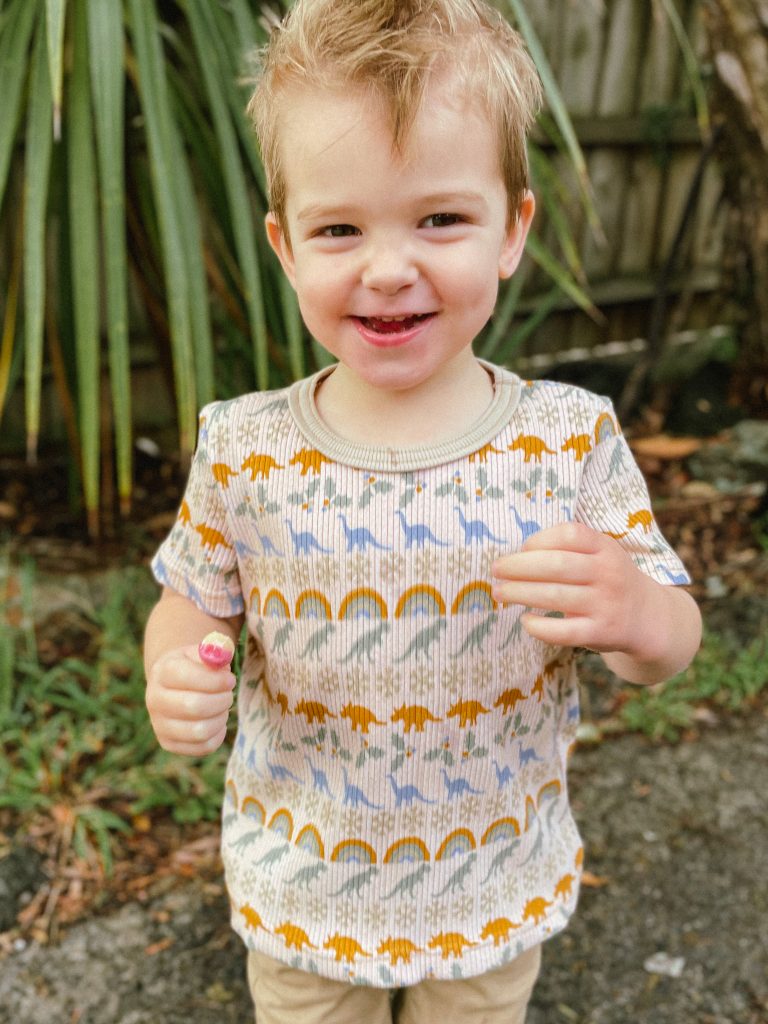
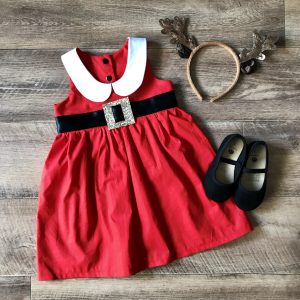
    Frankie Bear Fabric’s Christmas collection is brimming with whimsical designs perfect for all your christmas creations. I got to sew up some ROAR-some christmas dinos, the most delightful soft Christmas tree’s, festively fun Christmas Characters and a gorgeous decoration inspired print. With these enchanting designs, your imagination can roam free and create holiday magic like never before.

    Curious to see what wonders await you? Frankie Bear Fabric has brought their Christmas fabrics to life with a sprinkle of creativity! Head over to their website or join their social media channels to see lots of festive inspiration sewn up for you to be inspired. Check out all the fun fabrics I got to work with below and let your imagine start to explore the possibilities.

    Pre-Order Details:
    Santa may check his list twice, but you only have until July 12th, 2023, to secure your fave designs and bases in the Christmas fabric extravaganza! By pre-ordering now, you’ll be at the front of the line to receive your delightful fabrics come September 2023. Don’t let the holiday rush catch you off guard—be the smart elf who plans ahead and ensures a stress-free season of creativity. So, grab your hot cocoa, cozy up by the fire, and pre-order your favorite designs before the clock strikes midnight on July 12th!

    Dino Sweater - Tadah Slim Fit Tee

    For the Dino Sweater fabric I sewed up, I made a super cute tee for Ted. He thought it was ROAR-some.

    Christmas Tree's - Sibling Set

    I absolutely loved how this sibling set turned out! Jemma is wearing a Little Lizard King Cannes dress and Ted is wearing the Tadah Troop Shirt.​

    Santa Squad - Sibling Pj's

    Is there anything cuter than matching pj’s on xmas eve?! I had the best time sewing up this adorable set. You will not be disappointed with this print.

    Both kids are wearing the Peek A Boo Pattern Shop Night Owl Pj’s

    Decorations - Margot Peplum

    The kids didn’t get all the fun in this sew up, I got to have my fun with this gorgeous Margot Peplum from Love Notions. I have written about this one before and love shortening the bodice to give it a more empire waistline to better suit my shape. ​