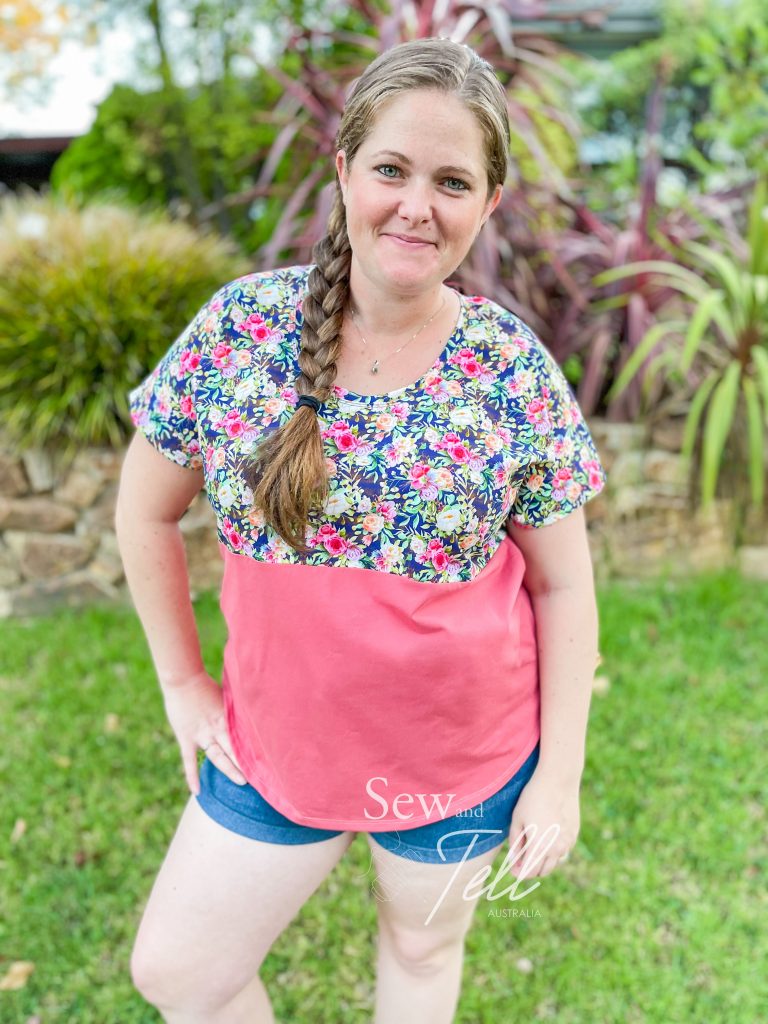
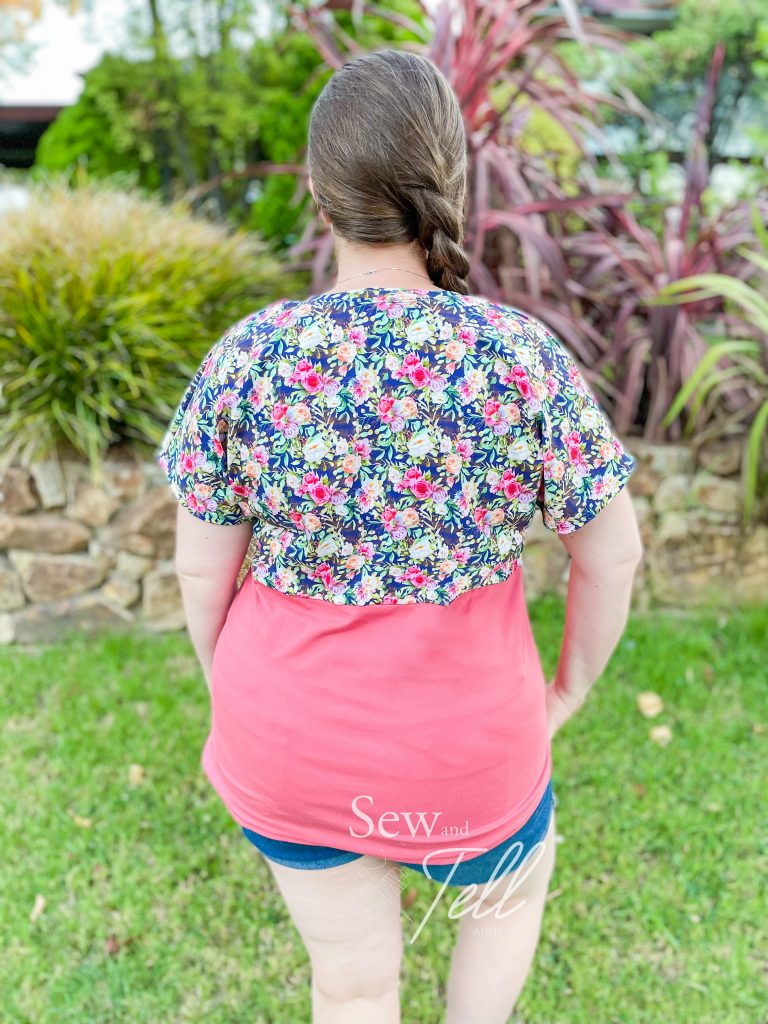
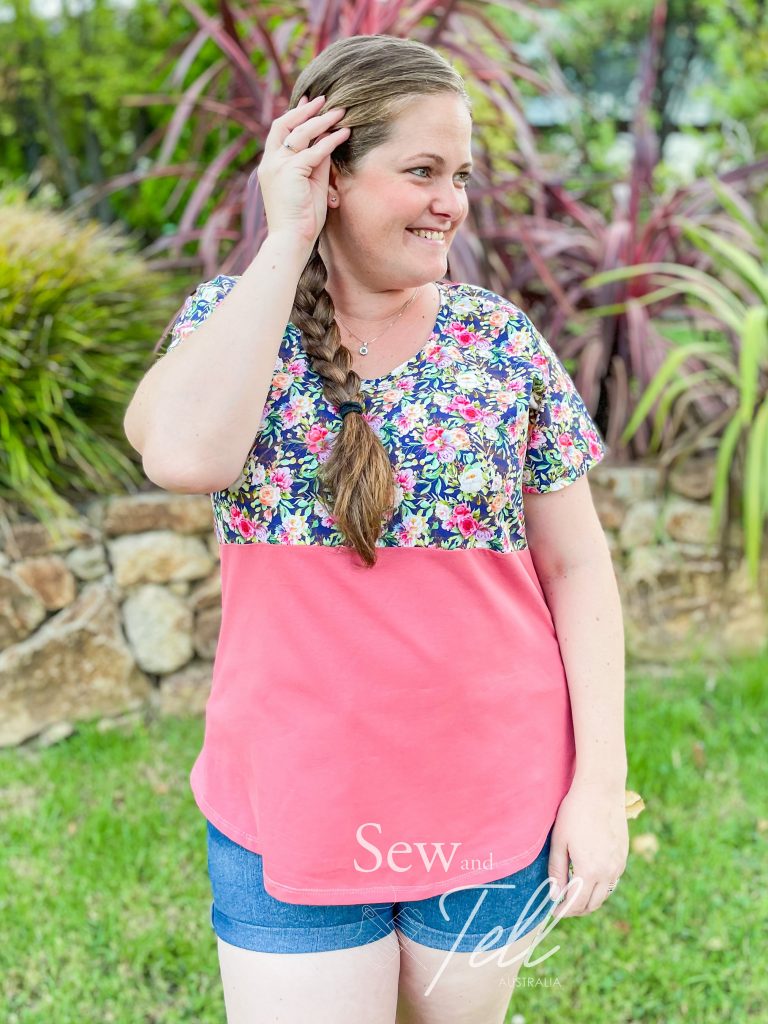
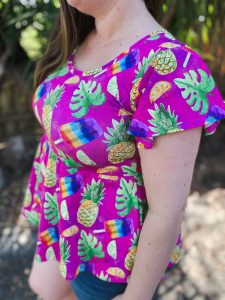
Pattern: Womens Domino Dolman Tee Designer: Peek a Boo Pattern Shop Fabrics: Accent fabric – Fabric By Missy Rose, Solid – Sew Unique Fabrics Measurements: Bust: 45″; Waist: 39″; Hips: 48″ Size made: 2X Adjustments: Took the sides in a little as it was very roomy Pros: Such a quick sew! and I love the different colour block options. Nursing Friendly as well Cons: It was very roomy in the 2X, I would normally make the XL, so will size down for my next one.
When Amy from Peek a Boo Pattern Shop put the tester call out for this one, I applied straight away. I love a Dolman tee, and the options for this one in terms of colour blocking were super appealing to me.
According to my measurements I fell in the 2X size category, which I made, but to be honest I felt this pattern had quite a lot of ease so it felt very roomy to me. I ended up taking the sides in about an inch on either side which worked well.
It is an incredibly quick pattern to put together, especially with the dolman style sleeve. I can definitely see a few more in my future, it is a great way to mix and match solids and accent fabrics. Also a good way to use up smaller cuts of fabric on the top colour block.
A great essential tee to have in your pattern collection.
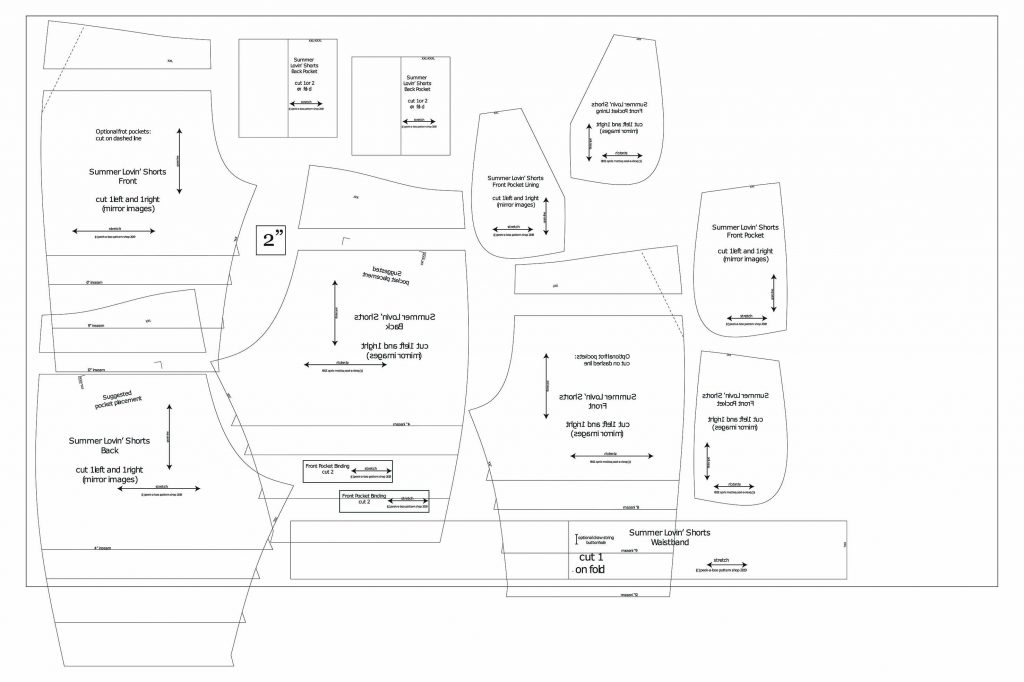
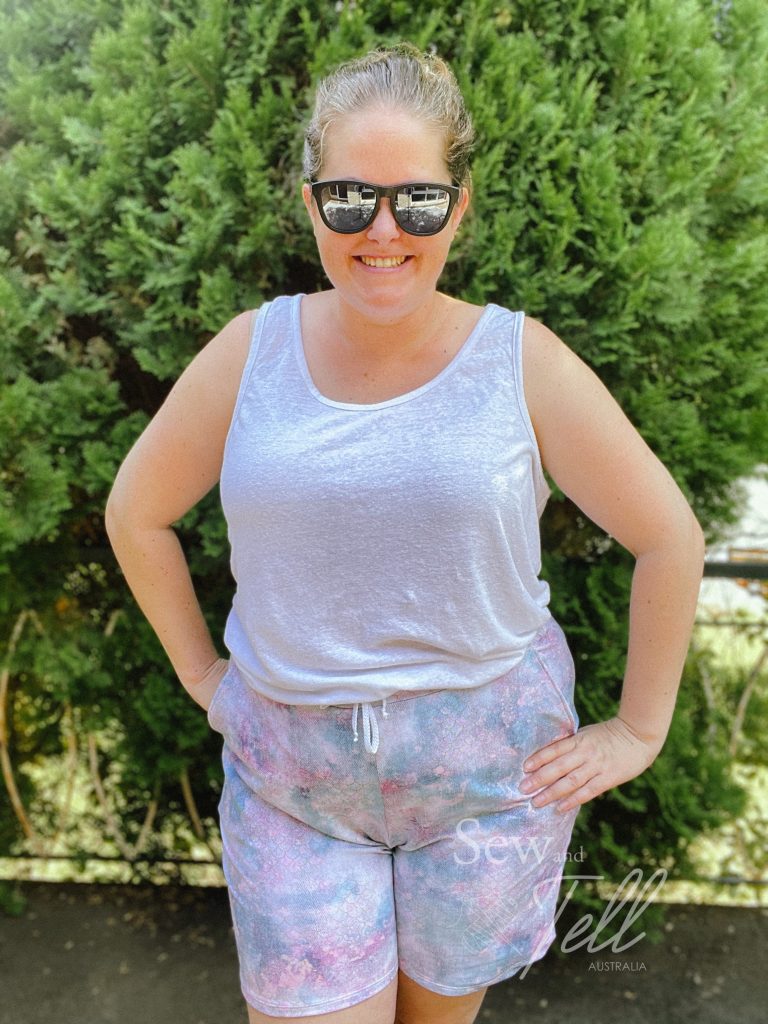
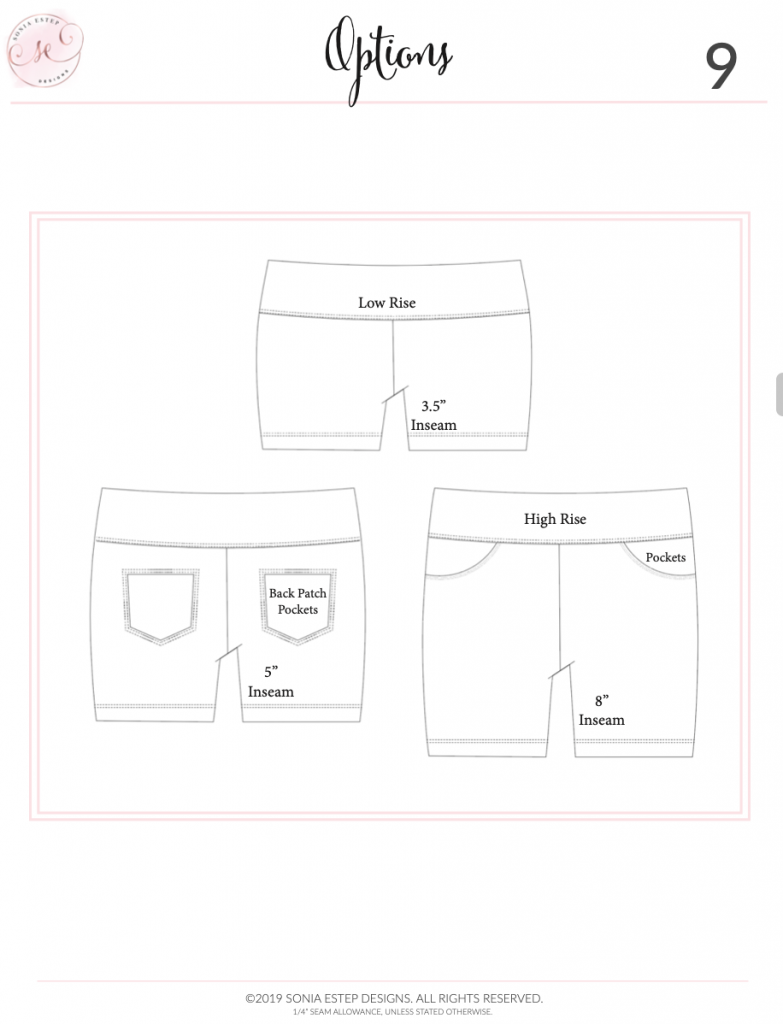
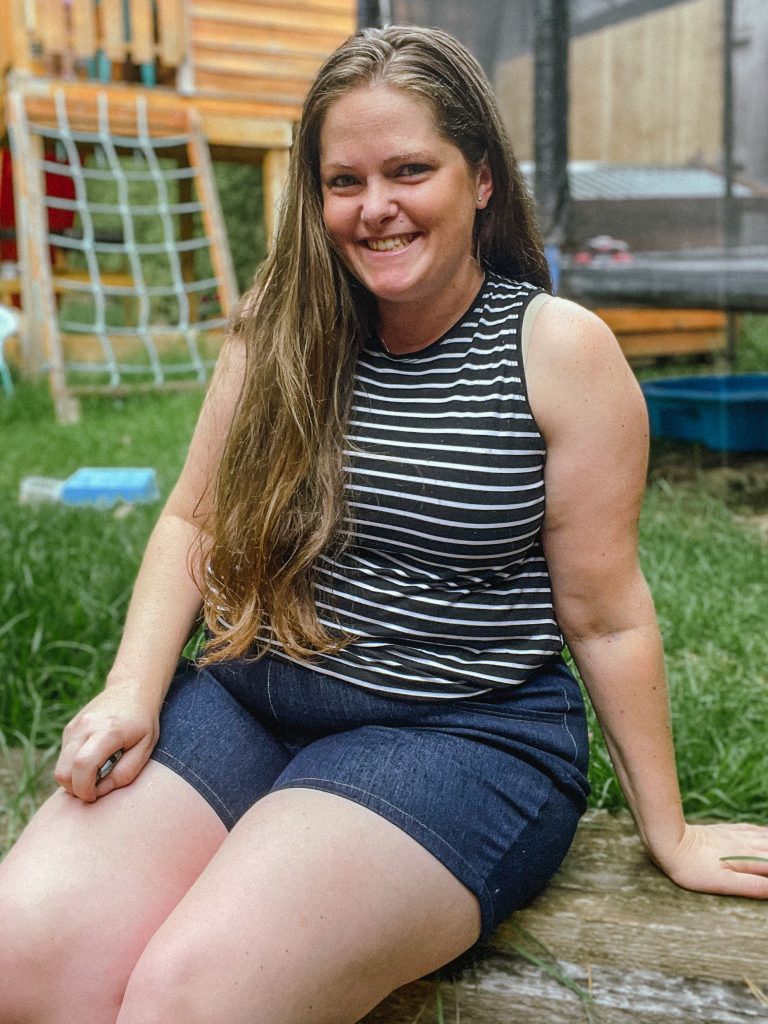
Pattern: Summer Lovin’ Shorts Designer: Peek a Boo Pattern Shop Fabrics: French Terry from Sew Unique Fabrics Measurements: Waist: 39″; Hips: 47″ Size made: XXL Adjustments: Adjusted the front and back rise by 1.5″ Pros: Very easy pattern and super comfortable. Perfect for, as the title suggests, summer shorts 🙂 Cons: No real cons, but a little size restrictive, it tops out at a XXXL. Hopefully they will revisit it to size up at some point.
After my recent success at seemingly cracking the code to my body for pants fitting, I was eager to try some other shorts and these seemed like the perfect comfy, loose summer shorts. I’ve also not made shorts from French Terry before but they are delicious! So soft and comfy.
The construction of these came together incredibly quickly which is always a bonus. If you are an experienced sewer, you should be able to put them together pretty much without looking at the instructions at all. The pockets are simple as are the back patch pockets. I originally cut the back pockets out but during construction I decided I didn’t want them anymore.
This was also the first time I used the program Inkscape to digitally make alterations to my pattern. It was incredibly helpful at playing ‘Pattern Tetris’ as well before I got to cutting. It was a bit of a bug bear of mine that I couldn’t lay out my fabric and place all my pieces down to try and get the most out of my fabric before cutting, but now that I am getting a better understanding of Inkscape, I will be able to do that again.
It is hard for me to learn a new program like this as I am a graphic Designer by trade and Adobe programs are my bread and butter. However, because I have fallen so hard for projector sewing, investing the time to watch YouTube videos on basic functions and how to utilise it is definitely worth it.
Patten tetris, digital style
So I was able to add the 1.5″ to both rises in Inkscape fairly easily, my next challenge will be to do a Full Bust Adjustment in it. I think thats a while off though, I need to watch a bit more first. If anyone has any YouTube videos to suggest, feel free to comment them below or email me at sewandtellau@gmail.com
Now excuse me while I go make allllll the pants and shorts 🙌🏼
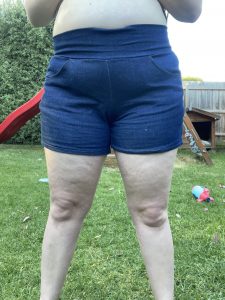
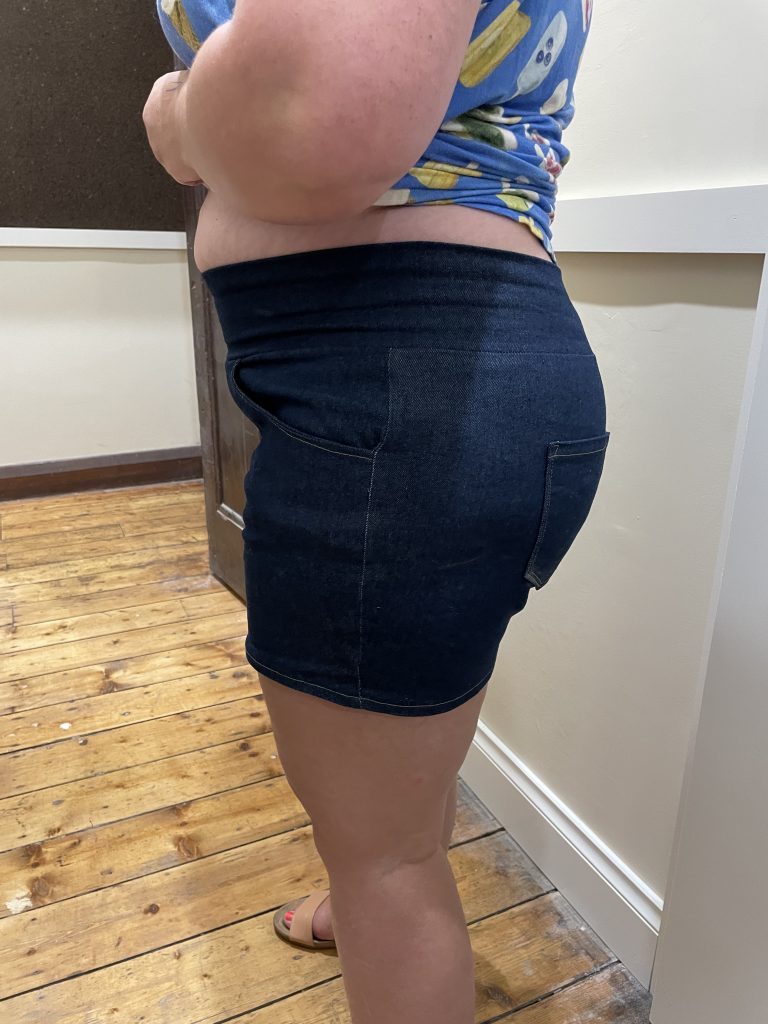
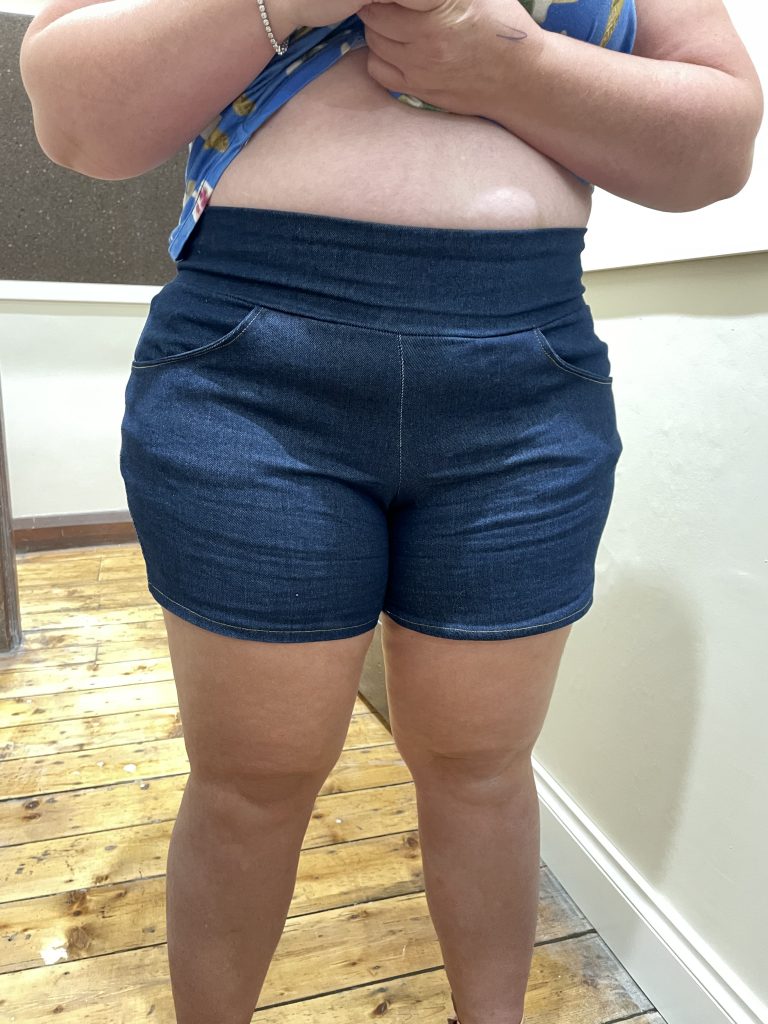
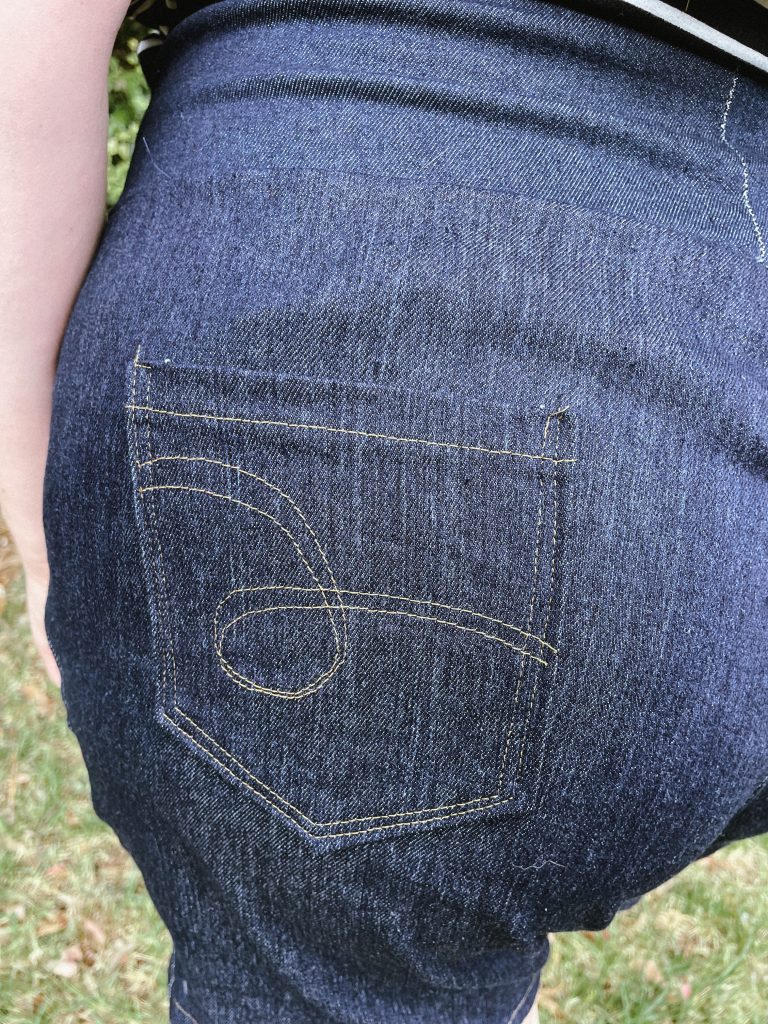
Pattern: Iris Shorts Designer: Sonia Estep Designs Fabrics: Stretch Denim from Spotlight Measurements: Waist: 39″; Hips: 47″ Size made: Straight 20 Adjustments: Adjusted the front and back rise by 1.5″; added 1/4 inch to crotch curve; added 1″ to the high rise waistband Pros: I am a big fan of pull on jean shorts and these fit the bill perfect. Very easy construction. Cons: As with all pants/shorts patterns I had no end of trouble fitting them, BUT I think I’ve worked out my body now and how to quickly fit pants going forward! So not a con of the pattern itself, just my body challenges.
Strap yourself in for this read, it’s going to be a long one!
I have had issues with pants/shorts since forever. I make them and they never fit right. It was so disheartening and honestly made me question my ability as a sewist. How can I sew the most complicated of tops, dresses and skirts and they look great, but pants? No deal. Every pair I made were ill fitting, clung to every lump and bump and half the time felt like my crotch was trying to eat the fabric.
I have had the Iris shorts on my list to try for a while but was very afraid due to my aforementioned fit issues. However, I decided the time was right to try again and this time I enlisted the help of my good friend and sewing teacher, Annette.
First I did my usual measuring, and decided from my measurements that I would be best with a size 20 waist and grade down to an 18. I cut them out and sewed them up with quiet confidence, THIS pair were going to fit…
My first ill fitting pair
Spoiler alert, they didn’t.
BUT, I did learn a tonne from this pair. I bought the book ‘Ahead of the Curve’ by Jenny Rushmore from Cashmerette and from looking through her fit pics, I determined that I needed to do something with the crotch, and possibly the back crotch.
So I set about making a second pair, this time FaceTiming Annette talking through my changes I wanted to make. I chose to add 1/2 an inch to both crotch curves and I scooped out both a little as well. After cutting these I eagerly sewed them up, this time they were going to be perfect.
Second pair, my bum was eating the farbic
Sequel spoiler, they still weren’t.
By this stage I’m slowing loosing the will to dress my lower half. I really couldn’t understand what I was doing wrong. I sent fit pics to Annette again, we discussed what could be going on and decided I would bring them to our kids tennis lesson the next day to see what I needed to do. I must say, it was a bit of a giggle to sit there surrounded by other parents, shoving food in the 1yos face while the 5yo plays tennis, pouring over a pair of pants drawing on them to see what changes needed making.
Annette gave a few suggestions for me to go home and try, but to be honest, I was a little done. I needed a pants break so I put them aside for about 3 weeks.
Eventually, Annette and I were due to meet up. After shelving them for a few weeks, I thought it was time to get them out and get her to help me in person. Giving her the chance to check fit problems on my body.
Once she was able to assess them on me in person, we talked about how we needed to raise the rise in both front and back. I have an Apron Tummy or Pannus Stomach, which everything I read about said I may need to make the crotch curve more of a J, but Annette advised against playing with the crotch too much if possible. In the end we settled on making a straight size 20 and adding 1.5 inches to both the front and back rises.
I cut the new pieces out with no real gusto. Third time lucky right, but I didn’t want to get my hopes up.
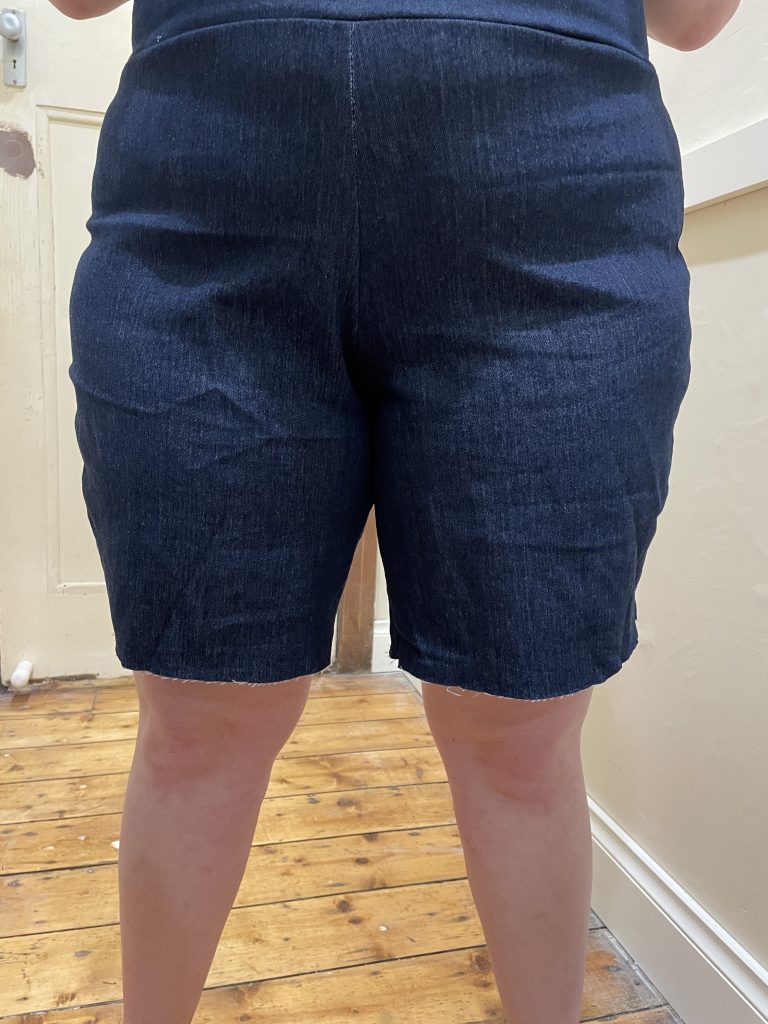
Well, after I basted them quickly together, just to get an idea of fit, they were near enough PERFECT!
As soon as I put them on we could see so many of the issues in the previous 2 pairs were eliminated. No smiling lines, no crotch and butt eating my fabric, no clinging to my apron accentuating the bulge. It all just skimmed over everything and fit just beautifully. I could have kissed Annette I was so happy!
Final pair that fit perfect!
So, what next?
Now that I appear to have ‘cracked’ the code to my body, I am going to try adding 1.5″ in the rise to all my pants going forward and see how that goes. I am also ready to try the Love Notions Glissando Shorts again I love this pattern and refuse to be beaten.
I’d also like to point out a few things about fit.
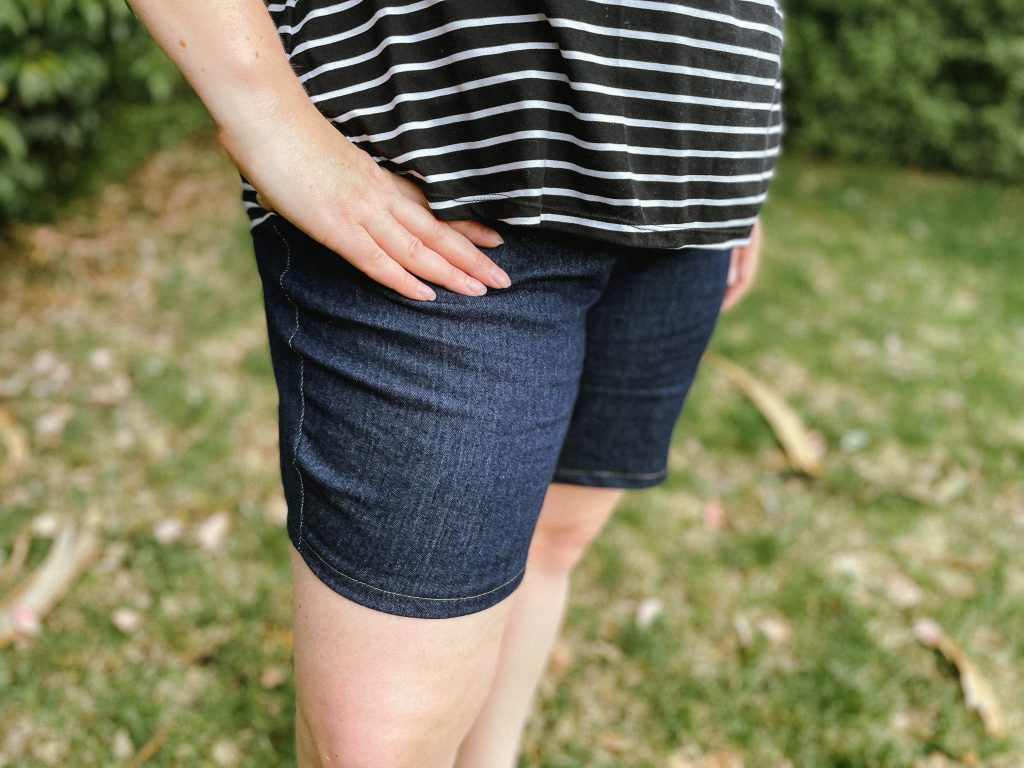
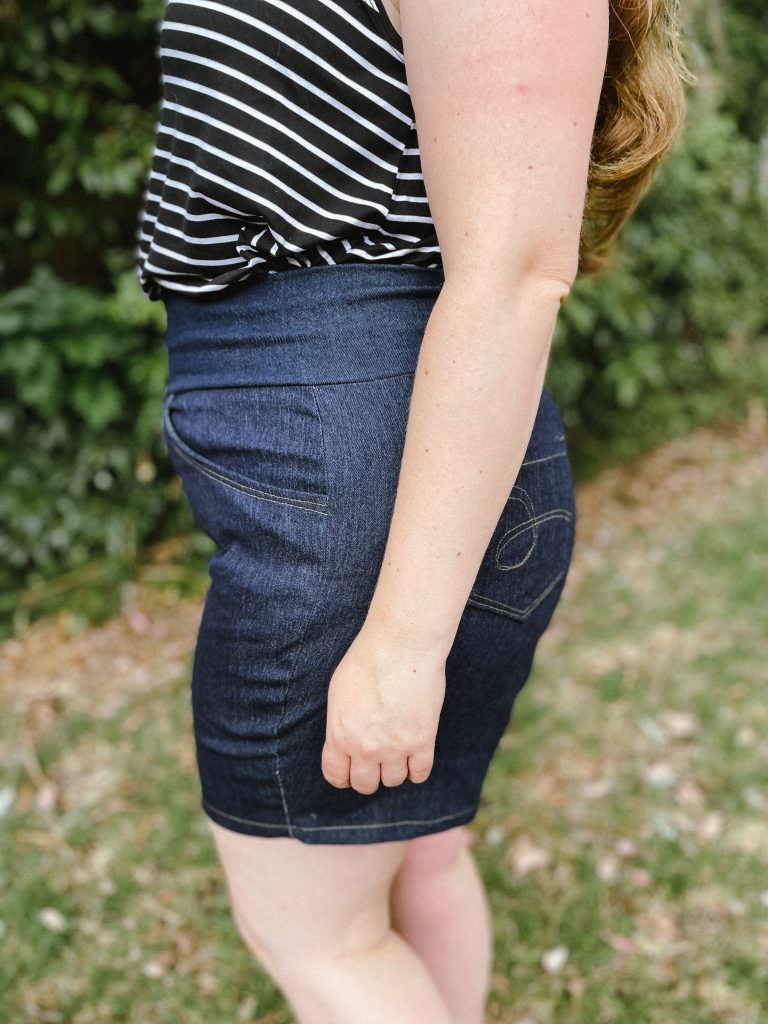
I asked Annette to try these shorts on, which she did. They fit her SO MUCH better. Like so much better. I asked if she would mind comparing measurements, which she didn’t. I’ll list them in a table to help visuliase
Annette
Megan
Bust – 45″
Bust – 45″
Under Bust – 39.5″
Under Bust – 36″
Waist – 40″
Waist – 39″
Hips – 51″
Hips – 47″
Height – 5’2
Height – 5’5
Torso – 16.5″
Torso – 19.5″
As you can see from above, we both have the same bust size, but I have larger breasts. Meaning most of the time I need to do a Full Bust Adjustment and Annette never does. We also are very similar in the waist, but different in hips, however I carry all my weight in my tummy and Annette’s is more focused on her bum and thighs. So while I had to size up and add height to the rise, Annette was fine the way it was as she didn’t have her tummy altering where the waistband sat. Her torso is also shorter as she is shorter than me which effected where the waistband sat on her. It never ceases to amaze me how measurements can be very similar, yet have such drastic differences on a body. I happily gifted my first pair of shorts to her as they looked so great on her and I didn’t want them to go to waste.
They fit so much nicer on Annette
I guess the moral to my long pants tale is, never give up and invest some time and energy into reading about fitting and if you can, get yourself some lessons with an experienced sewist who can help nut out your fit issues. Lots of pattern companies have free fit tutorials so spend some time really looking at where the pants are not feeling good for you and what it could mean. Also try not to be discouraged. Keep trying till you find your perfect fit, but don’t put a timeline on it. I was frustrated I couldn’t work it out in a day, it’s taken me a year, but really, fitting is only learnt with time and patience.
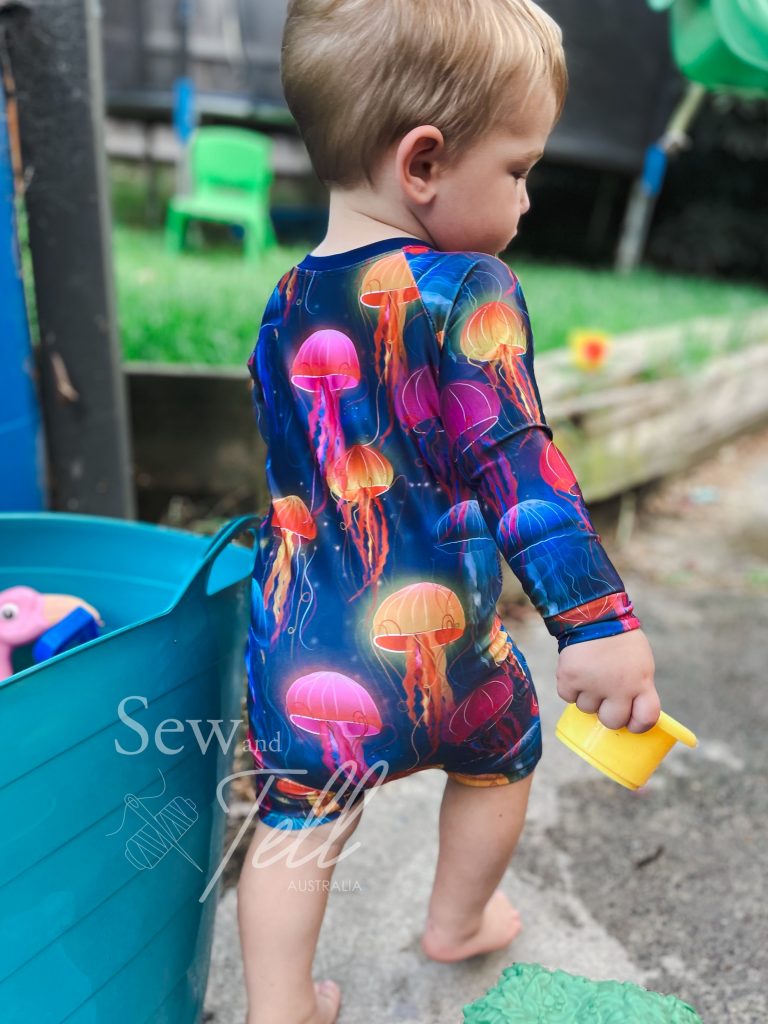
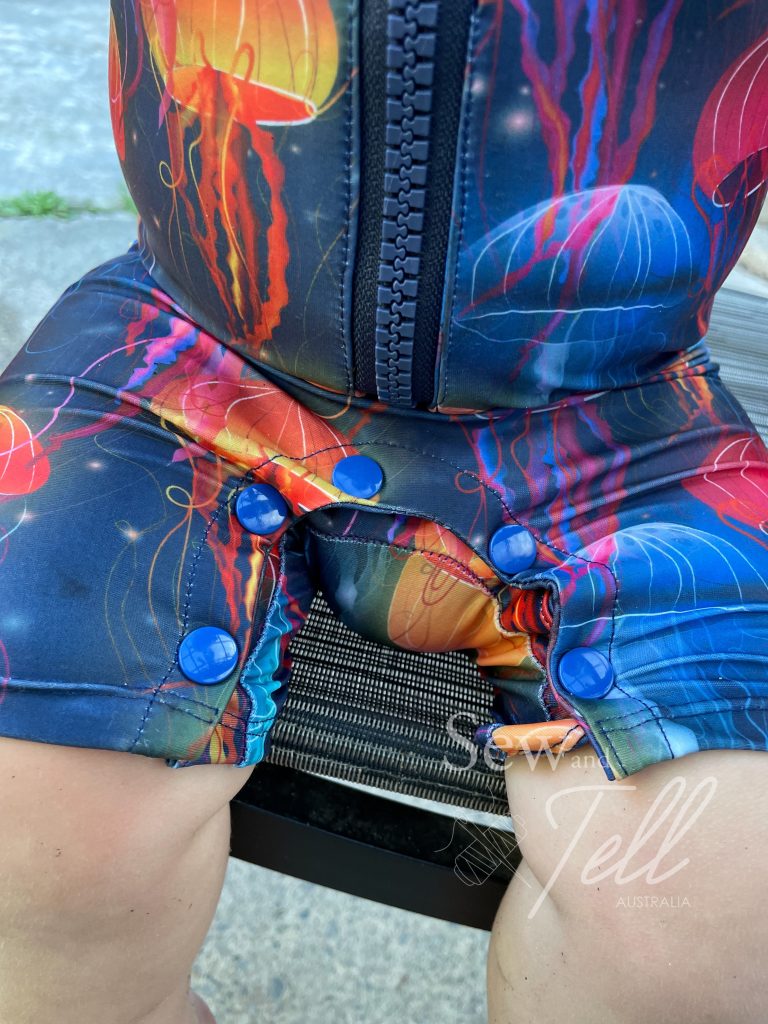
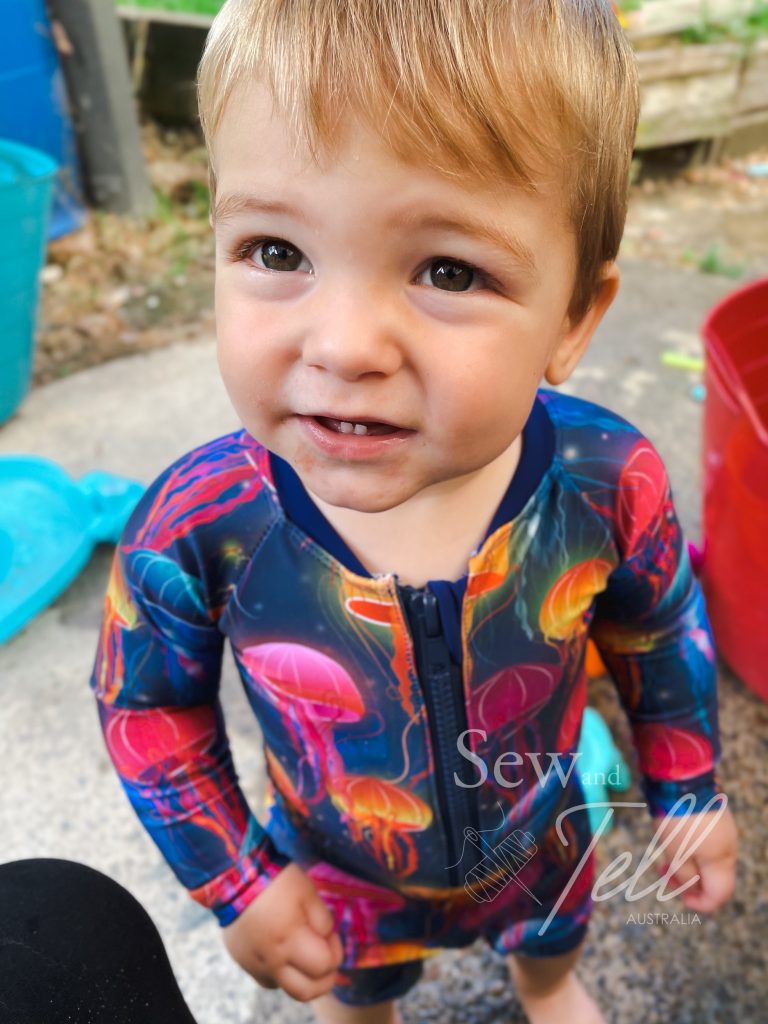
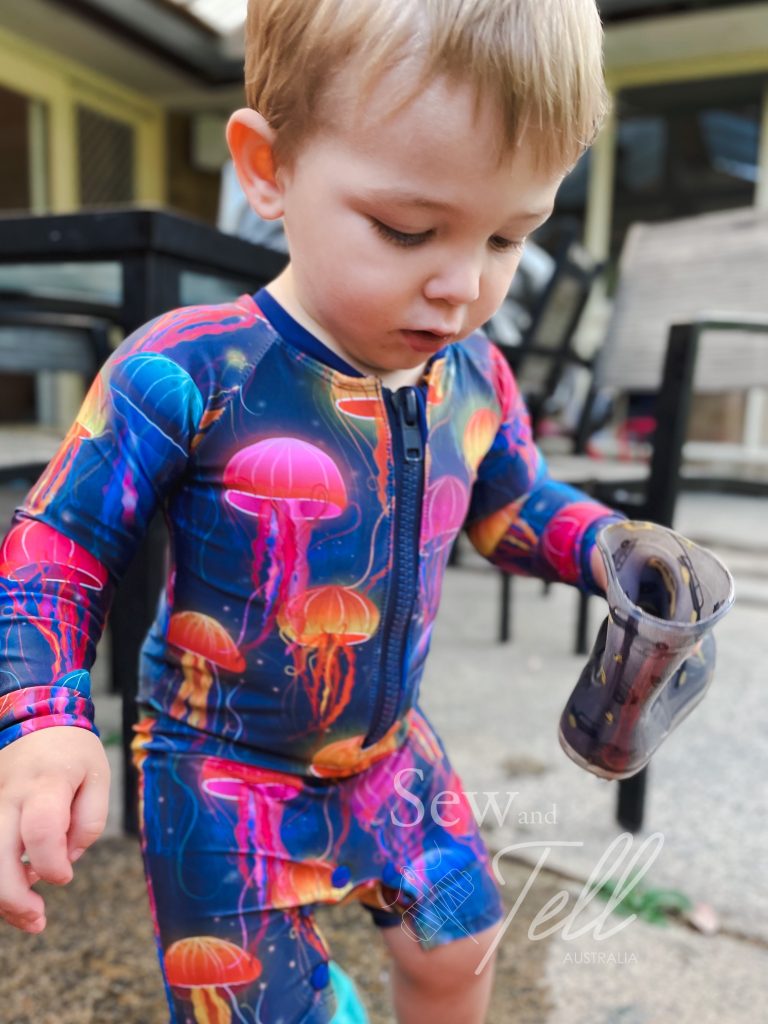
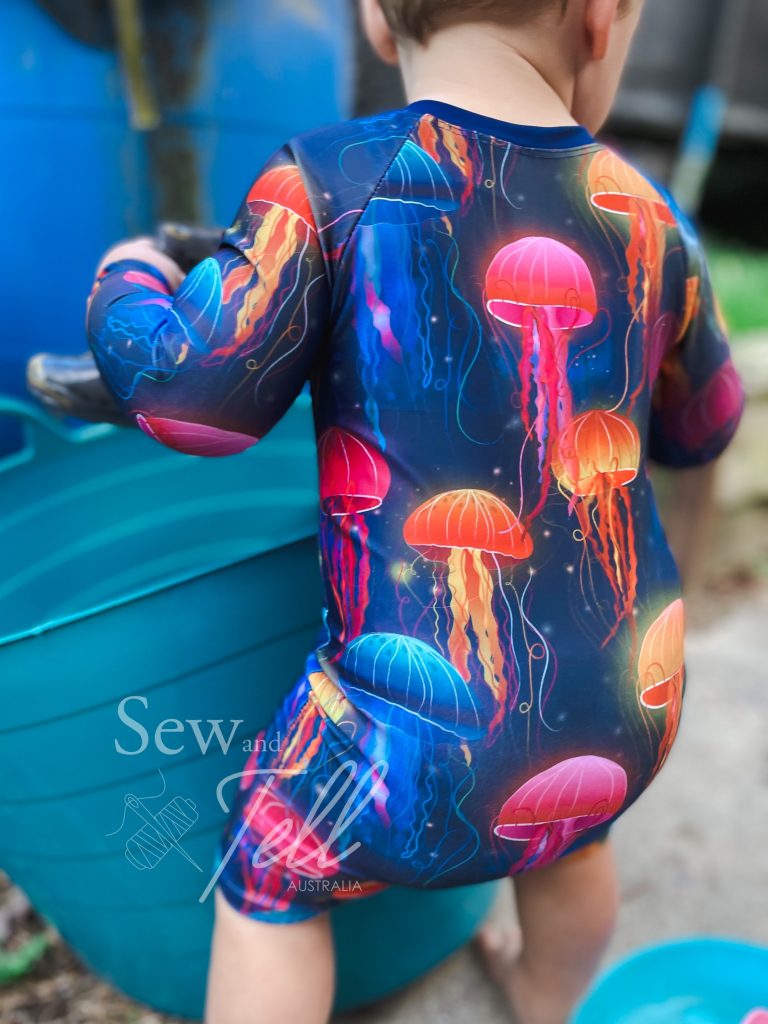
Pattern: Aloha Burn Blocker Designer: Peek a Boo Pattern Shop Fabrics: Swim Fabric from Sew Unique Fabrics Measurements: Chest: 21; Waist: 20″; Hips: 21″ Size made: 1 Adjustments: None Pros: LOVE the snap crotch option. Trying to change a nappy on a wet kid, who doesn’t want their nappy change is a challenge, so having the snap crotch makes a massive difference. Cons: I used a zip that was really too chunky. I also didn’t measure my son before I made it, so its a bit tighter
This was my first time sewing with swim, so I was a little nervous, but I’m so happy with how it turned out.
I used swim fabric from Sew Unique Fabrics as I was helping promote their latest release, SUF Ultimate. I am really impressed with the quality of their swim, it’s quite thick and has good coverage even when stretched over bottoms. The zip I got from Spotlight, its just a chunky closed end zipper.
The instructions were very clear and easy to follow. I would class this as an intermediate pattern, but as I say with most things, if you’re willing to give it a go, there is nothing stopping you.
I had a bit of trouble with the neckband and zipper, but I nearly always do. I need to practice some more as I often stuff it up 🙄 The snap placket along the crotch is definitely a favourite feature of mine. Trying to change a nappy of a kid in wet swim gear is a nightmare, so this is perfect!
All in all I will definitely be making more of these, I love that it goes to a kids size 12. So plenty more time to make for my boy, and my girl! The choice between long and short sleeve is also a bonus in our hot Australian sun. 10/10 for me.
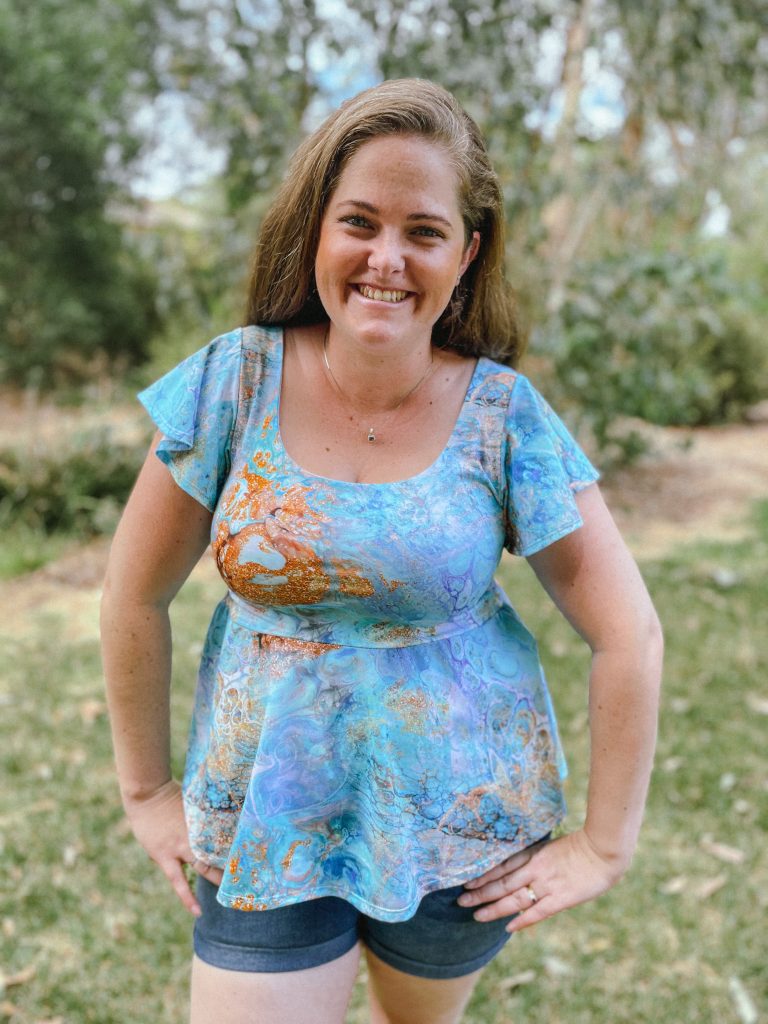
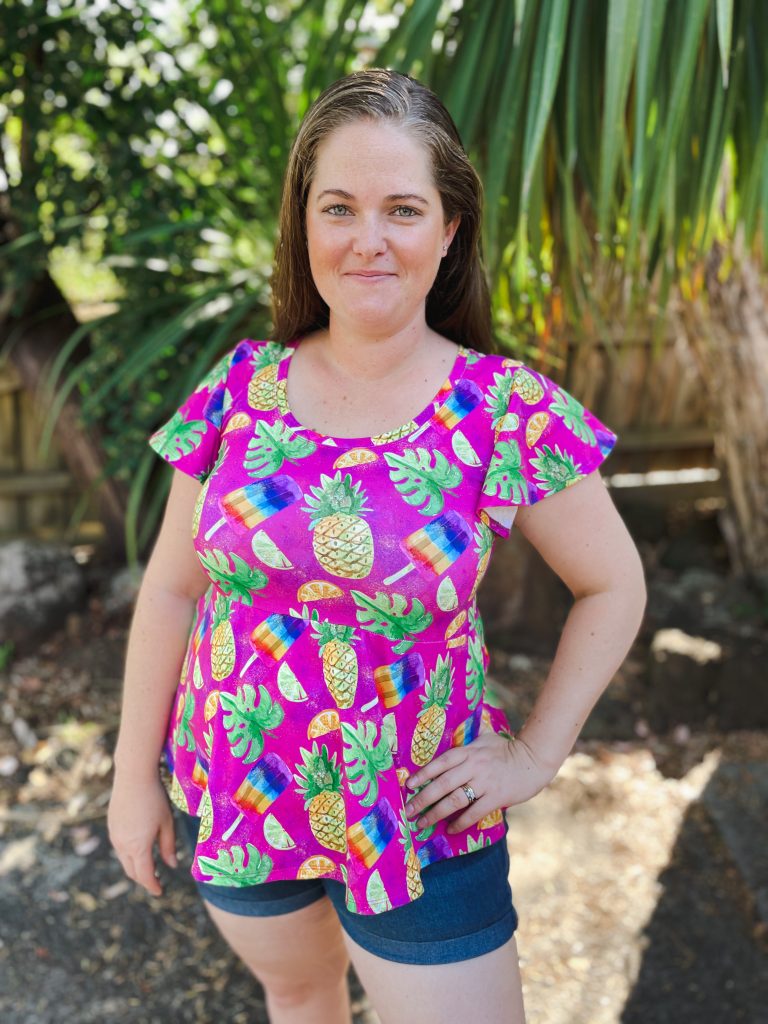
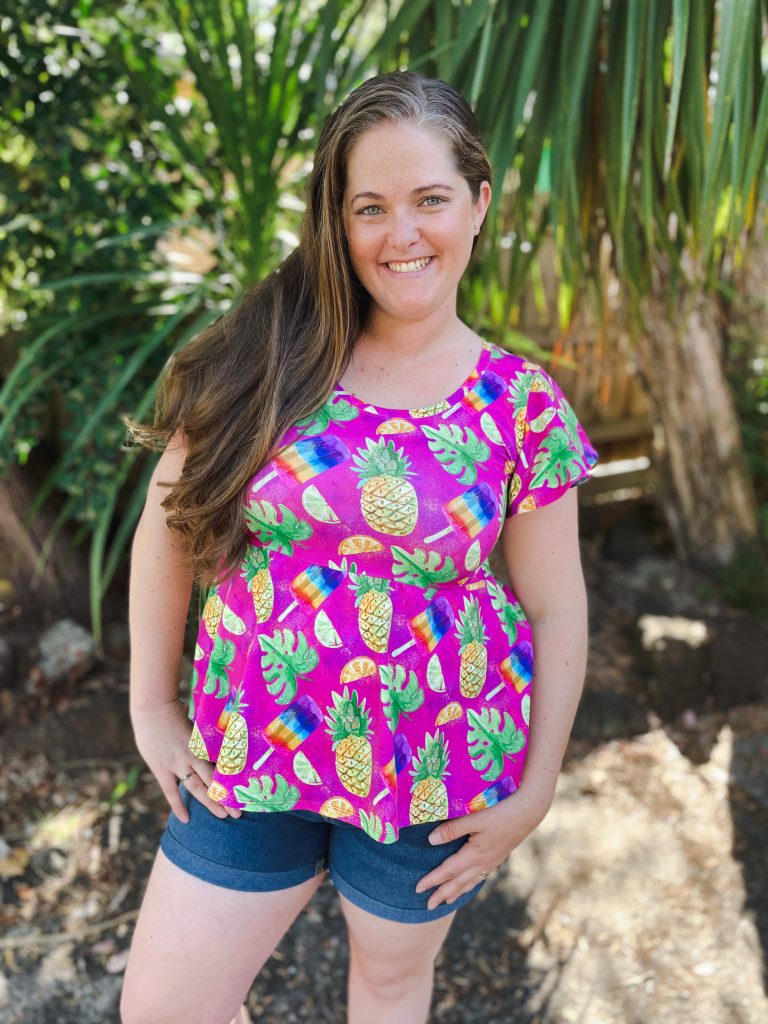
Pattern: Wylde Dress/Top Designer: Stitch Upon A Time Fabrics: ‘Summer Fruits’ from Sew Unique Fabrics. Cotton Lycra 220gsm Measurements: Bust: 42.5″; Waist: 39.5″; Hips: 47.5″ Size made: XL Adjustments: Changing the bodice from fully lined to a simple neckband Pros: LOVE where this hits my waist and flairs out hiding my tummy Cons: The fully lined version was cumbersome, hence this tutorial on using a neckband instead!
I first made the Stitch Upon A Time (SUAT) Wylde in the top version a few weeks ago and immediately fell in love. The fitted bodice, low neckline and skirt that flairs out from the bust is the perfect combo for my figure to help me feel more comfortable about my mum tum. I tend to favour a lower neckline in general as it detracts from my tummy and focuses more on my décolletage.
The only thing I didn’t love about it was that it was fully lined. Luckily, adding a knit neckband was a really easy thing to do and I’m going to show you how to do it as well!
Adding, or changing a neckband to either a higher or lower one is a pretty simple process, it just involves some maths. Which you can also do on Google if your mathematically challenged like I am haha.
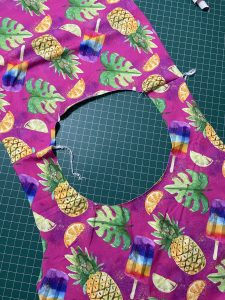
Obviously for this example I’m using the SUAT Wylde dress/top, but the same principles apply to any knit top really. To start with, you need to cut all your pieces out as indicated in the pattern except for the lining pieces or collar/hood if its something else you are changing. You then need to sew your front and back pieces together at the shoulder seams. (pic. 1)
Pic. 1 – Front and back pieces sewn together at shoulder seams
Pic. 2 – Fold the pieces in half to find the centre of both the front and back
Next you want to fold your bodice piece in half (as shown in pic. 2) to find the centre of both the front and back pieces. It is easier to do this on a flat surface as next we’re going to measure it.
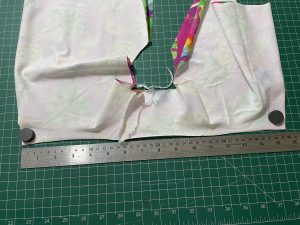
Once you’ve done that, you need to lay your bodice pieces out in a way that you can measure the neck opening. (pic. 3) In my example, it is roughly 15.5 inches. Remember, this measurement will be HALF of what the full opening actually is as we folded our bodice pieces in half. Again, for my example, if I could lay out my neck opening flat, it would be about 31 inches.
Pic. 3 – Laying out the neck opening
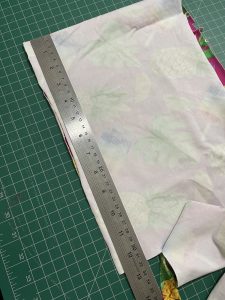
Pic. 4 – Measuring the neckband piece
Now the ‘Rule’ for working out how long to cut your neckband piece is usually around 85%-90% of your neck opening. My neck opening is roughly 31 inches. I went to Google and typed in 85% of 31 inches = 26.35 inches. The good thing about knit garments is that there is a little bit of wiggle room being that its stretchy. I rounded down to 26 inches. THIS IS YOUR NEW NECKBAND size. I then halved it = 13 inches to make it a little easier to cut the piece.
To cut your new neckband, get your remaining fabric and fold in half (pic. 4). Now, the height of your neckband is a little bit of personal preference. A common adult neckband height is 1/2″ so this can be a good starting point. You just have to remember to double it, as you’ll be folding the neckband in half and also add a little bit for seam allowance. I generally cut my neckband pieces at a height of 1.5″ x whatever length I need.
The piece I cut for this garment was 26 inches long by 1.5″ high.
Once you have that worked out you and cut the new piece can go ahead and attach your neckband as you usually would. If you aren’t super confident at how to sew the neckband on, this is a pretty good tutorial on YouTube to watch by Seamwork. https://www.youtube.com/watch?v=GF4Cix9TC9s
My biggest tip for a professional neckband is to make sure you quarter both your neckband and garment. It makes it so much easier to attach and a much nicer finish.
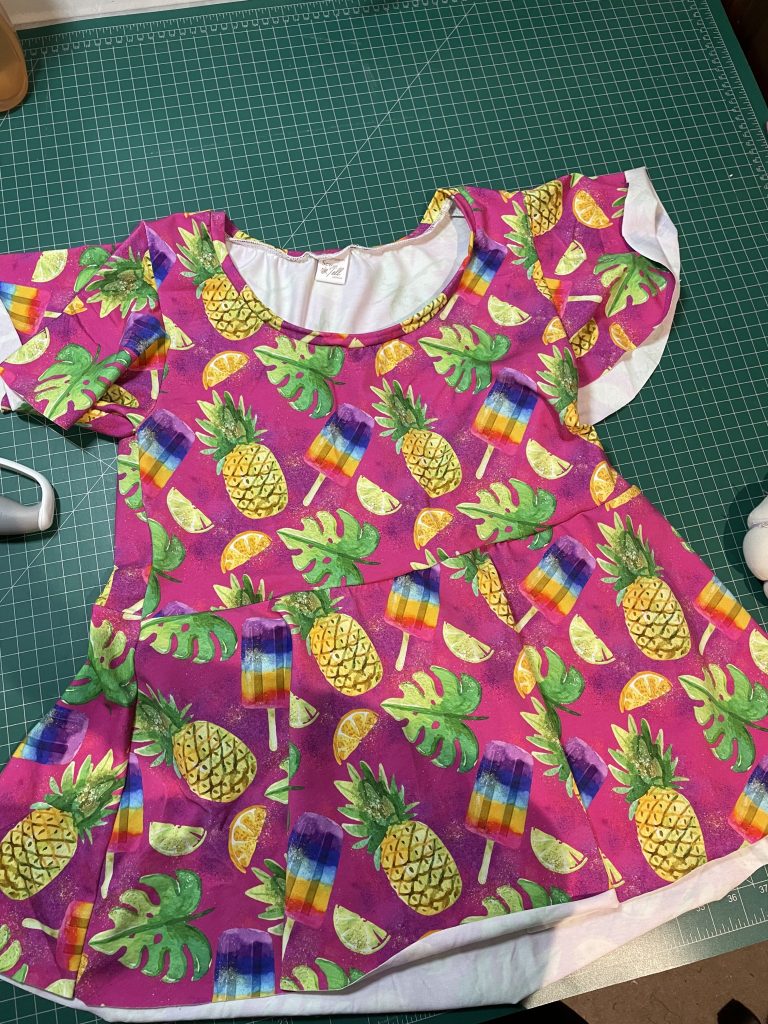
All done!
Them just sewn feels 😍
Finish your neckline with either a twin needle or Coverstitch and Tadah! You’ve just converted your fully lined neck opening to a neckband.
Now, there are some differences between the 2 garments as seen below. The neckband does give the garment a more ‘closed’ opening, but I definitely still like it. To help give it more of the look of the original design I think the next one I make (yep I’ll be making more cause I love it), I will try a neckband at 95% instead of 85%. This will allow the neckline to be more relaxed and settle back into more of the original opening size.
I hope this helped give you some confidence to giving this a go yourself, its not as scary as it seems, and if you get it wrong, you can rip it off and try and again 🙂
Tag me in your makes on Insta so I can see your beautiful creations @sewandtellau
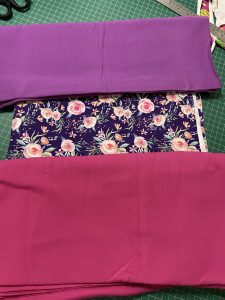
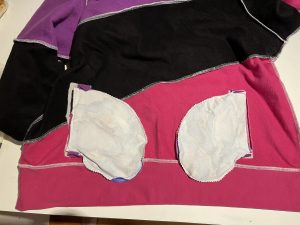
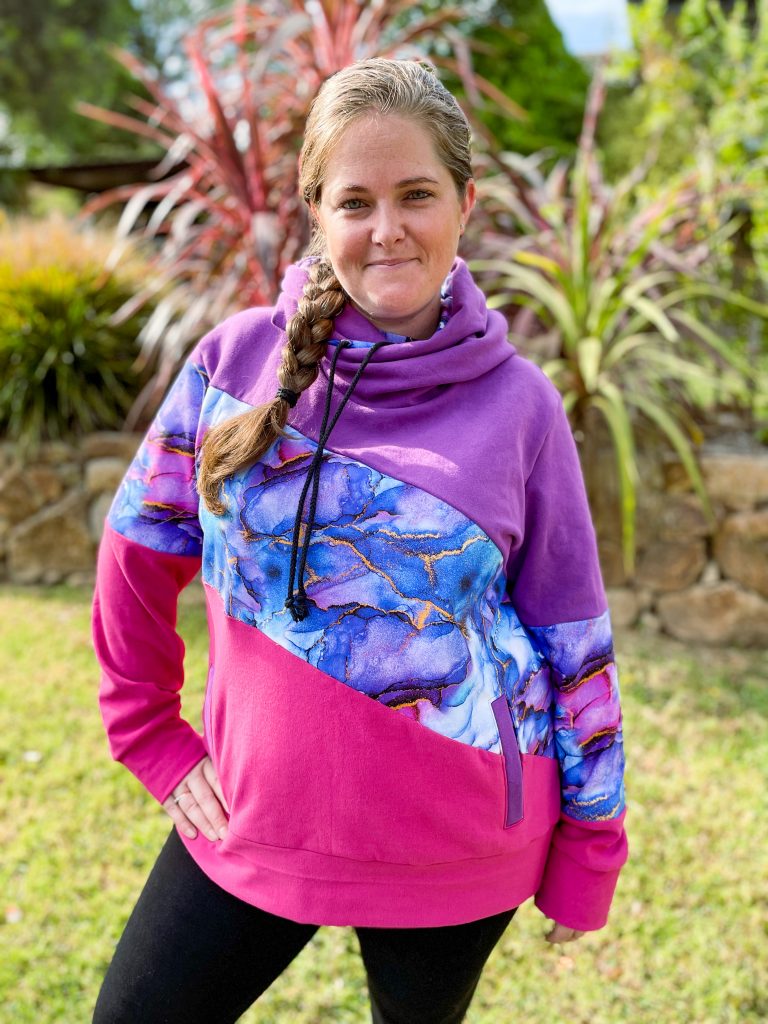
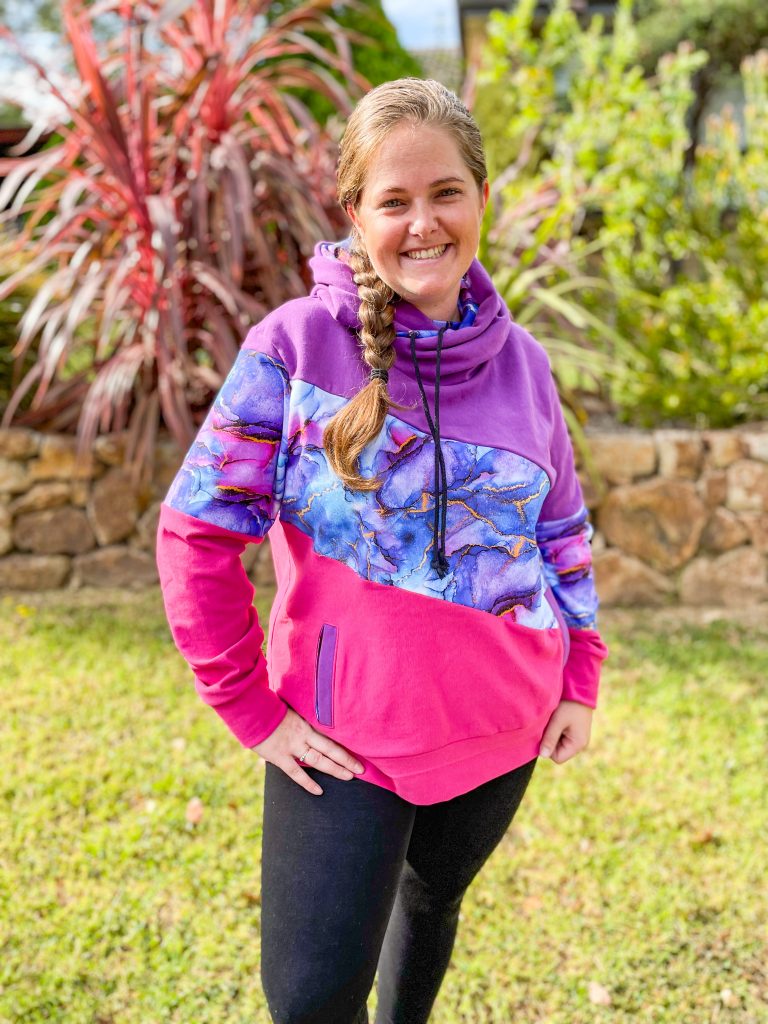
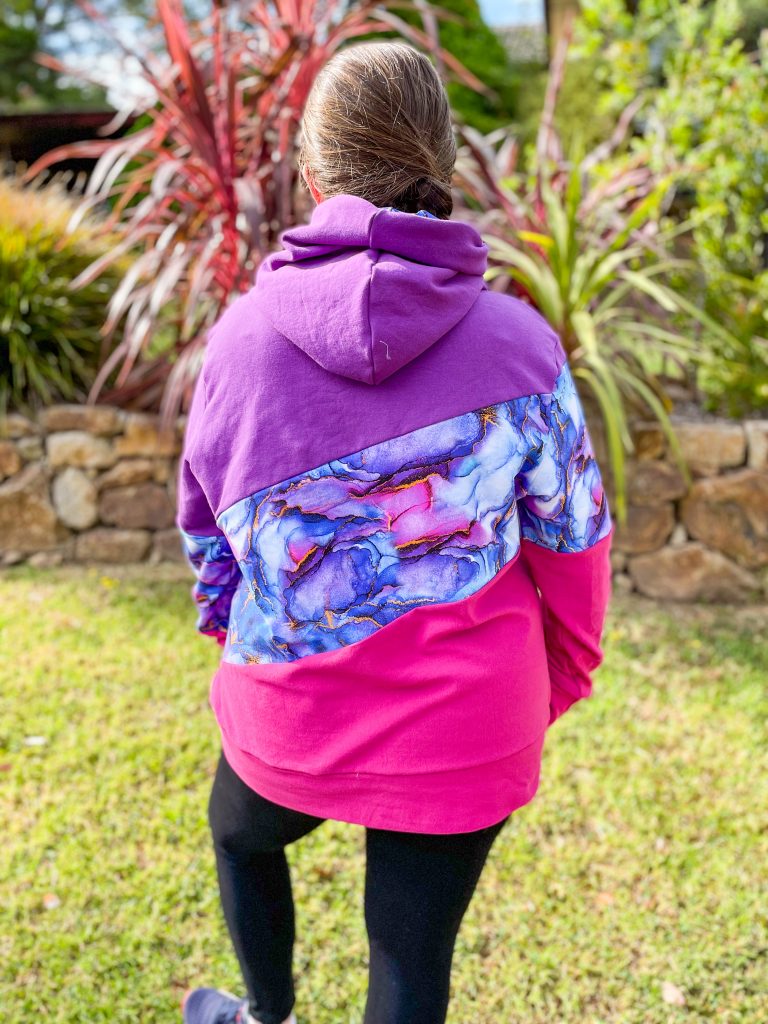
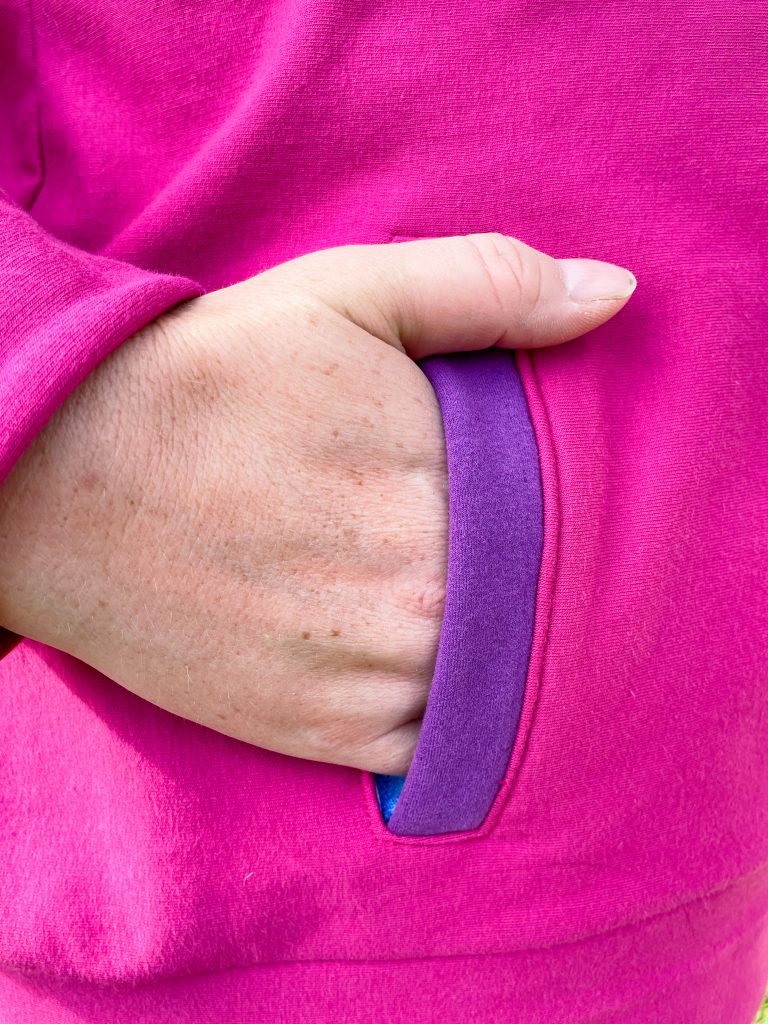
Pattern: Harper Hoodie Fabrics: Purple: Cotton Fleece from Sew Unique Fabrics Accent: ‘Artistic Ink’ from Sew Unique Farbics Pink: Jogging Sweater Knit from Wattle Hill Fabrics Measurements: Bust: 42.5″; Waist: 39.5″; Hips: 47.5″ Size made: Straight 22. I like my hoodies big and oversized Adjustments: None Pros: LOVE the colour blocking on this. It is super comfy to wear and I love the look of the welt pockets. Cons: I had to unpick the welt part of the pockets 3 times before I got it looking good enough that I was happy with it. I also felt the pocket bags on the inside look a little clunky.
This brand new hoodie pattern from Sonia Estep is a big winner in my eyes. From the minute I saw it, I knew I would love it and am so glad I got a chance to sew it up. It may be Summer over here in the Southern Hemisphere, but its never too early to start my winter wardrobe. Especially living in Melbourne. We can be in the middle of a heat wave and then next thing you’re freezing and fighting off hail storms! Never a dull moment in Melbourne haha.
I had a few choices for fabrics on this one. As I often do when I’m planning a new project, I got them all out and laid them together to see what combo jumped out at me. I straight away was drawn to the purple and pink combo, and the artistic ink was definitely a front runner.
As the artistic ink is a Cotton Lycra, quite thin, and the purple and pinks are cotton fleece, thick and fluffy, I decided to cut all my artistic ink pieces in black Cotton Fleece as well to ‘back’ each piece. I then treated them as one piece when sewing it together. It is a little bit of a extra tricky step, but well worth it for me.
Once I had decided on the fabrics, the next was choosing a size. In the past I have sewn to ‘my measurements’ and while the garments fit, and looks good, its taken me 3 or 4 hoodies to realise that I actually REALLY like oversized hoodies. Like, I buy RTW mens sized ones cause I want them big and snuggly. So this time I made a size 2-3 up from what my measurements said and its PERFECT.
The process of putting the garment together was quite straight forward, just a few extra steps in the piecing it together. I had to be very careful I made sure all the pieces went together as they should so that the colour blocks would match up. I did put my bottom pieces on upside down to begin with so that was a fun half hour unpicking that. doh!
My fabrics laid out to choose colour combo
The next part I had some issues with was the welt pockets. I had not done a welt pocket quite how it was constructed in this pattern and had some problems getting my outer piece even and nestled nicely from the front. One of the sides I unpicked 3 times, and the other side once. I am glad I did, as it was worth it to have it looking good, but it did cause for some swear words haha. I also thought the inside pocket bags were a little odd in terms of how they sit, and if I make another would look to how I could modify to perhaps make a circle through pocket, but for now I might hand stitch them to the inside so they don’t dip below the waistband when weighted down by objects in them.
Inside of pocket bags and my black ‘lined’ artistic ink pieces
I had some questions over wether I crossed my hood too much when I first did it, but it works. The designer also commented that the hood is intentionally a more ‘dramatic’ hood crossover than most. The cowl look around the neck when its not up is particularly appealing to me, I think it looks great!
The Harper Hoodies is definitely a staple in my wardrobe now and am looking forward to being able to crack her out A LOT over winter. The pattern is on sale for 50% till Thursday, click on the link below (afflink) to grab your copy.
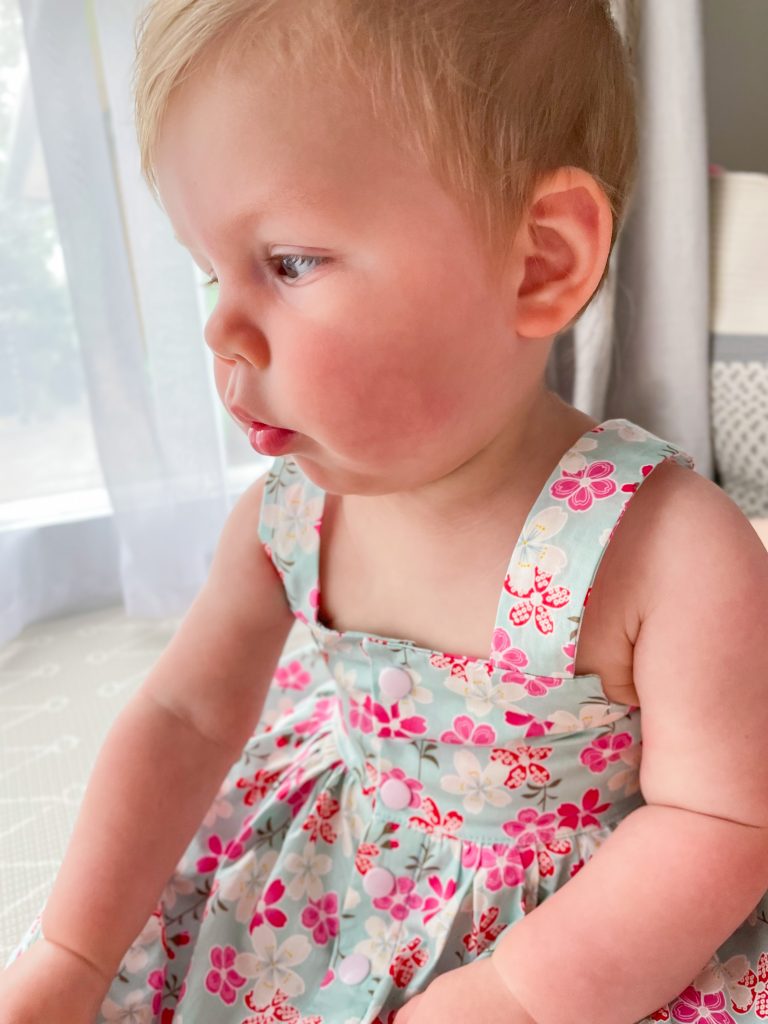
Pattern: Back to Front (BTF) Dress/Romper Designer: Tadah Patterns Fabrics: Cotton Poplin – I think from Spotlight, have had a LONG time Measurements: Chest: 46cm; Waist: 47cm; Height: 77cm Size made: 00 chest graded to 0 height Pros: Really simple construction, can be worn both ways. Cons: Size was a little tight on my models, may want to consider sizing up.
The Wrap Up:
This was my first time testing for Tadah. As a long time lover of there patterns, it really was quite an honour to get a chance to help owner Lauren to test this latest pattern.
I put my hand up to test the 00 size as I was going to be using my friends little girl as my model. When I got her measurements she ended up fitting in the 00 size for chest but 0 for length, so I ended up grading to suit.
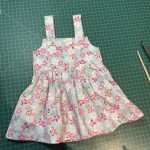
Finished Garment ready for fit photos
The version I tested was a little long in the short straps which I know was fixed in the final pattern, which is why its so important for designers to get a variety of models in the test phase, to iron out any of these little issues.
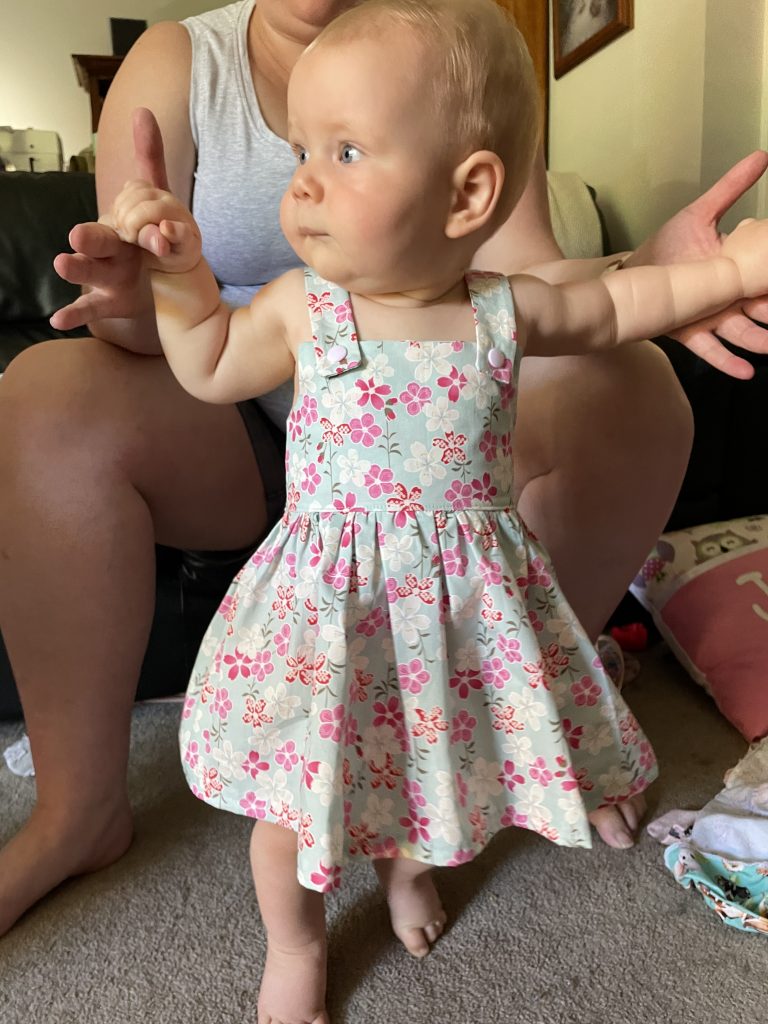
I chose to use a cute floral woven I’ve had in my stash forever and it turned out so cute. I did the most simple version as I was running a bit short on time to get my fit photos in. I was able to use my friends little girl for fit photos, but on the day didn’t get to do any styled shots. As there weren’t any major changes to the final version, I was able to use my fit garment for the final photos but changed models to my neighbour as she was available the day I could take the pics. Lucky the are the same size 🙈.
Fit photos with my model
I love the versatility of this pattern being that it can be worn both ways and still look super stylish and cute. It also has quite an easy construction designed with beginners in mind, so definitely give this a go if you’re new to sewing and want something easy. Lauren also has a really helpful Facebook Group that you can join for extra help or advice if you get stuck.
I have a few more of these planned now, I want to try the ruffles and I think they would make a great baby gift.
This pattern is on sale to celebrate its release so jump on the link below and grab it while its discounted. Tag me in your make so I can see your cute version as well!
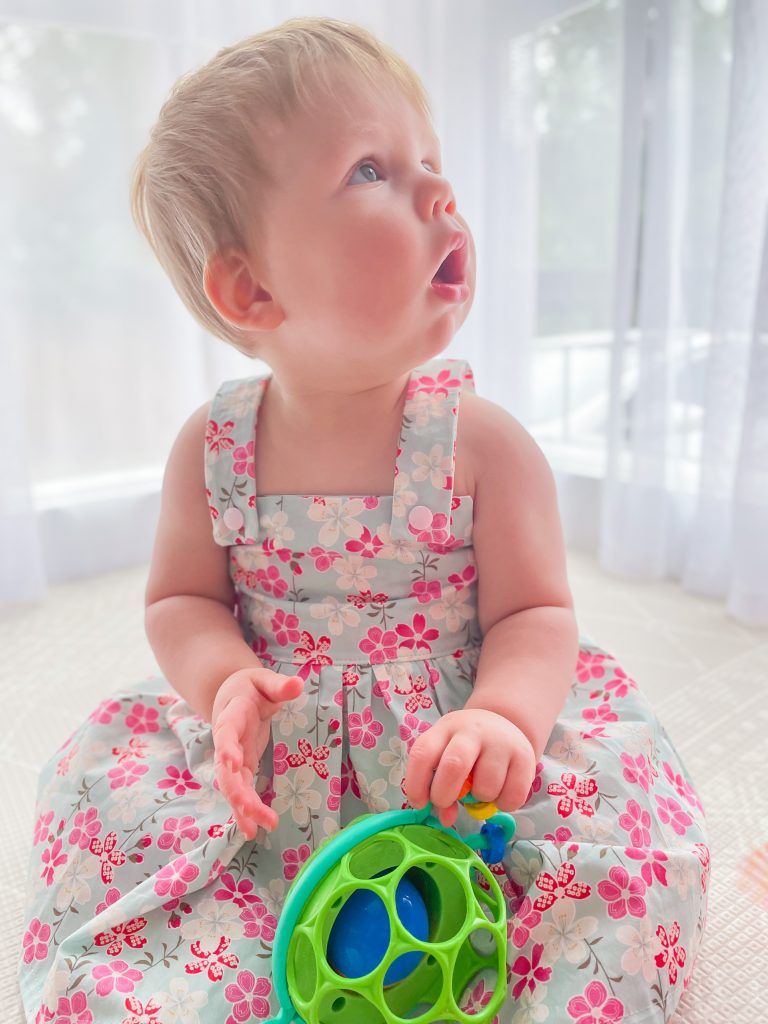
I was super excited to recently be involved in testing the newest pattern for Peek a Boo Pattern Shop. The Side Snap Body Suit pattern, was released this week as part of their lullaby line range designed for preemies up to 24 Months.
I chose to test the short sleeve, 12 months size and I am so happy with the final result.
Peek a Boo is one of my fave companies to test for as Amy, the owner is always so easy to communicate with and usually there are very minimal changes from the original version.
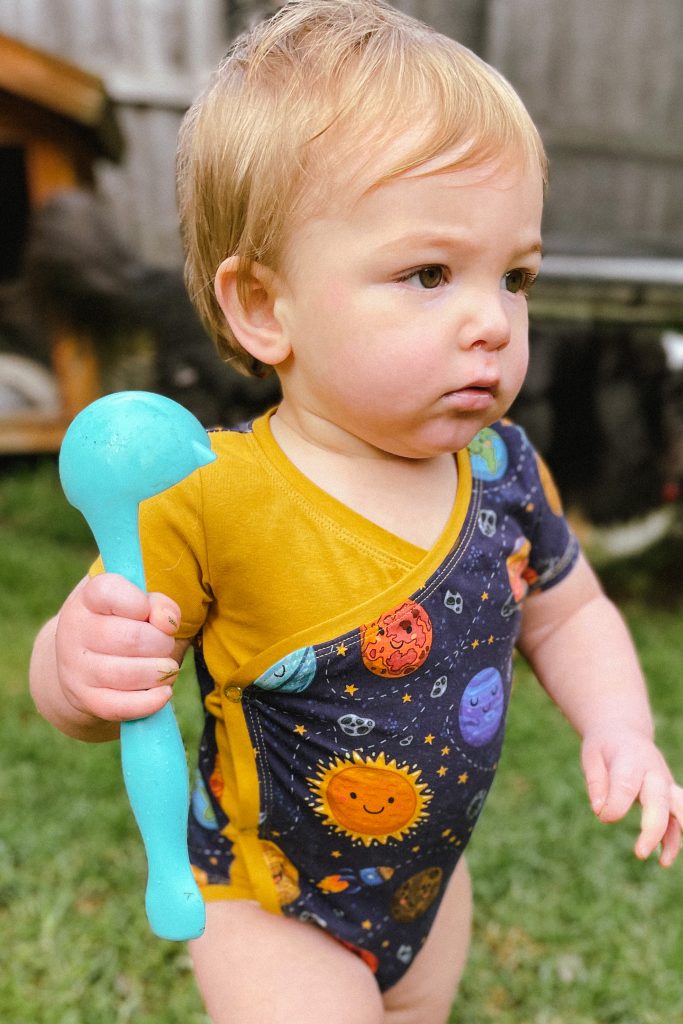
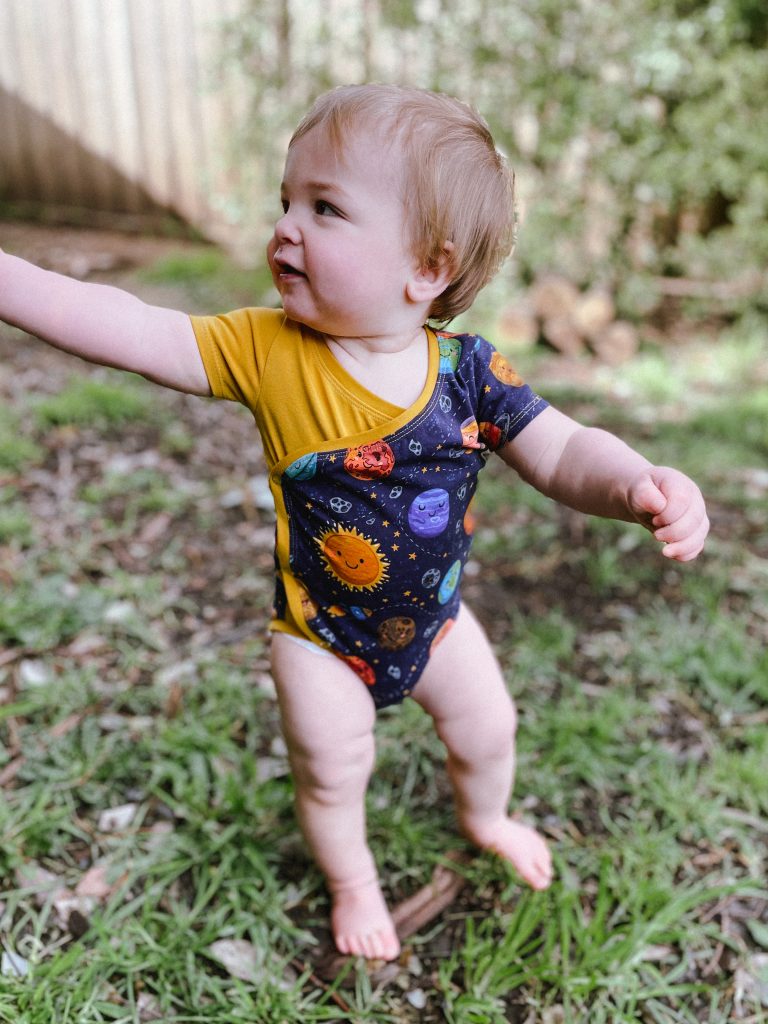
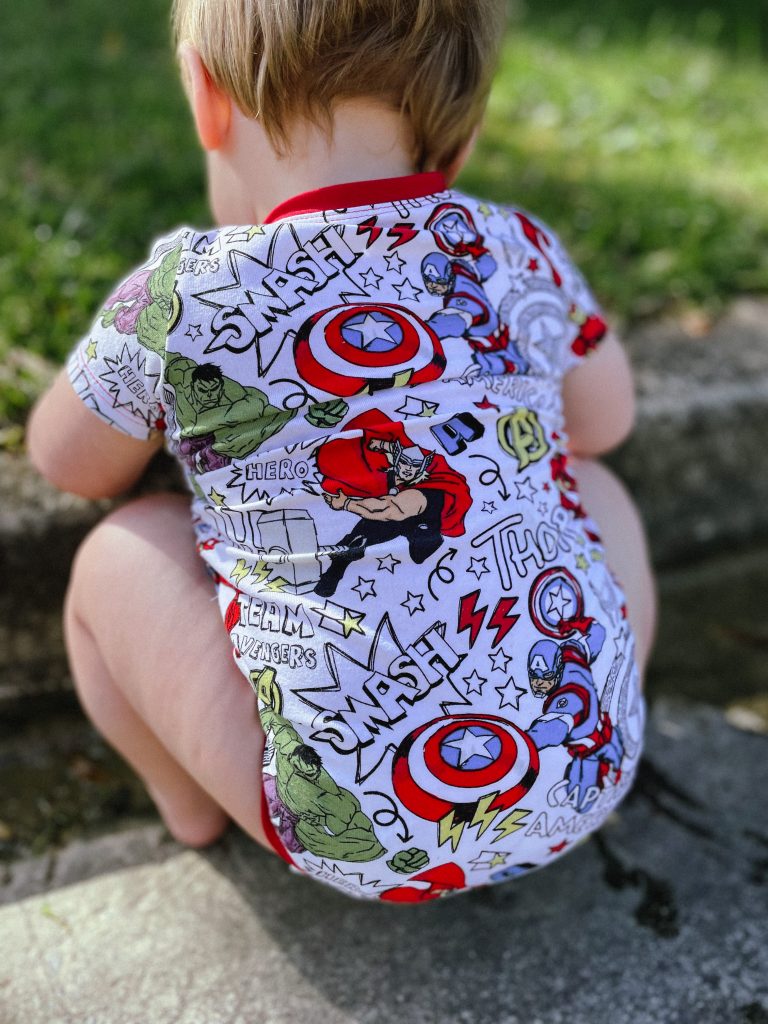
One of the other things I love when testing new garments is the opportunity to dive into some of my fabric stash. For this test I pulled out the planets fabric from Ruby Jam (check out my Sewing Buddies page for links) and also a cute Superheros fabric I picked up at Spotlight.
I also tried metal snaps for the first time on this test, and I can safely say I MUCH prefer plastic KAM snaps. I found the hammer on metal snaps cumbersome and not user friendly at all. Although, I did like the look, so perhaps I’ll persevere with them another time.
Theodore is becoming quite difficult to photograph for modelled shots now as well. He is on the move and zero interest in being a performing monkey haha. Even snacks don’t do much these days. For the whole time I tried to get photos of him in the planets suit, he became VERY attached to the blue Tupperware soup spoon. We just had to roll with it!
The pattern comes in A4, A0 copy shop size and projector formats, and is layered for ease of printing and projecting. As with all Peek a Boo patterns, the instructions are incredibly easy to follow. It’s is on sale for this weekend only, September 11/12, so if you want to grab it at a discounted price, click on my affiliate link below to get your copy.